With the production license code in your hands, it can then be applied to the PowerServer project. This can be done either before or after the Web APIs are compiled (with another license, such as a developer license that should now be replaced with a production license), we will explore both situations.
-
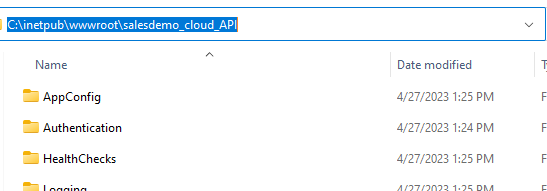
Go to the location where the Web APIs were deployed. In this example, the location is C:\inetpub\wwwroot\salesdemo_cloud_API (when deployed to IIS).
-
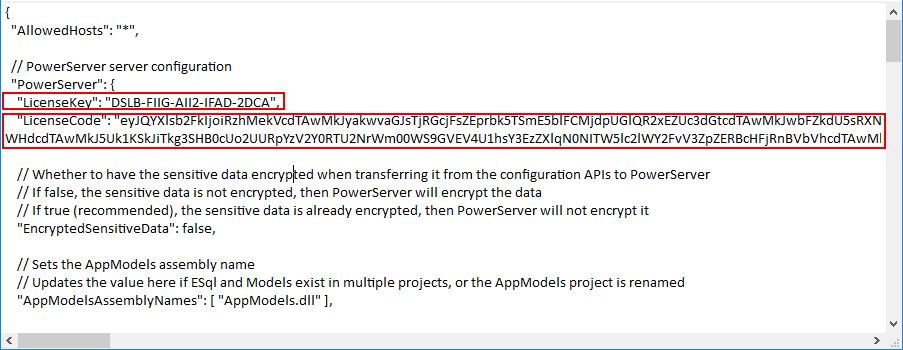
Open the UseConfig.json file inside this location with your editor of choice.
-
Replace the LicenseKey and LicenseCode values with the filename and contents of the license file respectively.
-
Save the file and restart PowerServer Web APIs for the license to be reloaded.
To replace the developer license before compiling the Web APIs to DLLs, you will need to edit the license string in either the PowerBuilder or SnapDevelop IDE:
-
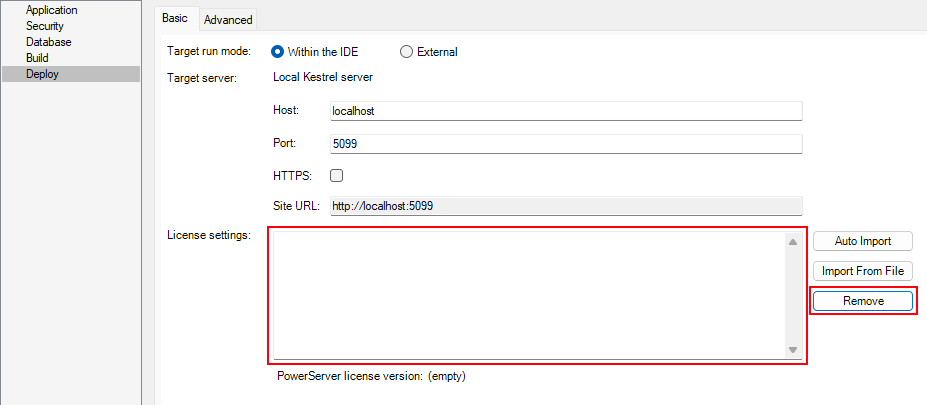
Go to the "Deploy" page of the PowerServer project.
-
Click on the "Remove" button of the "License settings" section. This will remove the PowerServer developer license (if any).
The license information will now be empty:
-
Now click on "Import from File" and import the text file with the production license code.
The production license has now been applied to this project.

You can now deploy your PowerServer project using the production license. The new license will be updated to the "LicenseKey" and "LicenseCode" settings in the Web API project.
It is possible to switch between developer and production licenses. To revert back to the developer license, simply click the "Remove" button and click on "Auto Import".
-
Open the Web APIs project in SnapDevelop.
You can do this by clicking on the "Open C# Solution in SnapDevelop" button in the PowerServer toolbar.

This will open SnapDevelop.
-
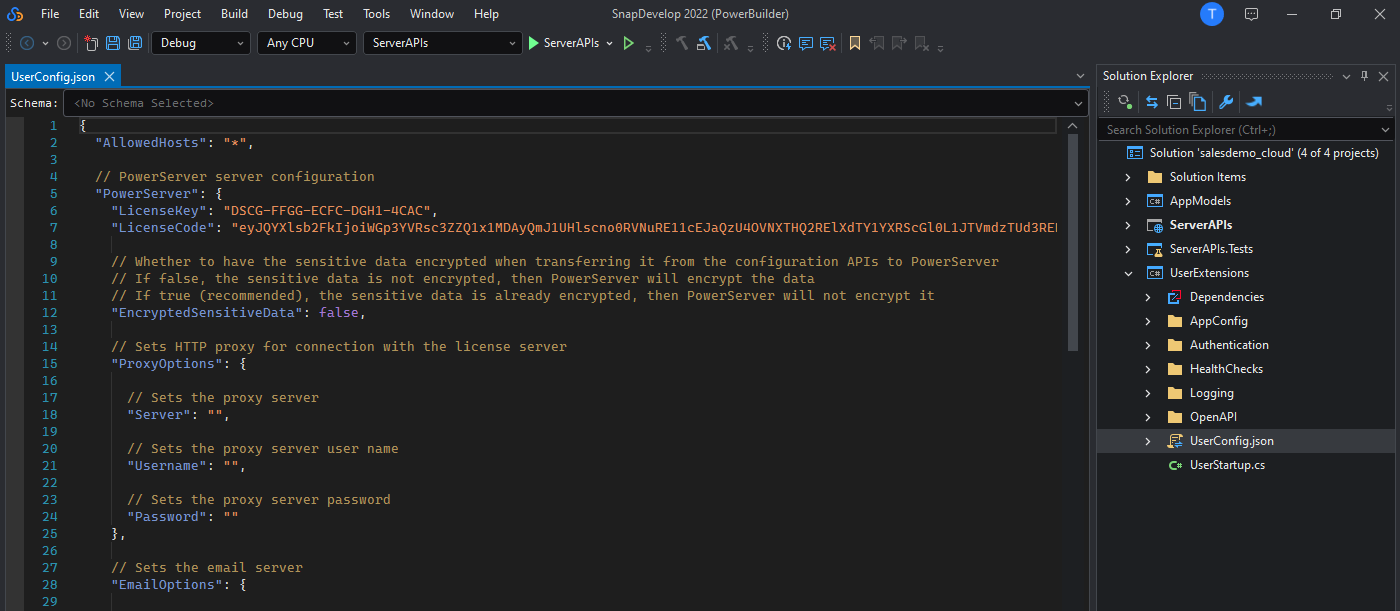
In the Solution Explorer on the right, open the UserExtensions project > UserConfig.json file.
The file should look similar to the following:
-
Replace the "LicenseKey" field with the name of the file without extension and replace the "LicenseCode" field with the contents of the file.
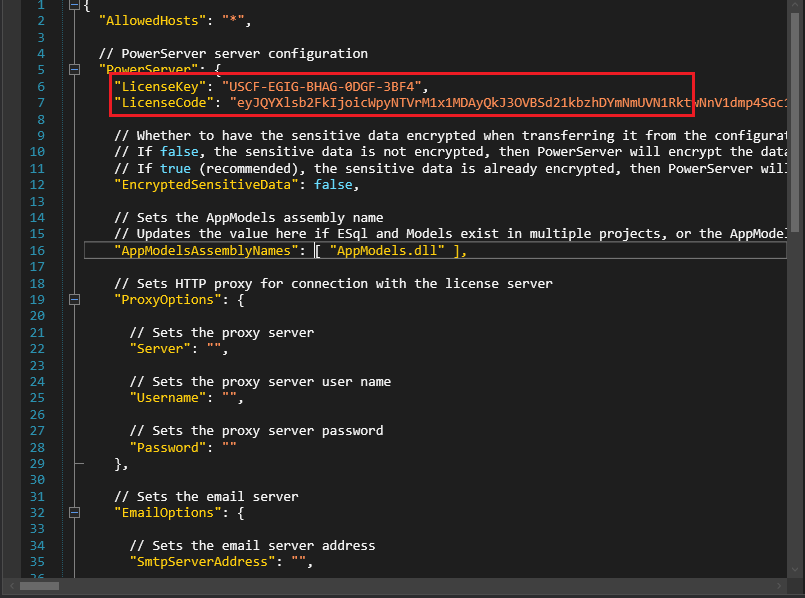
-
If the Web APIs were already running, you will need to restart it in order for the changes to be reflected.
-
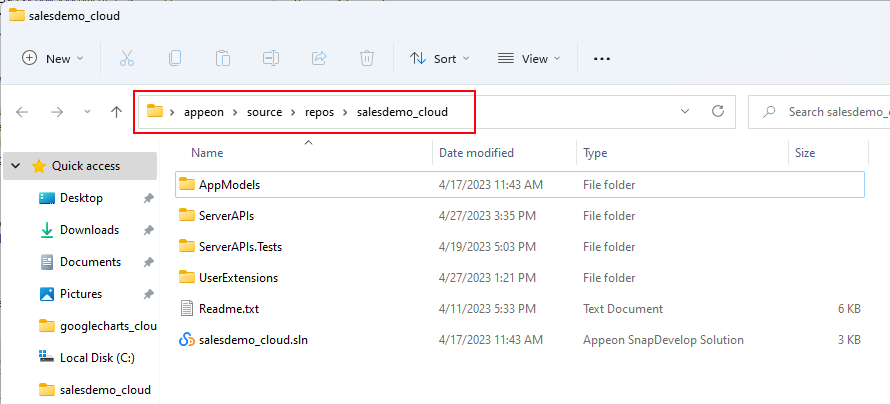
Browse to the generated Web APIs location. If you are on the same machine as the PowerBuilder IDE that was used to deploy the project, you can go to the "Build" page of the PowerServer project and click Open Folder.
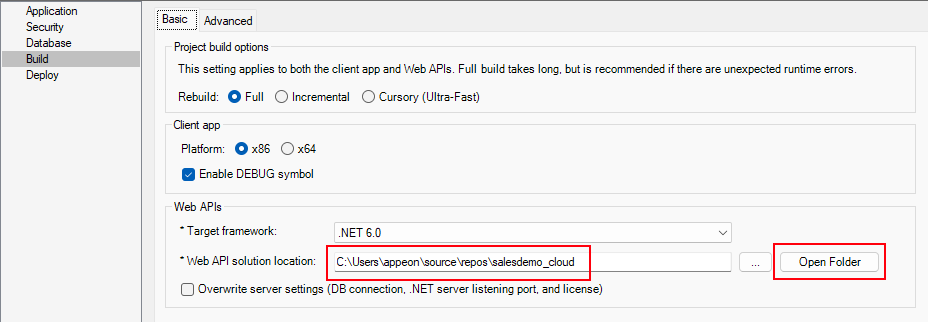
-
Browse to the UserExtensions sub-folder.
The contents should look as follows (UserConfig.json is one of them):

-
Open the "UserConfig.json" file in your text editor of choice.
-
Replace the "LicenseKey" field with the name of the file without extension and replace the "LicenseCode" field with the contents of the file.

-
If the Web APIs is already running, you will need to restart it in order for the changes to be reflected.


