This section is to configure IIS to 1) support remote connections and 2) allow the Windows user or IIS manager to connect to the site during deployment.
You can skip this section if you will deploy to IIS from the local computer, for example, if you will deploy to IIS on Windows 10 which supports only local deployment, or if you will deploy to a local folder first and then manually copy the files to IIS.
Step 1: Enable remote connections for the IIS server.
-
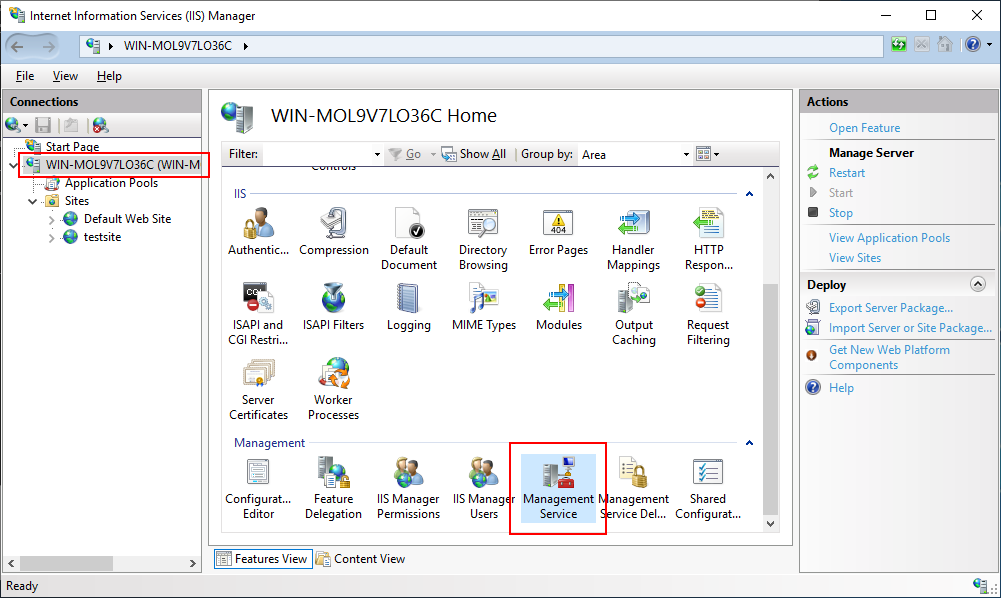
In IIS Manager, select the server's node in the Connections panel, and then double click Management Service on the Features View.
Note: The Management Service feature is available only when you select the Management Service feature when installing IIS.
-
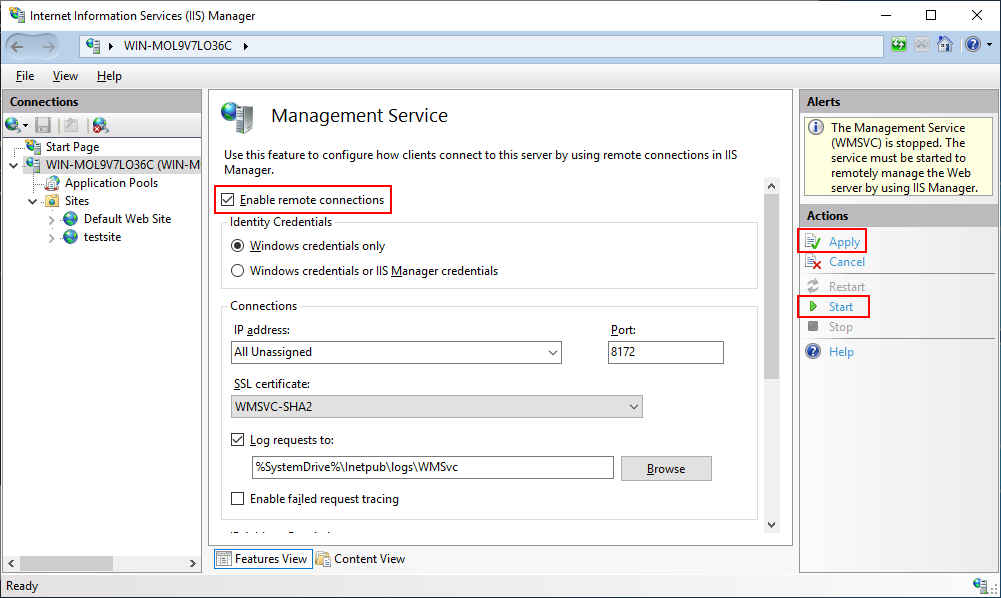
Select the check box of Enable remote connections, and then click Apply and Start in the Actions pane to start the management service.
If Management Service is already running, click Stop in the Actions pane to stop the service first before you can make changes to it.
-
Select Control Panel > System and Security > Administrative Tools > Services, and make sure the "Web Management Service" service is running.
Step 2: Configure the IIS website to allow a user to connect to the site.
The user can be a Windows user or IIS manager. For more, refer to this page.
The following steps will use a Windows user for example.
-
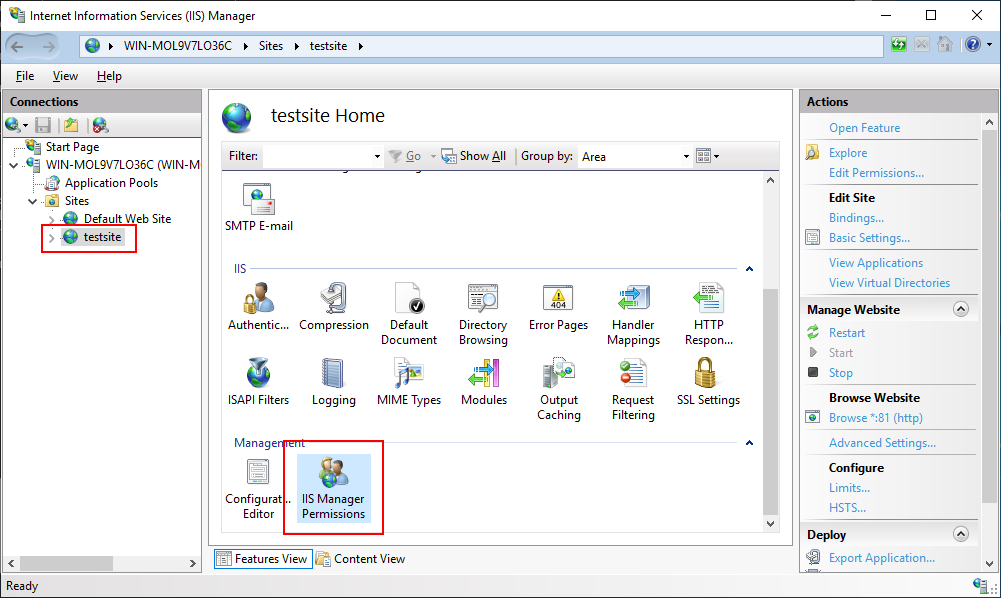
In IIS Manager, select the website in the Connections panel, and then double click IIS Manager Permissions on the Features View.
-
Click Allow User on the Actions pane. In the Allow User dialog, select Windows and then click Select.
-
Enter the Windows user name, click Check Names and then click OK.
IMPORTANT: Make sure to use a Windows user that has Full Control over the site's root folder so that it can create files and folders underneath.
The Windows user is added to IIS Manager Permissions. This Windows user is allowed to connect to the "testsite" site now.


