Step 1: In the PowerServer toolbar, click the Server Profile button.
Step 2: In the Server Profiles window, click the New button.
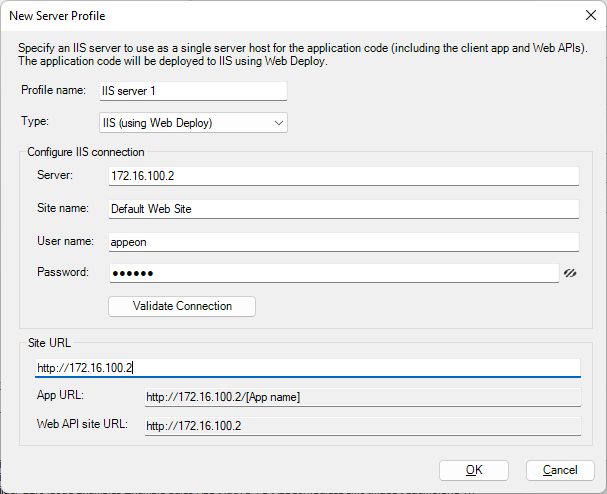
Step 3: In the New Server Profile dialog, specify a name for the profile in the Profile name field, and then select IIS (using Web Deploy) from the Type list.
Step 4: In the Configure IIS connection group, specify the following settings:
-
Server: the IP address or domain name of the IIS server
-
Site name: the name of the IIS web site
-
User name: the user name that has permissions to read and write the specified site. The user can be a Windows user or IIS manager. For more, refer to this page.
-
Password: the user password that has permissions to read and write the specified site.
Step 5: Click Validate Connection to make sure the connection is successful.
Step 6: In the Site URL field, specify the URL of the IIS web site, for example, https://172.16.100.2:80.
The site URL will be used to formulate the application URL and the Web API URL (the client app will be deployed with the Web API by default). If you have not specified the site URL, the Web API URL will be http://localhost by default, and you can change this value in the client app.
The following modifications are made to the PowerServer project created in Quick Start > Guide 1. If you have not created a PowerServer project yet, please follow Quick Start > Guide 1 to create one.
Select the server profile for the remote server.
Step 1: In the PowerServer project painter, select the Deploy page > Basic tab.
Step 2: Select External as the target run mode, and then select IIS as the target server.
Step 3: Select the server profile from the Server list.
If you have not created the server profile for the remote server, follow the instructions in Creating a server profile for remote deployment.
Or if you want to deploy to a Folder, follow the instructions in Packaging and copying the client app.
If you are deploying to a production server, you might want to use a production license for PowerServer, instead of using a developer license. To use a production license, you will need to export the license file from the Appeon website and then import the license to the PowerServer project.
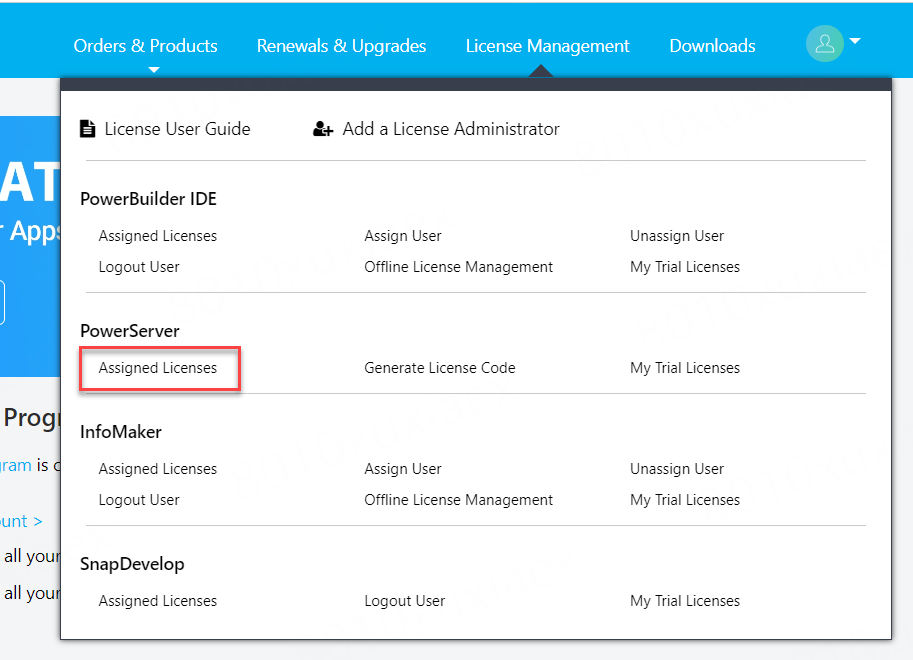
Step 1: Log into the Appeon User Center, click License Management, and then click Assigned Licenses under PowerServer.
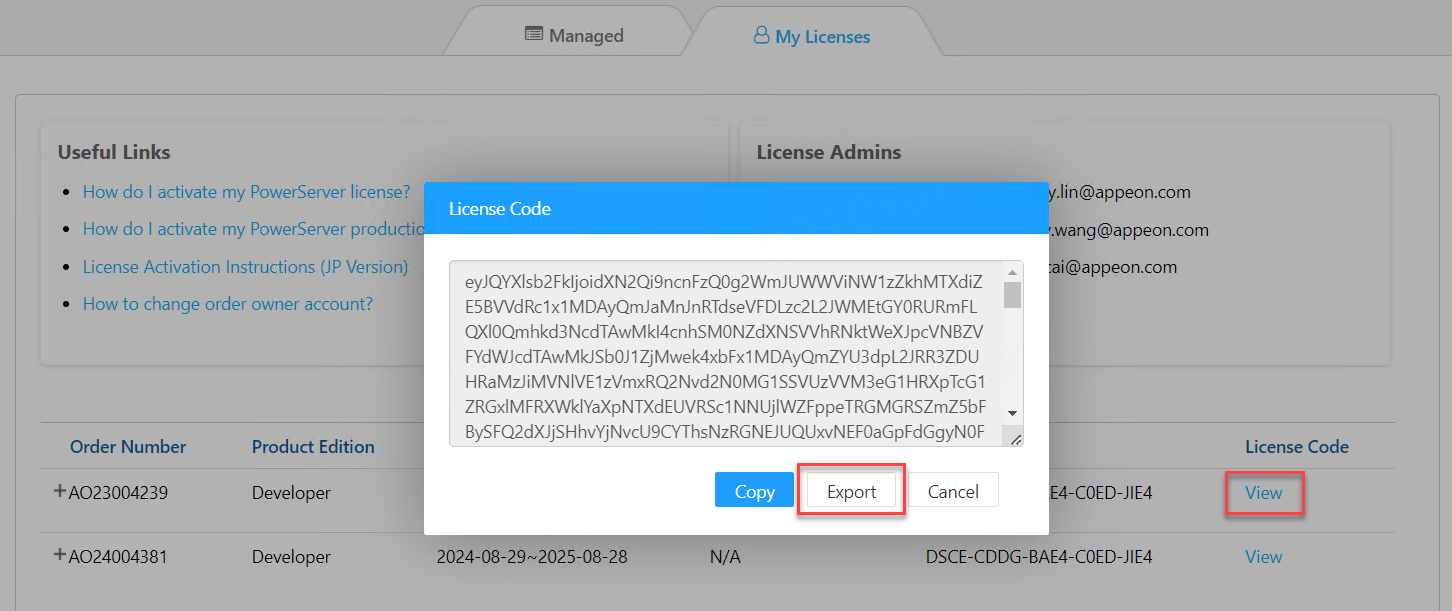
Step 2: On the My Licenses tab page, click View, and then click Export to export the license code to a TXT file ([LicenseKey].txt) and save the file on the local machine.
Do not change the file name, as the file name represents the unique license key.
Step 3: Go to the Deploy page of the PowerServer project painter, and then click Import From File to select and import the [LicenseKey].txt file.
It is strongly recommended for security concerns, that in the production environment, you shall safeguard the server resources through implementing an authentication server with PowerServer.
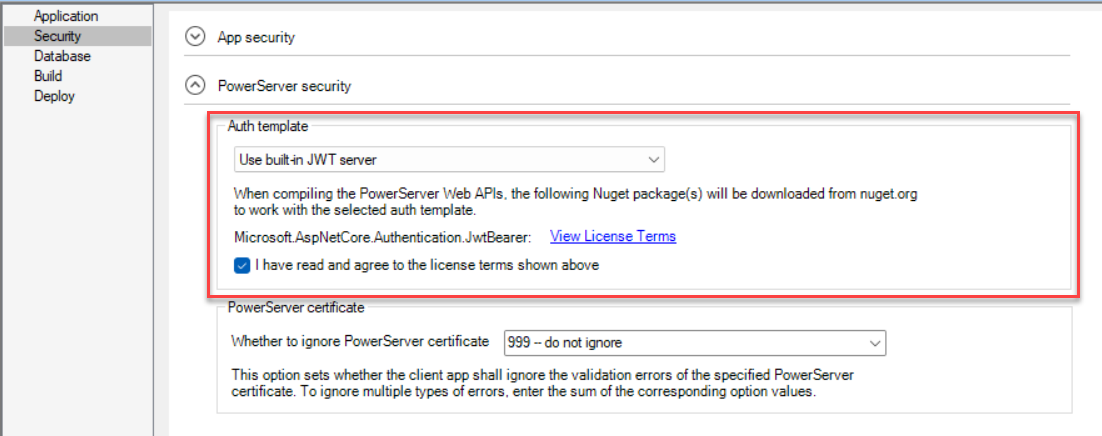
In the PowerServer project painter, select the Security page, then select a template type from the Auth Template list.
-
Use built-in JWT server: Includes a built-in authentication server that supports JWT or bearer tokens. See Authenticate > Using JWT for more information.
-
Use built-in AWS Cognito server: Includes a built-in authentication server that works with the Amazon Cognito user pool. See Authenticate > Using Amazon Cognito for more information.
-
Use external Microsoft Entra ID service: Includes templates that work with Microsoft Entra ID or Azure AD B2C. See Authenticate > Using Microsoft Entra ID for more information.
-
If you select "Use external auth service", see Authenticate > Using other auth servers for more information on how to incorporate the other auth servers that work with the OAuth flows or JWT, such as Okta OIDC (OpenID Connect).
To connect with a remote database (instead of the local database), you will need to create a new database cache.
Step 1: In the PowerServer project painter, select the Database page > Advanced tab, then click New in the upper part to create the database connection.
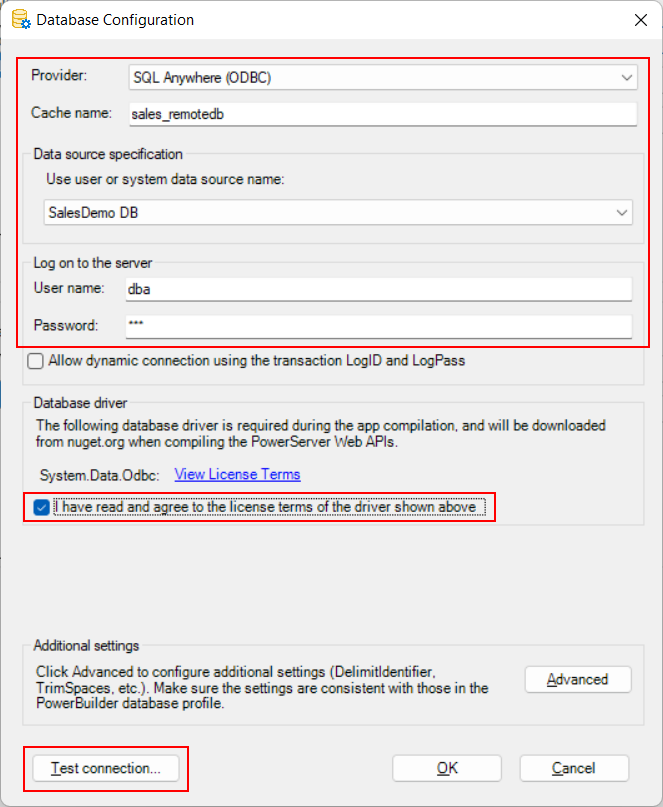
Step 2: In the dialog box that displays, specify the settings for the database connection.
The following uses the PB demo database for SQL Anywhere as an example.
-
Select SQL Anywhere (ODBC) from the Provider list.
-
Specify "sales_remotedb" (or any text you like) as the database cache name in the Cache name field.
-
Select the ODBC data source that connects with the remote database. The "SalesDemo DB" ODBC data source is created in Creating the ODBC data source.
-
Specify "dba" as the user name and "sql" as the password.
Step 3: Select the option "I have read and agree to the license ...".
Step 4: Click Test connection to make sure the database can be connected successfully.
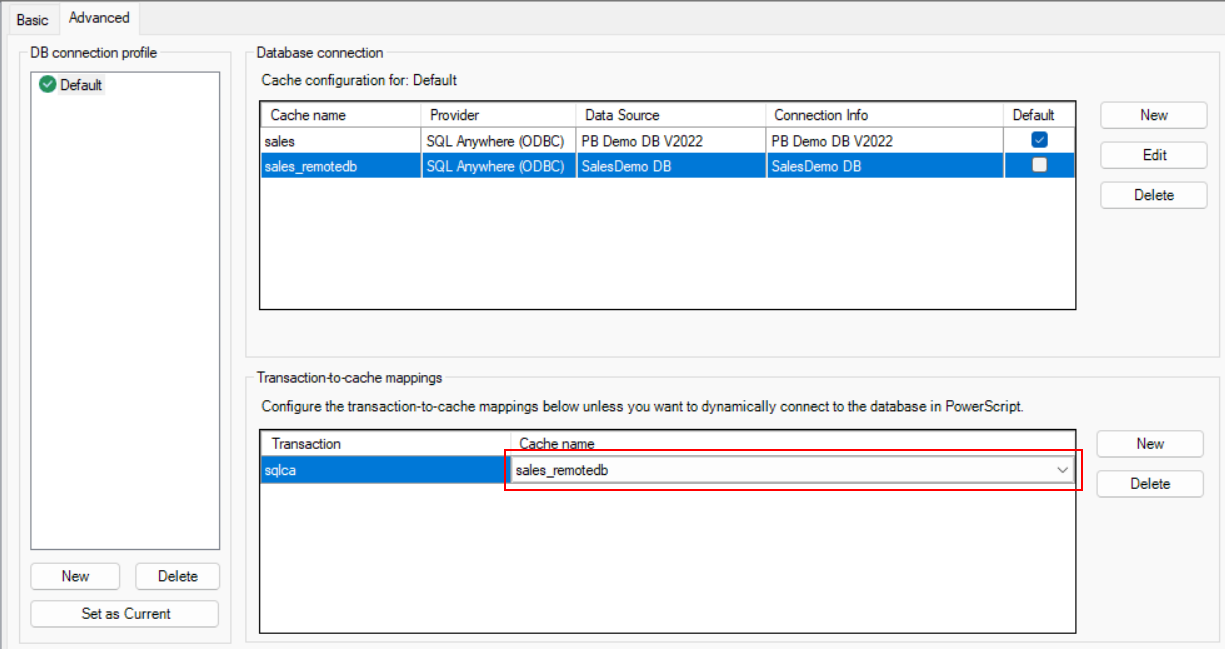
Step 5: Then select the database cache you created just now to map with the "sqlca" transaction object.
Step 1: Save the PowerServer project settings; and build and deploy the PowerServer project (using the Build & Deploy Project button) for the changes to take effect.
Step 2: Go to the server and verify that the following folders exist under the web root:
-
the "CloudAppPublisher" folder which contains the cloud app launcher and the runtime files
-
the "[appname]" folder (for example "salesdemo_cloud") which contains the client application files
-
the "[solutionname]_API" folder which contains the compiled PowerServer Web APIs
-
the web.config file used by IIS to invoke the PowerServer Web APIs
Step 3: Open the apprun.json file from the "[appname]" folder and verify that the launcher URL, Web API URL, and runtime URL are correct.
The client app and the Web APIs can be hosted separately in different servers.
The static files (that is the client app, launcher, and runtime) can be hosted in the file server, such as IIS, Apache, Nginx. For detailed instructions, refer to File server.
The Web APIs (files in the "[solutionname]_API" folder) can be hosted in the environment such as IIS, Docker, Kubernetes, Azure etc. For detailed instructions, refer to Server Setup.


