Recommendation: It is recommended that you launch PowerBuilder IDE as an administrator; otherwise PowerBuilder IDE may not have full permissions to read/write the folder under the local web server.
To create a PowerServer project:
-
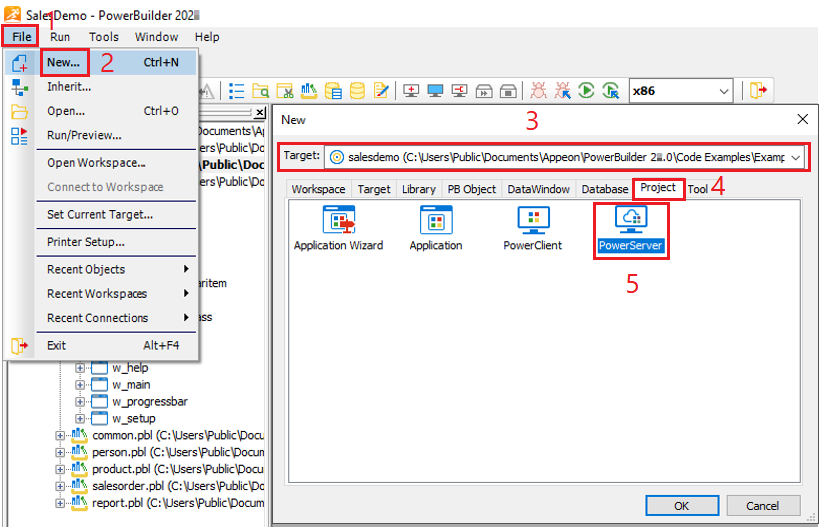
Select File>New or click the New button in the PowerBar to open the New dialog box.
-
Select the target in which you want to create the project from the Target drop-down list.
-
Select the Project tab.
-
Select the PowerServer project type and click OK.
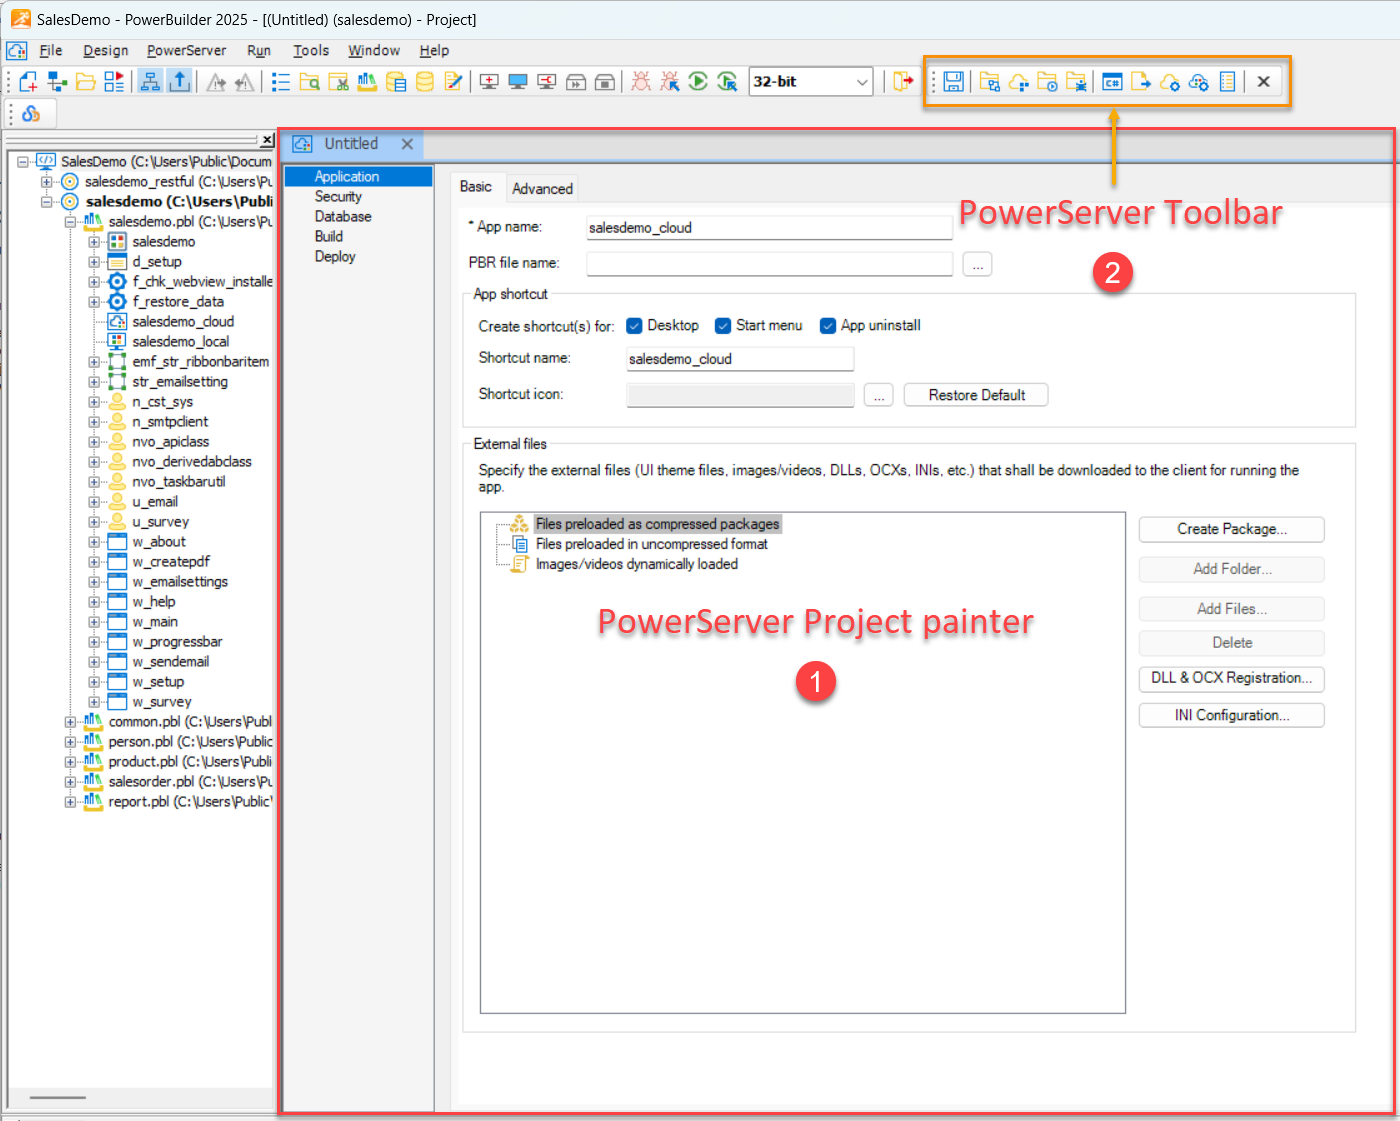
The PowerServer Project painter (①) opens, allowing you to configure various options of your application. See the next section for detailed description of these options.
The PowerServer Toolbar (②) is also displayed alongside the project painter.
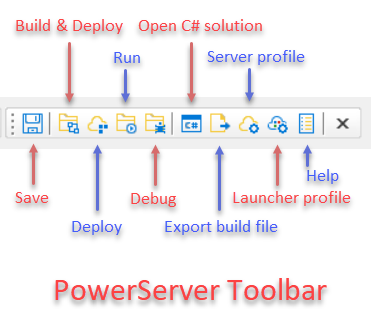
The PowerServer Toolbar (②) provides quick access to key actions for configuring, deploying, running, and debugging installable cloud applications.
Button
Description
Save
Saves the current state of your project settings.
Build & Deploy Project
Compiles your application and immediately pushes it to the configured server for testing or production use.
Refer to Build & deploy in the IDE for more information.
Deploy Project
Deploys the application to the configured server using the most recent build.
Use this when the app has already been built and you need to redeploy (e.g., after a configuration change).
Run Project
Launches the deployed installable cloud application in your default browser using settings from the active PowerServer Project Painter.
If deployed locally (Kestrel), it first starts the Web APIs on the local server before launching the app; if using IIS, the app is launched directly (IIS handles the Web API startup automatically).
Refer to Run the installable cloud application for more information.
Debug Project
Starts the PowerServer Debugger to debug client-side operations of the installable cloud application.
Ensure the application is built and deployed. For inspecting Web API-level details (e.g., HTTP headers or responses), use tools like Fiddler alongside the debugger.
Refer to Debugging with PowerServer Debugger for more information.
Open C# Solution in SnapDevelop
Opens the generated C# solution in SnapDevelop, where you can modify server settings, extend the C# code, and publish Web APIs to Docker or other environments.
Refer to PowerServer C# solution for more information.
Export PowerServer Build File
Exports the build and deployment settings to a .json file.
Useful for reusing configurations, sharing setups with team members, or automating processes using PBAutoBuild or CI/CD pipelines.
Refer to Build & deploy using commands for more information.
Server Profile
Opens the dialog to create, modify, import, or export profiles for local Kestrel or IIS servers.
Server profile is required to deploy and run the application on local or remote servers.
Refer to Configure a server for deployment for more information.
Cloud App Launcher Profile
Opens the dialog to create, modify, import, or export a profile for a customized cloud app launcher.
Launcher profile defines the appearance, installation settings, and digital signing of the launcher executable used to install and run the cloud application.
Refer to Customize cloud app launcher for more information.
-
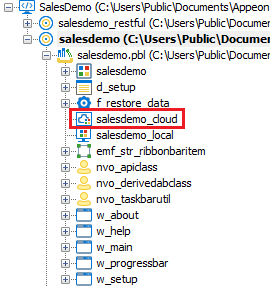
When you have finished defining the project object, save the object by selecting File>Save from the menu bar or by clicking the Save button (
 ) in the toolbar. PowerBuilder saves the
project as an independent object in the specified library. Like
other objects, projects are displayed in the System Tree and the
Library painter.
) in the toolbar. PowerBuilder saves the
project as an independent object in the specified library. Like
other objects, projects are displayed in the System Tree and the
Library painter.