After creating the package, you can install the installable cloud app to the server (such as IIS or Kestrel).
To install the app to the server:
-
Set up a server. For example, to set up an IIS server, follow instructions in Hosting Web APIs in IIS.
-
Install the app to the server.
-
If the generated package is the executable installer ([appname].exe), then
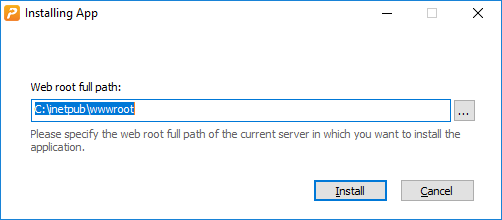
To run the executable installer, double click the [appname].exe file, then input the web root of the server, and then click Install. Wait until the installation is completed.
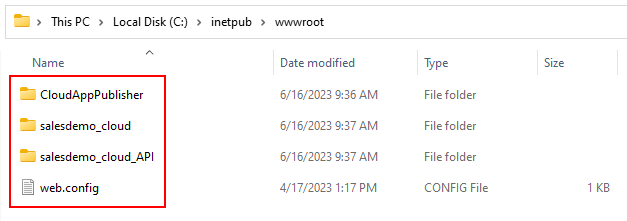
The following folders and file will be installed under the Web root (as shown in the figure below):
-
the "CloudAppPublisher" folder which contains the cloud app launcher and the PowerBuilder runtime files
-
the "[appname]" folder (named after the App name configured in IDE, for example "salesdemo_cloud") which contains the application files
-
the "[solutionname]_API" folder which contains the compiled PowerServer Web APIs
-
the web.config file used by IIS to invoke the PowerServer Web APIs
-
-
If the generated package is the zip package ([appname].zip), then
To de-compress the zip package, right click the [appname].zip file and select Extract. Copy the extracted folders and file to the web root of the server, as shown in the figure below.
Note
Do not manually change the name of the application folder on the server, otherwise the application uninstall program will fail to run.
-
(Optional) To create a docker image of PowerServer Web APIs:
-
Follow instructions in this section Publishing Web APIs to Docker.
(Optional) To upload the application via FTP:
-
Follow instructions in this section Uploading the application via FTP client.


