Once the project is deployed (and the new database information is in the Web APIs) open the C# Solution in SnapDevelop by clicking the Open C# Solution in SnapDevelop button in the PowerServer Toolbar.
When SnapDevelop opens, right click the Server APIs project in the Solution Explorer and click Publish.
Create a new Deployment Profile with a Docker Container Registry target.
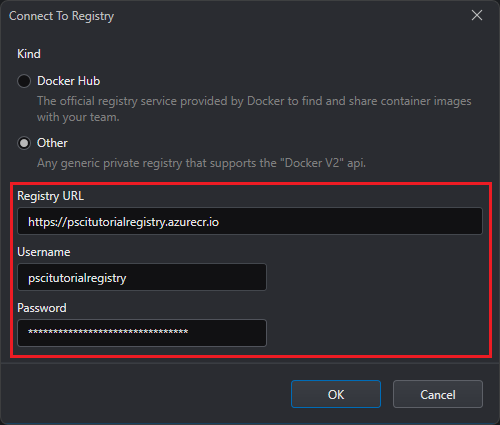
On the Registry dropdown menu click
New Connection and enter the registry server’s
address (prepending http://), username and password
from the Azure
Container Registry you created earlier and then click
OK:
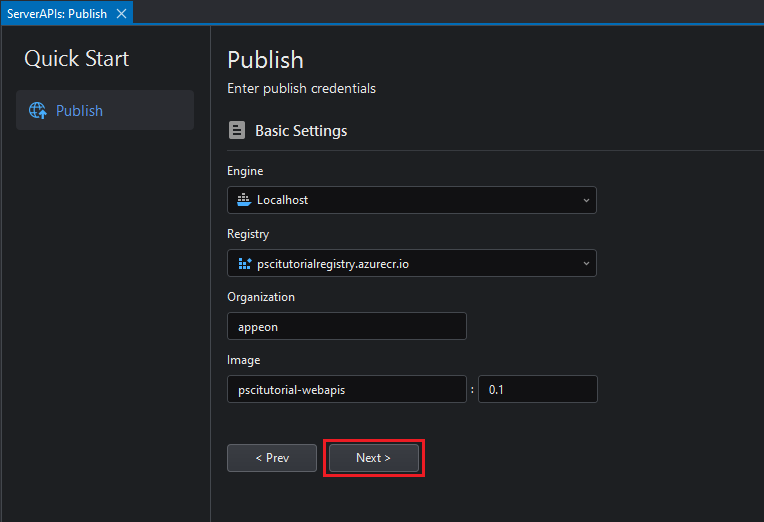
Fill in the rest of the profile’s information and click Next and then Publish:
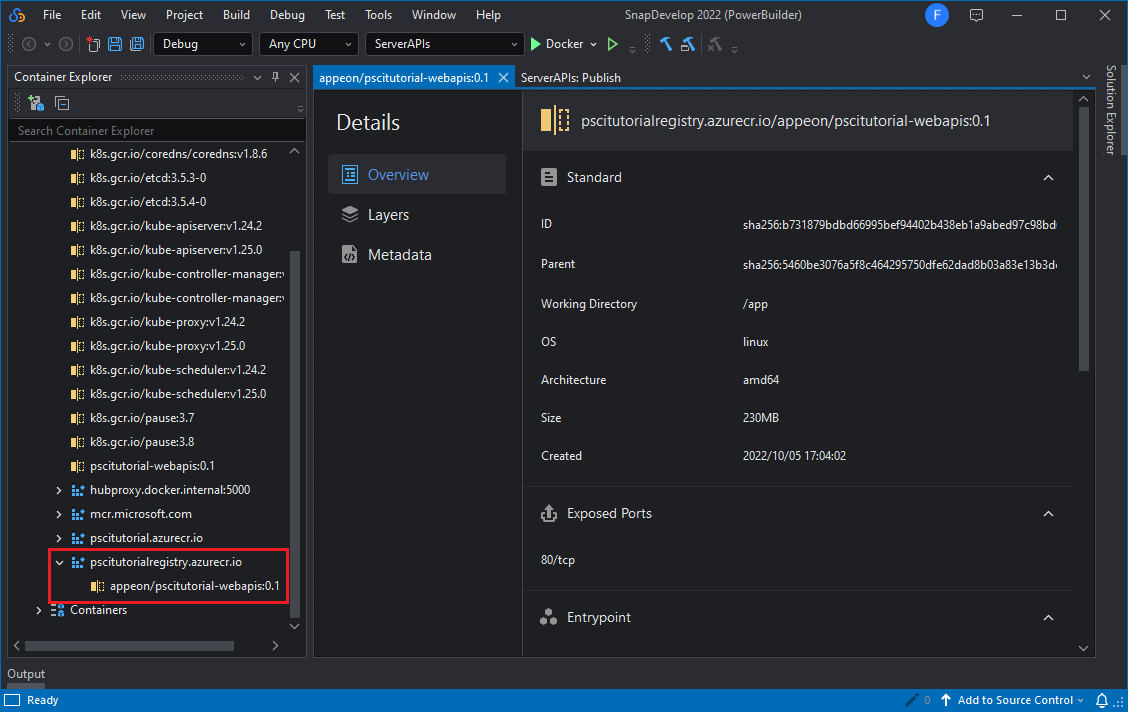
Once the publishing finishes, the Image Details window will open in SnapDevelop and the repository will be visible in the Container Explorer panel:
In this case,
pscitutorialregistry.azurecr.io/appeon/pscitutorial-webapis:0.1
is the image’s tag.
Create a file named Dockerfile in the same
directory as the C# Solution with the following contents (You might
need to create them somewhere else and then copy them over due to
permissions):
FROM mcr.microsoft.com/dotnet/aspnet:6.0 AS base
WORKDIR /app
EXPOSE 80

FROM mcr.microsoft.com/dotnet/sdk:6.0 AS build
WORKDIR /src
COPY ["ServerAPIs/ServerAPIs.csproj", "ServerAPIs/"]
COPY ["AppModels/AppModels.csproj", "AppModels/"]
RUN dotnet restore "ServerAPIs/ServerAPIs.csproj"
COPY . .
WORKDIR "/src/ServerAPIs"
RUN dotnet build "ServerAPIs.csproj" -c Release -o /app/build

FROM build AS publish
RUN dotnet publish "ServerAPIs.csproj" -c Release -o /app/publish

FROM base AS final
WORKDIR /app
COPY --from=publish /app/publish .
ENTRYPOINT ["dotnet", "ServerAPIs.dll"]
and a file named .dockerignore containing the
following:
**/.classpath
**/.dockerignore
**/.env
**/.git
**/.gitignore
**/.project
**/.sd
**/.settings
**/.svn
**/.toolstarget
**/.vs
**/.vscode
**/*.*proj.user
**/*.dbmdl
**/*.jfm
**/azds.yaml
**/bin
**/charts
**/docker-compose*
**/Dockerfile*
**/node_modules
**/npm-debug.log
**/obj
**/secrets.dev.yaml
**/values.dev.yaml
LICENSE
README.md
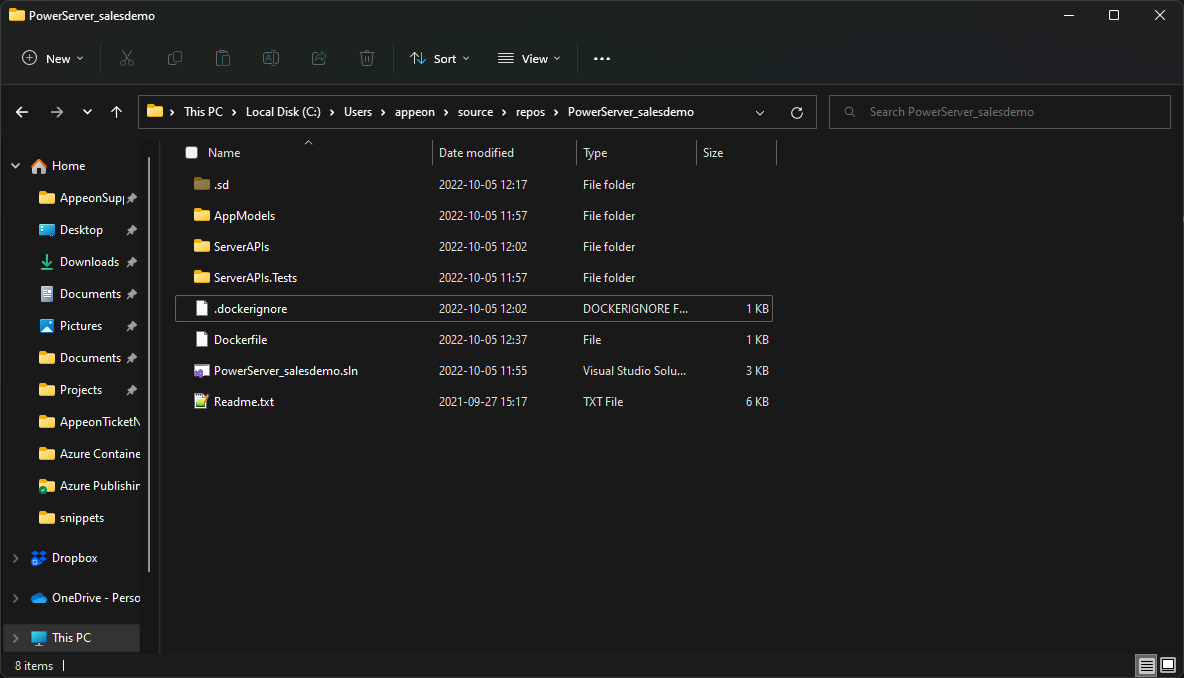
The location should look like this:
Open a PowerShell window in this directory and run the following command:
docker build -t pscitutorial-webapi:0.1 .
docker image tag pscitutorial-webapi:0.1 <Container Registry URL>/pscitutorial-webapi:0.1
Where <Container Registry URL> is the Container Registry’s URL from the Creating an Azure Container Registry section.
In this case, <Container Registry
URL>/pscitutorial-webapi:0.1 is the image’s tag.
Now you need to log in into azure from PowerShell. Run the following commands:
az login
This will open a browser tab in which you should login with the Microsoft Account you’ve been using so far.
Once you log in, run the following command:
az acr login --name <Container Registry name>
Where <Container Registry name> is the Container Registry’s URL from the Creating an Azure Container Registry section.
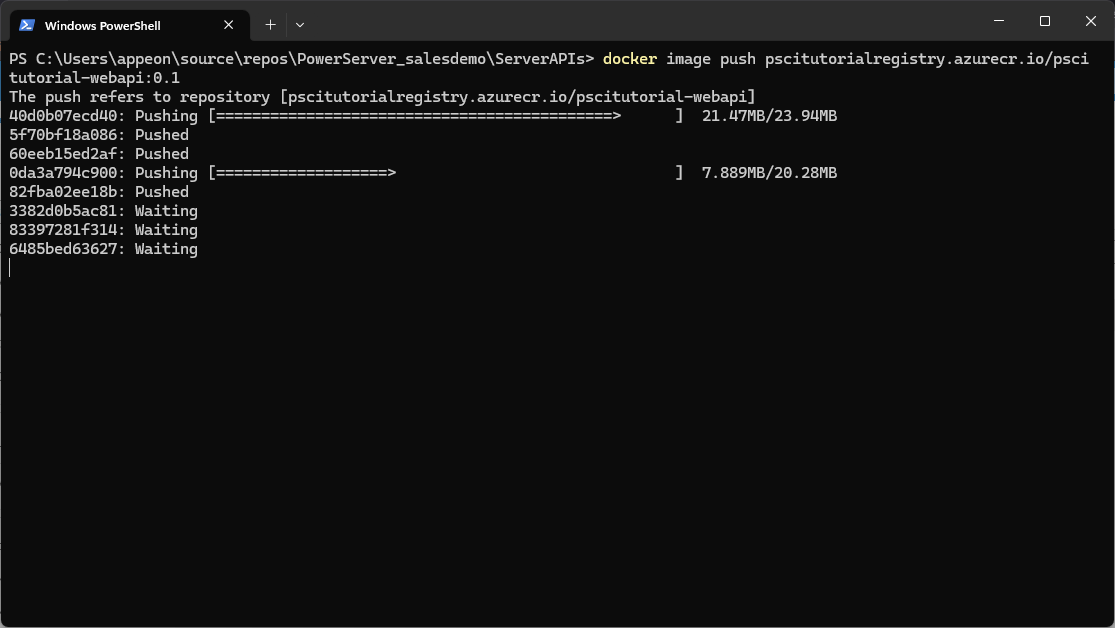
With this process finished, we can now push the image to the Container Registry:
docker image push <Image tag>
You should see something like this:
With this, the container is now available in the Container Repository for us to use.


