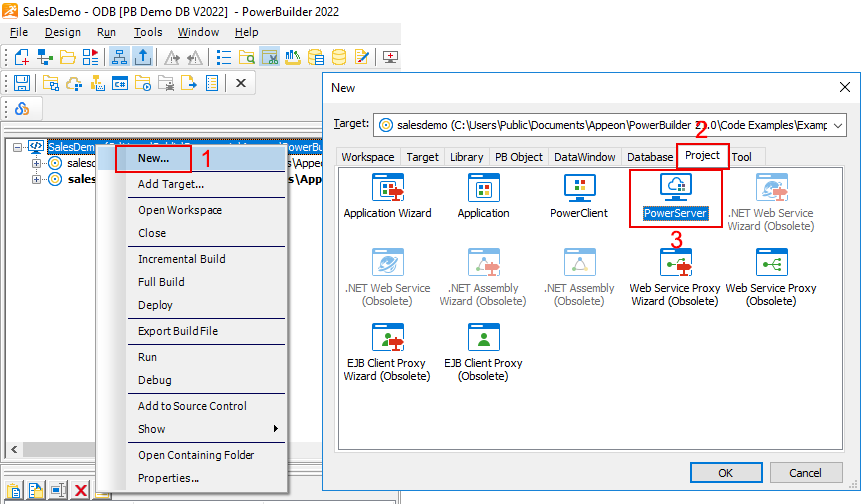
Step 1: In the PowerBuilder System Tree view, right click the SalesDemo workspace and select New. In the New dialog, select the Project tab and then select PowerServer.
The PowerServer project painter is opened.
Configure the PowerServer project painter according to the instructions below. Some pages that do not need to be configured in this guide will be skipped directly. For detailed information on how to use each page, refer to the How-to guides.
We will need to configure the application name, external files, and runtime files in the Client App page.
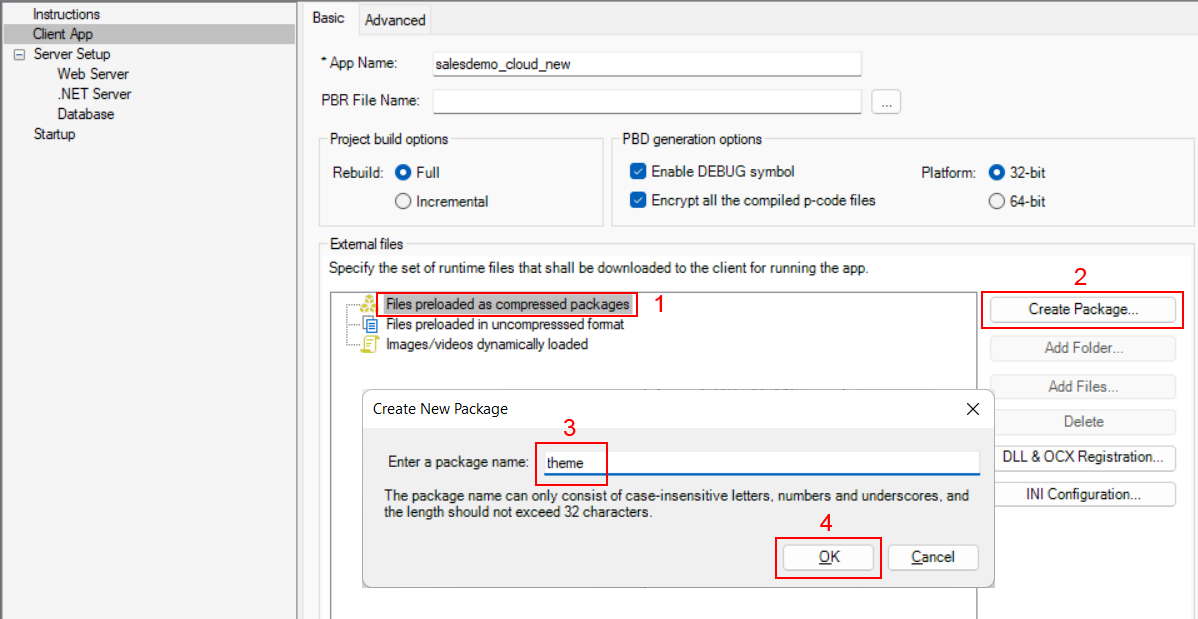
Step 1: In the PowerServer project painter, select the Client App page > Basic tab, input "salesdemo_cloud_new" in App name as the application name.
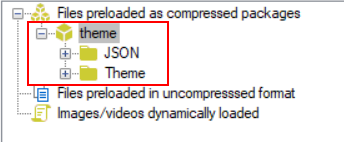
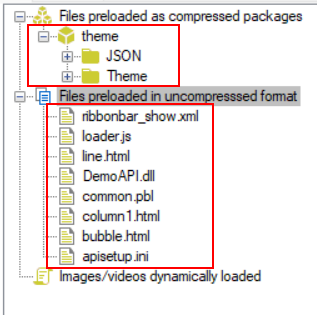
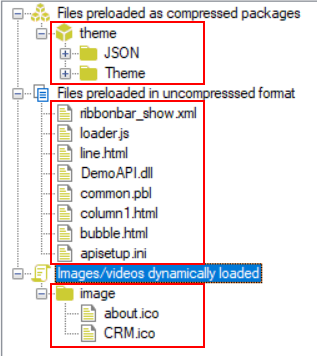
Step 2: In the External files option group, select Files preloaded as compressed packages and then click Create Package. Input a package name (for example "theme"). Then select this package and click Add Folder to add these two folders one by one: JSON and Theme, as shown in the figure below.
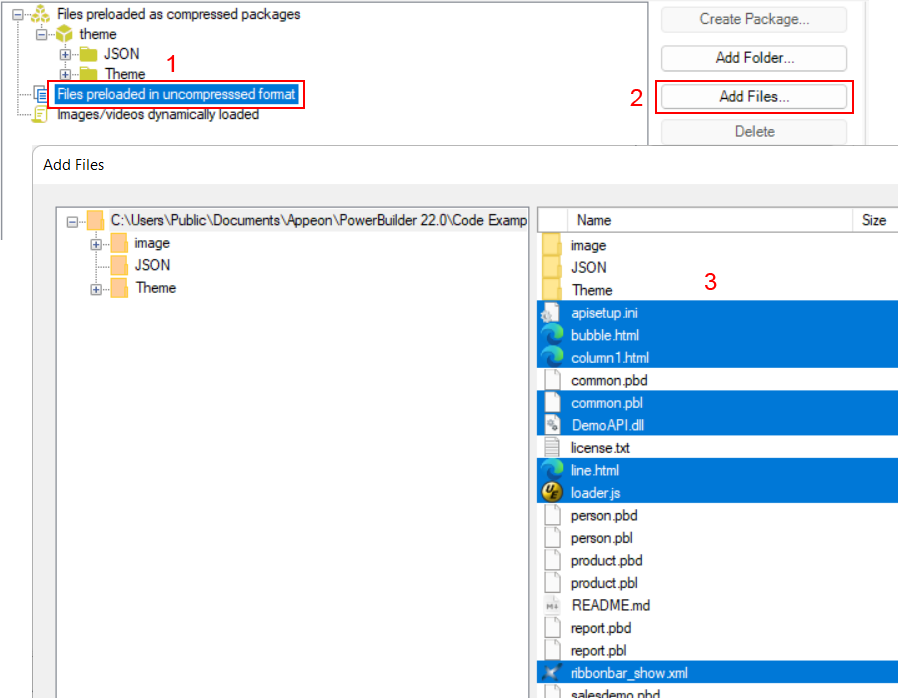
Step 3: Select Files preloaded in uncompressed format and then click Add Files to add the following files:
-
apisetup.ini
-
bubble.html
-
column1.html
-
common.pbl
-
DemoAPI.dll
-
line.html
-
loader.js
-
ribbonbar_show.xml
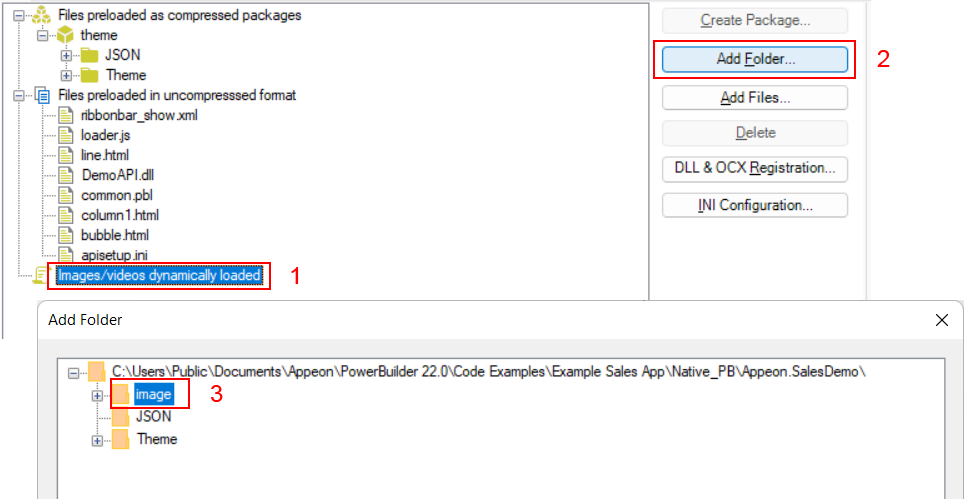
Step 4: Select Images/videos dynamically loaded and then click Add Folder to add the following folder: image.
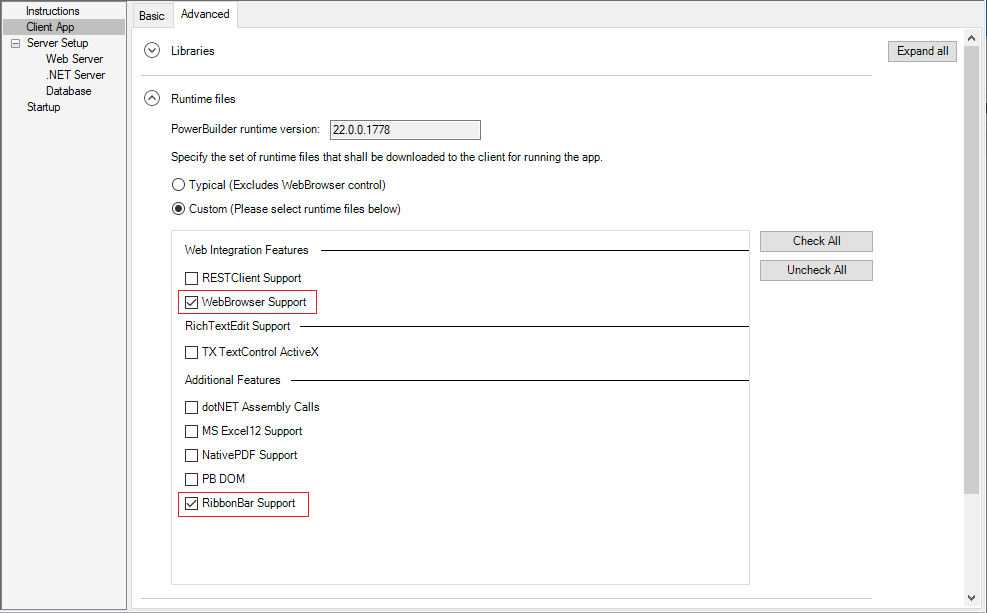
Step 5: Go to the Advanced tab, expand the Runtime files option group, select Custom, and then select WebBrowser Support and RibbonBar Support.
We will need to create a database connection cache in the Database page.
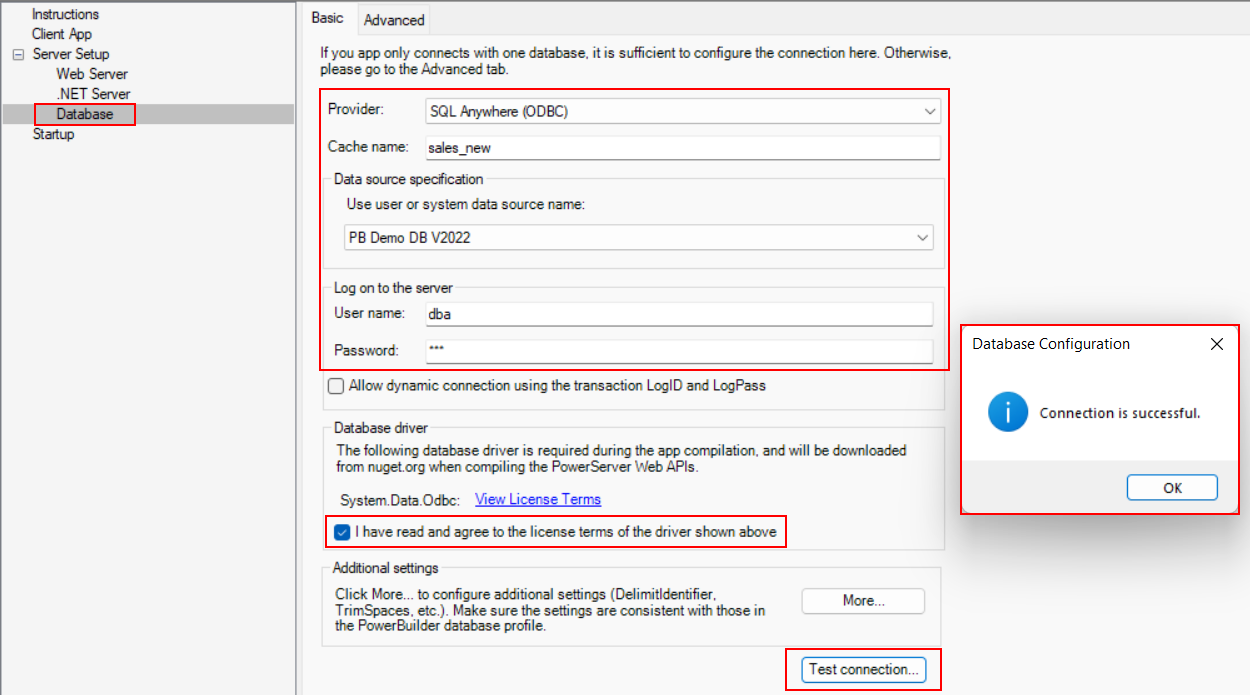
Step 1: In the PowerServer project painter, select the Database page > Basic tab.
Step 2: Select SQL Anywhere (ODBC) from the Provider list.
Step 3: Specify "sales_new" (or any text you like) in the Cache name field.
Step 4: Select PB Demo DB V2022 as the data source.
Step 5: Specify "dba" as the user name and "sql" as the password.
Step 4: In the Database driver option group, click the View License Terms link to view the license for the database driver, and then select the option "I have read and agree to the license ...".
Step 5: Click Test Connection to make sure the database can be connected successfully.
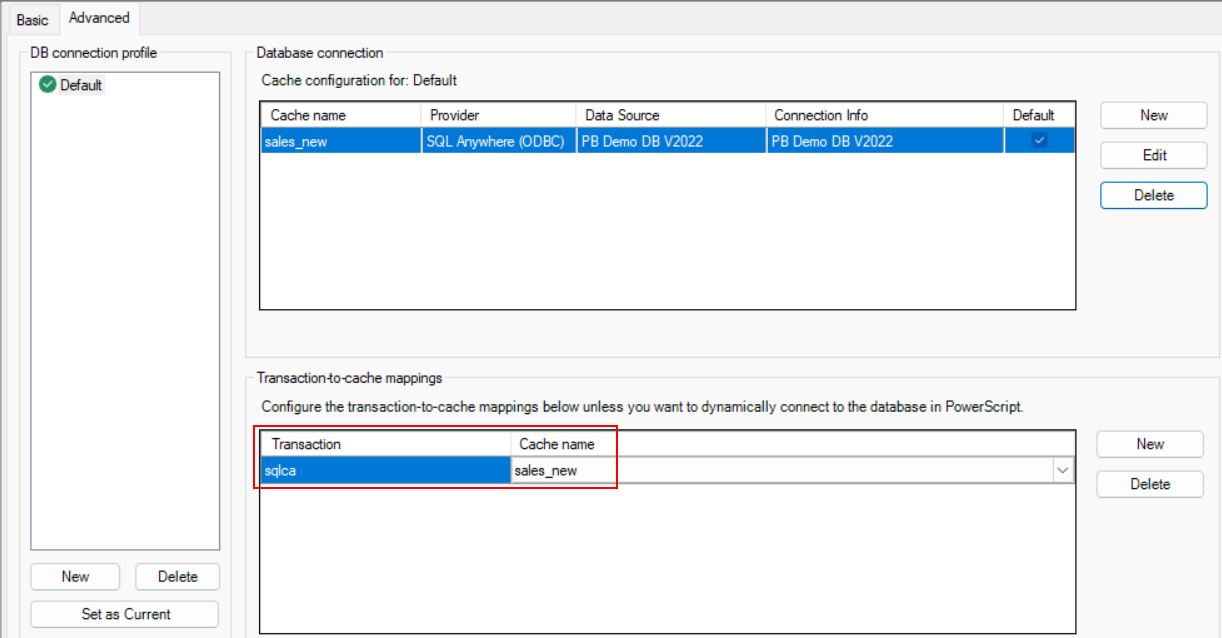
The cache will be automatically mapped to the SQLCA transaction object. (You can verify this in the Advanced tab).
There is no need to configure the Web Server page, as we will use the local IIS as the Web server for hosting the client app files. This section will go through and verify the default settings in the Web Server page.
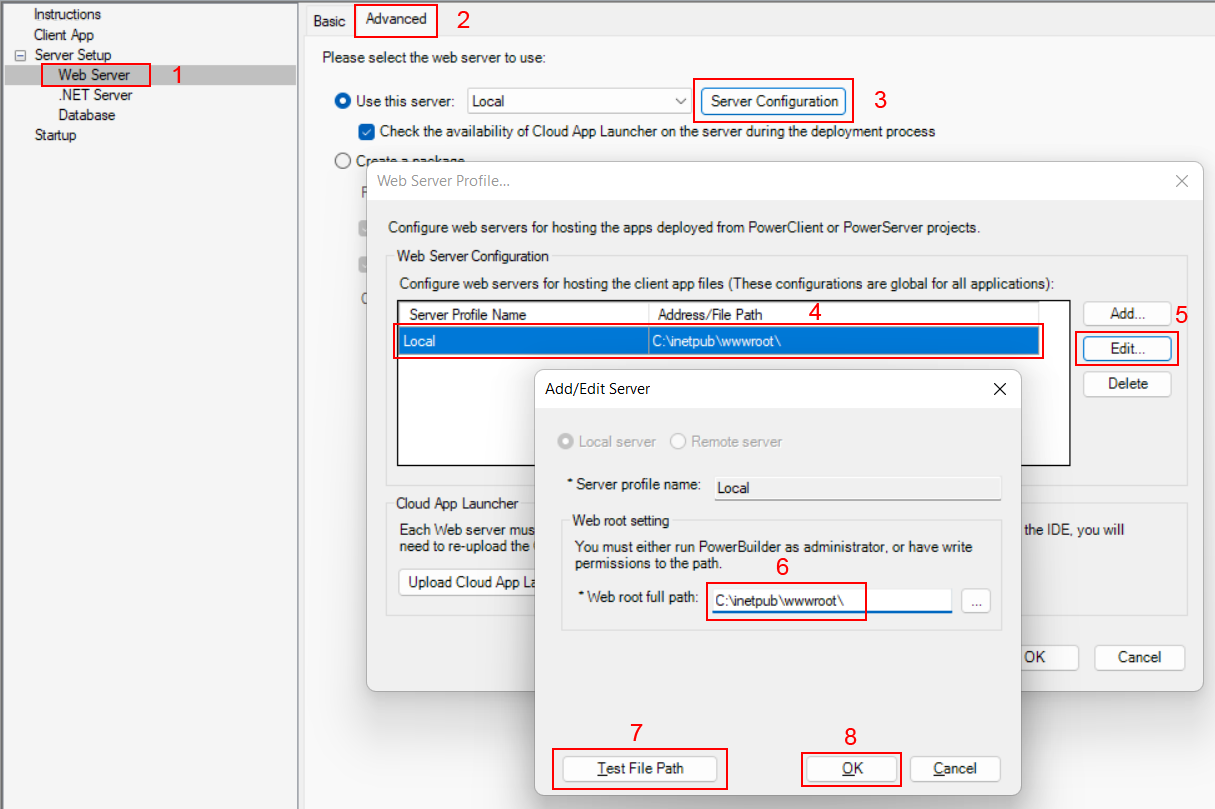
Step 1: In the PowerServer project painter, select the Web Server page > Advanced tab.
Step 2: Click the Server Configuration button.
Step 3: In the Web Server Profile window that appears, click the Edit button.
Step 4: In the Add/Edit Server window, double check that the Web root full path points to the appropriate path (by default it's set to the default web site's physical path: C:\inetpub\wwwroot), and then click Test File Path to ensure the path is valid.
This guide assumes your OS is installed to the C drive and the default web site's physical path is C:\inetpub\wwwroot. If you have changed the physical path or configured a new web site in the IIS Manager, the Web root full path should point to the new location.
If you encounter any errors when configuring the Web server profile, refer to Permission errors when configuring the Web server profile.
Your client app files (including the cloud app launcher, runtime files, and application files) will be deployed to this specified path later.
Step 5: Click OK to save the server profile and return to the Web Server Profile window.
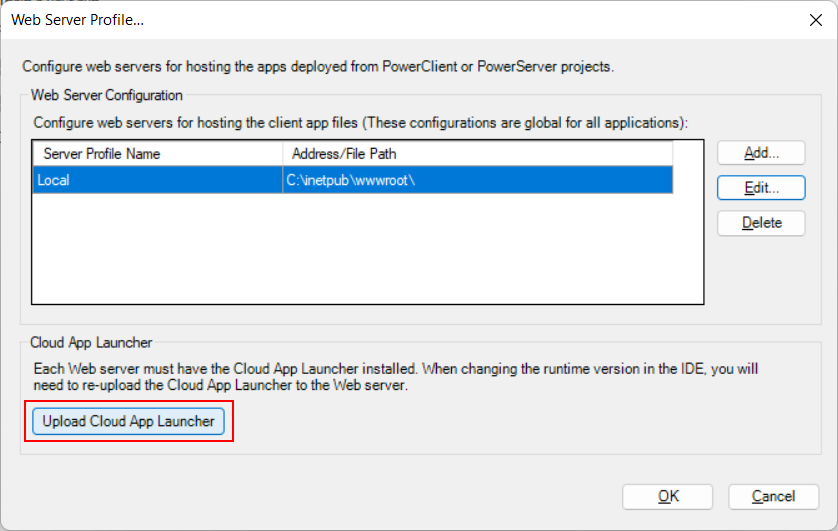
Step 6: Click the Upload Cloud App Launcher button.
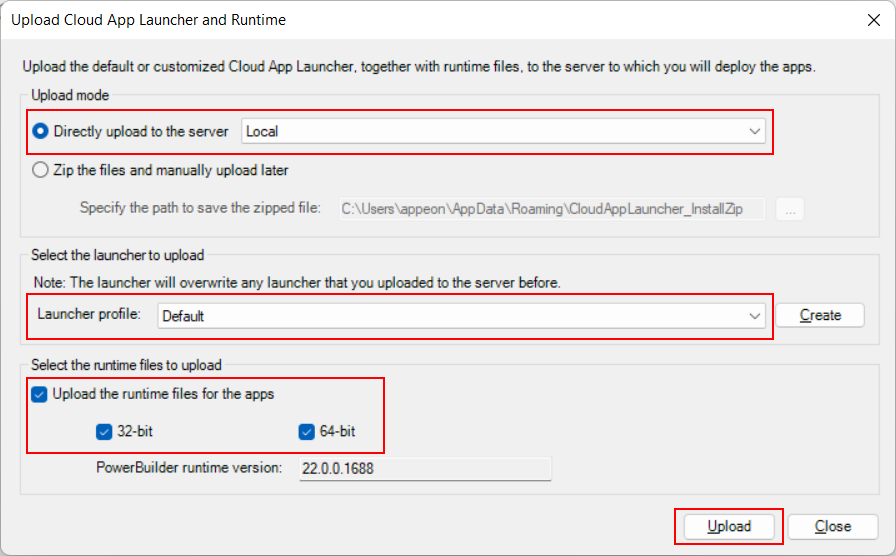
Step 7: In the Upload Cloud App Launcher and Runtime window that appears, select Directly upload to the server and Local, and then make sure the following are selected: Default, Upload the runtime files for the apps, 32-bit, and 64-bit.
Step 8: Click Upload and make sure the upload is successful.
This section Uploading the cloud app launcher and the runtime files has more details about this window.
There is no need to configure the .NET Server page, as we will run PowerServer locally from the IDE (This will directly start the built-in Kestrel server and run the PowerServer Web APIs in a development hosting environment). This section will go through and verify the default settings in the .NET Server page.
Step 1: In the PowerServer project painter, select the .NET Server page > Basic tab.
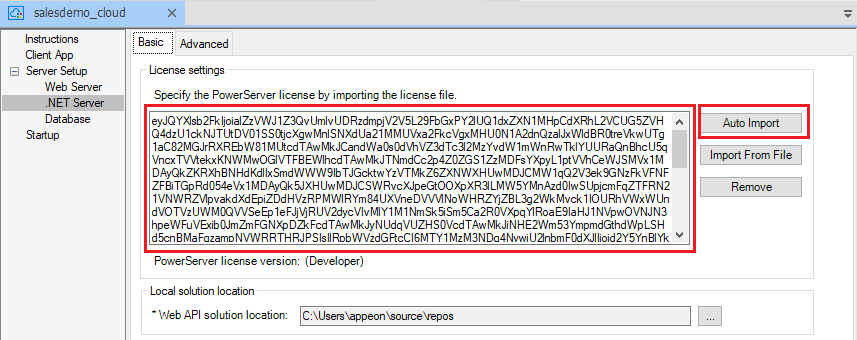
Step 2: Make sure the PowerServer license has been automatically imported. If not, click Auto Import to import the developer license or trial license included in the PowerBuilder CloudPro subscription.
The computer will need to access the Appeon sites: https://api.appeon.com and https://api2.appeon.com in order to import the license. For more detailed instructions, refer to Import license and activate PowerServer.
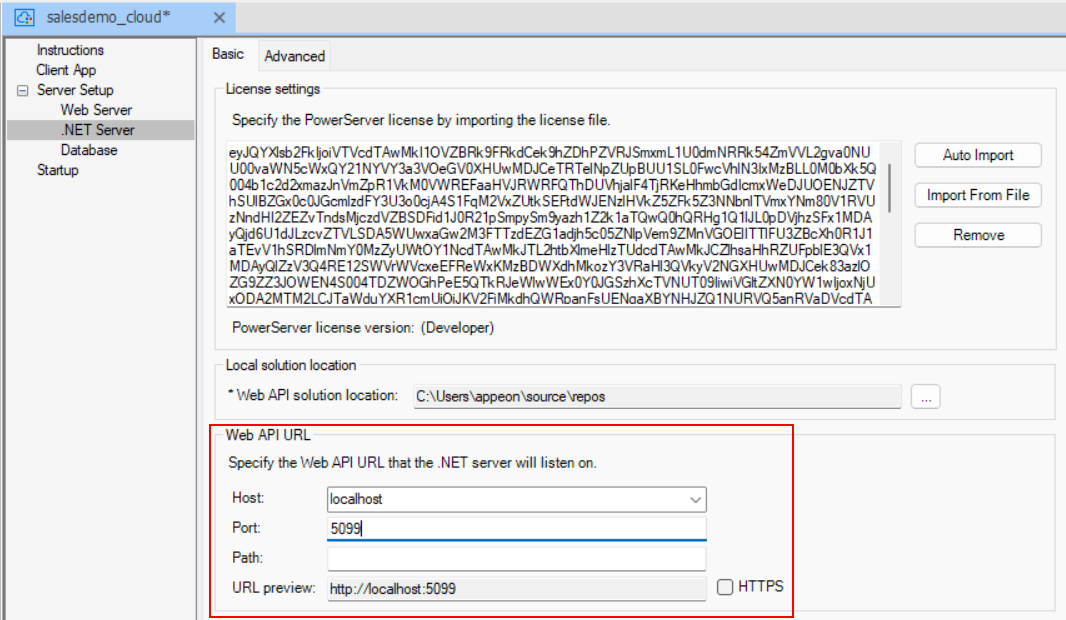
Step 3: Use the default Web API URL "http://localhost:5099", because in this guide, the Web APIs will be running on the built-in Kestrel server on the local computer, in order to quickly get started and running.
Make sure the port number is not occupied by another program. For how to verify if a port number is occupied, follow the instructions in Choosing an appropriate port number.
If you plan to publish the Web APIs to a dedicated server or apply a web debugging proxy tool to debug the deployed application, then use the actual IP address/domain name and port number, instead of localhost and 5099.
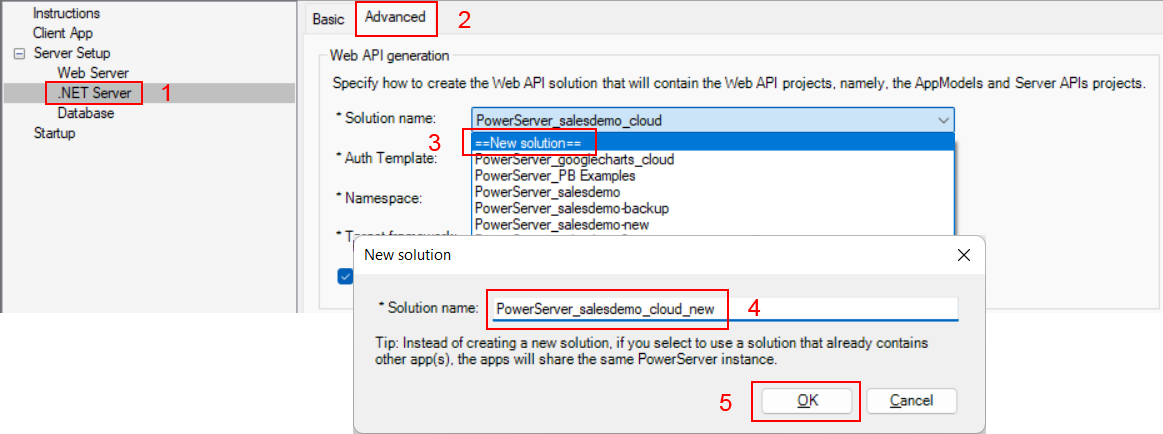
Step 4: On the Advanced tab, select an existing solution or select "New solution" from the Solution name list; in the New solution dialog, input "PowerServer_salesdemo_cloud_new" (or any name you like) and then click OK.


