If your database and Web APIs reside in different servers, you will need to create a new database cache so that the Web APIs can connect with the remote database at runtime.
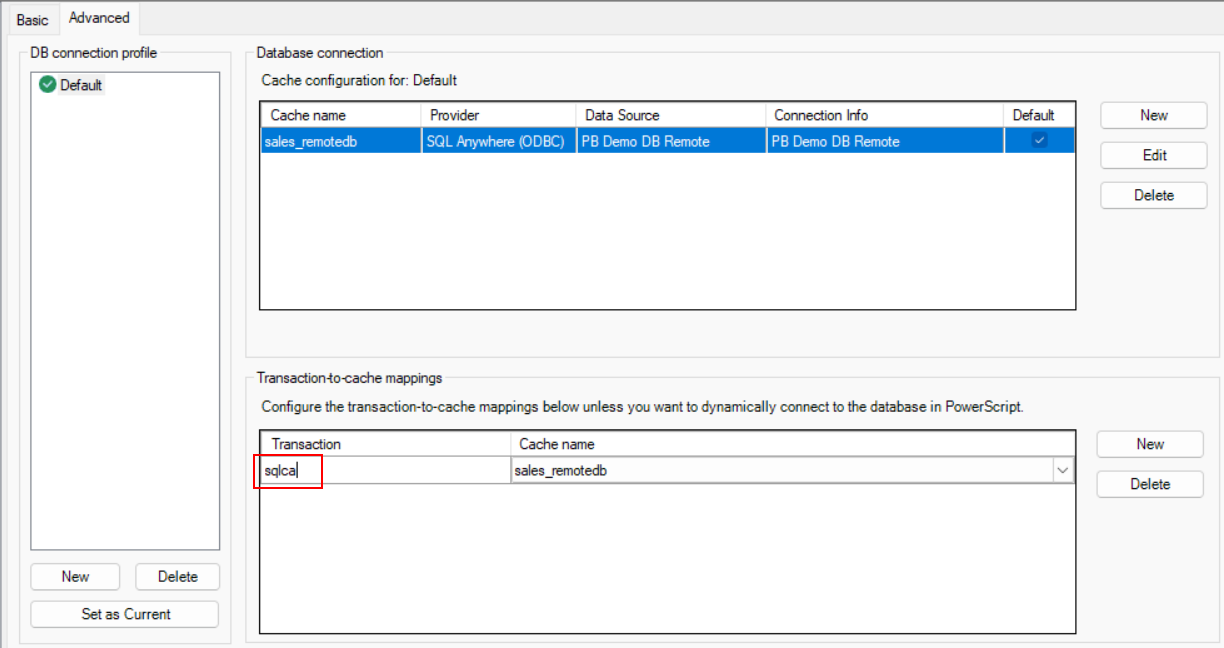
Step 1: In the PowerServer project painter, select the Database page > Advanced tab, click New in the upper part to create the database connection.
Step 2: In the dialog box that displays, specify the settings for the database connection.
The following uses the PB demo database for SQL Anywhere as an example.
-
Select SQL Anywhere (ODBC) from the Provider list.
-
Specify "sales_remotedb" (or any text you like) as the database cache name in the Cache name field.
-
Select the ODBC data source that connects with the remote database.
-
Specify "dba" as the user name and "sql" as the password.
Step 3: Select the option "I have read and agree to the license ...".
Step 4: Click Test connection to make sure the database can be connected successfully.
Step 5: Click OK to save settings and go back to the Advanced tab; and then click New in the lower part to map the transaction object with the database cache.
Step 6: Input "sqlca" as the transaction object that maps to the database cache.
Note
If firewall is turned on in your database server, make sure to configure the firewall to allow the database port number to go through.
If you are deploying to a production server, you might want to use a production license for PowerServer, instead of using a developer license. To use a production license, you will need to export the license file from the Appeon web site and then import the license to the PowerServer project.
Step 1: Log into the Appeon User Center, click License Management, and then click All Licenses under PowerServer.
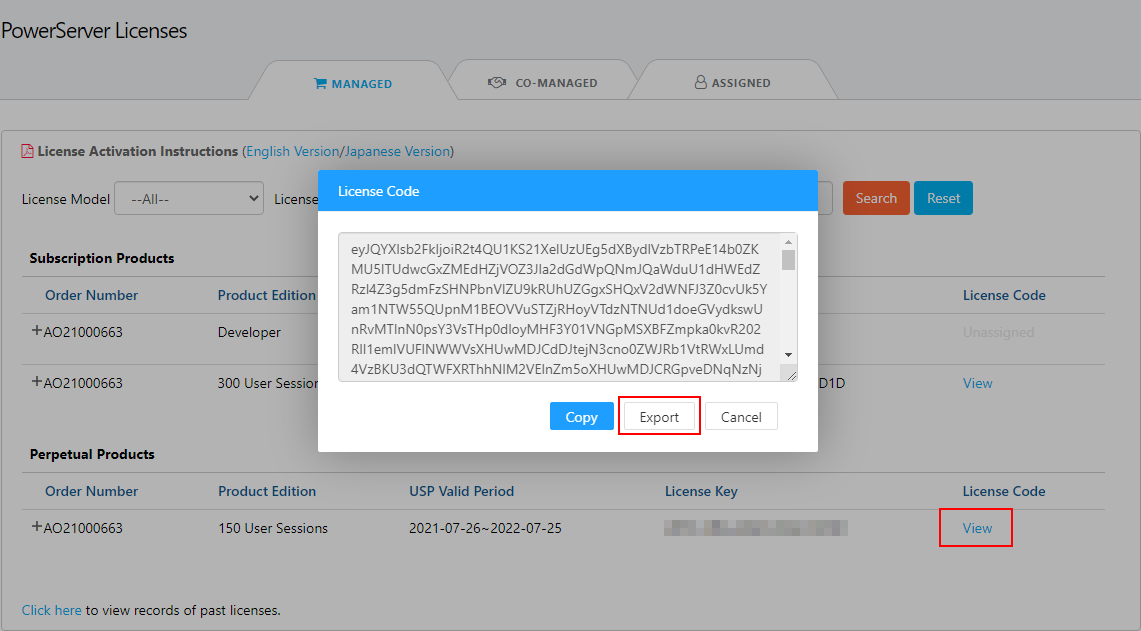
Step 2: Click View, and then click Export to export the license code to a TXT file ([LicenseKey].txt) and save the file on the local machine.
Do not change the file name, as the file name represents the unique license key.
Step 3: Go to the .NET Server page of the PowerServer project painter, and then click Import From File to select and import the [LicenseKey].txt file.
Save the PowerServer project settings; and build the PowerServer project (using the Build & Deploy PowerServer Project button) for the changes to take effect.
Note
If you want to deploy to an existing PowerServer C# solution, make sure the "Overwrite server settings (DB Connection, .NET server listening port, and license)" option is selected in the .NET Server page > Advanced tab, otherwise the solution will not be updated with the Web API port number (used in local development environment), the database cache, and the production license.
When the process is finished, manually open the specified location (by default C:\Users\appeon\source\repos\PowerServer_salesdemo) and double click the .sln file to open the PowerServer C# solution in SnapDevelop.
Double check the database cache settings in the ServerAPIs project > AppConfig > Applications.json file.
Double check the license in the ServerAPIs project > Server.json file.
Double check the Web API port number in ServerAPIs project > Properties > launchSettings.json file. This port number will be used if you want to run the Web APIs directly in the local development environment (for example, from the SnapDevelop IDE).
We will publish the Web APIs to a folder and then move the folder's content to the web site folder on the IIS server.
Let's publish the Web APIs to a folder first.
Step 1: Open the PowerServer C# solution in SnapDevelop. Log in to SnapDevelop if required.
At startup, the solution will install/update the dependencies. Wait until the Dependencies folder completes the install/update. (Make sure the machine can connect to the NuGet site: https://www.nuget.org in order to successfully install PowerServer NuGet packages).
Step 2: In the Solution Explorer, right click on the ServerAPIs project node, and select Publish.
Step 3: In the window that appears, select Folder, and click Next.
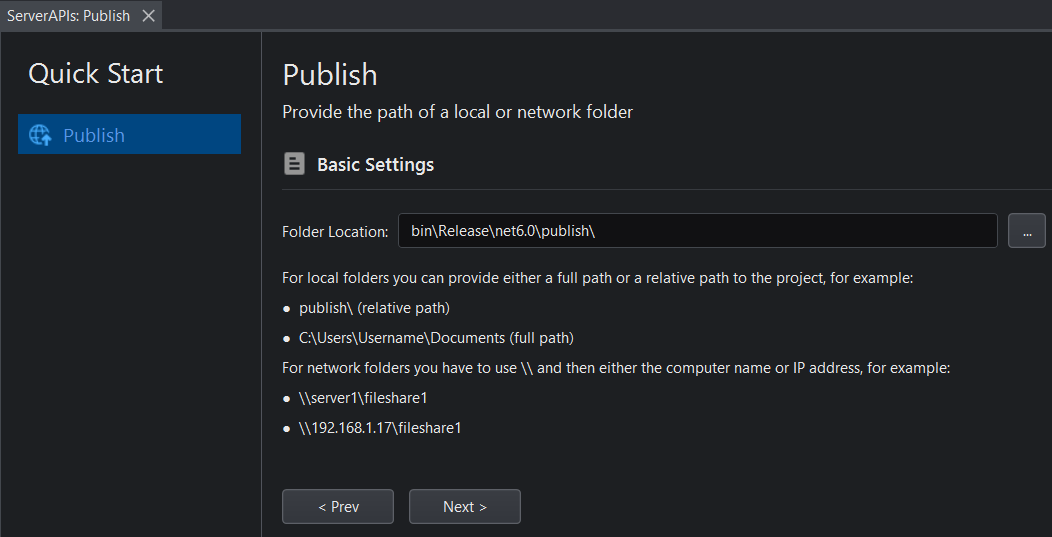
Step 4: Use the default location or specify a different location where the files will be published, and click Next.
Step 5: Click the Edit publish profile icon after the Release setting.
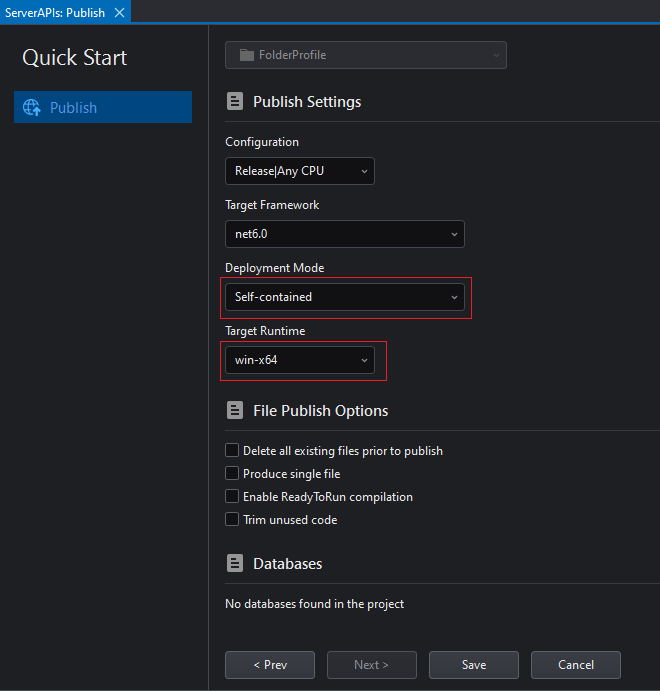
Step 6: Select the Self-Contained deployment mode and the appropriate target runtime, and then click Save.
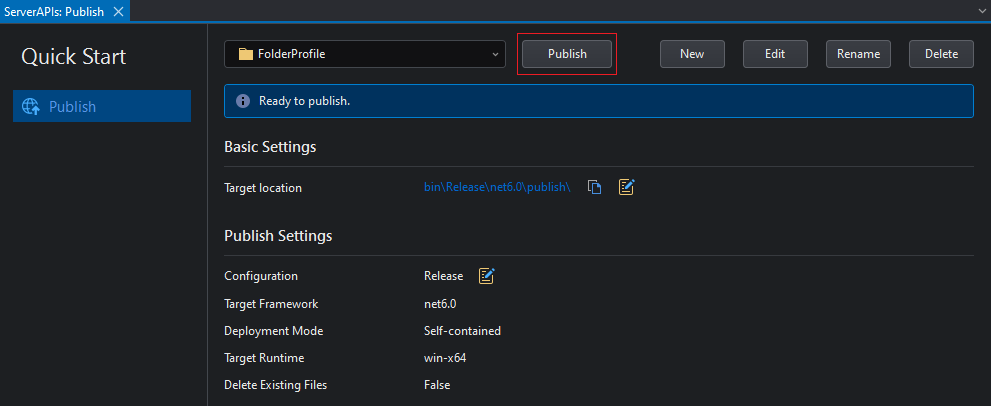
Step 7: Click Publish.
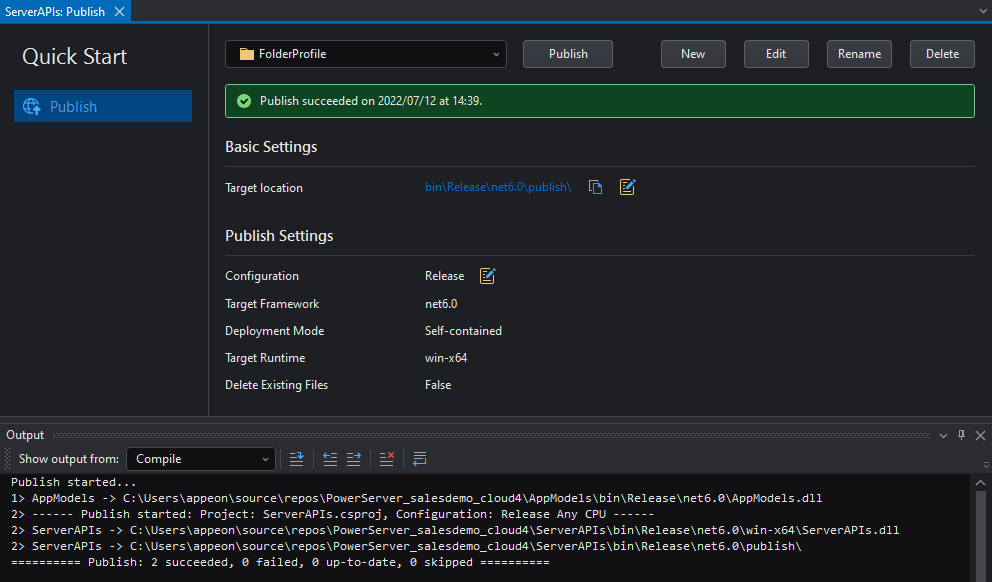
You can view the publish progress and result in the Output window.
Step 8: Make sure publishing was successful as shown in the figure below.
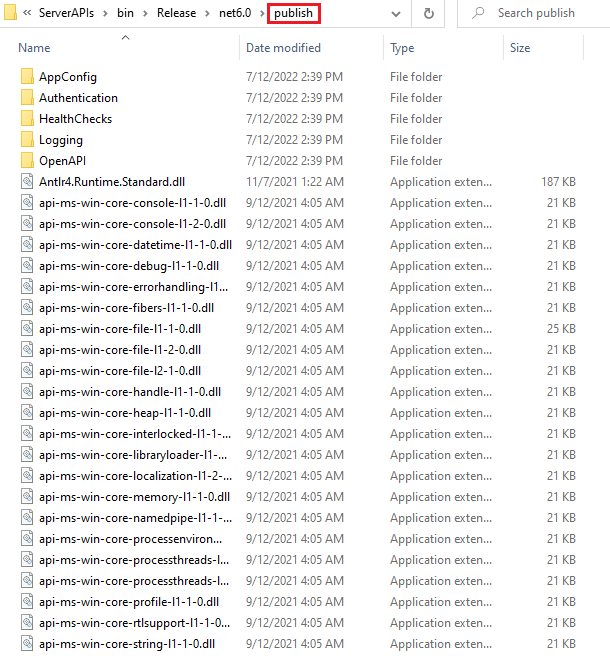
Step 9: Click the target location in the publish wizard to open the folder that contains the published files.
You will see a bunch of files generated under the "publish" folder.
After you copied the published Web APIs to the IIS web site, the IIS process manager will automatically launch the Web APIs.
Although you don't need to start the Web APIs manually, it is recommended that you verify the Web APIs can start and work correctly.
Verify that the Web APIs can automatically start.
-
(Optional) Verify that the Web APIs can be started locally (you directly login to the server machine and access the Web APIs through "localhost": http://localhost:82).
-
Verify that the Web APIs can be started remotely (you login to a client machine which is different from the server, and access the Web APIs through IP address or domain name: http://172.16.100.35:82).
Make sure the welcome page is displayed (as shown below), indicating the Web APIs can be started and accessed successfully. If the Web APIs can be accessed locally using "localhost" but NOT remotely using the IP address or domain name, you will need to check the firewall or network settings of the server machine.
-
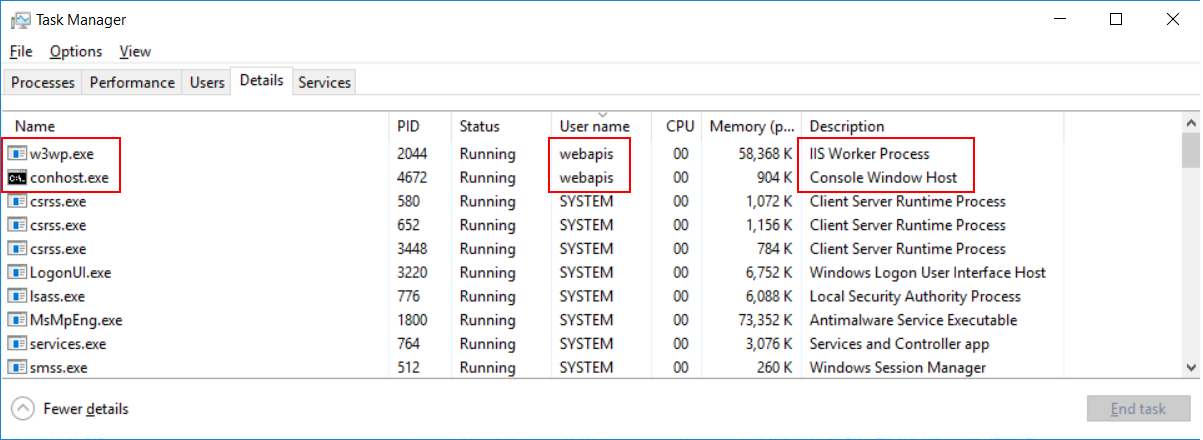
Open the Task Manager in the IIS server. You will notice that the following two processes have been automatically started.
-
End these two processes and then access http://172.16.100.35:82 again. The two processes will automatically start again.
Verify that the Web APIs is working normally.
-
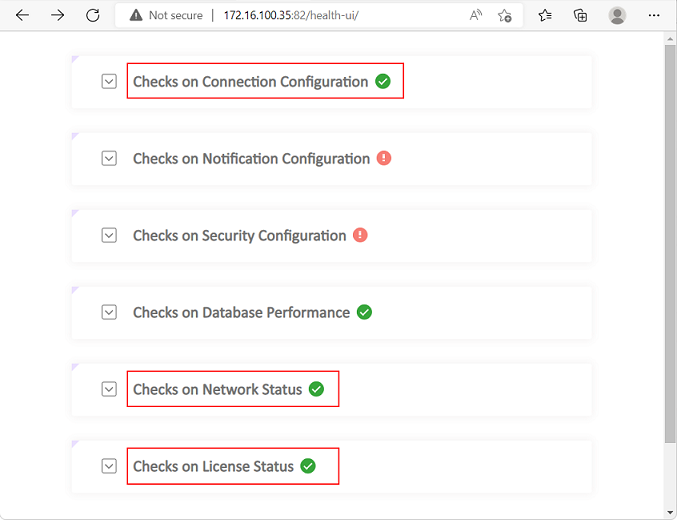
Access this URL in the Web browser: http://172.16.100.35:82/health-ui/.
-
Make sure a green check icon (
 ) is displayed for "Checks on Connection
Configuration", "Checks on Network Status", and "Checks on
License Status".
If you see an exclamation mark icon (
 ), you should expand to view details. For
example, you may see the following information if there is a
database connection problem. Follow the suggestions part to try
to resolve the problem.
If you use the SQL Anywhere database or ASE database which supports only ODBC connection at this moment, you will also need to set up the corresponding ODBC data source in the server where Web APIs is published and running. See Creating the ODBC data source for more details.


