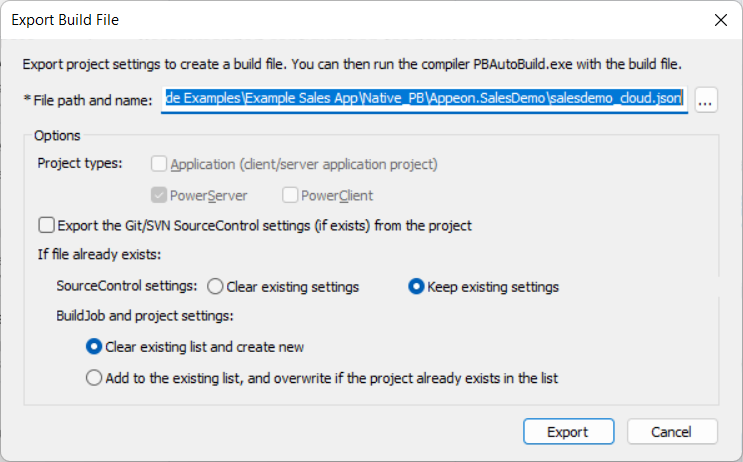
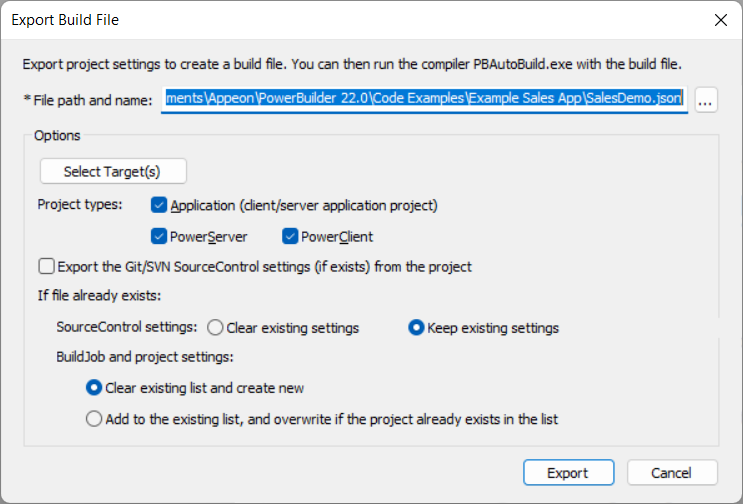
Now let's export the PowerServer project settings of the Example Sales Demo to a JSON file.
You can export the current project or all projects from the workspace (or target).
To export the current project:
-
Open the workspace for the Example Sales App in the PowerBuilder IDE, and then double-click the PowerServer project object to open the object in the project painter.
-
When the project painter is opened, click the Export PowerServer Build File button (
 ) in the toolbar.
-
In the Export Build File dialog box, specify the settings, write down the path and filename to be exported, and then click Export.
For more information about the settings, refer to Build & deploy using commands.
The current project will be exported to the build file.
To export all of the projects from the workspace (or target):
-
Open the workspace for the Example Sales App in the PowerBuilder IDE, and then right click the workspace (or target) in the System Tree and select Export Build File.
-
In the Export Build File dialog box, select which target(s) to be exported.
If the workspace contains multiple targets, then by default all targets will be exported to the same build file.
-
Select which project type(s) to be exported.
By default, all project types under the workspace (or target) will be exported to the build file.
-
Specify the settings, write down the path and filename to be exported, and then click Export.


