The PowerServer Web APIs will connect with the database at runtime. Therefore, you will need to double check that the database connection points to the correct database.
After the PowerServer C# solution is published as a distributable application, you can check and change the database connection settings in the publish folder > AppConfig sub-folder > Applications.json or Applications.[DBConnectionProfile].json file.
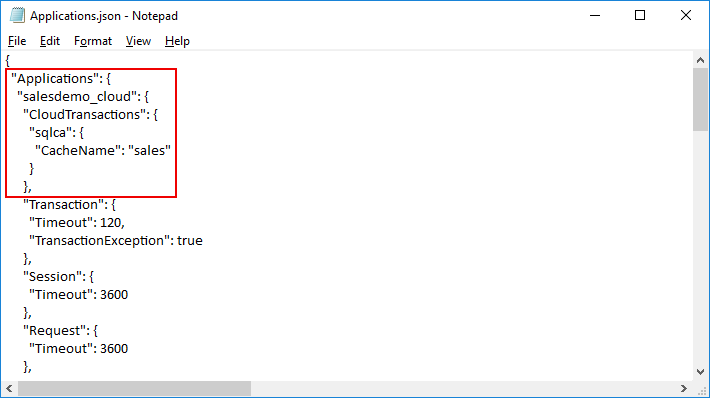
In the Applications.json (or Applications.[DBConnectionProfile].json) file, locate the "Applications" block > [application name] > "CloudTransactions". This is where the transaction-to-cache mapping(s) is stored. For example,

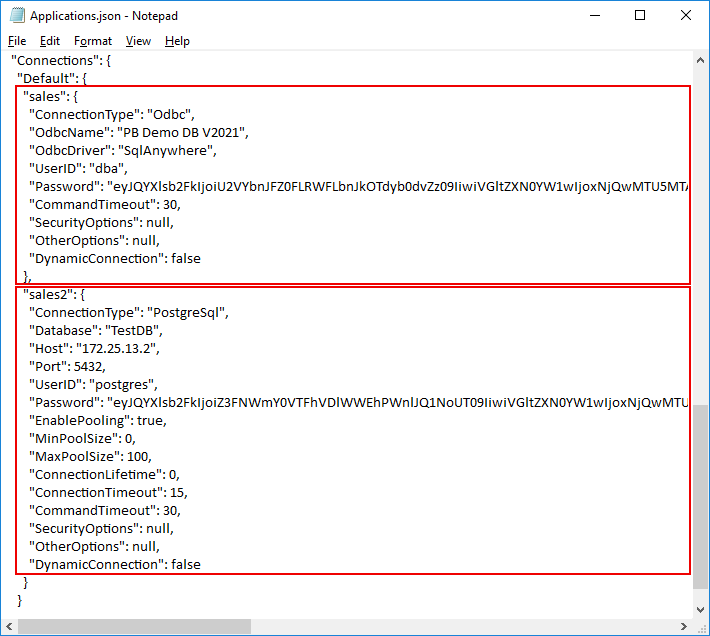
In the Applications.json (or Applications.[DBConnectionProfile].json) file, locate the "Connections" block. This is where the cache(s) is stored. For example,

Note that the database login password can be an encrypted value (encrypted by the CustomizeDeploy.dll tool).
The PowerServer license must be valid or appropriate for the current environment in order for PowerServer Web APIs to run successfully.
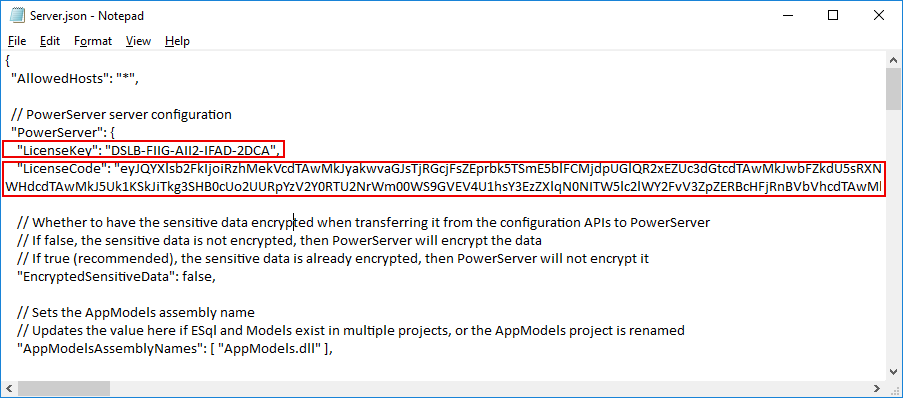
After the PowerServer C# solution is published as a distributable application, you can manually change the license in the publish folder > Server.json file.
Replace the "LicenseKey" field with the name of the file without extension and replace the "LicenseCode" field with the contents of the file.

For step-by-step instructions on how to get the PowerServer license from the Appeon web site, refer to Tutorial 12: Applying a production license to an existing PowerServer project > Accessing the production license code (Order Owner only).
You can configure the email account to send and receive notifications about the PowerServer license.
After the PowerServer C# solution is published as a distributable application, you can manually configure the email account in the publish folder > Server.json file.
Locate the "EmailOptions" section and configure the email server and account settings.


