You can reuse the database cache created in Stage 1: Configuring database connection for project compilation, or create a new one using the same instruction.
At app runtime, PowerServer uses the database native .NET Core driver to connect with the database. These database drivers will be automatically downloaded from Nuget (www.nuget.org) to PowerServer C# solution when the solution is loaded in SnapDevelop. All you need to do is to agree to the driver license terms in the PowerBuilder IDE and then re-generate the PowerServer C# solution.
To agree to download the driver to the PowerServer solution:
-
Open the PowerServer project painter > Database page from the PowerBuilder IDE.
-
In the Database driver group, select the option "I have read and agree to the license ...".
You will be required to select this option when you create the database cache.
The driver will be automatically downloaded from the NuGet site to the PowerServer C# solution when the solution is loaded in SnapDevelop later.
At app runtime, PowerServer determines which database connection cache to use according to the transaction object in use (the connection string in the PowerScript will be ignored).
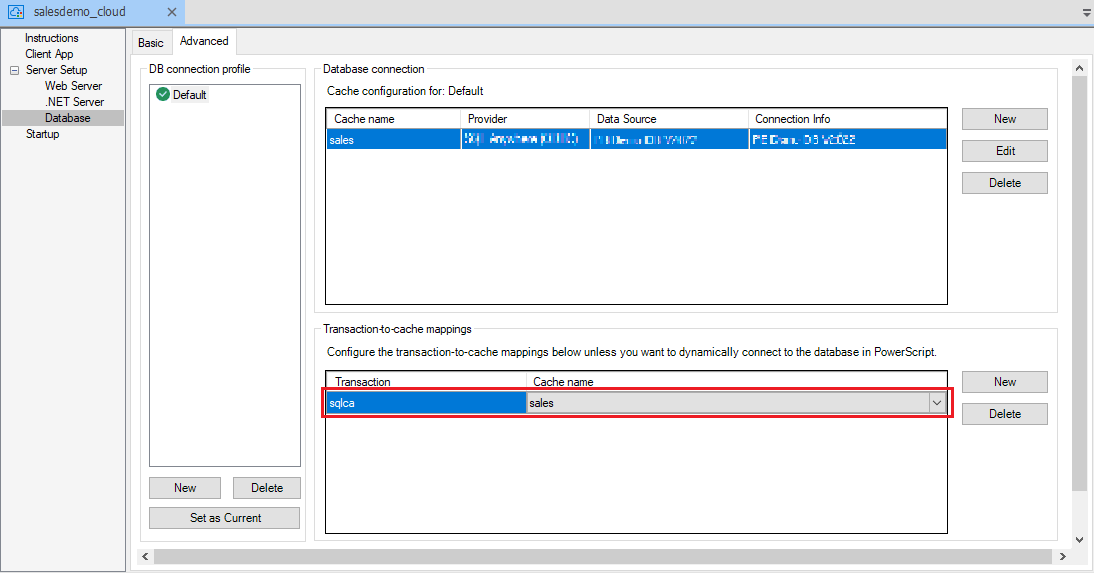
By default, the SQLCA transaction object will be automatically mapped with the cache. But if there is more than one transaction object existing in the application, you are required to map the other transaction objects with the database connection cache.
After you map the transaction object with the cache and then deploy these settings to the PowerServer C# solution, PowerServer will use these settings to set up a static database connection for the app runtime.
This section will only focus on how to create the static mapping between transaction object and database cache. For how to dynamically create the database connection, refer to Setting up dynamic database connection for the app runtime.
To configure the static mapping of the transaction object with the cache:
-
In the PowerServer project painter, select the Database page > Advanced tab.
-
In the Transaction-to-cache mappings group, click New, and then input the transaction object name (for example "sqlca2") and select one of the configured caches to map with.
You only need to map the transaction objects that are used by the current application.
-
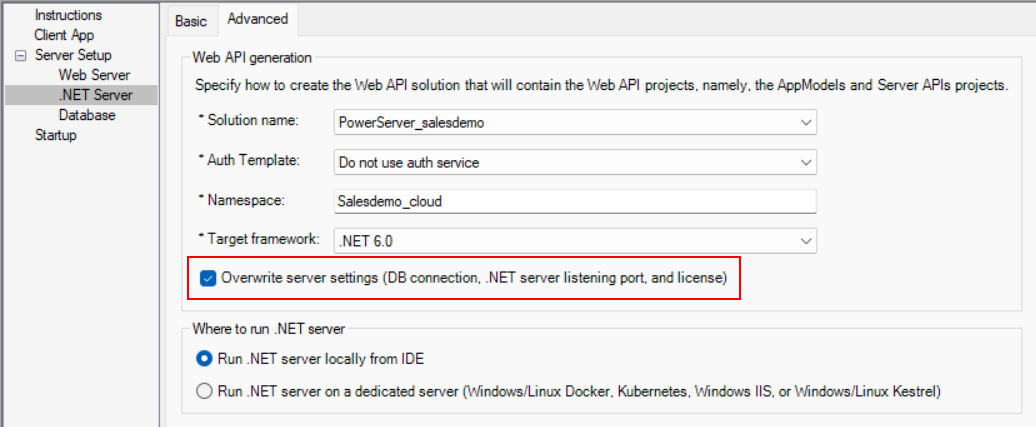
Make sure the "Overwrite server settings (DB Connection, .NET server listening port, and license)" option is selected in the .NET Server page > Advanced tab if you want to deploy to an existing solution.
This will make sure the database cache settings, if any, existing in the PowerServer C# solution will get updated.
-
Click the Build & Deploy PowerServer Project button in the toolbar.
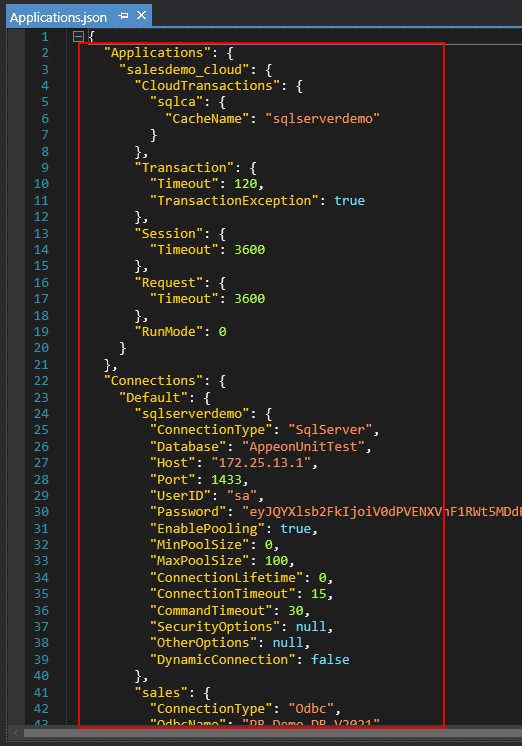
The transaction-to-cache mapping (as well as the cache settings) will be deployed to the PowerServer C# solution. You can manually change these settings in the PowerServer C# solution. For more details, see Managing database caches in the PowerServer solution and Managing transaction-to-cache mappings in the PowerServer solution.


