This tutorial uses the Amazon Cognito user pool as an SAML identity provider for the installable cloud app.
The following outlines the key steps for creating the Amazon Cognito user pool. For complete and detailed instructions, please refer to Getting Started with User Pools.
When the user pool is created successfully, gather the information such as region, user pool ID, user pool client ID, and user pool client secret which are required by the built-in server later (as shown below).
"AWS": {
    "Region": "us-west-2",
    "UserPoolId": "us-west-2_5wyOzYn1d",
    "UserPoolClientId": "4linbauf6d58b552r6lc3gbpkc",
    "UserPoolClientSecret": "1prlm08gm3aptlokcbai88ekiegff9mqbc98nhebfart5g4a3cr2"
  }
Step 1: Set up the AWS Single Sign-On (SSO).
Before you can set up AWS Single Sign-On (SSO), you must:
-
Have first set up the AWS Organizations service and have All features set to enabled. For more information about this setting, see Enabling All Features in Your Organization in the AWS Organizations User Guide.
-
Sign in with the AWS Organizations management account credentials before you begin setting up AWS SSO. These credentials are required to enable AWS SSO. For more information, see Creating and Managing an AWS Organization in the AWS Organizations User Guide. You cannot set up AWS SSO while signing in with credentials from an Organization’s member account.
For more details, refer to AWS SSO prerequisites.
Step 2: Get the SAML 2.0 metadata.
1) Add a new application.

2) Add a custom SAML 2.0 application.

3) After filling in the configuration, save it, and then download the SAML metadata file or save the metadata file URL.
For more details, refer to AWS Single Sign-On.
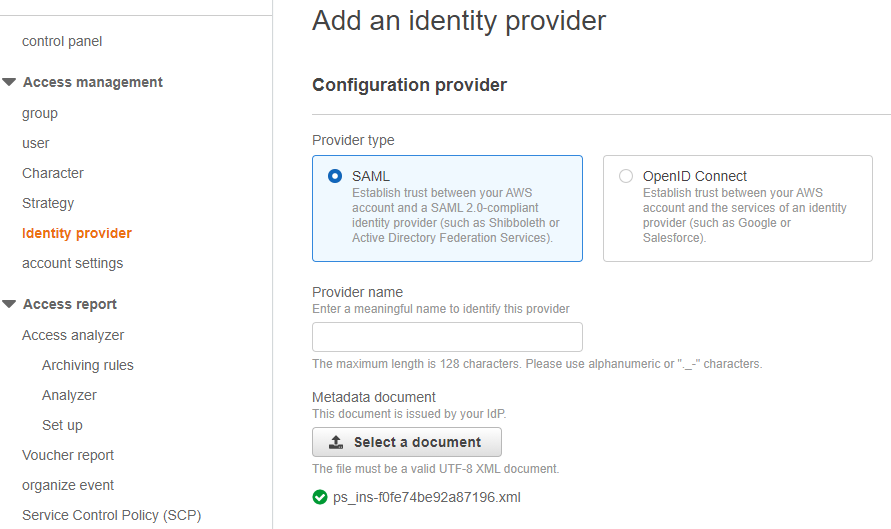
Step 3: Add an identity provider.
1) Click Add provider.

2) Select SAML and then upload the SAML metadata file you just got.
Step 4: Create the user pool.
-
Go to the Amazon Cognito console. You might be prompted for your AWS credentials.
-
Choose Manage User Pools.
-
In the top-right corner of the page, choose Create a user pool.
-
Provide a name for your user pool, and choose Review defaults to save the name.
-
In the top-left corner of the page, choose Attributes, choose Email address or phone number and Allow email addresses, and then choose Next step to save.
-
In the left navigation menu, choose Review.
-
Review the user pool information and make any necessary changes. When the information is correct, choose Create pool.
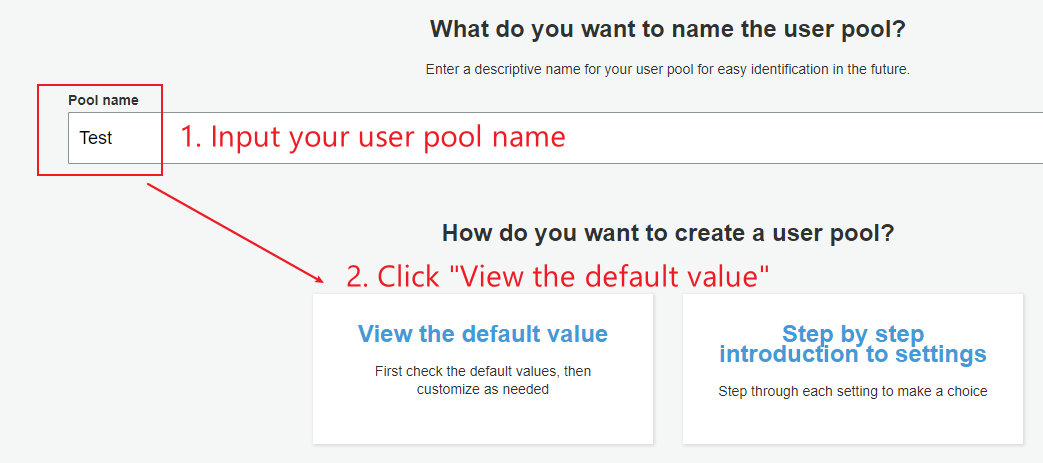
Fill in the following configuration as required.

Tips: It is recommended to modify the configuration (for example, "Attributes") that cannot be modified after pool creation.
Step 5: Create the user pool application client.
-
On the navigation bar on the left-side of the page, choose App clients under General settings.
-
Choose Add an app client.
-
Give your app a name.
-
Check Generate client key.
-
Check Enable authentication based on username and password (ALLOW_USER_PASSWORD_AUTH).
-
Choose Create an application client.

Step 6: Configure the SAML identity provider.
Open the identity provider configuration page of the user pool, choose SAML, select the SAML metadata file downloaded in step 2 or the terminal node URL of the metadata file.

Step 7: Configure the application integration settings.
-
Configure domain name. You can configure the Amazon Cognito domain name or your own domain name.
-
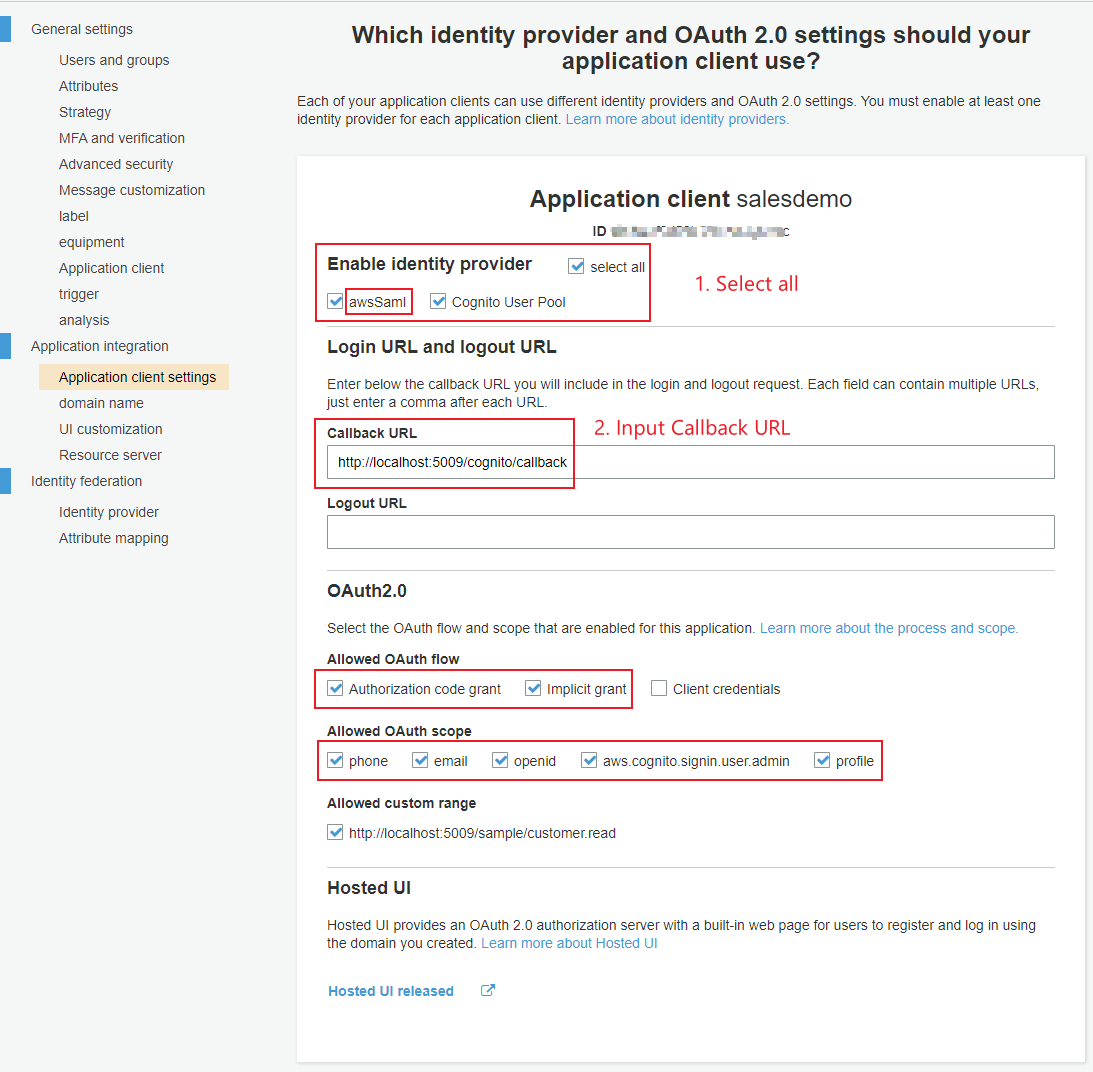
Configure the application client settings, select all options under the Enable identity provider, enter the callback URL and the logout URL, select Authorization code grant and implicit grant under the Allowed OAuth flow, select all options under the Allowed OAuth scope, save the settings and click to publish Hosted UI.
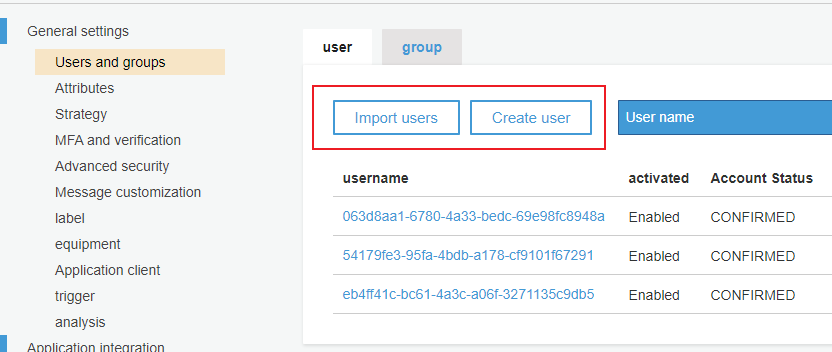
Step 8: Import or create users.
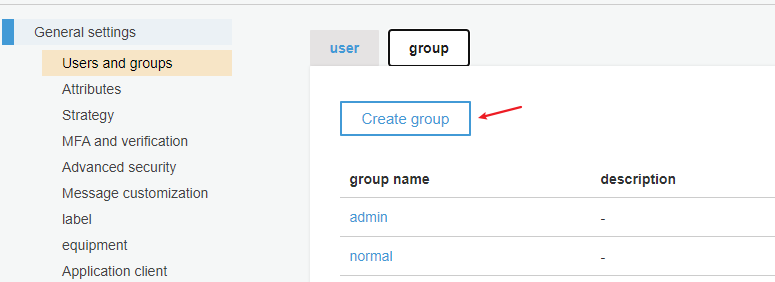
Step 9: Create a group (optional).
