Note
To deploy the client app from the development PC to the remote Web server, you can choose:
-
Method 1: Deploy the client app to the remote server through the FTP protocol. This requires that
1) An FTP server is set up on the Web server (the FTP server's physical path must point to the Web root of the Web server).
This section will walk you through how to set up an FTP server on the Web server.
2) The client app is deployed to the remote Web server through the FTP server.
Tutorial 1 > "Task 4: Setting up the development PC" has detailed instructions.
-
Method 2: Package the client app and then install (or copy) it to the remote Web server.
Follow the instructions in Packaging and copying the client app to package the client app and then install (or copy) it to the Web server Web root.
The following steps will walk you through setting up an FTP server on the Web server, so that PowerBuilder can deploy files to the remote server through the FTP protocol.
In this tutorial, we set up an IIS FTP server.
To enable the IIS FTP service and create an IIS FTP site,
Step 1: Follow the instructions in Installing Web Server (IIS) until the Role Services section displays; and make sure the following role services are selected and installed.
-
FTP Server
-
FTP Service
-
FTP Extensibility
-
-
Management Tools
-
IIS Management Console
-
Step 2: Follow the instructions in Creating an IIS FTP site to create an FTP site and set the physical path to the document root of the Apache HTTP server which is C:\Apache24\htdocs by default.
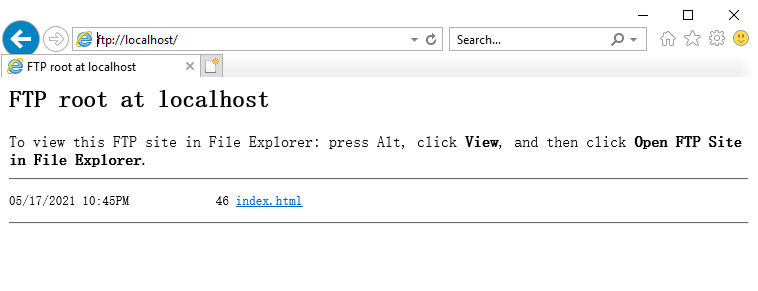
Step 3: Test the FTP site by opening up a Web browser and typing in the address: ftp://localhost.
The following message indicates the FTP site is working properly.
You can further test from the development PC by typing ftp://your_server_ip in a browser. (If access failed, check that if the firewall has blocked the FTP port; you can try to turn off the firewall on the server.)


