Instead of uploading the default app launcher, you can create your own launcher and upload it.
To create and customize the launcher:
-
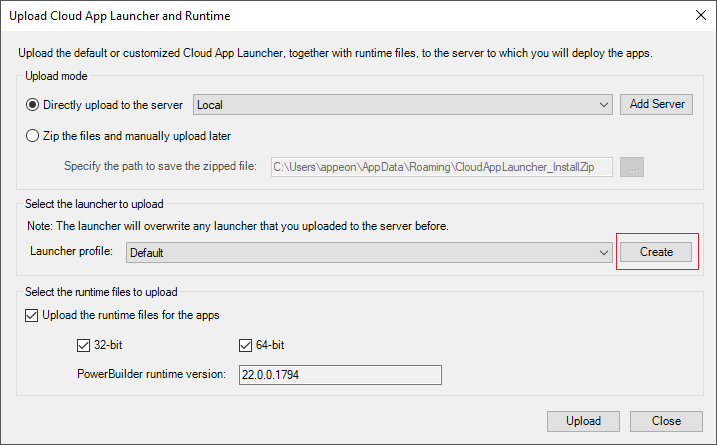
Select Tools>Upload Cloud App Launcher from the menu bar. The Upload Cloud App Launcher and Runtime window appears.
-
Click the Create button to create a new launcher and specify the settings.
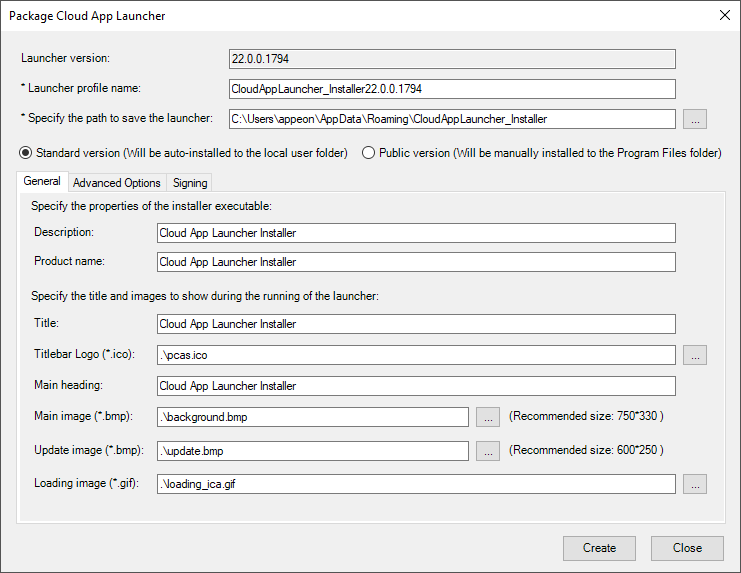
The following settings can be configured:
-
The Launcher Profile save location on the local machine.
-
The version of the launcher (Standard or Public). If you are not sure which version to select, refer to the previous section About cloud app launcher for their differences.
-
On the General tab:
-
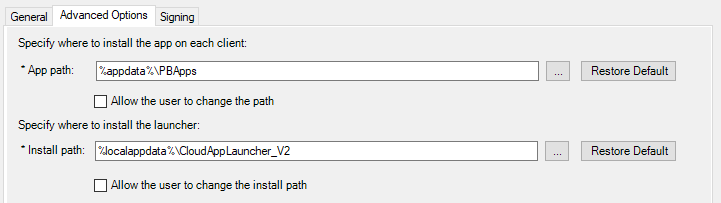
On the Advanced Options tab:
-
The install location of the application on the client. The path in the App path field will be used as the default installation path. If you want to allow the user to select where to install the application during the installation process, you can select "Allow the user to change the path".
-
The install location of the cloud app launcher on the client. The path in the Install path field will be used as the default installation path. If you want to allow the user to select where to install the cloud app launcher during the installation process, you can select "Allow the user to change the install path".
-
If "standard version" is selected, you can specify whether to allow the user to change the installation path of launcher. However, the standard version should not be installed to the same location as the public version.
-
If "public version" is selected, you should not allow the user to change the installation path of launcher.
-
If the end user has no sufficient rights to install to the default or specified path for the application or the cloud app launcher, they will be prompted to select an appropriate path before they can proceed with the installation process.
-
-
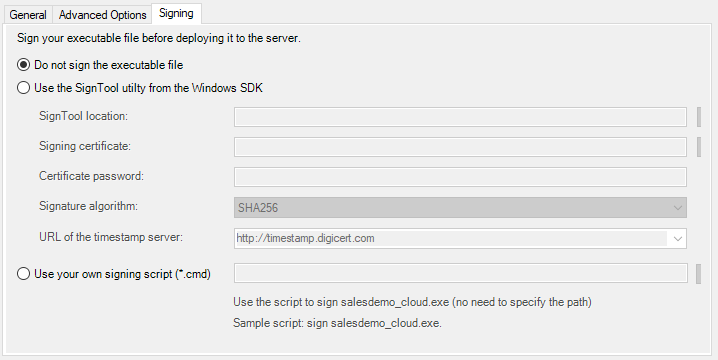
On the Signing tab, select whether to digitally sign the launcher executable file (CloudAppLauncher_Installer.exe).
If you want to digitally sign the launcher executable file, you can specify the settings required for signing under the "Use the SignTool utility from the Windows SDK" option, for example, SignTool location, signing certificate, certificate password, signature algorithm, and URL of the time stamp server. And make sure Microsoft’s SignTool has been installed on the current machine.
Or you can place the signing scripts in a file (with file extension as .cmd) and then select the file for the "Use your own signing script" option. For example, to sign the executable file (CloudAppLauncher_Installer.exe) using Microsoft’s SignTool, you may create a cmd file that includes the following scripts:
signtool.exe sign /f mycert.pfx /p password /d "My app launcher" /du http://www.mytest.com /fd sha256 /tr "http://timestamp.digicert.com" /td sha256 CloudAppLauncher_Installer.exe
After the executable file is generated and before it is uploaded to the server, PowerBuilder will sign the executable file using your own signing scripts or using the SignTool settings you specified.
Note
If you want to sign your customized Cloud App Launcher using the SignTool utility, ensure that the current Windows OS account that runs the PowerBuilder IDE has permission to access the specified URL of the timestamp server. Otherwise, the signing may fail.
Note
You will not be able to edit the launcher profile; you can only create new ones.
To remove a launcher profile, go to the path where the launcher is saved (by default, C:\Users\appeon\AppData\Roaming\CloudAppLauncher_Installer\), go into the folder which corresponds to the launcher version and then delete the sub-folder that is named after the profile.
