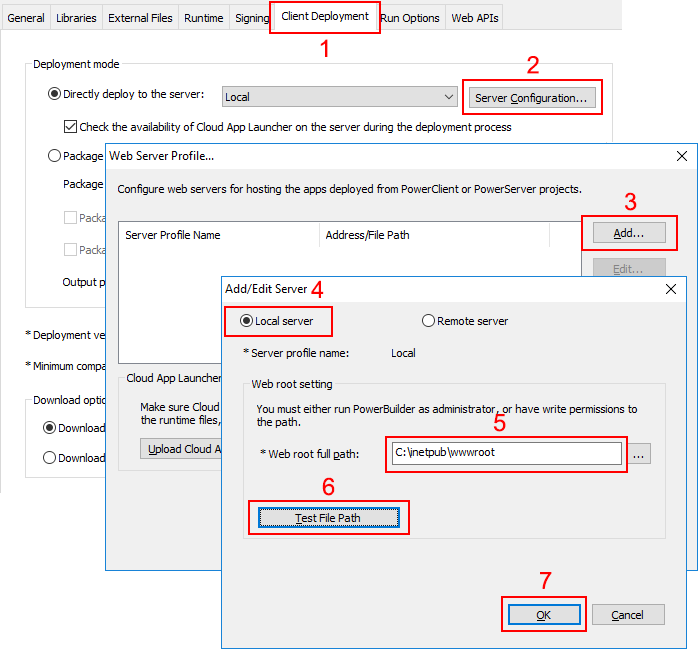
Step 1: Select the Client Deployment tab in the PowerServer project painter.
Step 2: In the Deployment mode section, click the Server Configuration button.
Step 3: In the Web Server Profile window that appears, click the Add button.
Step 4: In the Add/Edit Server window, select Local server, set the Web root full path (in this tutorial, C:\inetpub\wwwroot), and then click Test File Path to ensure the path is valid.
This tutorial assumes your OS is installed to the C drive and the IIS Web root is C:\inetpub\wwwroot.
If you encounter any errors when configuring the Web server profile, refer to Permission errors when configuring the Web server profile.
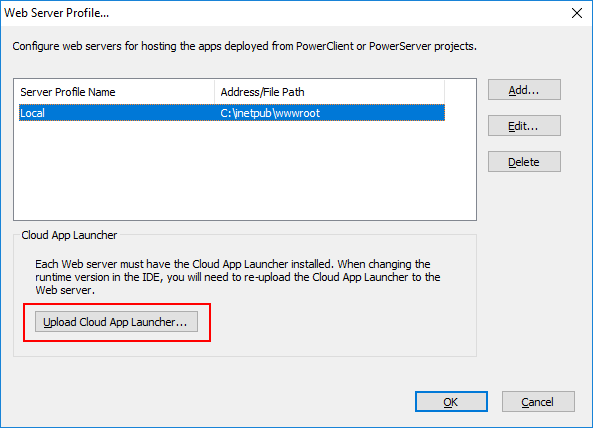
Step 5: Click OK to save the server profile and return to the Web Server Profile window.
Step 6: Click the Upload Cloud App Launcher button.
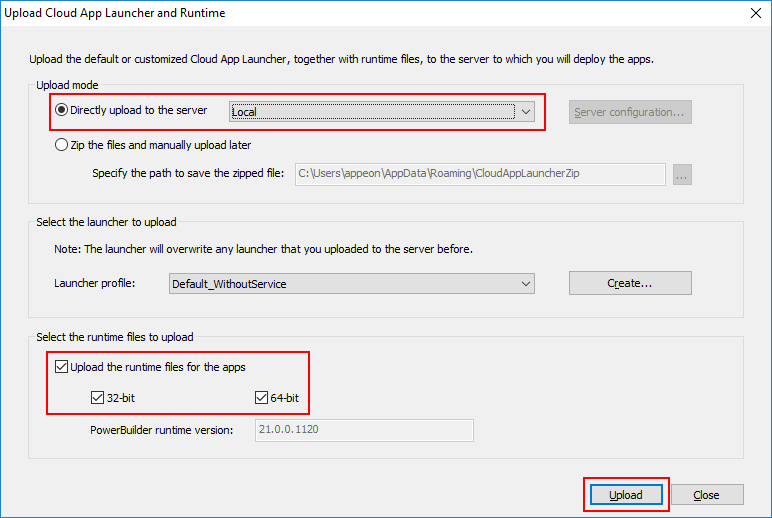
Step 7: In the Upload Cloud App Launcher and Runtime window that appears, select Directly upload to the server and Local, and then make sure the following are selected: Local, Upload the runtime files for the apps, 32-bit, and 64-bit.
Step 8: Click Upload and make sure the upload is successful.
This section Uploading the cloud app launcher and the runtime files has more details about this window.


