To deploy the client app from the local development PC to the remote Web server, you can choose:
-
Method 1: Deploy the client app to the remote server through the FTP protocol.
Step 1: Set up an FTP server (the FTP server's physical path must point to the Web root of the Web server).
Method 1: Creating an IIS FTP site will walk you through how to set up an FTP server.
Step 2: Deploy the client app from the development machine to the remote server through the FTP server.
"Task 4: Setting up the development PC" has detailed instructions.
-
Method 2: Package the client app and then install (or copy) it to the Web root of the Web server.
Method 2: Packaging and copying the client app will walk you through how to package the client app and then install (or copy) it to the Web server Web root.
The following steps will walk you through setting up an IIS FTP site on the Web server, so that PowerBuilder can deploy files to the remote server through the FTP protocol.
In the previous section, if you have selected to enable FTP Service & FTP Extensibility, you can create an IIS FTP site to be used by the remote deployment.
Step 1: In the IIS Manager, right click Sites, select Add FTP Site.
Step 2: Specify a name for the FTP site, and set the physical path to the Web root of the IIS Web server (C:\inetpub\wwwroot in this tutorial). Click Next.
Step 3: Use the default port 21 (or specify a different port if you like). If no certificate is available, you can select No SSL. Use the default values for the other settings. Click Next.
For how to configure SSL on an IIS FTP site, refer to Configure an SSL-based FTP server.
Step 4: Select Anonymous and Basic authentication. Select All users or specify the users that are allowed to access the FTP site, and then select the Read and Write permissions. Click Finish.
The FTP site is created.
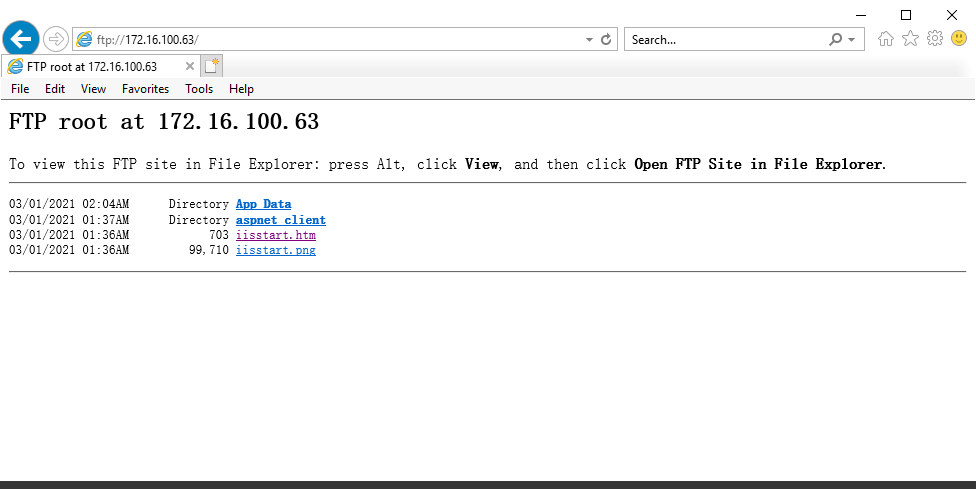
Step 5: Open a Web browser and run the following URL to access the FTP site.
ftp://your_server_ip:21/
If the FTP root displays, then the FTP site is working properly.
Before you take the steps below to package the client app, make sure you have built the application successfully by following instructions in the next section "Task 4: Setting up the development PC".
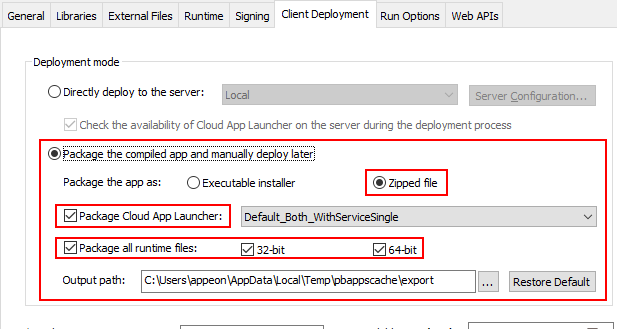
Step 1: In the PowerServer project painter, select the Client Deployment tab, then select Package the compiled app and manually deploy later, and then select Zipped file, Package Cloud App Launcher, and Package all runtime files.
Step 2: Save the project settings and then click the Build & Deploy PowerServer Project or Deploy PowerServer Project button in the toolbar to generate the package.
When the packaging process is completed, the folder that contains the generated package will be displayed.
Step 3: Copy and extract the generated zipped file to the Web root of the Web server.
You should be able to see two folders extracted under the Web root: 1) the "CloudAppPublisher" folder which contains the cloud app launcher and the PowerServer runtime files; and 2) the application folder (named after the App name configured in IDE) which contains the application files.
After that you should be able to access the application by inputting the URL in the Web browser: http://[ServerIP]/[AppName].


