You can create a Kubernetes cluster in Azure Kubernetes Service (AKS) using either of the following methods:
-
Using template-driven deployment options, like Azure Resource Manager templates and Terraform
This tutorial will show you how to create the cluster using the Azure portal.
Step 1: Sign in to the Azure portal at https://portal.azure.com.
Step 2: In the search box at the top of the portal, enter Kubernetes.
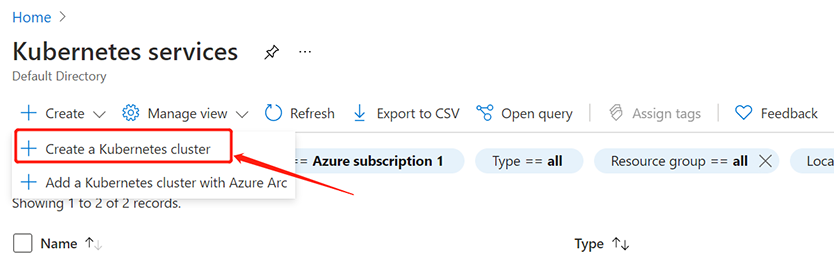
Step 3: In the search results, select Kubernetes services.

Step 4: Select Create a Kubernetes cluster.
Step 5: On the Basics page, configure the following options:
-
Project details:
-
Select an Azure Subscription.
-
Select or create an Azure Resource group, such as pscloudapp.
-
-
Cluster details:
-
Ensure the Preset configuration is Standard. For more details on preset configurations, see Cluster configuration presets in the Azure portal.
-
Enter a Kubernetes cluster name, such as pscloudapp.
-
Select a Region and Kubernetes version for the AKS cluster.
-
-
Primary node pool:
-
Leave the default values selected.
-
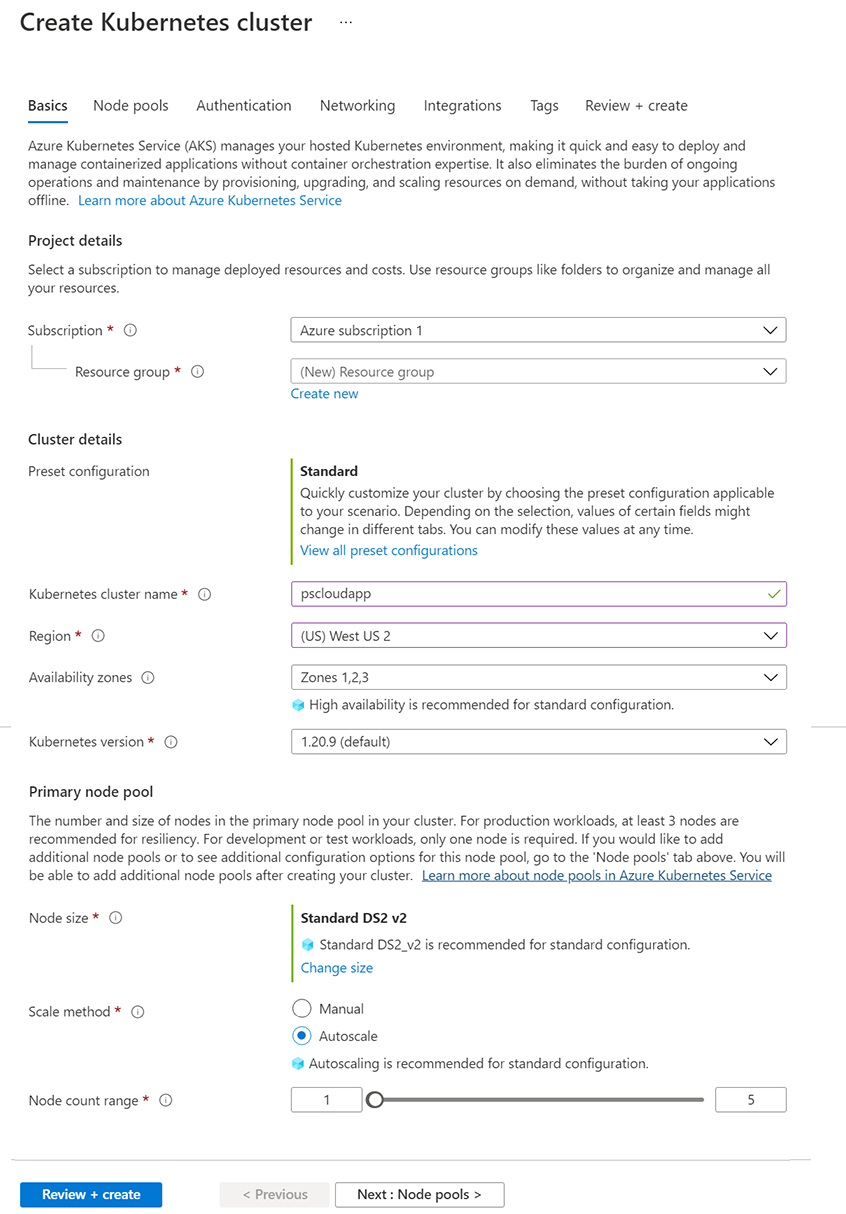
Step 6: Select Next: Node pools at the bottom of the screen.
Step 7: On the Node pools page, keep the default options. Click Next: Authentication at the bottom of the screen.
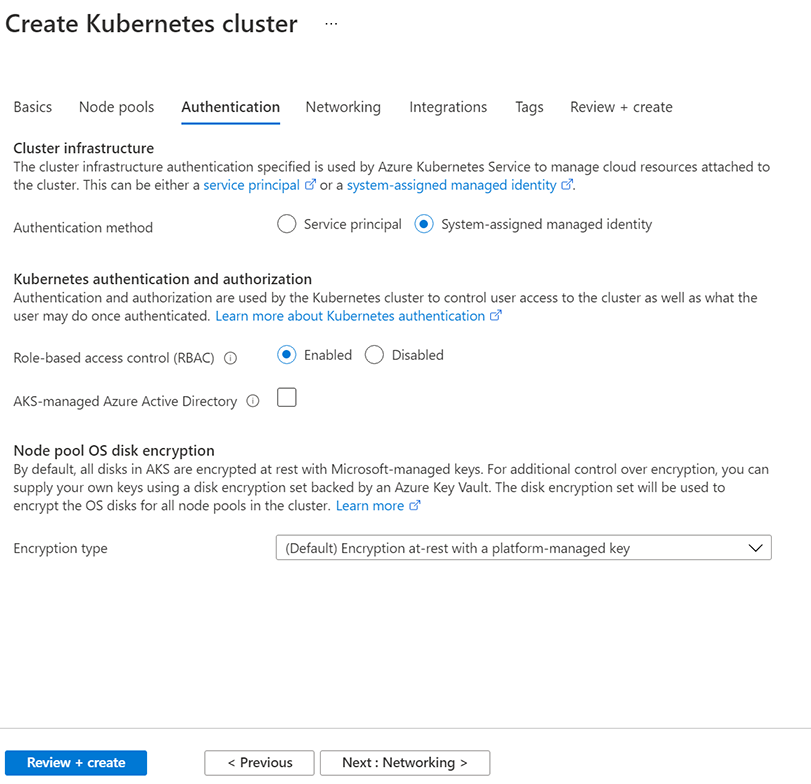
Step 8: On the Authentication page, configure the following options:
-
Leave the Authentication method field with System-assigned managed identity.
To avoid needing an Owner or Azure account administrator role, you can also manually configure a service principal to pull images from ACR. For more information, see ACR authentication with service principals or Authenticate from Kubernetes with a pull secret.
-
Enable the Kubernetes role-based access control (Kubernetes RBAC) option to provide more fine-grained control over access to the Kubernetes resources deployed in your AKS cluster.
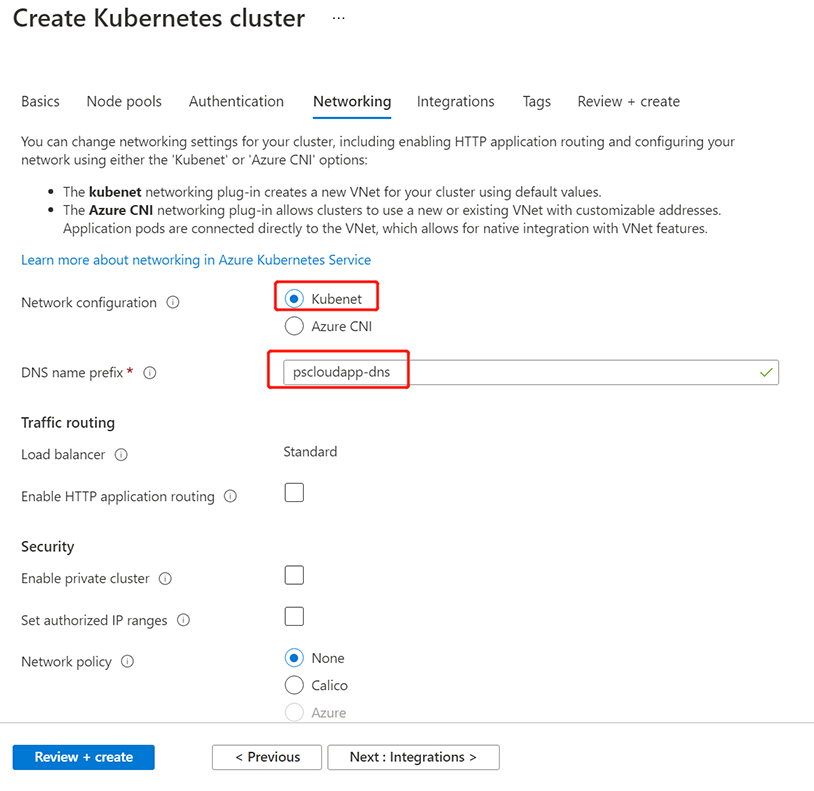
Step 9: Click Next: Networking at the bottom of the screen.
Step 10: On the Networking page, select Kubenet. Click Next: Integrations at the bottom of the screen.
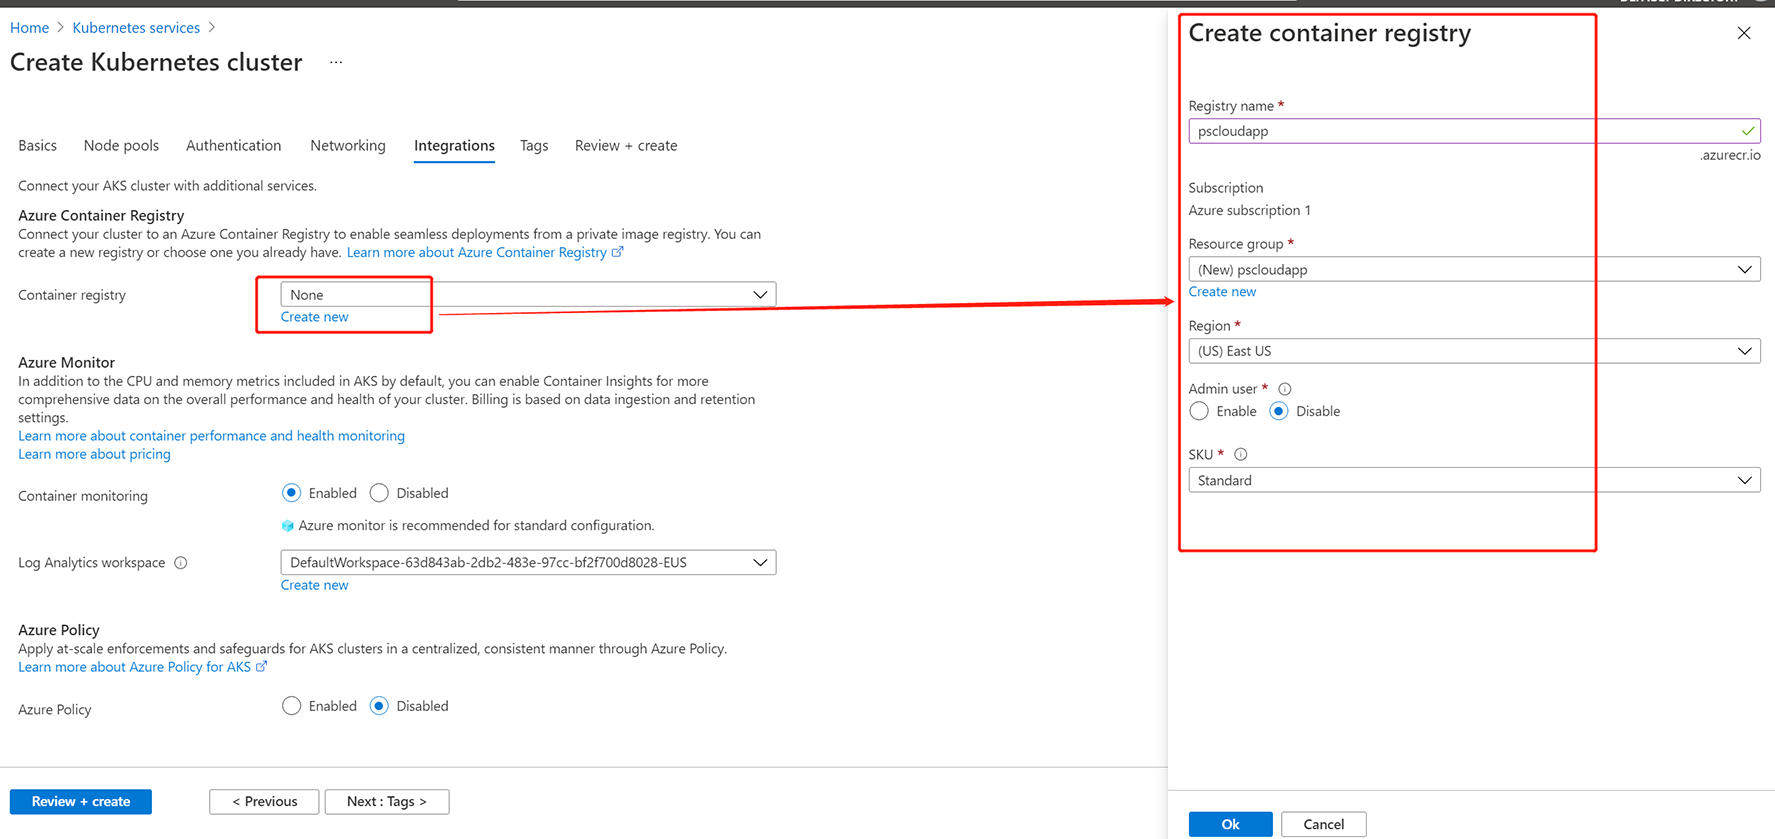
Step 11: On the Integrations page, configure the following options:
-
In the Container registry section, select Create new to create a new container registry.
If you selected Service principal authentication method, you can only select None in the Container registry section.
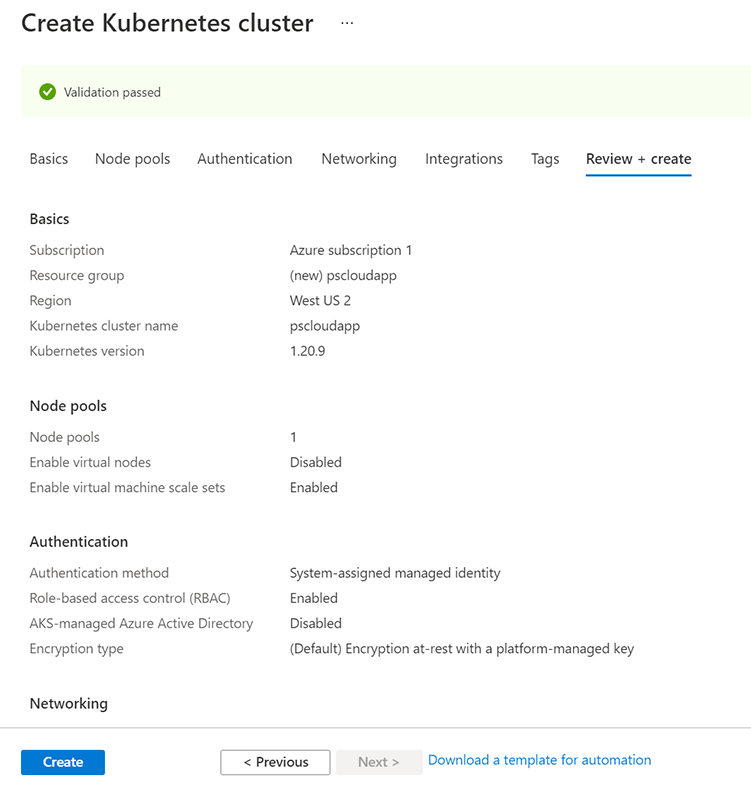
Step 12: Click Review + create at the bottom of the screen.
Step 13: When validation completes, click Create.
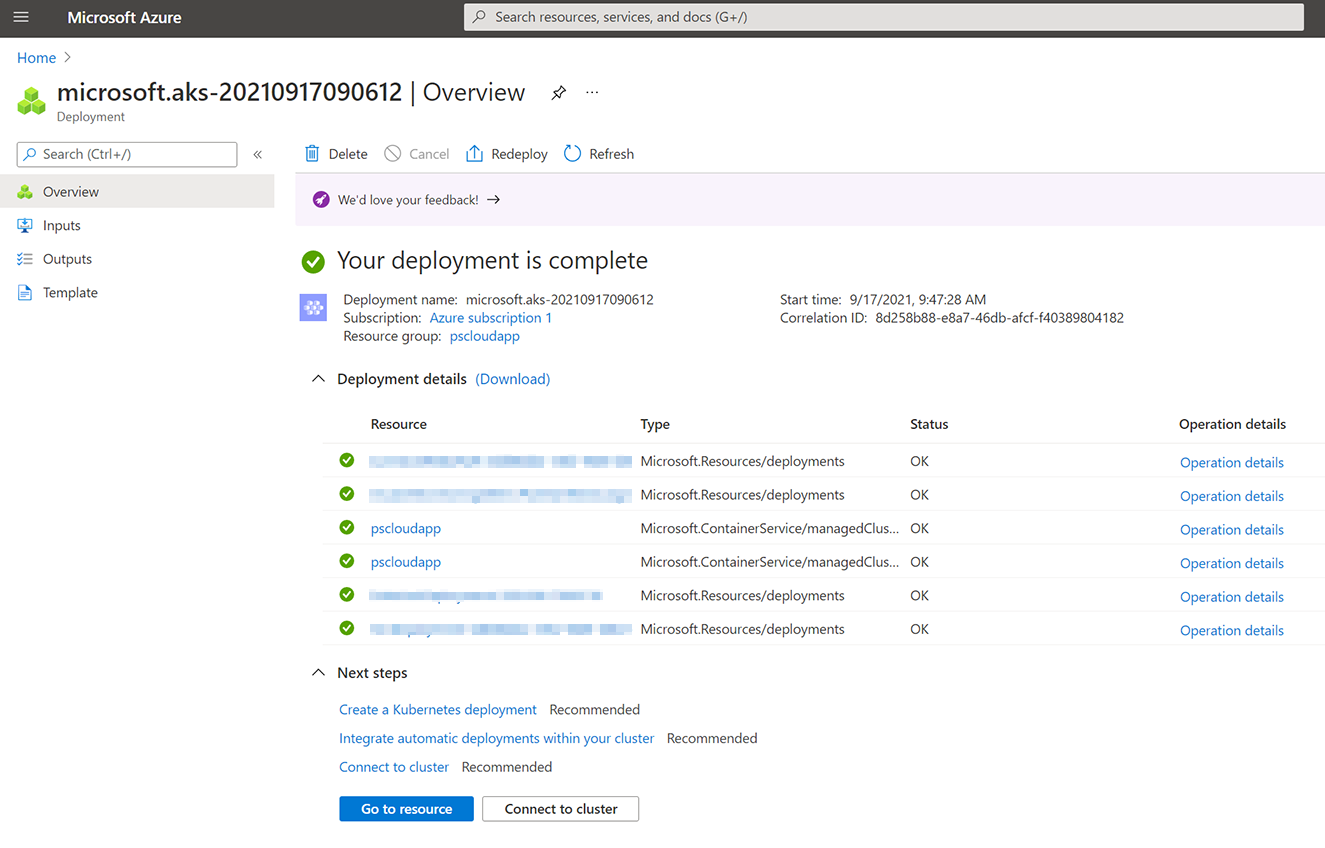
Step 14: When deployment completes, view the details.