An ingress controller is a piece of software that provides reverse proxy, configurable traffic routing, and TLS termination for Kubernetes services. For more, refer to https://docs.microsoft.com/en-us/azure/aks/ingress-basic. You can choose from a number of ingress controllers.
This tutorial shows you how to install the Nginx ingress controller in the AKS cluster.
By default, an Nginx ingress controller is created with a new public IP address assignment. This public IP address is only static for the life-span of the ingress controller, and is lost if the controller is deleted and re-created. A common configuration requirement is to provide the Nginx ingress controller an existing static public IP address. The static public IP address remains if the ingress controller is deleted. This approach allows you to use existing DNS records and network configurations in a consistent manner throughout the life cycle of your applications.
There are several ways to create a static public IP address, as described here. In this tutorial, you will create a static public IP address using the Azure portal.
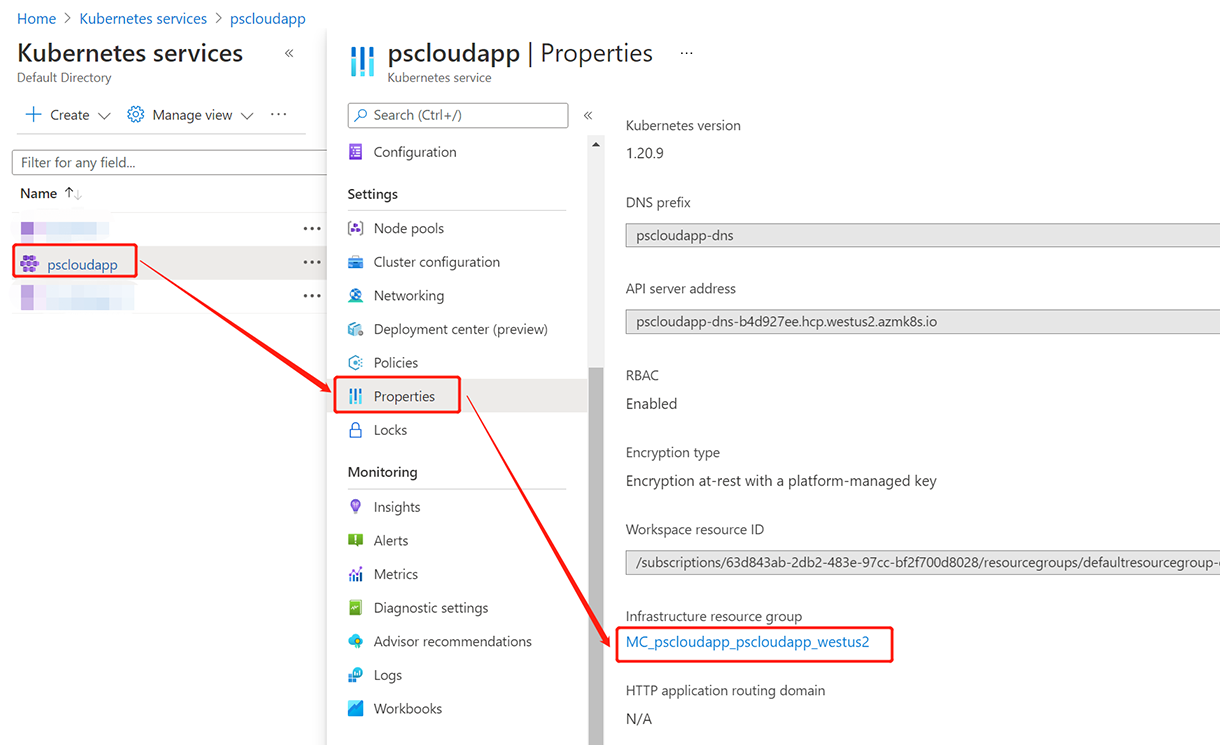
Step 1: Get the resource group name of the AKS cluster before you create the static public IP address:
-
In the Azure portal, select the resource group.
-
Select the Properties page.
-
Make a note of the Infrastructure resource group.
For example, the infrastructure resource group for pscloudapp is MC_pscloudapp_pscloudapp_westus2.
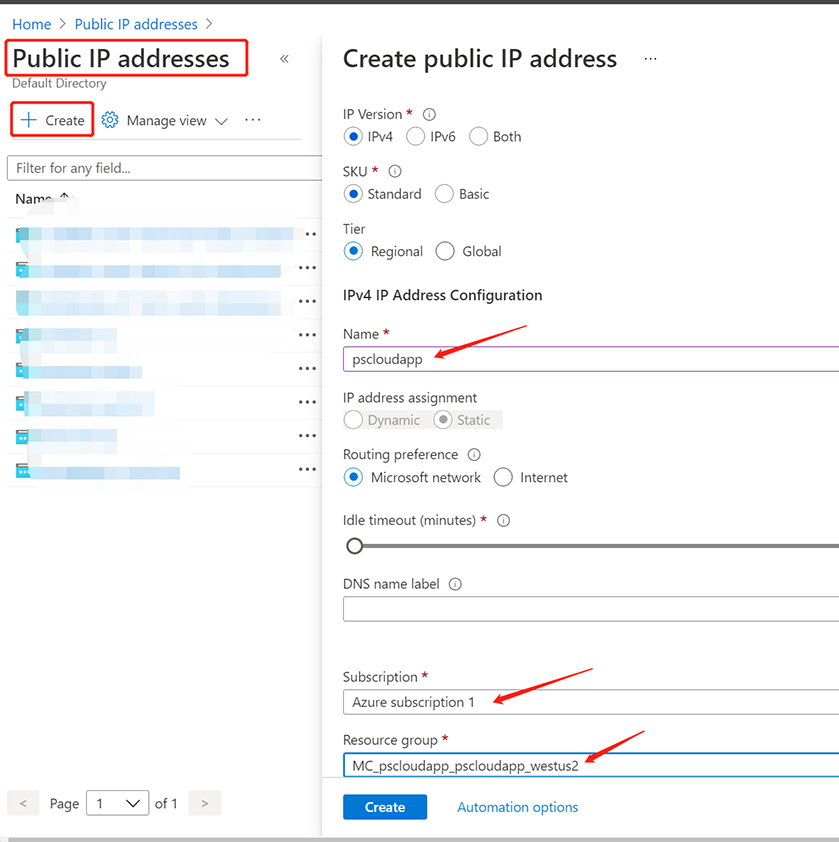
Step 2: Create a static public IP address.
The following example creates a static public IP address named pscloudapp in the AKS cluster resource group obtained in the previous step:
-
In the search box at the top of the portal, enter Public IP.
-
In the search results, select Public IP addresses.
-
Select + Create.
-
In Create public IP address, enter, or select the following information:
Select Standard from SKU.
Enter a name for the IP address.
Select your subscription.
Select MC_pscloudapp_pscloudapp_westus2 from Resource group.
Select the same location as the cluster.
Leave the others as default.
Finally, click Create.
When the IP address is created successfully, make a note of the IP address, for example, 52.143.79.245.
You will associate this static public IP address with the Nginx ingress controller in the next section, and you may use it to access the application later.

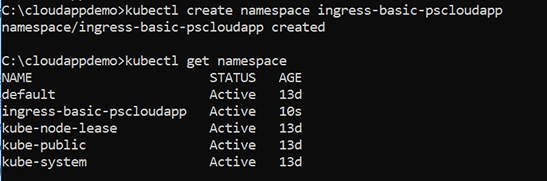
Before installing Ingress-Nginx, you are recommended to create a new Kubernetes namespace for the ingress resources.
For example, execute the following command to create a new namespace: ingress-basic-pscloudapp.
kubectl create namespace ingress-basic-pscloudapp
Step 1: Add the repo of the ingress-nginx repository to your helm config:
helm repo add ingress-nginx https://kubernetes.github.io/ingress-nginx
helm repo update
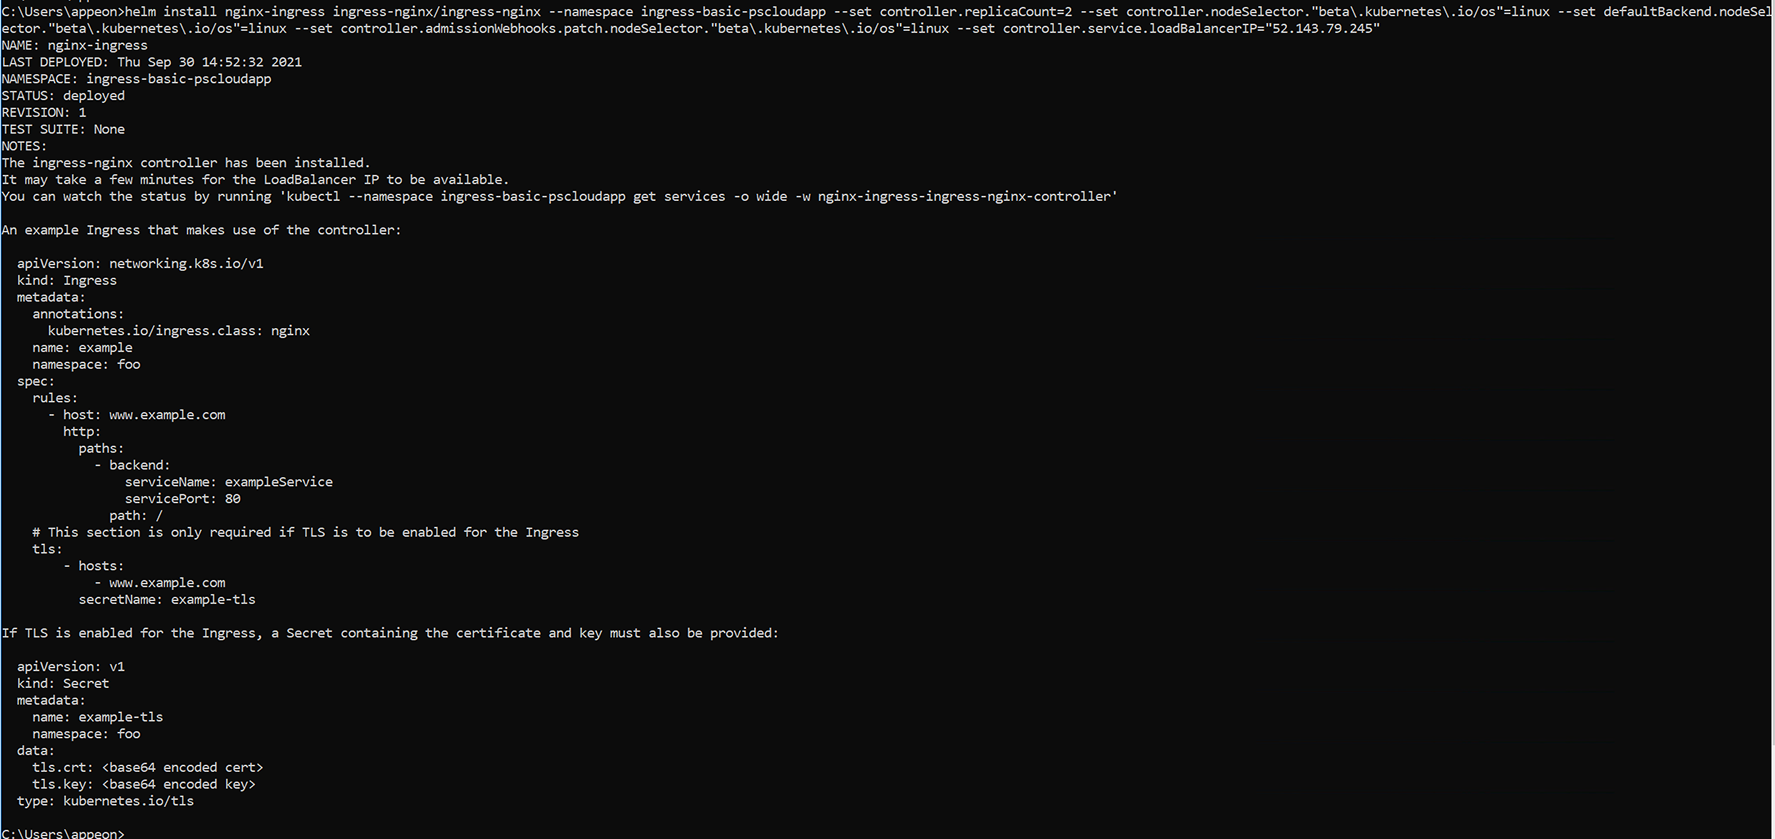
Step 2: Install the Nginx ingress controller in the ingress-basic-pscloudapp namespace created in the previous step.
-
The static public IP address created in the earlier step will be assigned to the ingress controller using the --set controller.service.loadBalancerIP parameter.
-
For added redundancy, two replicas of the Nginx ingress controllers are deployed with the --set controller.replicaCount parameter.
-
The ingress controller also needs to be scheduled on a Linux node. Windows Server nodes shouldn't run the ingress controller. A node selector is specified using the --set nodeSelector parameter to tell the Kubernetes scheduler to run the Nginx ingress controller on a Linux-based node.
helm install nginx-ingress ingress-nginx/ingress-nginx \
        --namespace ingress-basic-pscloudapp \
        --set controller.replicaCount=2 \
        --set controller.nodeSelector."beta\.kubernetes\.io/os"=linux \
        --set defaultBackend.nodeSelector."beta\.kubernetes\.io/os"=linux \
        --set controller.admissionWebhooks.patch.nodeSelector."beta\.kubernetes\.io/os"=linux \
        --set controller.service.loadBalancerIP="52.143.79.245"
Step 3: View the installed Nginx ingress controller.
kubectl --namespace ingress-basic-pscloudapp get services -o wide -w nginx-ingress-ingress-nginx-controller

A Kubernetes load balancer service is created for the Nginx ingress controller; and the static public IP address is assigned.
You can generate your own certificates, and create a Kubernetes secret for use with the ingress route.
For testing purpose, you can generate a self-signed certificate with openssl. For production use, you should request a trusted, signed certificate through a provider or your own certificate authority (CA).
In this tutorial, we assume that you have already generated a TLS certificate and a private key.
Now, you will generate a Kubernetes TLS secret using the TLS certificate and the private key.
To allow Kubernetes to use the TLS certificate and private key for the ingress controller, you create and use a Secret.
The secret is defined once, and will be referenced later when you define ingress routes.
Step 1: Copy the certificate and the private key to the local publish directory, for example, C:\cloudappdemo\publish.
Step 2: Create a secret. For example, the following command creates a secret named aks-ingress-tls-appeon.com.
kubectl create secret tls aks-ingress-tls-appeon.com \
          --key server.key \
          --cert server_appeon.com_ssl.cer
You can also add a default certificate, so that it displays no matter when the IP address or domain name is accessed.
Step 1: Edit the Nginx-Ingress deployment configuration file. For example,
kubectl edit deployment nginx-ingress-ingress-nginx-controller -o yaml -n ingress-basic-pscloudapp

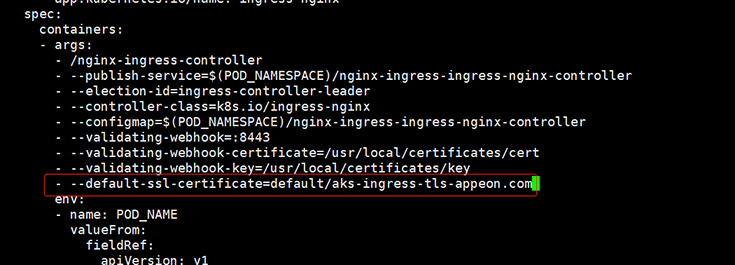
Step 2: Add the following parameter to the configuration.
- --default-ssl-certificate=default/aks-ingress-tls-appeon.com