For optimal performance, it is highly recommended that the application database is also running in the same Azure instance.
You can create a database in Azure using the Azure portal, a PowerShell script, or an Azure CLI script.
In this tutorial, you will create a database using the Azure portal; and you will create an Azure SQL Database.
Azure SQL Database is based on the latest stable version of the Microsoft SQL Server database engine.
Step 1: In the search box at the top of the portal, enter SQL database.
Step 2: In the search results, select SQL database.
Step 3: Select Create.
Step 4: On the Basics page, configure the following options:
-
Select the subscription.
-
Select the resource group.
-
Enter any text as the database name.
-
For Server, select Create New to create a new server and specify the following:
-
Server name: Enter a unique name as the server name, for example, pscloudapp (so the full name is pscloudapp.database.windows.net)
-
Server admin login: Enter any text as the administrator user name, for example, appeon
-
Password: Enter a password that meets the requirement, for example, pwdsqlserver8*
-
-
Leave Want to use SQL elastic pool set to No.
-
Under Compute + storage, select Configure database, and then select the appropriate options and click Apply.
-
For Backup storage redundancy, select Geo-redundant backup storage.
-
Select Next: Networking at the bottom of the page.

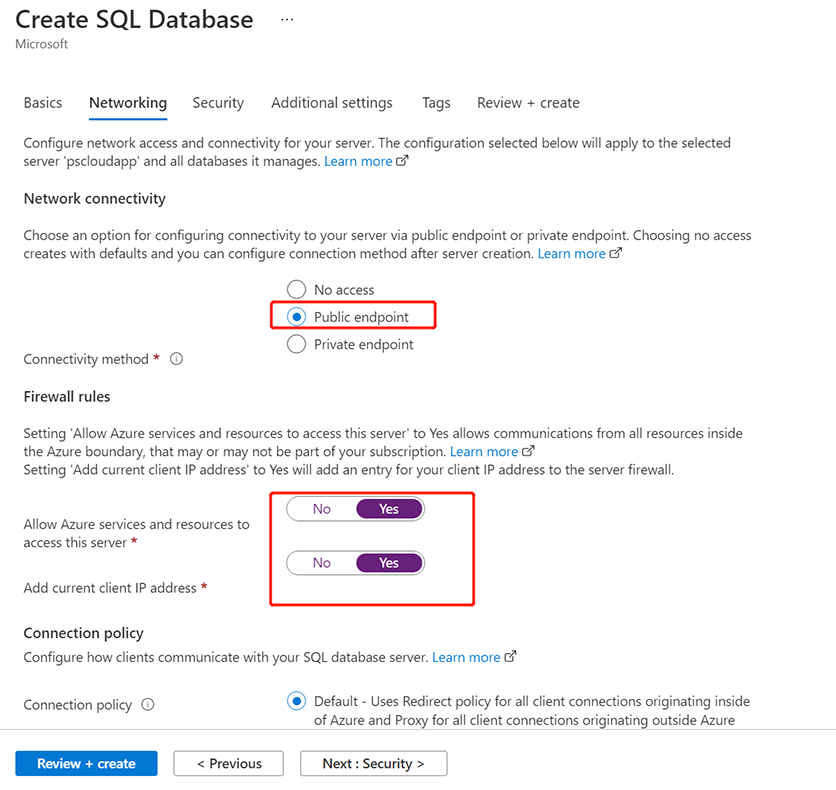
Step 5: On the Networking page, configure the following options:
-
For Network connectivity, select Public endpoint.
-
Set both of Allow Azure services and resources to access this server and Add current client IP address to Yes.
-
Select Next: Security at the bottom of the page.
Step 6: Keep the default Security options. Click Next: Additional settings at the bottom of the screen.
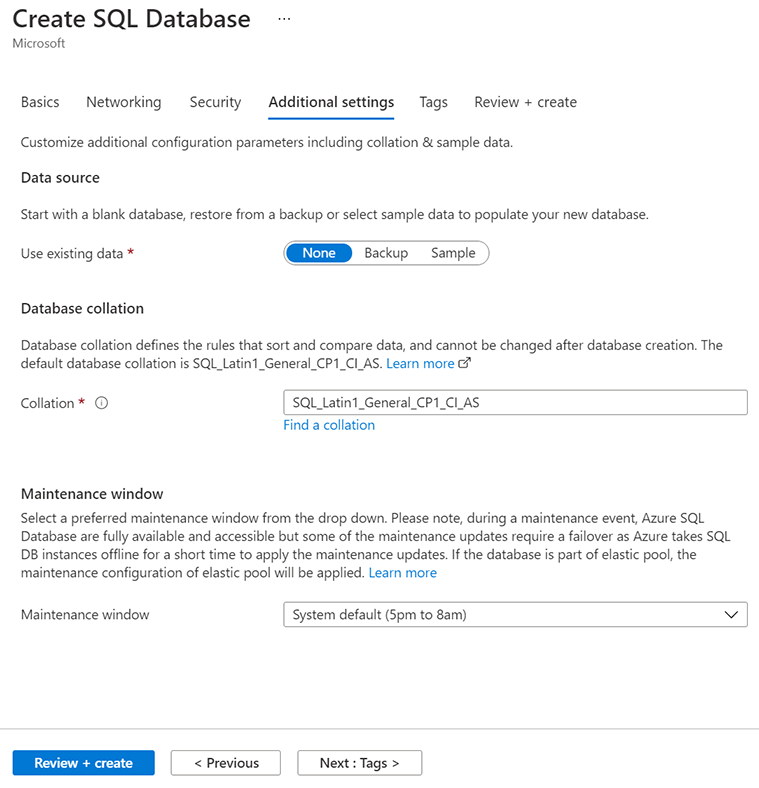
Step 7: On the Additional settings page, in the Data source section, select whether to restore from a backup or select sample data or start with a blank database.
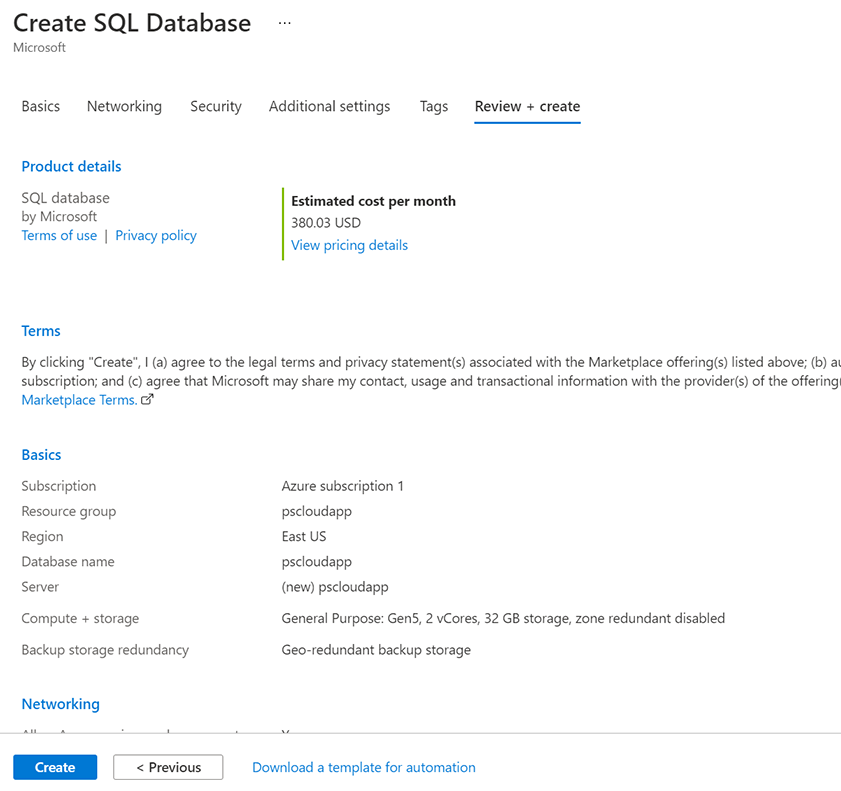
Step 8: Select Review + create at the bottom of the page.
Step 9: When validation completes, select Create.
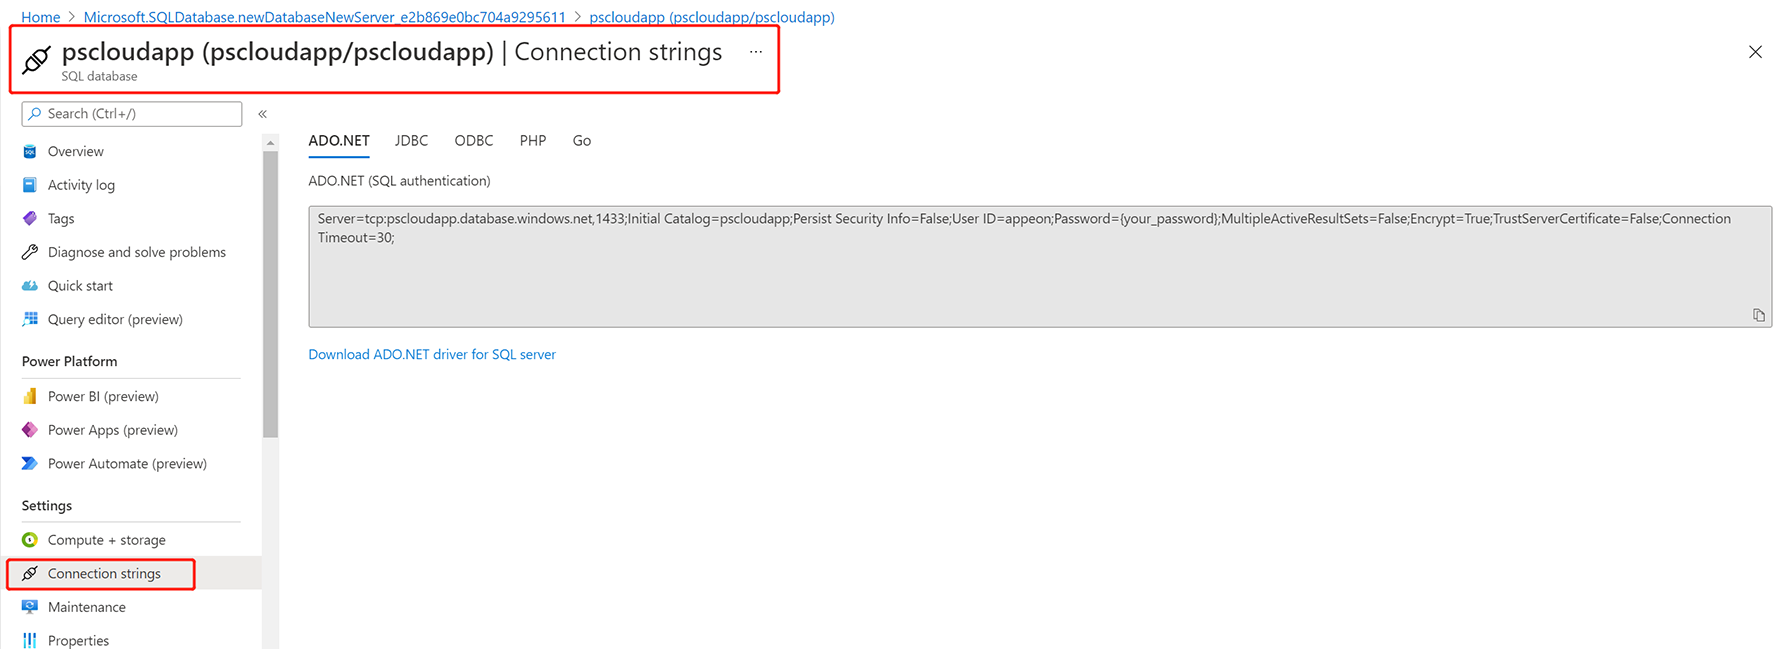
After the database is created, you can view the connection strings.