The following uses the File System method to publish the Web API to a folder first and then move the folder's content to the IIS site folder:
Step 1: On the development machine, open the PowerServer C# solution in SnapDevelop. Log in to SnapDevelop if required.
Click the Open C# Solution in
SnapDevelop button ( ) in the PowerBuilder toolbar to launch the
PowerServer C# solution in SnapDevelop. Or go to the location where the
PowerServer C# solution is generated; and double click PowerServer_[appname].sln to launch the solution
in SnapDevelop.
) in the PowerBuilder toolbar to launch the
PowerServer C# solution in SnapDevelop. Or go to the location where the
PowerServer C# solution is generated; and double click PowerServer_[appname].sln to launch the solution
in SnapDevelop.
At startup, the solution will install/update the dependencies. Wait until the Dependencies folder completes the install/update. (Make sure the machine can connect to the NuGet site: https://www.nuget.org in order to successfully install PowerServer NuGet packages).
Step 2: In the Solution Explorer, right click on the ServerAPIs project node, and select Publish.
Step 3: In the window that appears, select File System, and click Start.
Step 4: Specify a name for the profile and specify the destination folder where the files will be published, and click Next.
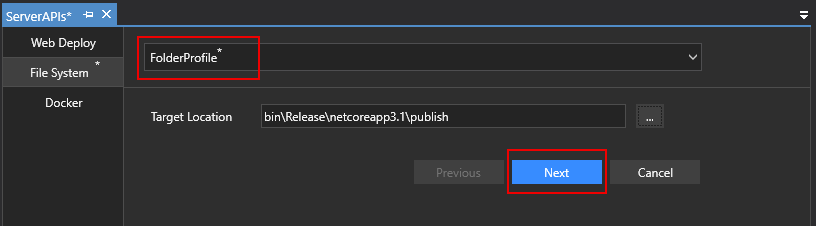
Step 5: Select Release from the Configuration list.
Step 6: Select the Self-Contained deployment mode and the appropriate target runtime, and then click Finish.
-
A Self-Contained package will not only include the project itself and its dependencies, but also include the .NET Core runtime and libraries. Users can run it on a machine that has no .NET Core runtime installed.
-
A Framework-Dependent package will only include the project itself and its dependencies. Users have to install the .NET Core runtime in order to run the project.

Publishing begins automatically. If any error or failure is reported in the Output window, click the link provided at the end to view more details and possible solutions.
Step 7: Make sure publishing was successful as shown in the figure below.
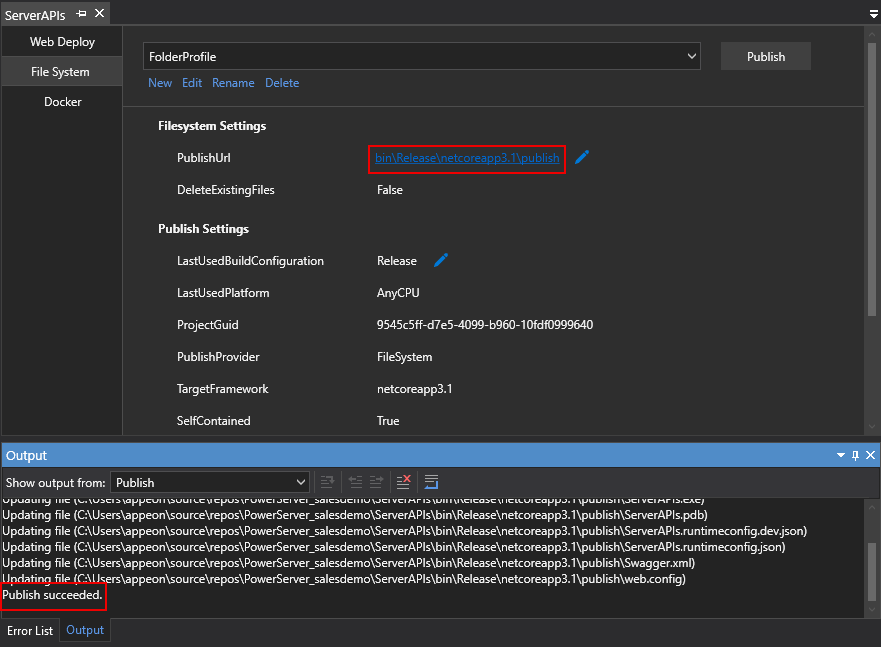
Step 8: Click the publish URL (as shown in the figure above) to open the folder that contains the published files.
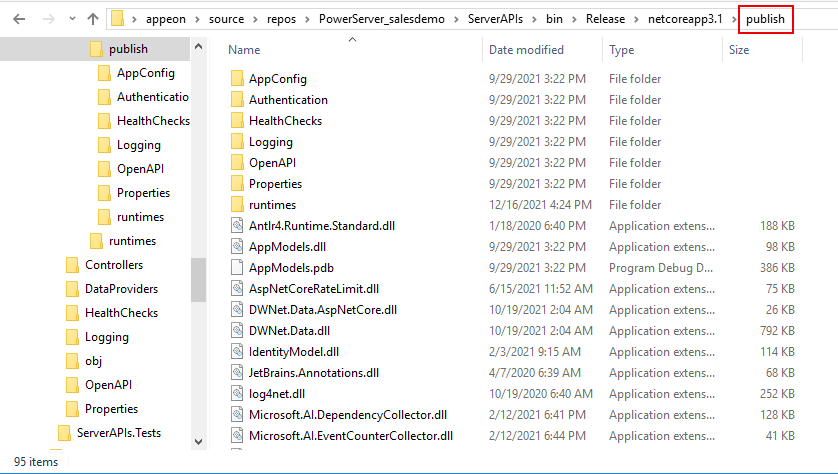
Step 9: Copy all files from the "publish" folder to the server.
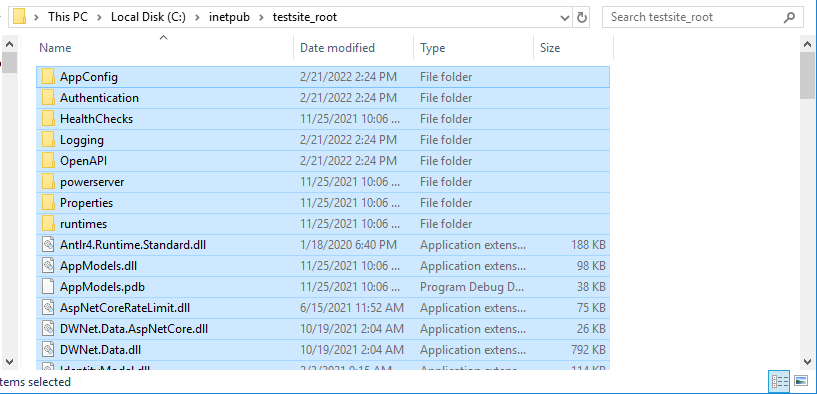
Suppose the server is running IIS with IP address 172.16.100.83, port number 81, and physical path C:\inetpub\testsite_root; then you should copy all files from the "publish" folder to C:\inetpub\testsite_root, as shown below. After that, the IIS process manager will automatically launch the Web APIs when requests are made to http://172.16.100.83:81.
But before you can run the installable cloud application, you might need to adjust the following settings first:
-
Specify the URL (for example, https://172.16.100.83:81) as the Web API URL in the Web APIs tab of the PowerServer project painter and then build and deploy the project again. If you do not want to build and deploy the project again, you can also directly change the value of the Web API URL stored on the Web server using the command-line tool (CustomizeDeploy.dll). See this section for more details.
-
If you use the SQL Anywhere database or ASE database which supports only ODBC connection at this moment, you will also need to set up the corresponding ODBC data source in the server where Web APIs is published and running.
