The following modifications are made to the PowerServer project created in the Quick Start guide and modified in Tutorial 1. If you have not created a PowerServer project yet, please follow the instructions in the Quick Start guide and Tutorial 1 to create one.
Step 1: Specify where the Web APIs is actually hosted and run. This tells the client app where and how to call the Web APIs.
On the Web APIs tab of the PowerServer project painter, specify the URL of the docker container where the Web APIs is running. The host name (or IP address) of the docker container should be the same as that of the docker host/Docker Engine. The port number is what will be specified later when the docker container is run, for example, https://172.16.100.20:5009. This indicates that the client app will call the Web APIs running on the docker container at https://172.16.100.20:5009.
It is highly recommended that you specify an HTTPS URL for the production environment.
Note
-
Make sure the docker container is run at the same host name (or IP address) and port number. For how to run the image as a container, see the next section Publishing Web APIs to Docker.
-
If the host name and port number of the docker container are changed later, you will need to modify the settings here and then deploy the project again (using the "Build & Deploy PowerServer Project" option).
Step 2: Configure the database connection.
-
At the bottom of the Web APIs tab of the PowerServer project painter, click the Database Configuration button.
-
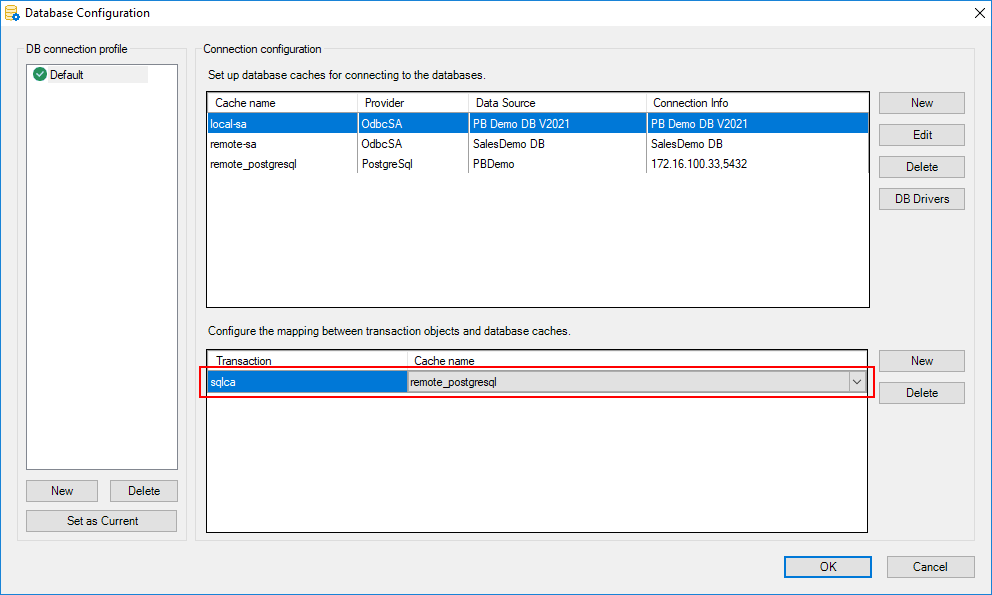
In the Database Configuration window, click DB Drivers in the upper part to make sure the corresponding database driver and the option "I have read and agree to the license ..." both are selected.
-
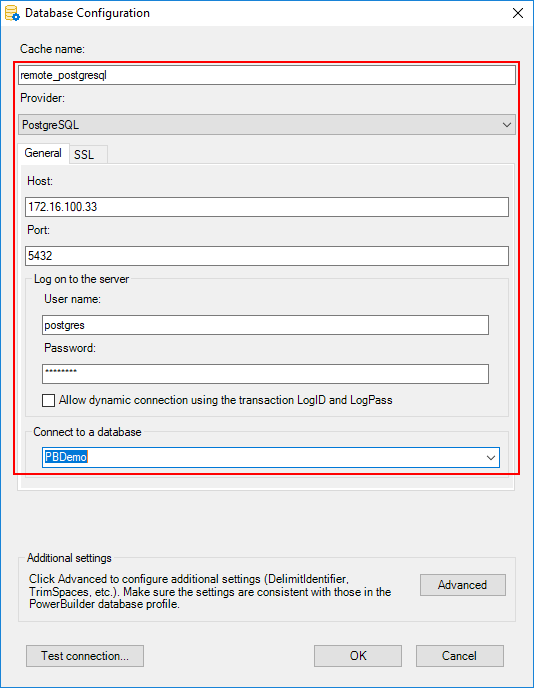
In the Database Configuration window, click New in the upper part to create the database connection that will be used by the deployment.
-
In the dialog box that displays, configure the database connection settings (using the PBDemo PostgreSQL database in this tutorial).

If the following errors occur when testing the connection, try the following solutions:
-
"Exception while connecting"
Solution: make sure the firewall on the database server has been configured to allow the database port 5432 (detailed instructions).
-
"28000: no pg_hba.conf entry for host "172.16.100.104", user "postgres", database "postgres", SSL off"
Solution: edit the %PostgreSQL%\12\data\pg_hba.conf file to allow remote connections (detailed instructions).
-
-
Select the database cache you created just now and map it to the "sqlca" transaction object.
Step 3: Save the PowerServer project settings.
Step 4: Build and deploy the PowerServer project (using the "Build & Deploy PowerServer Project" option) for the changes to take effect.


