Table of Contents
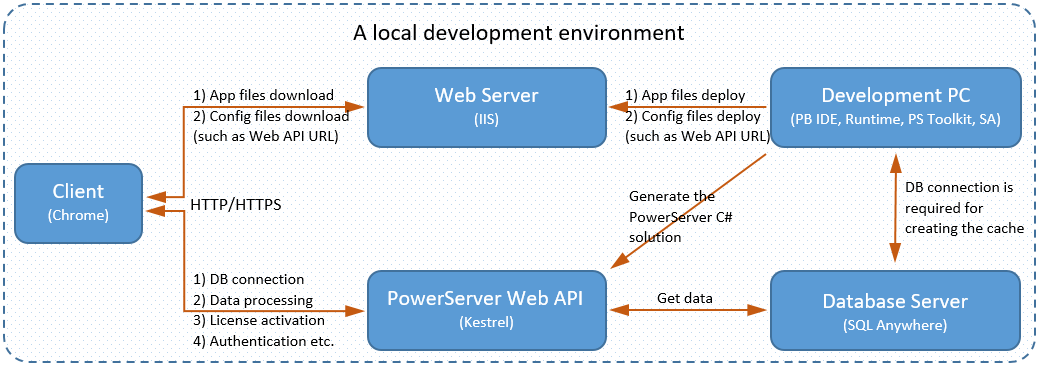
In order to quickly get started with PowerServer, we will use a local development machine for all roles (development, client, Web server, .NET server, and database server).
Therefore, "a local development environment" in this Quick Start guide does not mean the development PC; it means all roles in one machine, as illustrated in the following graph. And this represents only one supported environment (not all), for example, the IIS web server is used as an example here (although Apache and Nginx web servers are also supported), the SQL Anywhere database is used as an example (although PostgreSQL, SQL Server, Oracle etc. are also supported), Chrome is used as an example (although Firefox and Edge are also supported), etc.
The following steps will guide you through preparing such an environment.
Step 1: Prepare a Windows 10 (64-bit) machine.
PowerBuilder IDE can only run on Windows 10 or 8.1.
Step 2: Make sure this machine has Internet connection.
Step 3: Install the following software to this machine.
|
Role |
Requires the following software |
|---|---|
|
Client |
|
|
Database Server |
|
| Development | |
|
Development |
Step 1: Download the PowerBuilder Installer executable from the Downloads page on the Appeon User Center (login is required) and then run the PowerBuilder Installer. Step 2: Select the Programs tab and make sure the following programs are selected:
Step 3: Select the Components tab and make sure the following component is selected:
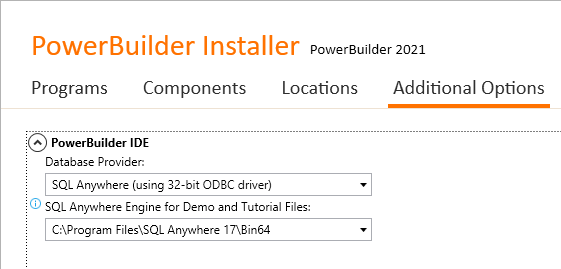
Step 4: Select the Additional Options tab and make sure the SQL Anywhere engine (or PostgreSQL engine) is selected. The demo database file is automatically installed to %Public%\Documents\Appeon\PowerBuilder 21.0\ and the corresponding ODBC data source is automatically created during the PowerBuilder installation.
|
|
Web Server |
|
|
.NET Server |
|


