This tutorial will walk you through configuring IIS as a load balancer to direct client requests to a group of PowerServer Web APIs. You will have to configure IIS to support sticky sessions.
Step 1: Follow the sections below to install IIS.
-
Setting up IIS > "Preparations" and "Installing Web Server (IIS)" sections
Step 2: Follow the sections below to install the extensions required by IIS to work as proxy server and load balancer.
-
Configuring IIS reverse proxy server > "Preparations" section
Step 3: Configure IIS as a proxy server and load balancer which redirects requests to the PowerServer Web APIs group.
-
Create a new website "proxyserver" which binds to port number 8080. You can also use the existing Default Web Site (with port 80).
-
Set the application pool to "No managed code".
-
Select Application Pools in the Connections pane.
-
Right click "proxyserver" in the list of application pools and then select Basic Settings.
-
In the Edit Application Pool window, select No Managed Code from the .NET CLR version list box, and then click OK.
-
-
Set the cookie timeout value to a value equal to or greater than the session timeout value which is 3600 seconds (60 minutes) by default.
-
Create a server farm that includes the group of PowerServer Web APIs.
-
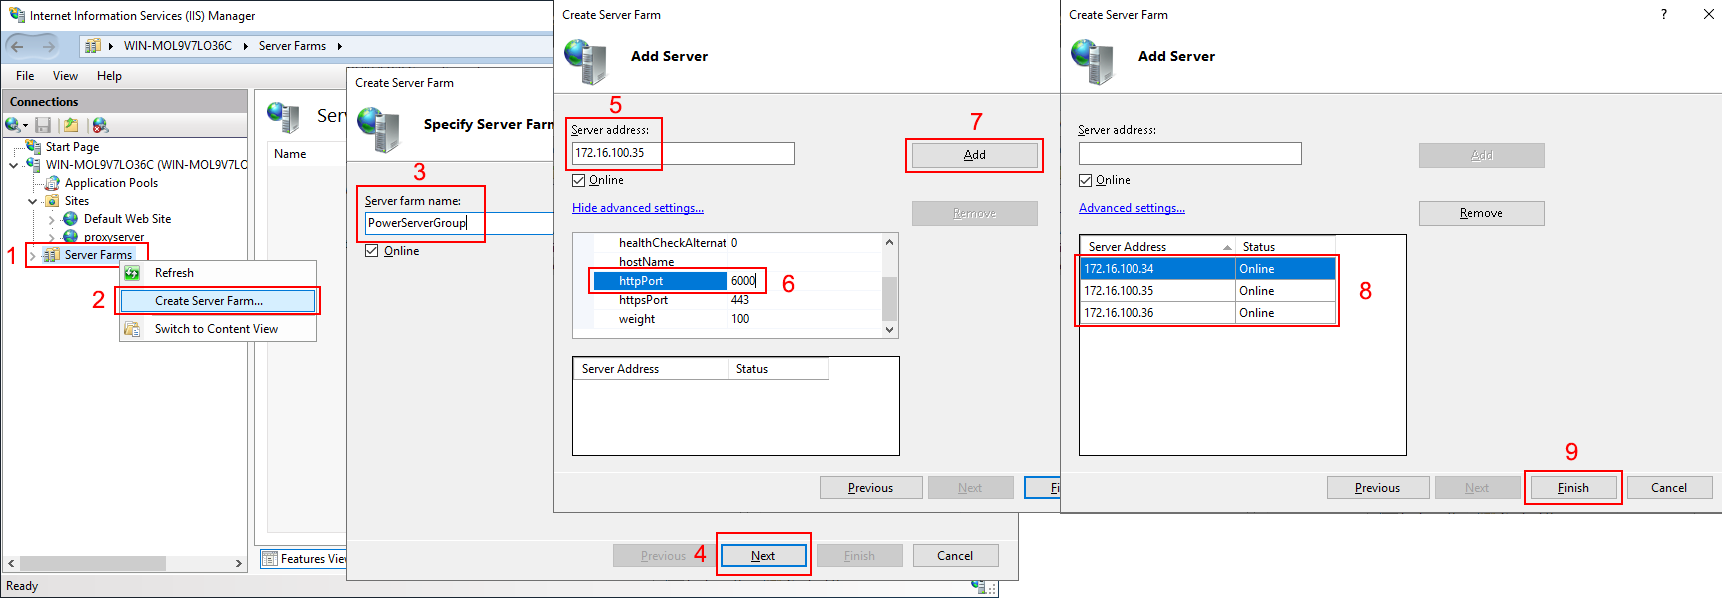
Right click Server Farms in the Connections pane, and then select Create Server Farm.
The Server Farms node will not be available if "IIS Application Request Routing (ARR)" is not installed.
-
In the Create Server Farm window, specify the server farm name and then click Next.
-
Add the server instance by inputting the host name or IP address of PowerServer Web APIs, clicking Advanced settings to specify the port number of PowerServer Web APIs, and then clicking Add.
-
Repeat the previous step to add the server instances one by one and then click Finish.
-
Select Yes when asked whether to automatically create a URL rewrite rule.
-
-
Modify the URL rewrite rule.
-
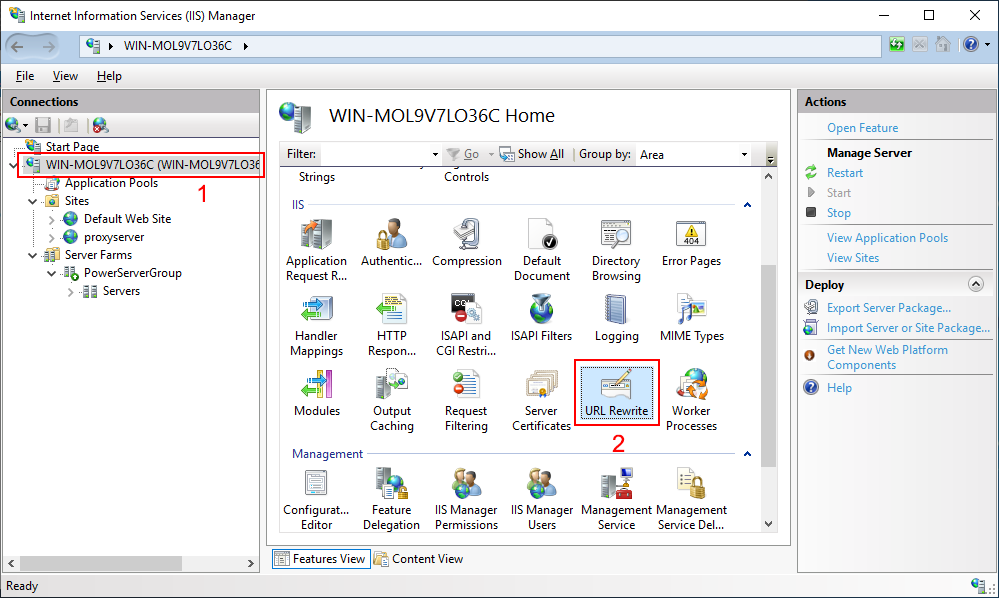
Select the server in the Connections pane and then double click URL Rewrite in the features view to open the feature.
-
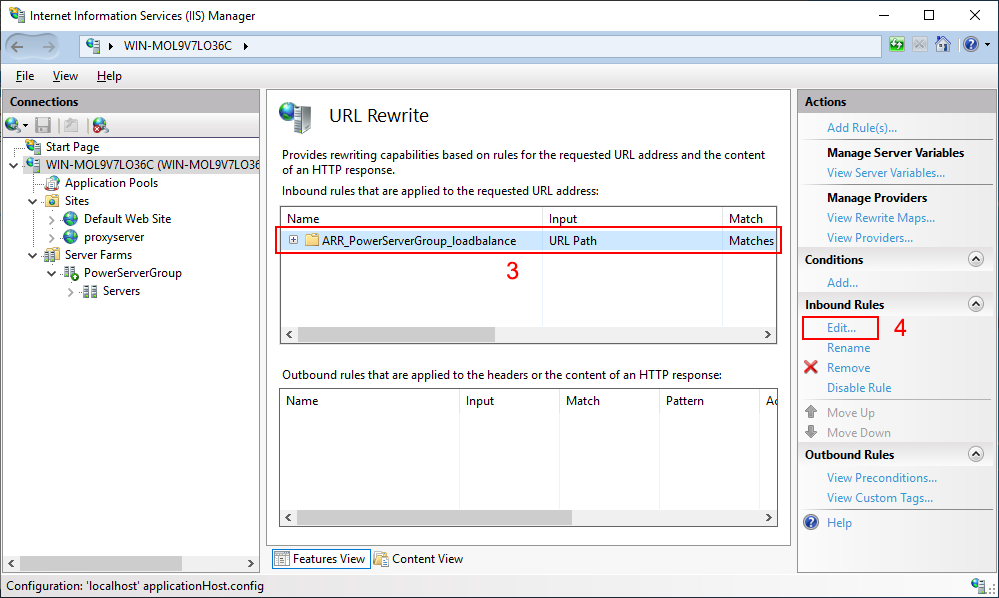
Select the "ARR_PowerServerGroup_loadbalance" rule (this rule is automatically created when you create the server farm) and then click Edit from the Actions pane.
-
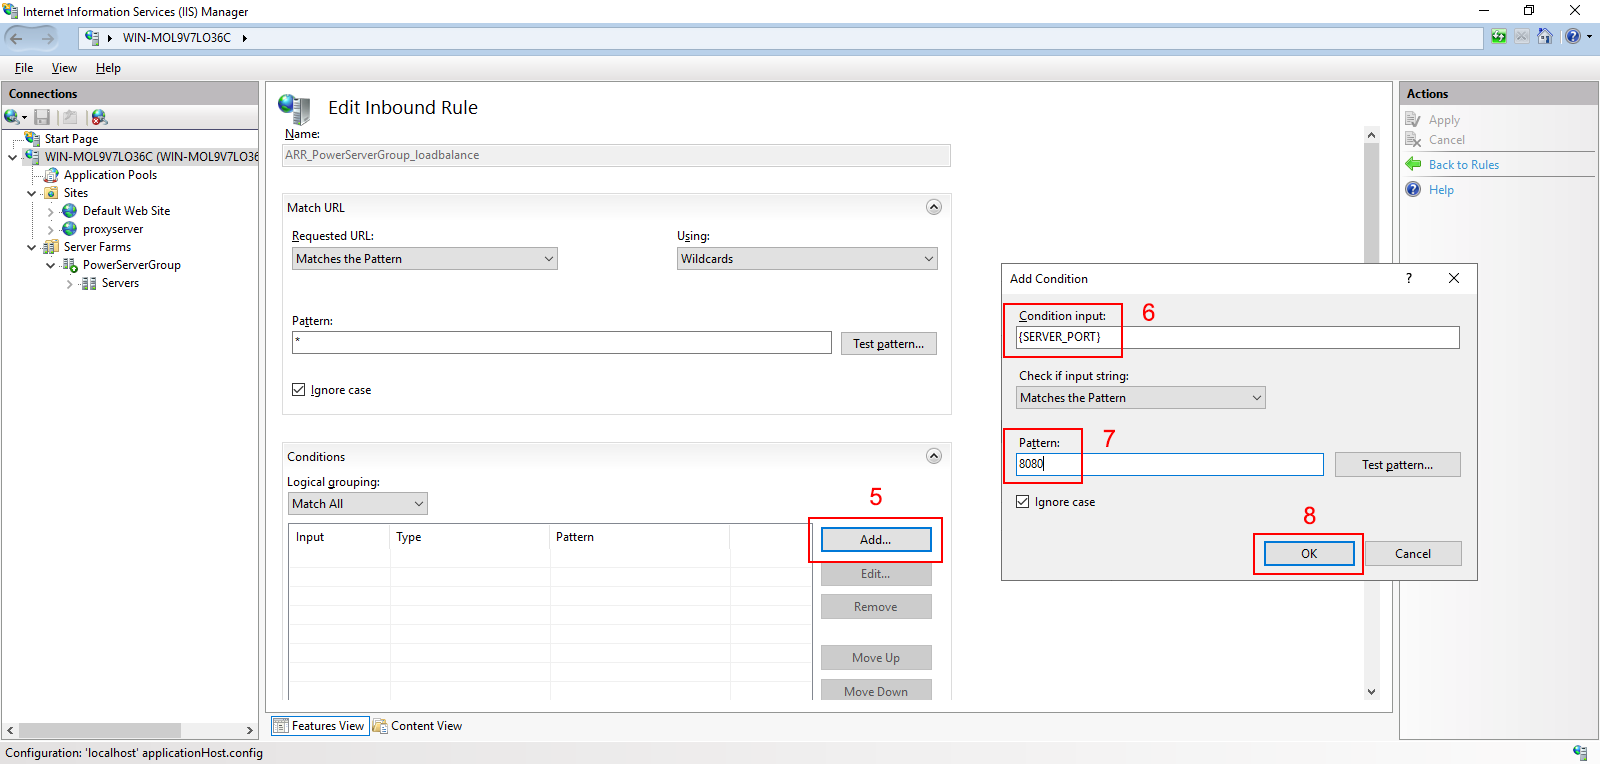
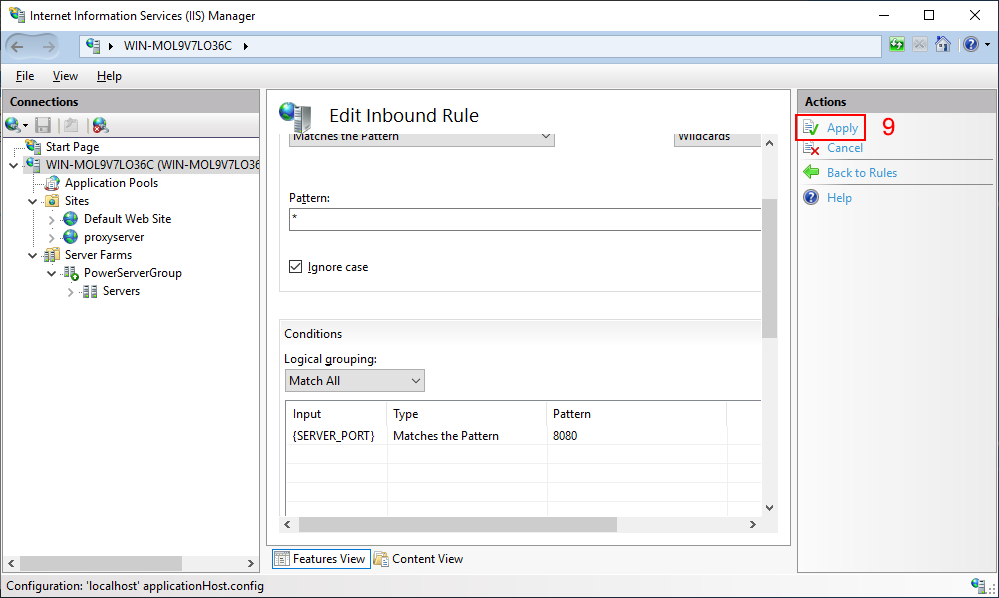
In the Edit Inbound Rule window, expand the Conditions block and then click Add. In the Add Condition dialog, input "{SERVER_PORT}" to the Condition input field and "8080" (port of "proxyserver" website) to the Pattern field, and click OK.
-
Click Apply for the changes to take effect.
-
-
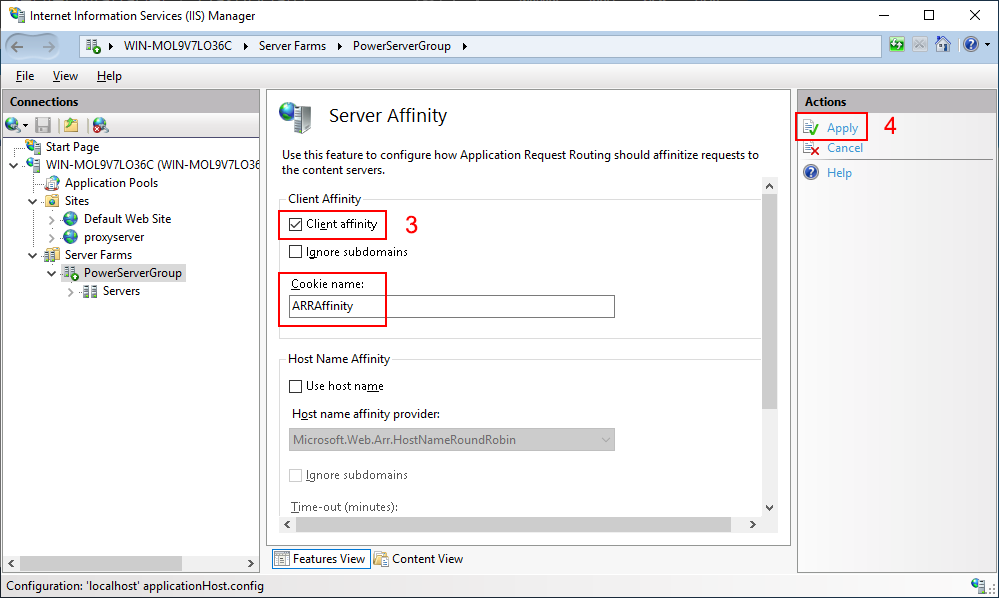
Configure Server Affinity of the server farm to support sticky sessions.