Table of Contents
When the application is deployed (from the PowerBuilder IDE) or installed (from the packaged executable installer or zipped file) to the Web server, the app files and config files are generated with hash codes, to prevent files changed illegally from running. Therefore, you cannot directly change the deployed settings/files on the Web server, instead you will have to make changes in the project painter and then deploy the application again, or modify the settings/files using commands (the CustomizeDeploy.dll tool).
The CustomizeDeploy.dll tool allows you to:
-
Change the Web API URL -- The Web API URL (specified on the PowerServer project painter > Web APIs tab) is stored on the Web server, so that the client knows where to call the PowerServer Web APIs at runtime. You may want to change the Web API URL value, if you want the client to call the PowerServer Web APIs running on a different URL.
-
Change the External Files -- The "External Files" refers to the packages, folders, and files (such as INI files, DLL/OCX etc.) that are deployed from the External Files tab of the PowerServer project painter.
-
Encrypt the password -- You can encrypt 1) the database login password used in the PowerServer project painter > Database Configuration, or in the PowerServer C# solution > ServerAPIs project > AppConfig > Applications.json file, or 2) the proxy server password in the PowerServer C# solution > ServerAPIs project > Server.json file > "ProxyOptions" block. You can use the encrypted string instead of the plain-text string to protect sensitive information.
The CustomizeDeploy.dll file is located in the PowerBuilder IDE installation folder (%AppeonInstallPath%\PowerBuilder [version]\Pstools\CustomizeDeploy) and in the "[version]" sub-folder of the application folder on the Web server.
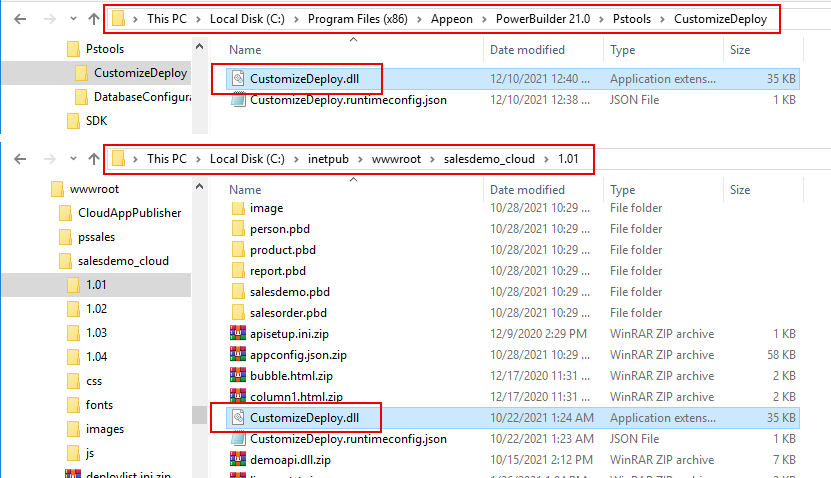
To change the Web API URL and external files on the Web server, you will need to execute the CustomizeDeploy.dll file in the application folder on the Web server, to encrypt the password, you can execute the CustomizeDeploy.dll file in the PowerBuilder IDE installation folder or on the Web server.
Note
Prerequisites
To execute the CustomizeDeploy.dll file located in the application folder on the Web server, you will need to install the ASP.NET Core Runtime 3.1 first.
To execute the CustomizeDeploy.dll file located in the PowerBuilder IDE installation folder, there is no need to install the ASP.NET Core Runtime as it is already installed with PowerServer Toolkit.
To run CustomizeDeploy.dll in Windows Web server:
-
Install the ASP.NET Core Runtime 3.1 or later.
-
Open the command prompt. (You'd better run the command prompt using an administrator by right-clicking it and then selecting "Run as administrator").
-
Navigate to the Web server root folder > [application] folder > [version] folder (for example, C:\inetpub\wwwroot\pssales\1.01).
-
Execute the CustomizeDeploy.dll file using the dotnet command.
To run CustomizeDeploy.dll in Linux Web server:
-
Install the ASP.NET Core Runtime 3.1 or later.
dnf install aspnetcore-runtime-5.0
-
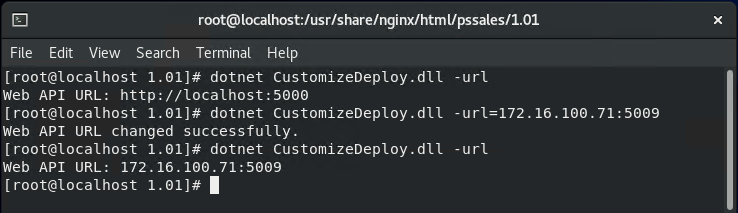
Go to the Web server root folder > [application] folder > [version] folder (for example, /var/www/html/pssales/1.01, or /usr/share/nginx/html/pssales/1.01).
-
Right click the blank area within the folder and then select Open in Terminal.
-
Execute the CustomizeDeploy.dll file using the dotnet command. Notice that the command and file name are all case-sensitive in the Linux OS.
For example,
dotnet CustomizeDeploy.dll -url=https://172.16.100.71:5009