When PowerBuilder IDE opens without loading any workspace/solution, you can get a PowerBuilder workspace/solution from the source control system and open the workspace/solution in the PowerBuilder IDE directly.
To get a PowerBuilder workspace/solution from the Git source control system:
-
Right-click "None" in the System Tree and select Connect to Workspace/Solution from the pop-up menu
or
Select Connect to Workspace/Solution from the File menu.
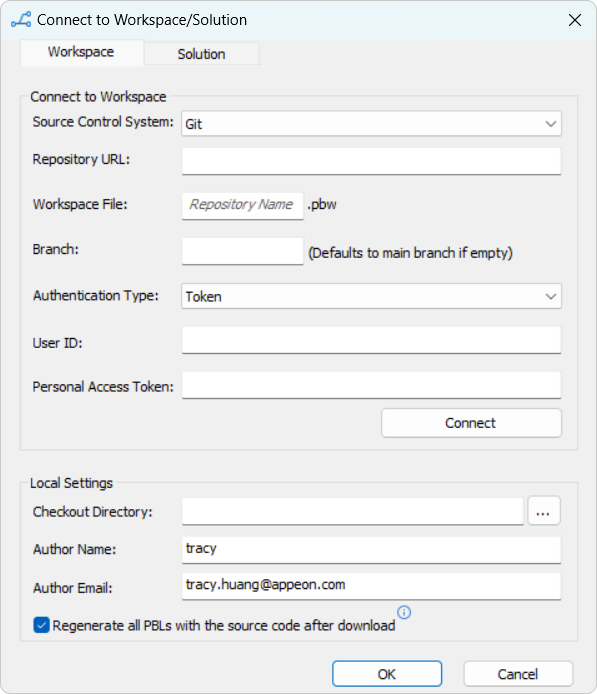
The Connect to Workspace/Solution dialog box displays. If the login information has been input before, they will be filled in automatically.
-
Select the Workspace or Solution tab.
-
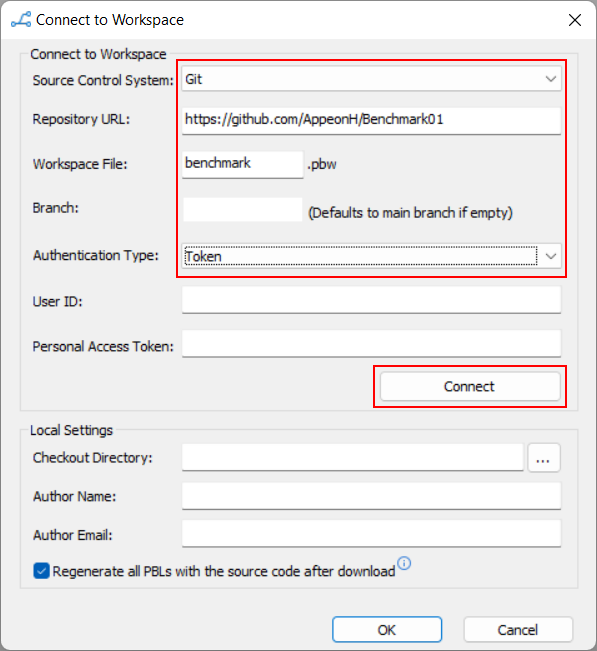
Select Git from the Source Control System list.
-
In the Repository URL box, input the URL of the Git source control server and the name of an existing repository on the server.
-
In the Workspace File or Solution File box, type in the name of the workspace/solution file to be downloaded from the repository. Note that the workspace/solution file name is case-sensitive.
-
In the Branch box, specify the branch from which source code will be downloaded. If not specified, it will default to the "main" branch.
-
Select Basic or Token from the Authentication Type list.
-
In the User ID and Password (or Personal Access Token) boxes, type in your user name and password (or token) for the Git source control system.
-
In the Checkout Directory box, type or select a path for the local root directory. All the files that you add to or get from source control must reside in this path or in a subdirectory of this path.
-
In the Author Name and Author Email box, input the author name and author email.
-
In the Workspace tab, you can also select the "Regenerate all PBLs with the source code after download" option to regenerate all PBLs after downloading the source code from workspace if you are unsure whether the PBLs are updated with the latest source code.
Note
If using the proxy server, configure the proxy server IP address and port number in the PB.ini file. See Using proxy server for more information.
-
Click Test Connection, and click OK when connection is successful.
PowerBuilder starts downloading the workspace/solution from the Git source control system, and after the workspace/solution is successfully downloaded, it will be loaded in the PowerBuilder IDE automatically.
Note
After you get a workspace/solution which was added to Git using a third-party tool such as TortoiseGit (not by PowerBuilder IDE), the objects will be marked with this icon
 which means the objects are not yet under
source control in PowerBuilder IDE, so you should commit the
entire workspace/solution from the PowerBuilder IDE to Git to
add it under source control.
which means the objects are not yet under
source control in PowerBuilder IDE, so you should commit the
entire workspace/solution from the PowerBuilder IDE to Git to
add it under source control.
To authenticate your user credentials with the Git server:
You can directly get your username/password (or personal access token) from the GitHub, GitLab, BitBucket etc. in the Connect to Workspace/Solution dialog box.
-
In the Connect to Workspace/Solution dialog box, select Git from the Source Control System list.
-
In the Repository URL box, input the URL of the Git source control server and the name of an existing repository on the server.
-
In the Workspace File or Solution File box, type in the name of the workspace/solution file to be downloaded from the repository. Note that the workspace/solution file name is case-sensitive.
-
Leave the Branch box empty if downloading from the "main" branch, or specify a branch.
-
Select Basic or Token from the Authentication Type list and leave the User ID and Password (or Personal Access Token) boxes empty.
-
Click Connect.
-
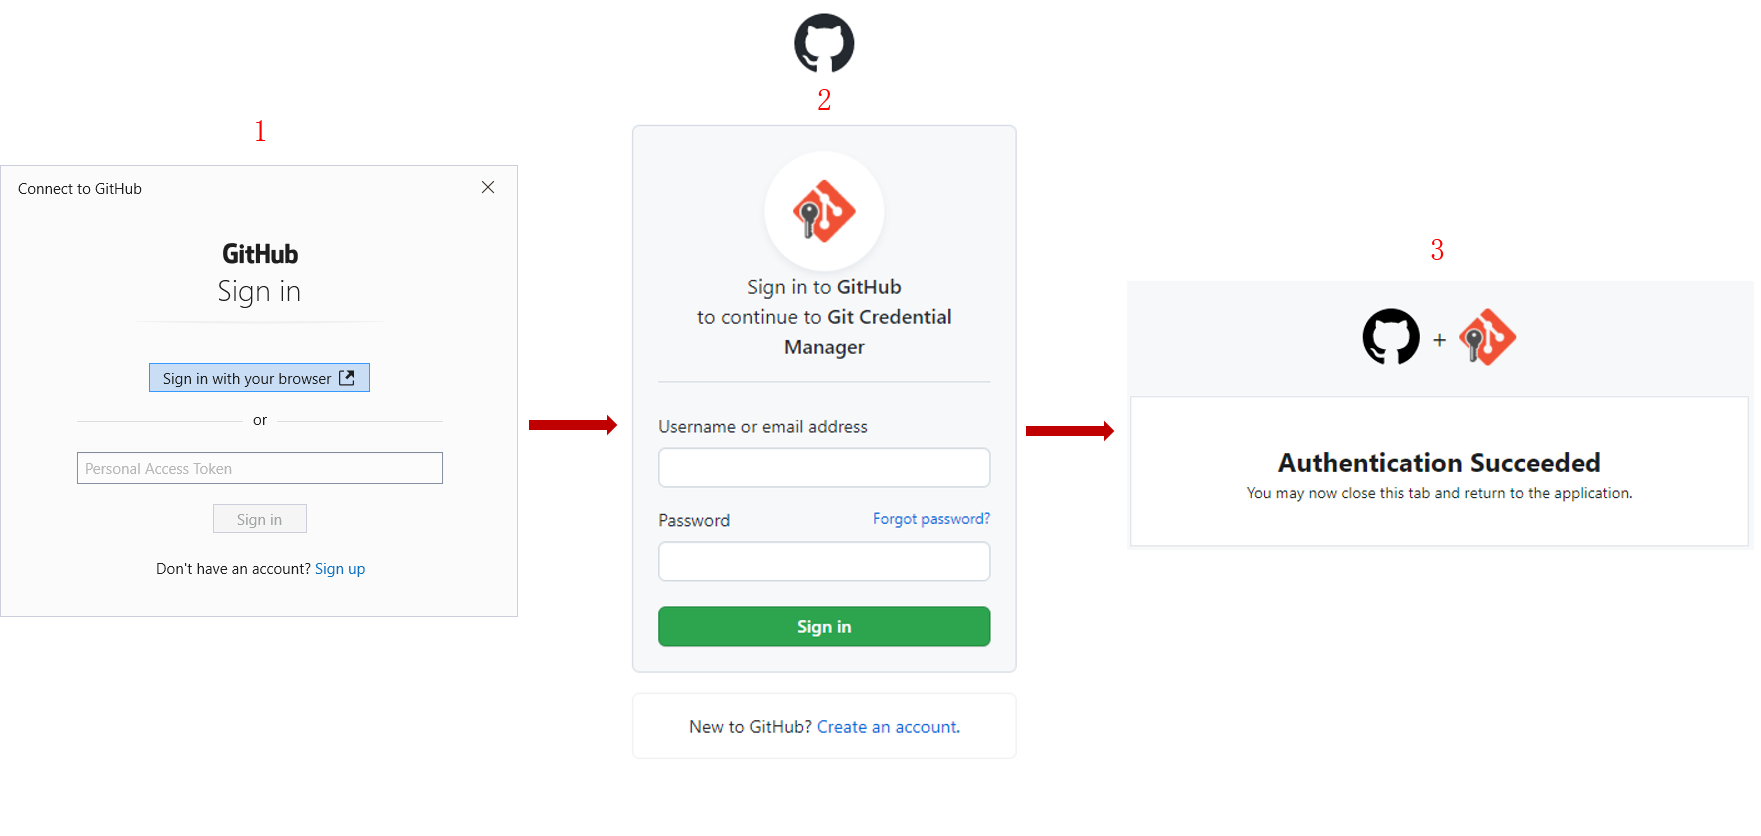
In the Windows Credentials window or the sign-in window for GitHub, GitLab, BitBucket etc., sign in with your user name and password.
You will need to install the Git for Windows tool first in order to display the Windows Credentials window or the sign-in window for GitHub, GitLab, BitBucket etc..
Take GitHub for example. In the Connect to GitHub window, click Sign in with your browser, and then sign in to GitHub with your user name and password in the browser window. When authentication succeeds, your user name and password or personal access token will be automatically filled into the Connect to Workspace/Solution dialog box.
-
Make sure the authentication is successful and your user name and password or personal access token are automatically filled in the Connect to Workspace/Solution dialog box.
-
Click Connect again in the Connect to Workspace/Solution dialog box to verify that the connection is successful.