The applications deployed with PowerClient will be installed and updated through a Web server. Therefore, you will need to configure a Web server for deployment.
You can deploy the PowerClient project directly from the PowerBuilder IDE to the following servers:
-
local web server
For quick testing purpose, you can directly deploy to a local server (such as IIS, Apache, Nginx etc.).
-
remote web server
To deploy to the remote IIS server, you need to configure a server profile first and then deploy from IDE to the server.
To deploy to the other remote servers such as Apache, Nginx etc., you need to deploy from IDE to a local folder first and then deploy the folder (through FTP or manual copy) to the server.
To create a local server profile:
-
Set up a local Web server according to the documents provided by the vendor.
Any type of Web server (such as IIS, Apache, Nginx etc.) is supported.
-
Click the Server Profile button on the PowerClient Toolkit toolbar, or select PowerClient > Server Profile from the menu bar.
-
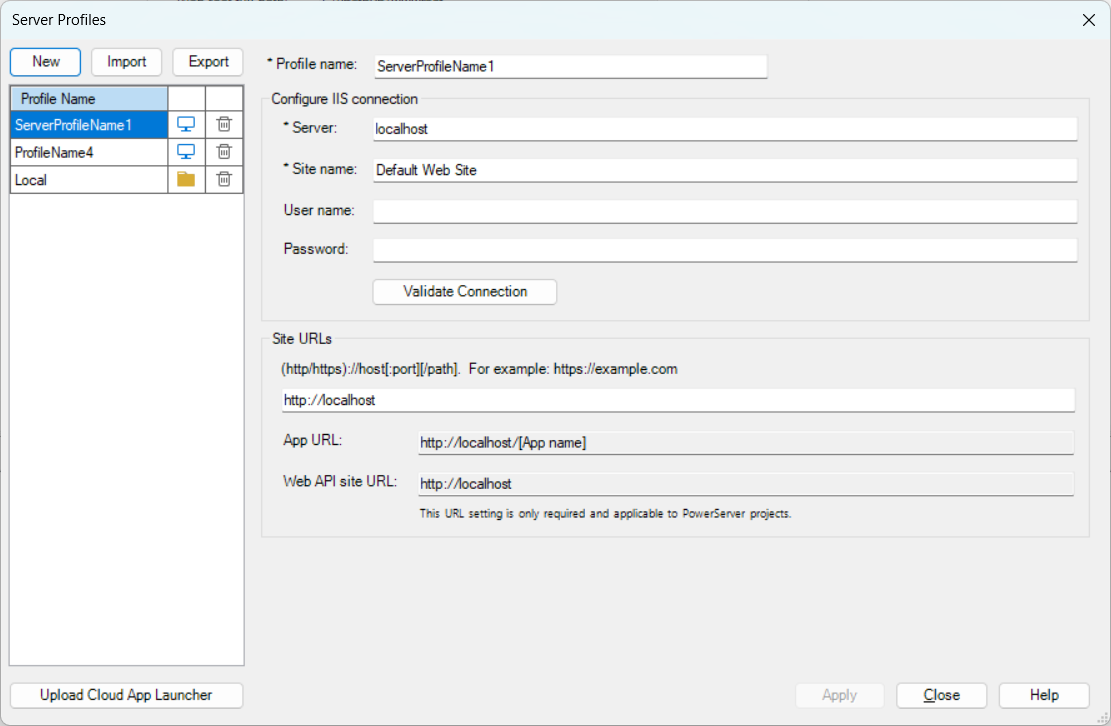
In the Server Profiles window, click the New button on the top left corner to create a new server profile (you can also select an existing local profile on the left and then modify the settings on the right, or delete the profile).
A "Local" server profile is configured by default.
-
In the New Server Profile window, modify the profile name as needed, select Local (for PowerClient only) from the Type list, and then specify the Web root of the Web server (for example %systemdrive%\inetpub\wwwroot for IIS) or a subdirectory under the Web root.
-
Click Test File Path to make sure the specified path is valid for deployment.
Note
If you intend to deploy to a local Web server, make sure you run PowerBuilder as administrator or have the read and write permissions to the specified directory (read and write permissions are required when transferring files to the local server).
You can select this server profile later (in the PowerServer project painter > Deploy > Basic tab > IIS target server), and then configure the host name, port number, and connection method. These settings will be used to generate the application URL when you run the app within the IDE.
-
Specify the site URL. Make sure the site URL points to where files will be deployed, for example, http://172.16.100.89:80.
The App URL is generated automatically based on the site URL + [App name], for example, http://localhost/salesdemo_local. The App URL will be run by default when you click Run Project from the PowerBuilder IDE after you build & deploy the project using this profile.
-
Click OK. The server profile will be created and listed in the Server Profiles window.

To create a server profile for IIS:
-
Set up the IIS Web server according to the documents provided by the vendor.
-
Click the Server Profile button on the PowerClient Toolkit toolbar.
-
In the Server Profiles window, click the New button to create a new server profile (you can also select an existing server profile on the left and then modify the settings on the right, or delete the server profile).
-
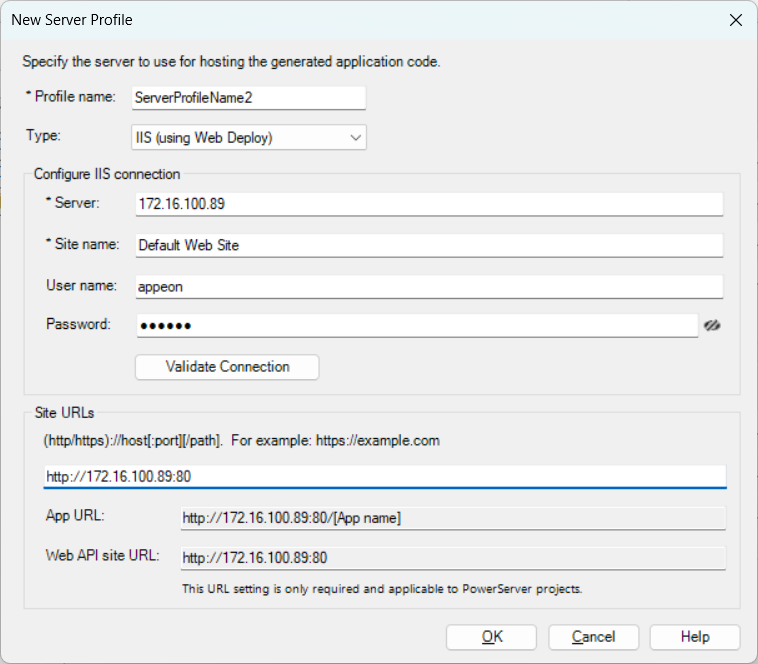
In the New Server Profile window, create an IIS server profile with the following settings.
-
Modify the profile name as needed.
-
Select IIS (using Web Deploy) from the Type list.
-
Configure the IIS connection.
Server: The IP address or machine name of the IIS server. The port is by default 8172. If you have changed the port, specify the port here.
Site name: The IIS web site where files will be deployed.
User name: The user name that has permissions to read and write the specified site. The user can be a Windows user or IIS manager. For more, refer to this page.
Password: The user password that has permissions to read and write the specified site.
To connect with a local IIS server "localhost", if the current Windows user has permissions to read and write the site location, you can leave User name and Password blank.
Click Validate Connection to make sure the connection is successful.
-
Specify the site URL. Make sure the URL points to where files will be deployed, for example, http://172.16.100.89:80.
The App URL is generated automatically based on the site URL + [App name], for example, http://localhost/salesdemo_local. The App URL will be run by default when you click Run Project from the PowerBuilder IDE after you build & deploy the project using this profile.
-
Click OK.
The server profile will be created and listed in the Server Profiles window.
-
To import or export a server profile:
-
In the Server Profiles window, click the Import or Export button to import or export a server profile.
The server profile will be saved in the JSON file format.
Note
As PowerBuilder is designed to be case-insensitive, therefore, in a case-sensitive system like Linux, some app files (such as images) may not be found or loaded. To avoid any issue caused by the case of file name, make sure to configure the Linux server to ignore case-sensitive.
Note
The server profiles can be used by all PowerClient and PowerServer projects; therefore if you have changed the server settings especially the host name or directory, you will need to upload the app launcher if no launcher has been uploaded to that server or directory.
