Once you have created a PowerClient project, you can open it from the System Tree and modify the properties if necessary. The Project painter for the PowerClient project looks like this.
The following sections describe each of the options you can specify in the Project painter for PowerClient.
Note
If you want to view an example of the PowerClient project, you can open the demo app, for example, from Windows Start | Appeon PowerBuilder [version] | Example Sales App, and view the PowerClient project included in the demo.
The Application page > Basic tab has the following settings:

|
Option |
What you specify |
|---|---|
|
App Name |
Specify a name for the application. The application name is mainly used in the following places:
If you need to define and modify the App Name, it is recommended to consider comprehensively. |
|
PBR file name |
(Optional) Specify a PowerBuilder resource file (PBR) for your application if you dynamically reference resources (such as bitmaps and icons) in your scripts and you want the resources included in the application instead of having to distribute the resources separately. You can type the name of a PBR file in the box or click the button next to the box to browse your directories for the PBR file you want to include. The PBR file as well as the resources it references must reside in the application directory or subdirectory; and only relative paths of the PBR file and the resources will be accepted. For more about PBRs, see Distributing_resources. |
|
"App shortcut" group |
You can specify whether to create shortcuts for:
You can also customize the app shortcut name and the shortcut icon.
|
|
"External files" group |
Specify the custom user external files and/or the resource files that are referenced in the PowerScript. Make sure all these files are placed in the same folder or sub-folder of the application target (.pbt) file. The custom user external files may include the following:
Files preloaded as compressed packages and Files preloaded in uncompressed format The custom user external files will be downloaded from the server before the application starts. It is recommended that you deploy the files which are large or stay unchanged most of the time (such as UI theme files) as one compressed package, so that it can be transferred faster; and deploy the files which may be modified (hence downloaded) frequently as individual files (such as INI files), or deploy them as a separate package because they need to be downloaded frequently.
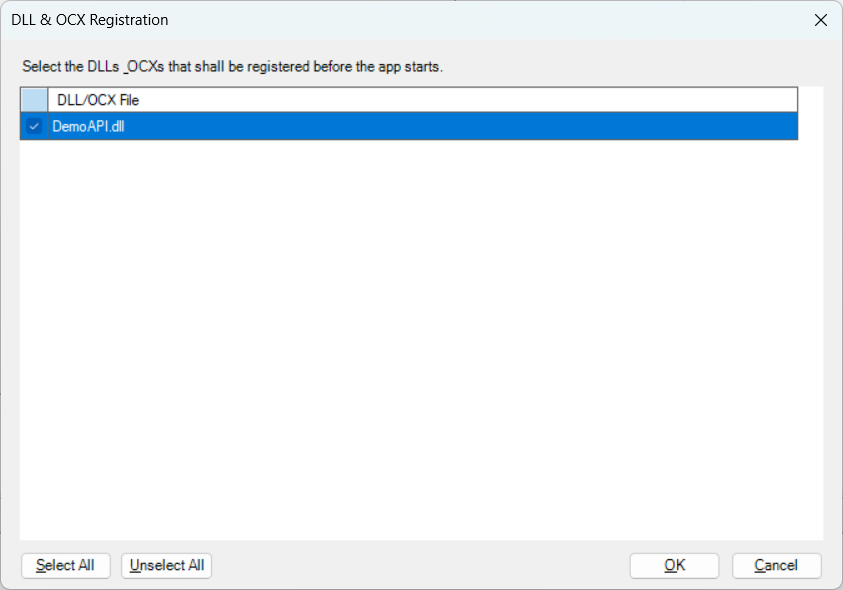
Images/videos dynamically loaded The resource files (such as images, videos etc.) are downloaded from the server at the moment when they are used by the application. You can select Images/videos dynamically loaded and then click Add Folder or Add Files to add the folder or files under it. Note1) After these files are added to External Files, they will be deployed together with the other application files to the server. If these files are changed later, you must re-deploy the application, or replace these files on the server using the CustomizeDeploy.dll tool without needing to deploy the application again. For more information, refer to Change the deployed app using commands. 2) When external files are deployed to the server, they are appended with the file extension ".zip", but they are not compressed files (the only exception is package). For example, if apisetup.ini is selected in the External Files tab, it will be deployed as apisetup.ini.zip to the server, however, apisetup.ini.zip is not a compressed file and it can be directly opened in a text editor just like apisetup.ini. 3) If you have added or removed files from the folder after it is added to External Files, the file list will not be automatically refreshed, thus, you may be prompted for missing files during deployment. In this case, you can remove the folder and then add it back again to External Files, in order to correctly refresh the file list. If the application uses DLL/OCX files and if these DLL/OCX files must be registered before use, you can choose the following methods to register the files:
Note1) For DLL/OCX files that do not need to be registered or those that will be registered by scripts, please do not select them in the DLL & OCX Registration dialog, because unnecessary registration will affect the app startup performance. 2) PowerServer itself does not require any DLL/OCX file registration, please select and register only those DLL/OCX files that are required by the application. INI Configuration When the application is updated, the INI file can be updated with the specified strategy. Click the INI Configuration button and then select one or more INI files and configure the strategy for them at one time; or select and configure for the INI file one by one.
NoteThe external files cannot contain any file that has the same name as the application, or the PBD or p-code file to be generated, otherwise duplicate name error occurs. For example, [appname].exe, [appname].xml, [appname].manifest file etc. cannot be added to External Files. For another example, test.pbl will be deployed as test.pbd, therefore, test.pbd cannot be added to External Files. |
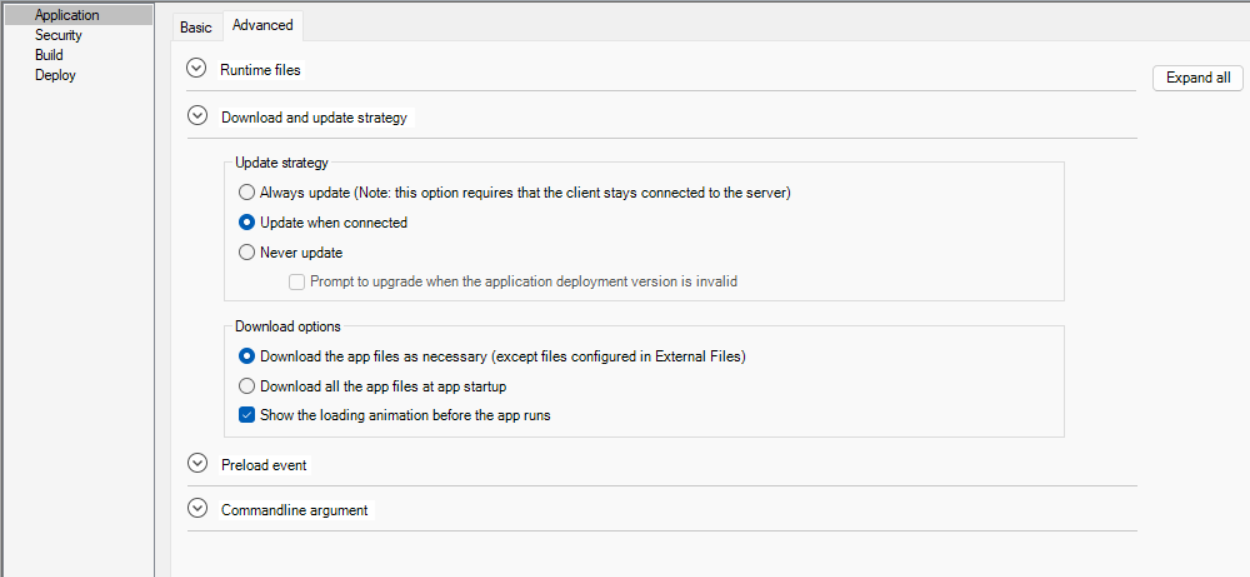
The Application page > Advanced tab has the following settings:
|
Option group |
What you specify |
|---|---|
|
Runtime files |
Select the runtime files according to the features used in the application. The runtime files will be downloaded from the server to the client, for the application to run. You can select Typical to automatically select all files (except the WebBrowser control), or select Custom to select files manually. The deployment tool does not actually deploy the files, instead it notifies the application to download such files (corresponding to the runtime version displayed) from the server directly, therefore, you will need to make sure the corresponding version of PowerBuilder Runtime is uploaded to the server when you upload the Cloud App Launcher to the server (view detailed instructions). When the project is opened, if the runtime version configured in the System Options dialog (Tools > System Options) is different from the runtime version last saved with the project, they both will be displayed (as shown below); and then when the project is saved, the runtime version in the System Options dialog (the second text box) will be saved with the project.  |
|
Download and update strategy |
Specify the update strategy for the application.
Specify the download strategy for the application.
|
|
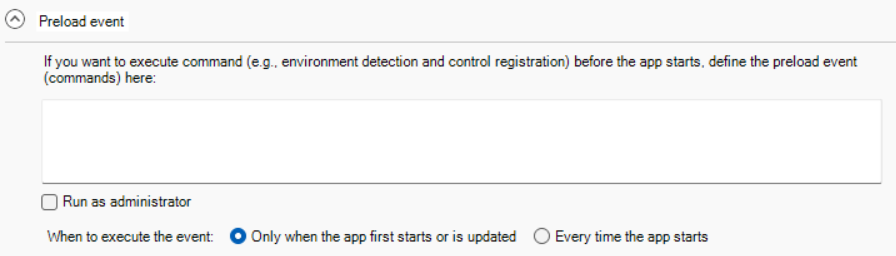
Preload Event |
(Optional) Specify the commands that will be executed immediately after files are downloaded and before the application starts. For example, you can specify commands to register DLL/OCX files that cannot be registered by Regsrv32 or Regasm or require administrator rights to register; or any other commands that need to be executed with administrator rights. For another example, if your application contains .NET DLLs which have dependencies on the .NET runtime, you can also create a batch file to check and install the .NET runtime on the client and then assign the batch file in the preload event. If the commands need to be executed with the administrator rights, you should select the Run as administrator option. You can specify how often the commands should be executed: if you select "Only when the app first starts or is updated", the commands will be executed for only one time when the application is launched for the first time or when the application is updated; if you select "Every time the app starts", the commands will be executed every time when the application runs. The commands can be any Windows commands or user-defined commands. For example, suppose there is a DLL file from the application that needs to be registered on the client, you can enter the following commands: cd /d "C:\Windows\Microsoft.NET\Framework\v4.0.30319" regasm "%AppData%\Appeon\PBCloud\demo.appeon.com_app1\EncryptDecryptClass.dll" /tlb:testappeon.tlb /codebase /nologo Note: As the commands are executed silently, any commands that will pause the execution and wait for user input will cause the application to wait endlessly. |
|
Commandline argument |
Specify the command line arguments for the application. The arguments will be directly passed to the application when the application is run. The arguments will be automatically saved and updated to the app startup icon on the desktop and the app shortcut menu in Windows start. The arguments specified here are static and cannot be modified at runtime. If you want to pass the argument dynamically at runtime, you can specify the argument in the application URL (for example, http://localhost/salesdemo/?arg=1). But note that the arguments appended to the application URL cannot contain special characters such as "?", "#", as they have special meanings in HTML URL; if you want to use these characters in the argument name or value, you can specify them in Commandline argument as static arguments, so that they can be passed to the application directly instead of being sent as part of the URL. You can also pass arguments to the EXE directly. If there are multiple arguments, please include them in quotation marks or separate them with a delimiter (instead of a space), for example, C:\Users\<username>\AppData\Roaming\PBApps\Applications\localhost_<appname>\<appname>.exe "parm1 parm2 parm3" C:\Users\<username>\AppData\Roaming\PBApps\Applications\localhost_<appname>\<appname>.exe parm1/parm2/parm3 If the commandline argument is specified on the client, in the URL or desktop shortcut, and if you want to save the argument in pbapp.ini for future access, you can select the "Save the argument(s) in the pbapp.ini file for future access" option. By default, the arguments will not be saved to the pbapp.ini file. |


Tip
Advanced usage of External Files and Preload Event
The combination of External Files and Preload Event can streamline the process of deploying a setup package to the server, installing the package and registering the file on the client machine. In the External Files page, you add the folders and/or files that make up of the setup package, and in the Preload Event field, you add commands to run the setup file and register any component if necessary.
Take Microsoft OLE DB Driver for SQL Server (MSOLEDBSQL) as an example. Suppose the MSOLEDBSQL setup package includes the following folders and files: msoledbsql folder, sqlncli folder, CheckDBDriver.bat file, and Install.bat file.
Step 1: Copy the msoledbsql folder, sqlncli folder, CheckDBDriver.bat file, and Install.bat file to the same folder as the application target file.
Step 2: In the External Files page, select Files (Download at startup) in the list, and then click Add Folder to add the folders: msoledbsql and sqlncli and click Add Files to add the files: CheckDBDriver.bat and Install.bat.
The selected folders and files will be first deployed to the server and then downloaded to the application directory on the client machine.
Step 3: In the Startup page > Advanced tab, add the following command in the Preload Event field: .\CheckDBDriver.bat.
The command will be executed automatically when the application is first installed or upgraded. The CheckDBDriver.bat file checks whether MSOLEDBSQL is installed on the client machine. If MSOLEDBSQL is not installed, then Install.bat is automatically run to install MSOLEDBSQL. Administrator rights are required to run the Install.bat file, so the end user will be prompted for that if Install.bat is run.
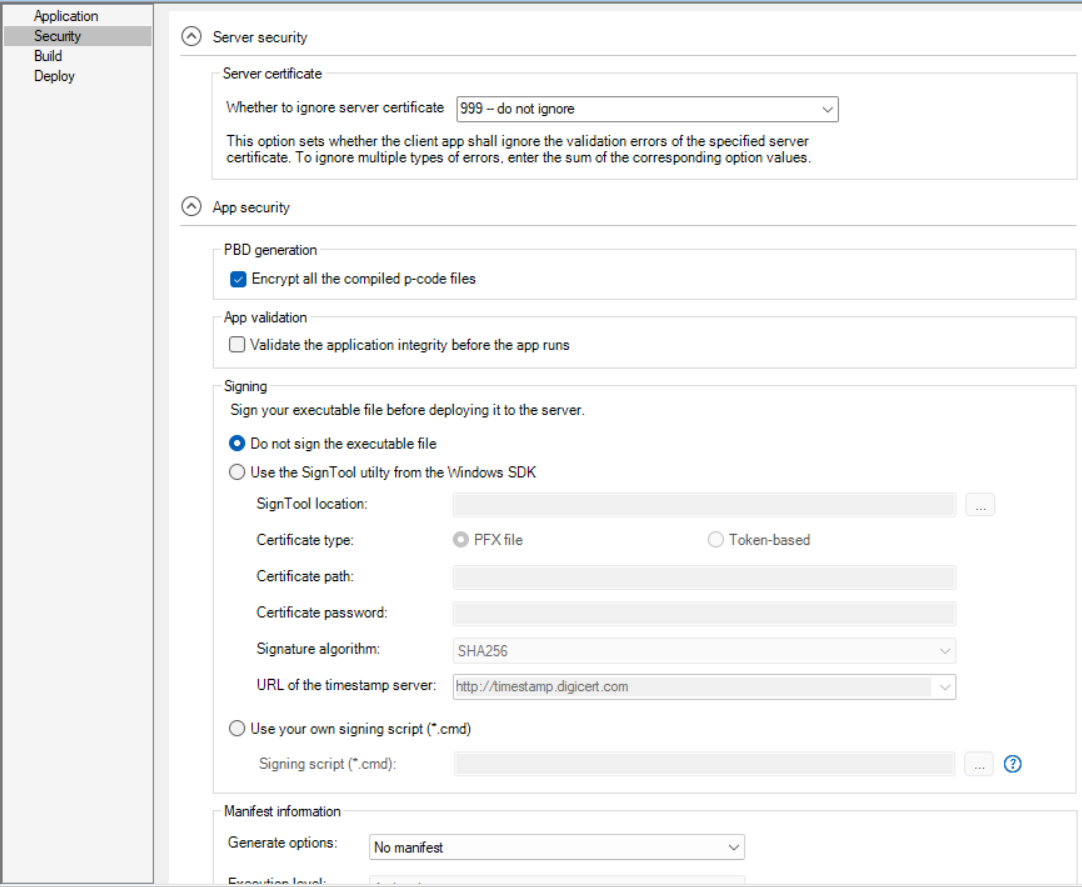
The Security page has the following settings:
|
Option or option group |
What you specify |
|---|---|
|
Whether to ignore server certificate |
Select or input a value or a sum of values, if you want the client app to ignore certain type(s) of server certificate error when sending a request. The client app can suppress certain type(s) of certificate error from the server. The value can be 0, 1, 2, 4, 8, 999, or a sum of two or more values of 1, 2, 4, 8 (each value representing one type of error). For example, the value 3 means ignoring unknown certificate authentication (CA) and certificates whose date is invalid. The value 0 means all of the certificate errors will be ignored.
It is recommended to ignore certificate errors only in the development or testing environment; in the production environment, you'd better resolve (rather than ignore) the certificate errors. The above settings will take effect after you deploy the application. If you want to change the ignore option without needing to deploy the application again, you can use the CustomizeDeploy.dll tool. For more, refer to Ignoring server certificate errors. |
|
Encrypt all the compiled p-code files |
Select whether to encrypt the object files when compiled from the PowerBuilder dynamic libraries. |
|
Validate the application integrity before the app runs |
Specify whether to validate the hash of every object file before they are loaded, so that files changed illegally will not be run. |
|
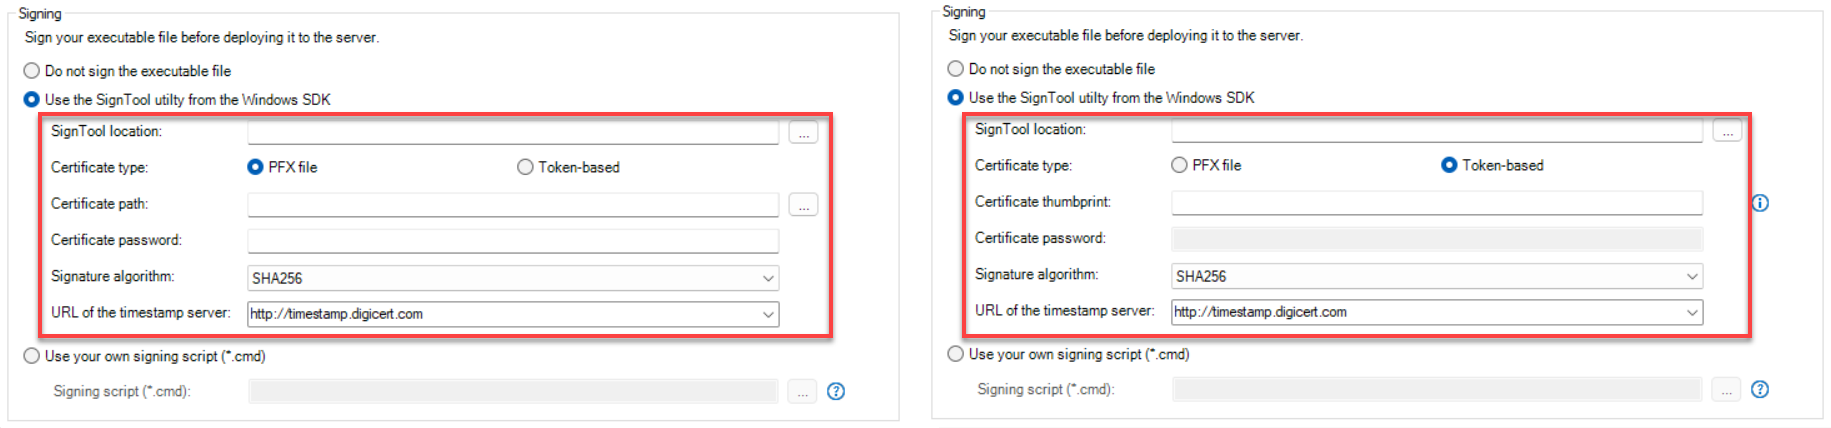
Select whether to digitally sign the application executable file (appname.exe). You can sign the file using a PFX file or a token. (To sign with an HSM (Hardware Security Module), you can only use the "Use your own signing script" option.) To use the "Use the SignTool utility from the Windows SDK" option to sign the application executable file:
To use the "Use your own signing script" option, you should place the signing scripts in a file (with file extension as .cmd) and then select the file under the "Use your own signing script" option. To sign with an HSM (Hardware Security Module), you can only use the "Use your own signing script" option. Take the PFX file for example,
Take the token for example, (The following examples show how to sign the application using an EV code signing certificate)
To avoid repeatedly entering the UKey password (for instance the screen is locked or the system is restarted), you can use the "Use your own signing script" option and specify the token password in the signing commands, for example:
Note: 1) When writing scripts in the .cmd file, please follow the rules of Windows commands. If there are any exceptions or errors in the logs after configuring the "Use your own signing script" option, try running the scripts in the Windows Command Prompt or Windows PowerShell to identify the issue. 2) For .cmd files without dynamic parameters, both the directory name and the .cmd file name can contain spaces. However, for .cmd files with dynamic parameters, the directory path should not contain spaces, while the .cmd file name itself can contain spaces. 3) When entering the file path of the .cmd file in the "Use your own signing script" text box, follow the standard rules for accessing file paths in Windows. If the file name or path contains spaces, use double quotes to avoid escape errors. It is recommended to use absolute paths for the .cmd file and the parameters. After the executable file is generated and before it is deployed to the server, PowerBuilder will sign the executable file using your own signing scripts or using the SignTool settings you specified. Make sure the PowerBuilder user has the appropriate rights to access the time stamp server and sign files. |
|
|
Manifest Information |
Select whether to generate a manifest file (either external or embedded) and to set the execution level of the application. For further information, see Attaching or embedding manifest files. |
The Build page > Basic tab has the following settings:

|
Option or option group |
What you specify |
|---|---|
|
Rebuild |
Specify how to build the application:
As a precaution, regenerate all objects before rebuilding your project. |
|
Platform |
Select if the client app can run on 32-bit or 64-bit machines. |
|
Enable DEBUG symbol |
Select to enable any code that you placed in DEBUG conditional code blocks. For more information, see Using the DEBUG preprocessor symbol. |
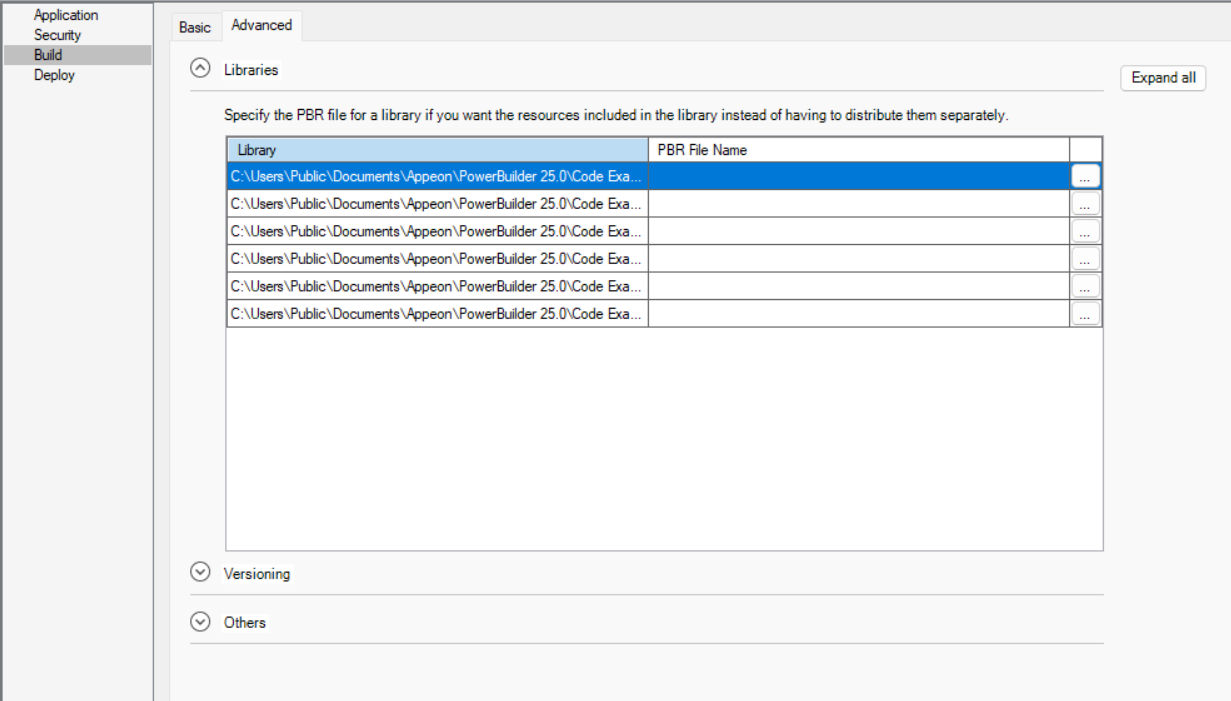
The Build page > Advanced tab has the following settings:
|
Option group |
What you specify |
|---|---|
|
Libraries |
(Optional) Specify a PowerBuilder resource file (PBR) for your application if you dynamically reference resources (such as bitmaps and icons) in your scripts and you want the resources included in the application instead of having to distribute the resources separately. You can type the name of a PBR file in the box or click the button next to the box to browse your directories for the PBR file you want to include. The PBR file as well as the resources it references must reside in the application directory or subdirectory; and only relative paths of the PBR file and the resources will be accepted. For more about PBRs, see Distributing_resources. |
|
Deployment version -- The deployment version number is used by the server to determine whether to perform an install or update for the application on the client. It is recommended to increment the deployment version number every time when the application is updated and re-deployed. Minimum compatible version -- Specify the lowest compatible version for the application. If the version installed on the client is older than it, a forced update will be performed, or the application will stop running. NoteTo effectively manage version compatibility and prevent issues when upgrading the application, you should follow these guidelines when defining Deployment version and Minimum compatible version (the rules of comparing the versions are similar to the rules of sorting the file name in Windows):
Available time -- Schedule the time for the deployment version to be accessible to end users. Expiration time -- Schedule the time for the deployment version to be inaccessible to end users. If the available time or expiration time is reached and the app is still open, the app will not get updated, until the app is closed or the session times out. Therefore, it is recommended that the session timeout feature should be enabled (for apps deployed via PowerServer) or implemented (for apps deployed via PowerClient). Version used by the installer > Product version -- Specify the product version (in numeric values) that will be used by Microsoft Installer to determine whether a product needs to be updated. Version used by the installer > File version -- Specify the file version (in numeric values) that will be used by Microsoft Installer to determine whether a file needs to be updated. Product name, Company name, Description, Copyright, Product version, File version -- Specify your own values for these fields associated with the application file and with machine-code DLLs. These values become part of the Version resource associated with the application file, and most of them display on the Version tab page of the Properties dialog box for the file in Windows Explorer. The Product and File version string fields can have any format. The four numbers can be used to represent the major version, minor version, point release, and build number of your product. They must all be present. If your file versioning system does not use all these components, you can replace the unused numbers with zeros. The maximum value for any of the numbers is 65535. |
|
|
Others |
Windows classic style -- Select this to add a manifest file to the application that specifies the appearance of the controls as an application resource. By default, this option is not selected, which means the Windows flat style is used and the 3D effect of some controls will be removed to have a "flat" look, for example, the 3D lowered border of Column and Computed Field in the DataWindow object, the background color of Button, the BackColor and TextColor of the tooltip, and the TabBackColor of tab header will not take effect. If you still want the 3D effect, you should select the "Windows classic style" option when deploying the application. NoteIf you have applied a theme to the application, you should not check the "Enable Windows Classic Style in the IDE" option in the System Options or the "Windows classic style" option in the project painter and the PB.INI file (if any) should not contain such setting, otherwise, the application UI will be rendered in the Windows classic style instead of the selected theme. |

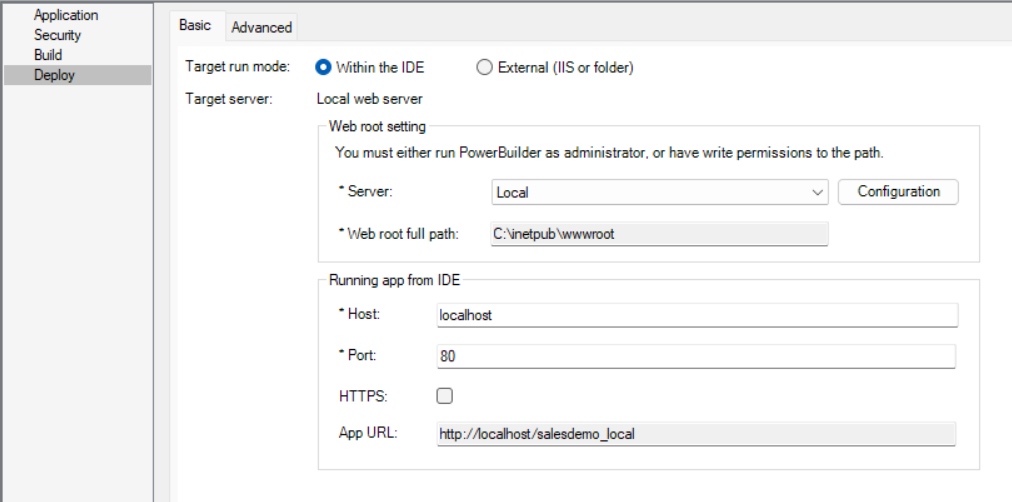
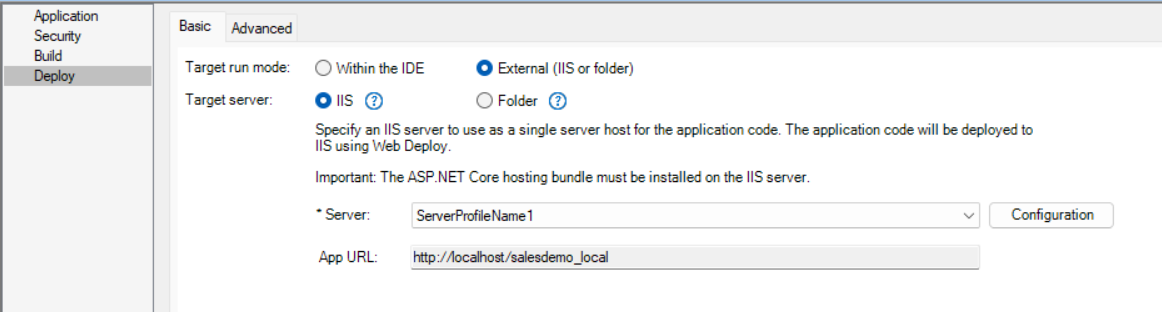
The Deploy page > Basic tab has the following settings:
|
Option or option group |
What you specify |
|---|---|
|
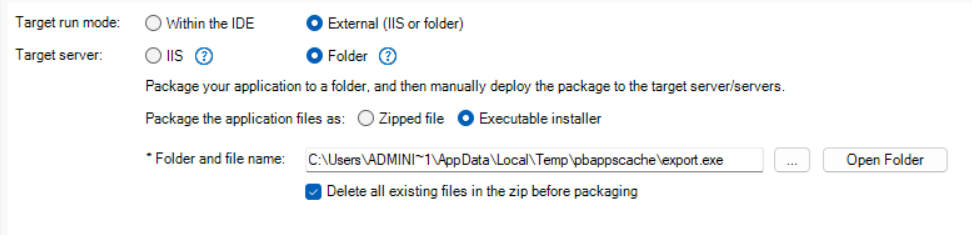
Target server |
You can deploy to the following servers/folder:
|
The Deploy page > Advanced tab has the following settings:

IMPORTANT: Cloud App Launcher and runtime files are indispensable files that make up the app. Only after you confirm that these files already exist in the server, you can choose to not upload these files. Otherwise, any missing file may cause the app to fail to run.
|
Option or option group |
What you specify |
|---|---|
|
Cloud App Launcher |
Select whether to deploy/package the Cloud App Launcher. You can click Configuration to customize the cloud app launcher. For how to customize the cloud app launcher, refer to Customize cloud app launcher. |
|
Runtime files |
Select whether to deploy/package the runtime files. The runtime files compatible with the selected platform (32-bit or 64-bit) of the client app will be deployed or packaged. |
|
Select whether to deploy/package the apprun.json file. apprun.json specifies the location of launcher and runtime. It is used by the client app to download the launcher and runtime. {
"deployment_urls": {
"launcher": "CloudAppPublisher/CloudAppInstall V3",
"runtime": "CloudAppPublisher/runtime/25.0.0.3522"
}
}The launcher URL and the runtime URL can be relative URLs (without the site/domain name) or complete URLs (including the site/domain name). |
