Once the project is deployed (and the new database information is in the Web APIs) open the C# Solution in SnapDevelop by clicking the Open C# Solution in SnapDevelop button in the PowerServer Toolbar.
When SnapDevelop opens, right click the Server APIs project in the Solution Explorer and click Publish.
Create a new Deployment Profile with a Docker Container Registry target.
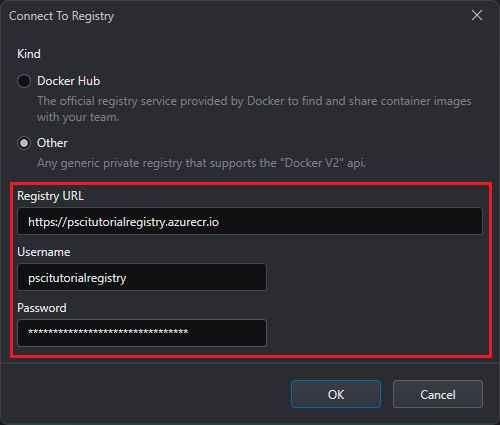
On the Registry dropdown menu click
New Connection and enter the registry server’s
address (prepending http://), username and
password from the Azure Container
Registry you created earlier and then click OK:
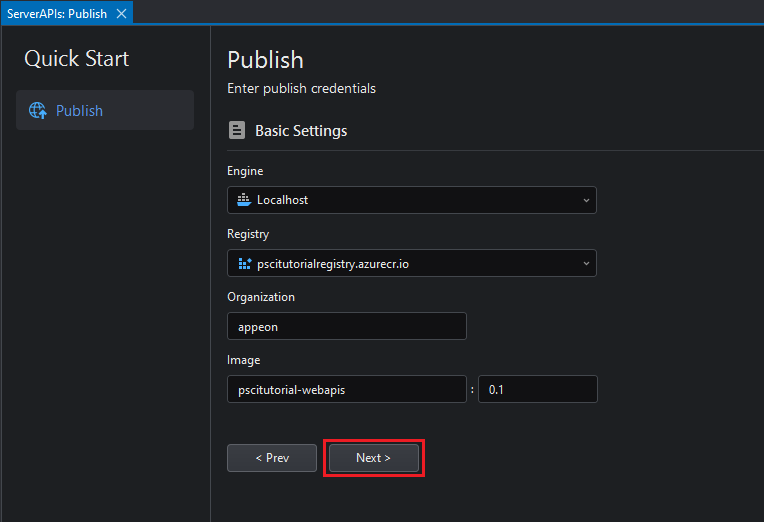
Fill in the rest of the profile’s information and click Next and then Publish:
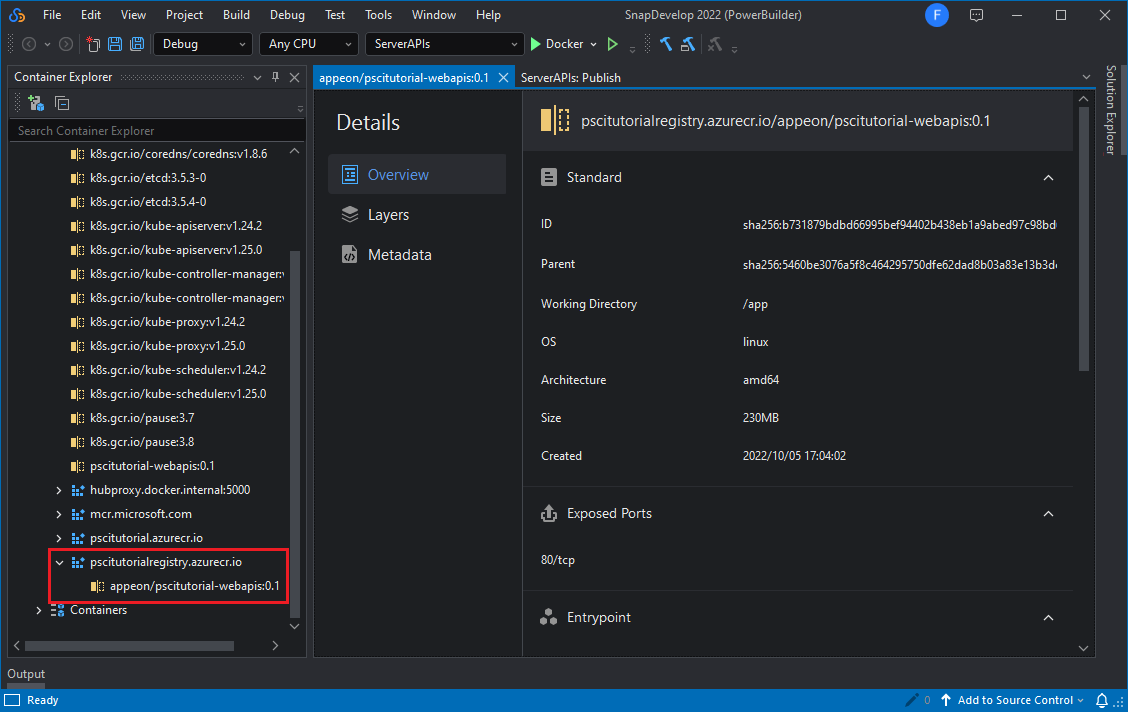
Once the publishing finishes, the Image Details window will open in SnapDevelop and the repository will be visible in the Container Explorer panel:
In this case,
pscitutorialregistry.azurecr.io/appeon/pscitutorial-webapis:0.1
is the image’s tag.


