After installing the app to the server, you can double check that the Web API URL is correct and replace the external files (such as INI, images etc.) on the server when necessary.
After the application is installed to the server, you can check and change the Web API URL in the application folder on the server.
To check and change the Web API URL for an application:
-
Go to the server root > [appname] folder (named after the App name configured in IDE, for example "salesdemo_cloud").
-
Open the apprun.json file in a text editor and change the Web API URL (and the launcher URL and runtime URL) when necessary.
{
    "deployment_urls": {
        "launcher": "CloudAppPublisher/CloudAppInstall 22.0",
        "runtime": "CloudAppPublisher/runtime/22.1.0.2670",
        "web_api": "http://localhost:5099"
    }
}
After the application is installed to the server, you can change the external files using the command-line tool (CustomizeDeploy.dll) which is located in the application folder on the server.
The "External Files" refers to the packages, folders, and files (such as INI files, DLL/OCX, images etc.) that are configured in External Files in the PowerServer project painter > Application page.
To replace the External Files for an application:
-
Install the ASP.NET Core Runtime 3.1 or later.
The CustomizeDeploy.dll tool requires the ASP.NET Core Runtime 3.1 or later to run, therefore, you may be prompted to install ASP.NET Core Runtime if it is not installed.
-
Open the command prompt.
You'd better run the command prompt using an administrator by right-clicking it and then selecting "Run as administrator".
-
Navigate to the server root folder > [appname] folder > [version] folder.
If you have created multiple deployment versions for the application, you will have multiple sub-folders for version, such as 1.01, 1.02, etc., make sure you navigate to the folder of the current deployment version, for example, C:\inetpub\wwwroot\salesdemo_cloud\1.01.
-
Execute the CustomizeDeploy.dll file using the dotnet command.
dotnet CustomizeDeploy.dll -src=<source file> -dest=<destination file>
The "src" argument should point to the new file that you want to use to replace the old file.
The "dest" argument should point to the old file that you want to replace with the new file.
When external files are deployed and installed, they are appended with the file extension ".zip", but they are not compressed files (the only exception is package). For example, if apisetup.ini is selected in External Files, it will be deployed as apisetup.ini.zip to the server, however, apisetup.ini.zip is not a compressed file and it can be directly opened in a text editor just like apisetup.ini.
And to replace the file, you should prepare the source file without .zip extension.
For example,
dotnet CustomizeDeploy.dll -src=/new/apisetup.ini -dest=apisetup.ini.zip
Or
dotnet CustomizeDeploy.dll -src=/new/new.ini -dest=apisetup.ini.zip
The only exception is the package which is indeed compressed as the zip format (with file extension ".zip.zip"). Therefore, you should prepare the source file for the package in the compressed zip format.
For example,
dotnet CustomizeDeploy.dll -src=/new/theme.zip -dest=theme.zip.zip
Or
dotnet CustomizeDeploy.dll -src=/new/aaa.zip -dest=theme.zip.zip
Note
The tool will replace the package as a whole (and refresh the hash code of the package) and it will not validate the individual files included in the package. Therefore you need to make sure the files included in the package are correct and complete.
Note
Double check that the source files are NOT read-only before replacement, otherwise the following error may occur at runtime: "Access to the path C:\inetpub\wwwroot\testapp\1.01\cp.ico.zip' is denied."
After installing the app to the server, you can verify that the cloud app launcher can be successfully installed and the Web API URL is correct.
-
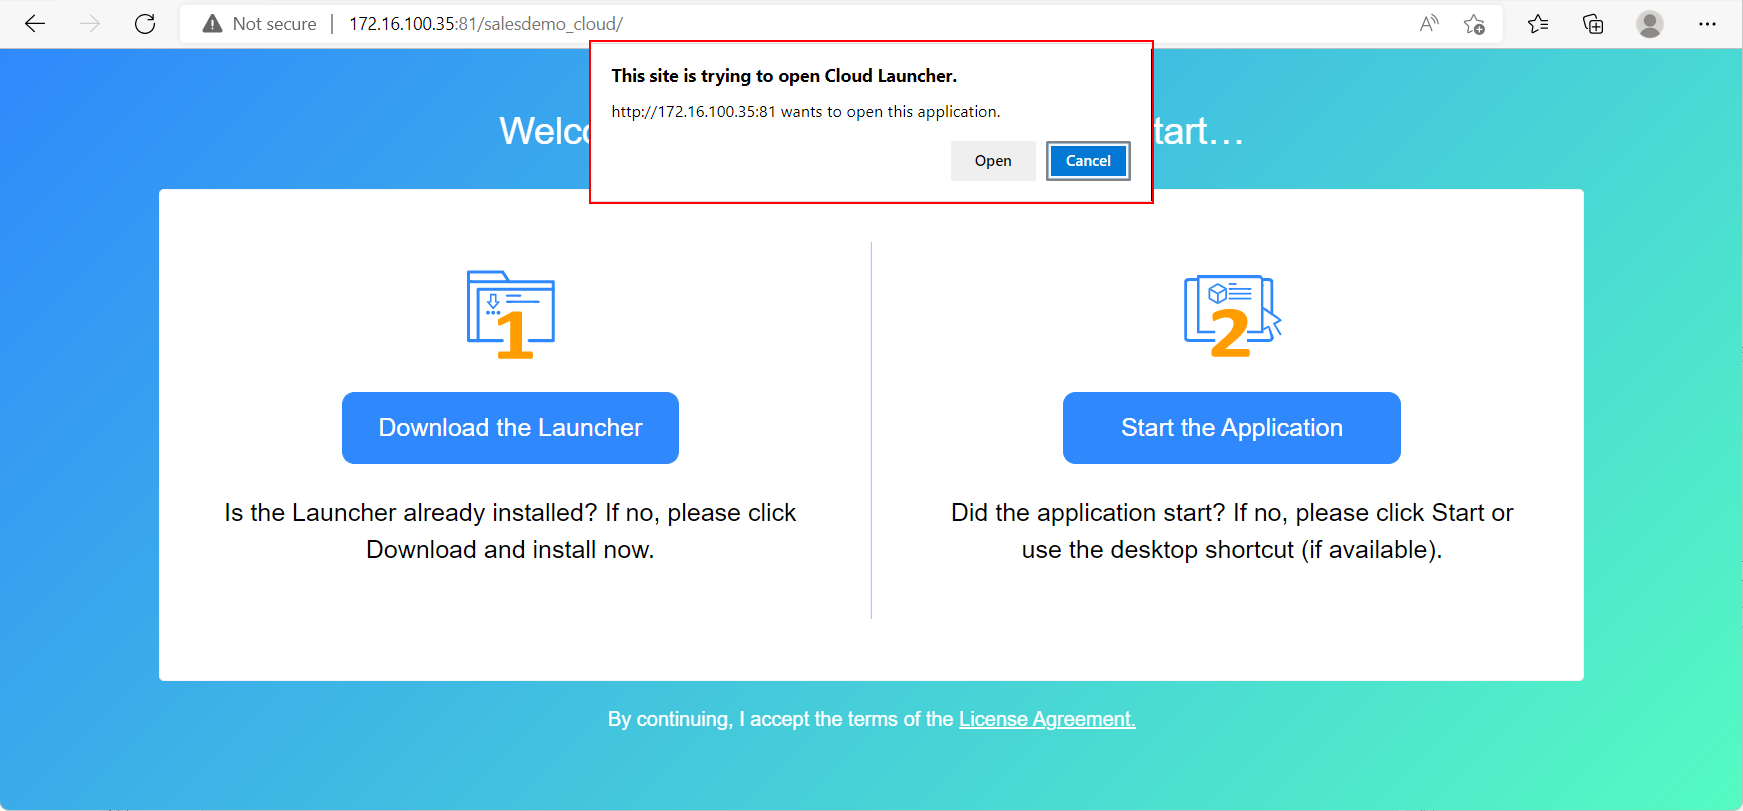
On the client machine, access the application URL in the Web browser, for example, http://172.16.100.35:81/salesdemo_cloud/.
-
Follow the prompt message to open Cloud Launcher or download/install the cloud app launcher.
After the cloud app launcher is installed, the application will run.
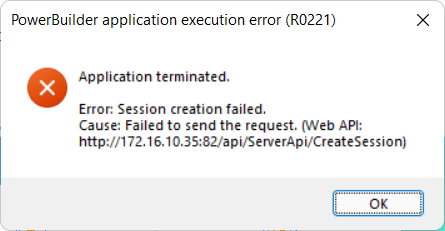
If you see the "Session creation failed" error, make sure you have installed the Web APIs to the root URL as mentioned in the message; the root URL should include only the IP address or domain name and the port number and should exclude any other path such as "/api/ServerApi/CreateSession", for example, http://172.16.10.35:82 is the root URL in the following figure. If the root URL is not correct, change it in the client app.


