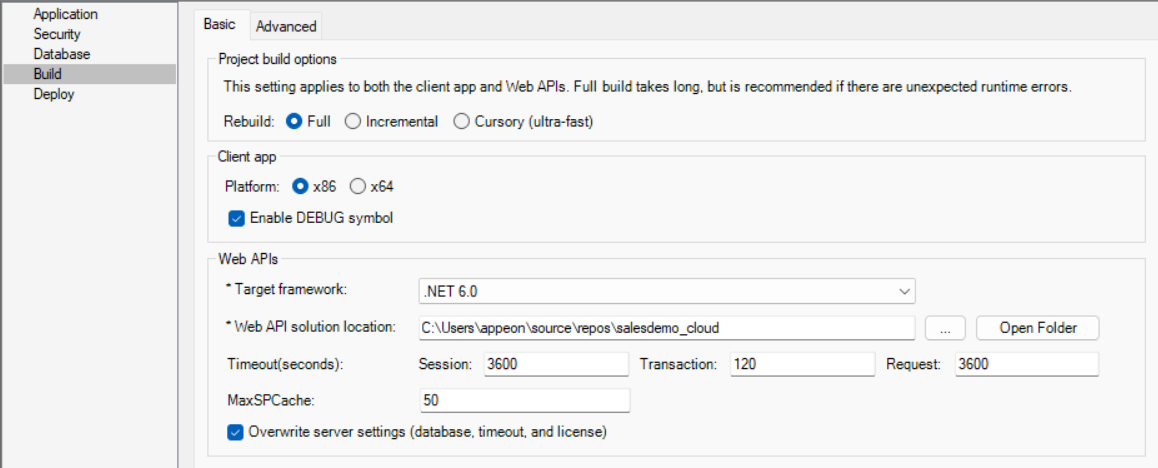
The Build page > Basic tab has the following settings:
|
Option or option group |
What you specify |
|---|---|
|
Rebuild |
Specify how to build the application:
|
|
Platform |
Select if the client app can run on 32-bit or 64-bit machines. |
|
Enable DEBUG symbol |
Select to enable any code that you placed in DEBUG conditional code blocks. For more information, see Using the DEBUG preprocessor symbol in PowerBuilder User Guide. |
|
Target framework |
Select the .NET version the solution is targeting. |
|
Web API solution location |
Specify the location for the PowerServer C# solution. If the PowerServer C# solution already exists, you can deploy the app to the existing solution, the application data models and ESQLs will be updated in the solution, and if you deploy a new app to an existing solution, the application data models and ESQLs will be added to the existing solution. For more information, refer to Generate the PowerServer C# solution. |
|
Timeout |
Set timeout values (in seconds) for session, transaction, and request. For more information, refer to Configure the timeout settings. |
|
MaxSPCache |
Specify the maximum number of stored procedures for which the driver caches information. The driver retrieves information from the server about a stored procedure's parameters the first time the stored procedure is called and caches that information. The next time the procedure is called, the driver retrieves the information from the cache to improve performance. You can turn off caching by setting the value of MaxSPCache to 0. |
|
Overwrite server settings |
Choose whether to overwrite the server settings (such as the database connection, timeout values, PowerServer license etc.) and the authentication template in the solution, when you deploy to the same or existing solution. For more information, refer to What settings will be deployed to the solution. |
|
Ignore errors during DataWindow to C# model conversion for Web API generation |
This option is designed to offer flexibility, allowing deployment to continue when there are non-critical errors in model conversion. By default, this option is NOT selected to ensure that developers address critical errors during model conversion and recompile as needed. This helps prevent potential functional issues or system instability. Critical errors include, but are not limited to:
You may consider selecting this option in the following scenarios:
When you are selecting this option, you will be prompted about the risk. Please choose this option only when you are certain that there are no other significant errors to ensure the stability and reliability of the deployment. |
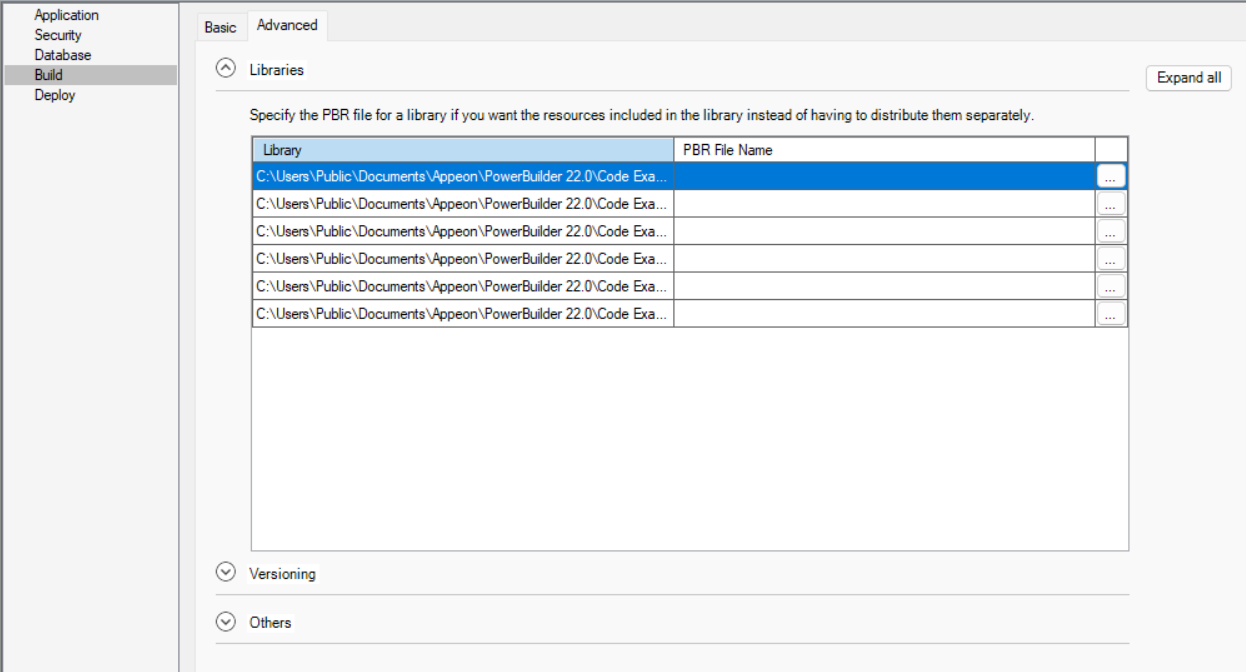
The Build page > Advanced tab has the following settings:
|
Option group |
What you specify |
|---|---|
|
Libraries |
Specify a PBR file for a dynamic library if it uses resources (such as bitmaps and icons) and you want the resources included in the dynamic library instead of having to distribute the resources separately. You can type the name of a PBR file in the box or click the button next to the box to browse your directories for the PBR file you want to include. The PBR file as well as the resources it references must reside in the application directory or subdirectory; and only relative paths of the PBR file and the resources will be accepted. |
|
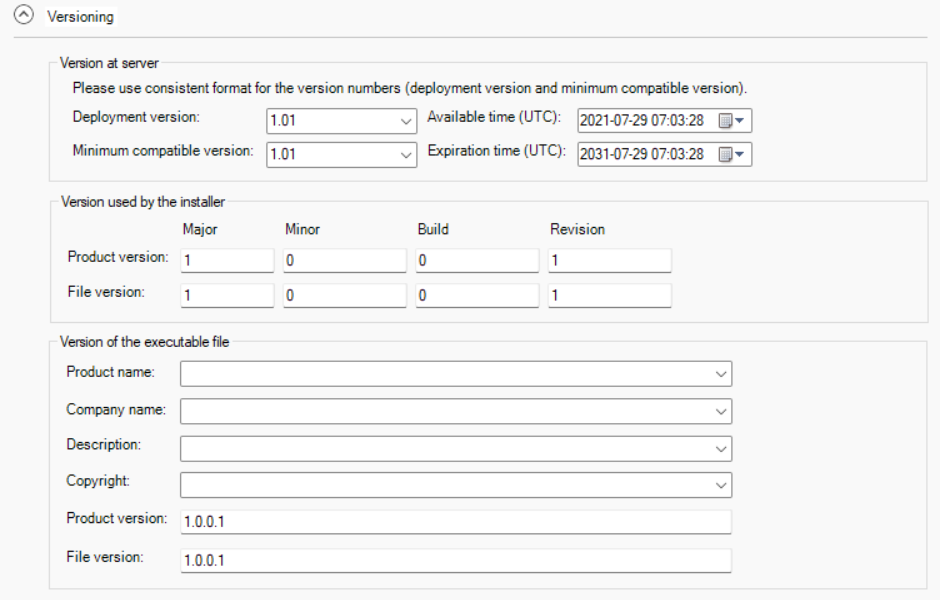
Deployment version -- The deployment version number is used by the server to determine whether to perform an install or update for the application on the client. It is recommended to increment the deployment version number every time when the application is updated and re-deployed. For more, refer to Manage app versions/updates. Minimum compatible version -- Specify the lowest compatible version for the application. If the version installed on the client is older than it, a forced update will be performed, or the application will stop running. For more, refer to Manage app versions/updates. NoteTo effectively manage version compatibility and prevent issues when upgrading the application, you should follow these guidelines when defining Deployment version and Minimum compatible version (the rules of comparing the versions are similar to the rules of sorting the file name in Windows):
Available time -- Schedule the time for the deployment version to be accessible to end users. Expiration time -- Schedule the time for the deployment version to be inaccessible to end users. If the available time or expiration time is reached and the app is still open, the app will not get updated, until the app is closed or the session times out. Therefore, it is recommended that the session timeout feature should be enabled (for apps deployed via PowerServer) or implemented (for apps deployed via PowerClient). Version used by the installer > Product version -- Specify the product version (in numeric values) that will be used by Microsoft Installer to determine whether a product needs to be updated. Version used by the installer > File version -- Specify the file version (in numeric values) that will be used by Microsoft Installer to determine whether a file needs to be updated. Product name, Company name, Description, Copyright, Product version, File version -- Specify your own values for these fields associated with the application file and with machine-code DLLs. These values become part of the Version resource associated with the application file, and most of them display on the Version tab page of the Properties dialog box for the file in Windows Explorer. The Product and File version string fields can have any format. The four numbers can be used to represent the major version, minor version, point release, and build number of your product. They must all be present. If your file versioning system does not use all these components, you can replace the unused numbers with zeros. The maximum value for any of the numbers is 65535. |
|
|
Others |
Windows classic style -- Select this to add a manifest file to the application that specifies the appearance of the controls as an application resource. By default, this option is not selected, which means the Windows flat style is used and the 3D effect of some controls will be removed to have a "flat" look, for example, the 3D lowered border of Column and Computed Field in the DataWindow object, the background color of Button, the BackColor and TextColor of the tooltip, and the TabBackColor of tab header will not take effect. If you still want the 3D effect, you should select the "Windows classic style" option when deploying the application. NoteIf you have applied a theme to the application, you should not check the "Enable Windows Classic Style in the IDE" option in the System Options or the "Windows classic style" option in the project painter and the PB.INI file (if any) should not contain such setting, otherwise, the application UI will be rendered in the Windows classic style instead of the selected theme. |


