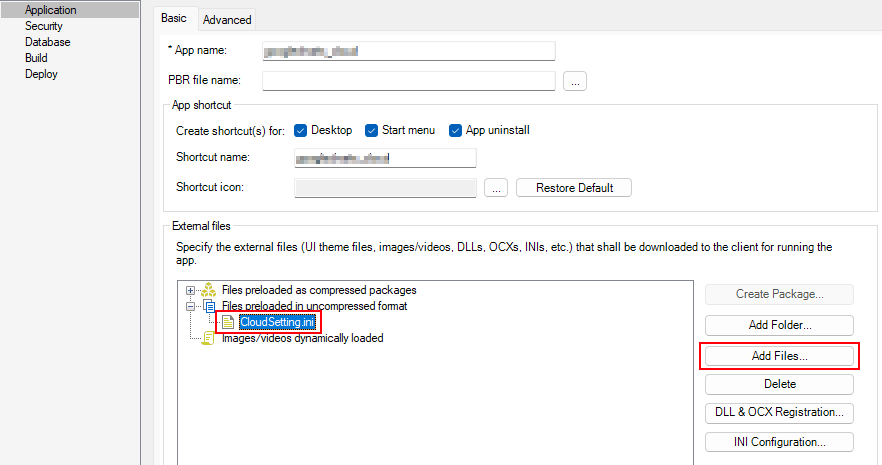
Step 1: Add the INI file CloudSetting.ini to the Files preloaded in uncompressed format section in the Application page.
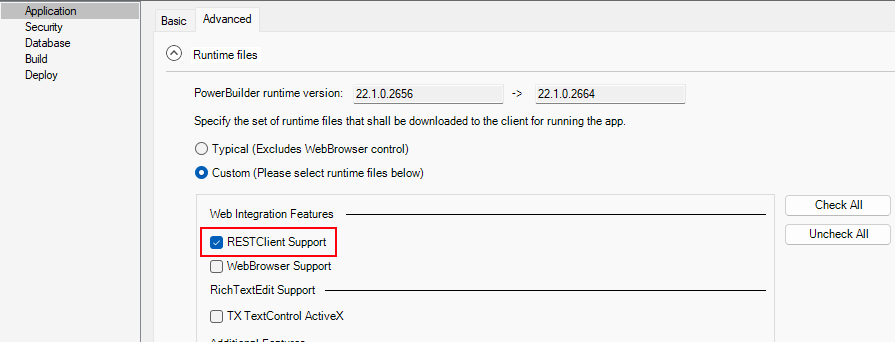
Step 2: Select RESTClient Support under the Runtime files group in the Application page > Advanced tab.
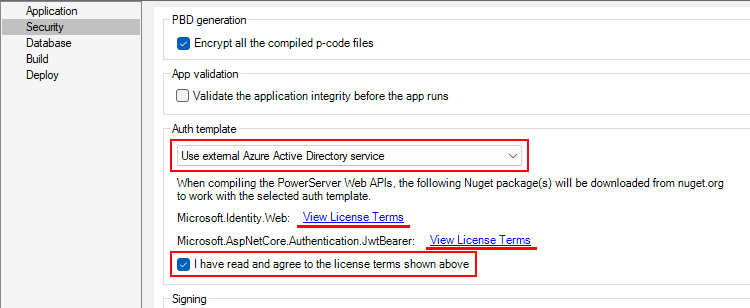
Step 3: Select Use external Azure Active Directory service in the Security page.
Select Use external Azure Active Directory service from the Auth Template list box, view the license terms, and select the "I have read and agree to the license..." option.
Step 4: Save the changes and then deploy the PowerServer project again (using the "Build & Deploy PowerServer Project" option).
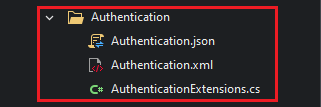
The PowerServer C# solution > UserExtensions project provides templates for configuring the address of the authentication server like Azure AD or Azure AD B2C.
-
Authentication.json contains the settings for enabling the authentication feature ("PowerServer:EnableAuthentication") and specifying the address of the authentication server ("AzureAd"). The PowerServer Web APIs will validate the token against the authentication server; and if validation is successful, data will be obtained from the database.
The "PowerServer:EnableAuthentication" setting is set to true by default. Setting it to false will turn off the authentication feature.
The "AzureAd" block is for specifying the information of Azure AD and Azure AD B2C. See the next section for more details.


