After the Web APIs is deployed to the IIS website, the IIS process manager will automatically launch the Web APIs. (Make sure you have installed ASP.NET Core Hosting Bundle to IIS.)
Although you don't need to start the Web APIs manually, it is recommended that you verify the Web APIs can start and work correctly.
Verify that the Web APIs can start and work normally.
-
(Optional) Verify that the Web APIs can be started locally (you directly login to the server machine and access the URL in the Web browser, for example, https://localhost:81/health-ui/).
-
Verify that the Web APIs can be started remotely (you login to a client machine which is different from the server, and access the URL in the Web browser, for example, https://172.16.100.83:81/health-ui/).
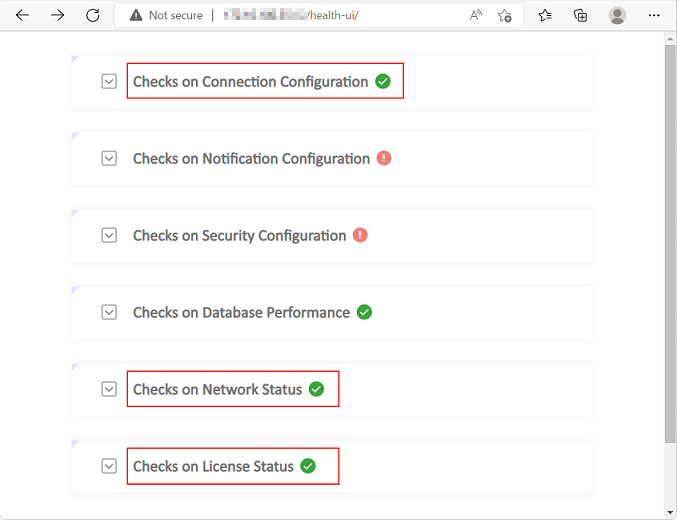
Make sure the page is displayed (as shown below), indicating the Web APIs can be started and accessed successfully. If the Web APIs can be accessed locally using "localhost" but NOT remotely using the IP address or domain name, you will need to check the firewall or network settings of the server machine.
If any error displays, refer to Troubleshooting Guide > Server for more information.
-
Make sure a green check icon (
 ) is displayed for "Checks on Connection
Configuration", "Checks on Network Status", and "Checks on License
Status".
If you see an exclamation mark icon (
 ), you should expand to view details. For
example, you may see the following information if there is a
database connection problem. Follow the suggestions part to try to
resolve the problem.


