Recommendation: It is recommended that you launch PowerBuilder IDE as an administrator; otherwise PowerBuilder IDE may not have full permissions to read/write the folder under the local web server.
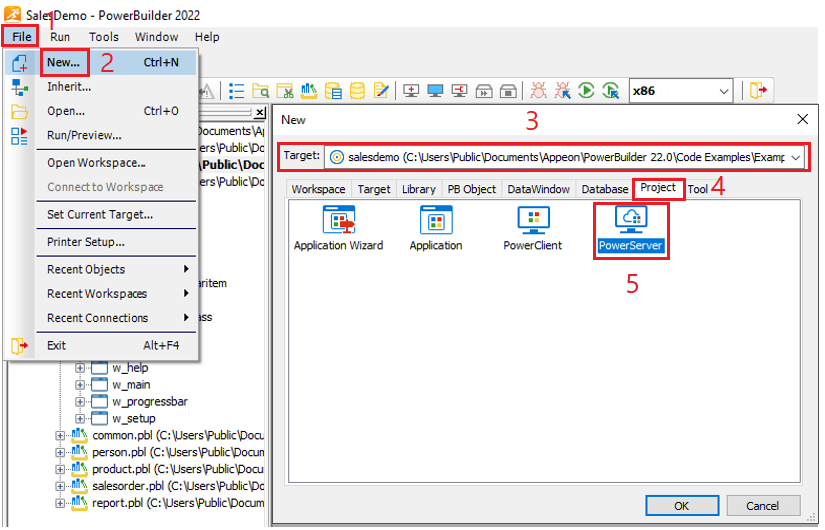
To create a PowerServer project:
-
Select File>New or click the New button in the PowerBar to open the New dialog box.
-
Select the target in which you want to create the project from the Target drop-down list.
-
Select the Project tab.
-
Select the PowerServer project type and click OK.
The Project painter for PowerServer opens so that you can specify the various properties of your application.
-
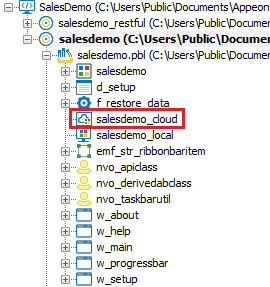
When you have finished defining the project object, save the object by selecting File>Save from the menu bar or by clicking the Save button (
 ) in the toolbar. PowerBuilder saves the
project as an independent object in the specified library. Like
other objects, projects are displayed in the System Tree and the
Library painter.
) in the toolbar. PowerBuilder saves the
project as an independent object in the specified library. Like
other objects, projects are displayed in the System Tree and the
Library painter.