One easy way to create a test plan is to use the JMeter HTTP(S) Test Script Recorder. With Recorder, you can just browse on the application and do the actions and everything (including HTTP requests) will get recorded automatically.
This section provides step-by-step instructions for recording scripts on the Sales Demo application.
Double check that PowerServer Web APIs is running before you proceed with the following sections.
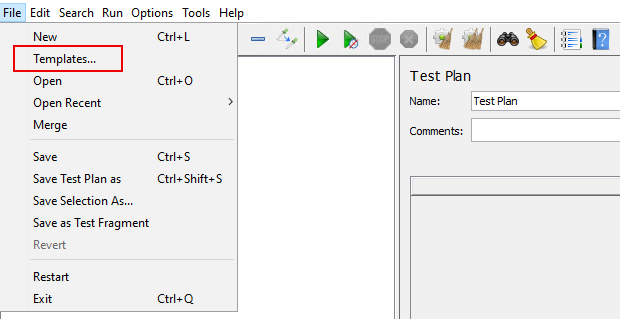
Step 1: Select Templates from the File menu.
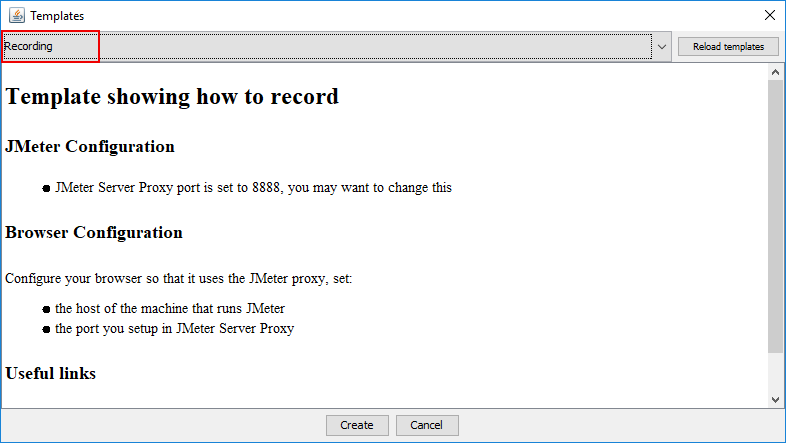
Step 2: Select Recording and then click Create.
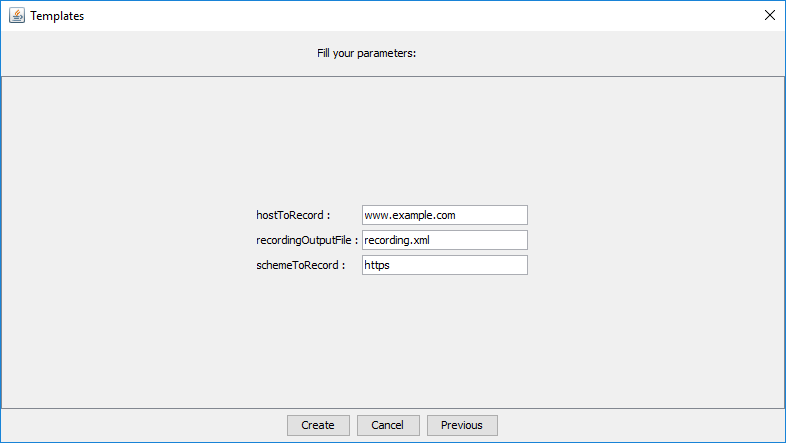
Step 3: Use the default values or modify them according to your needs, and then click Create.
A complete Test Plan is generated successfully.
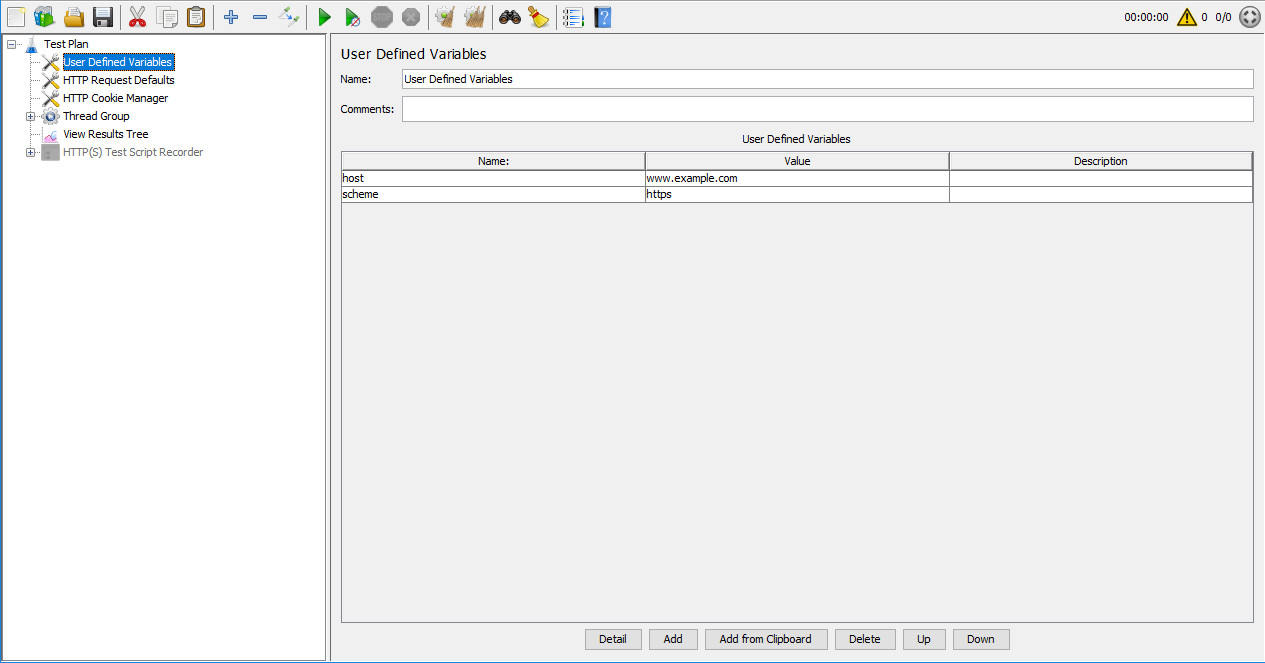
In Test Plan, the HTTP(S) Test Script Recorder is disabled by default.
Right click on it and then select Enable to enable it.
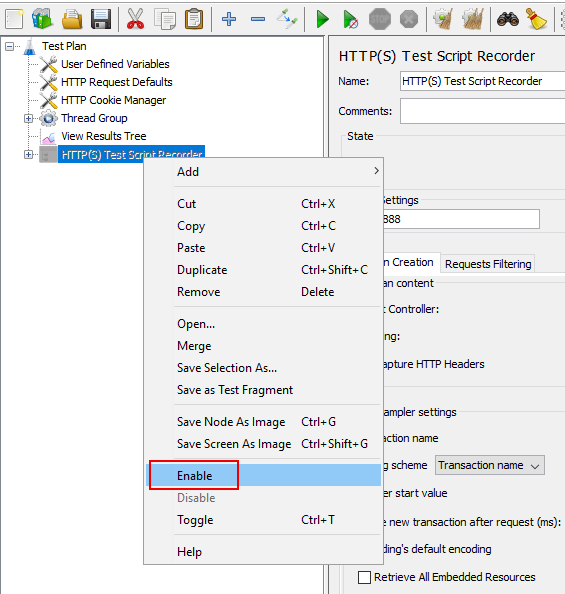
In the HTTP(S) Test Script Recorder window, specify the following settings:
-
Use the default port number 8888 or input a new one. Make sure the port is not occupied by any other program. Make sure the browser proxy is set to the same port later.
-
Modify Target Controller to Test Plan > Thread Group.
-
Modify Naming scheme to Prefix.

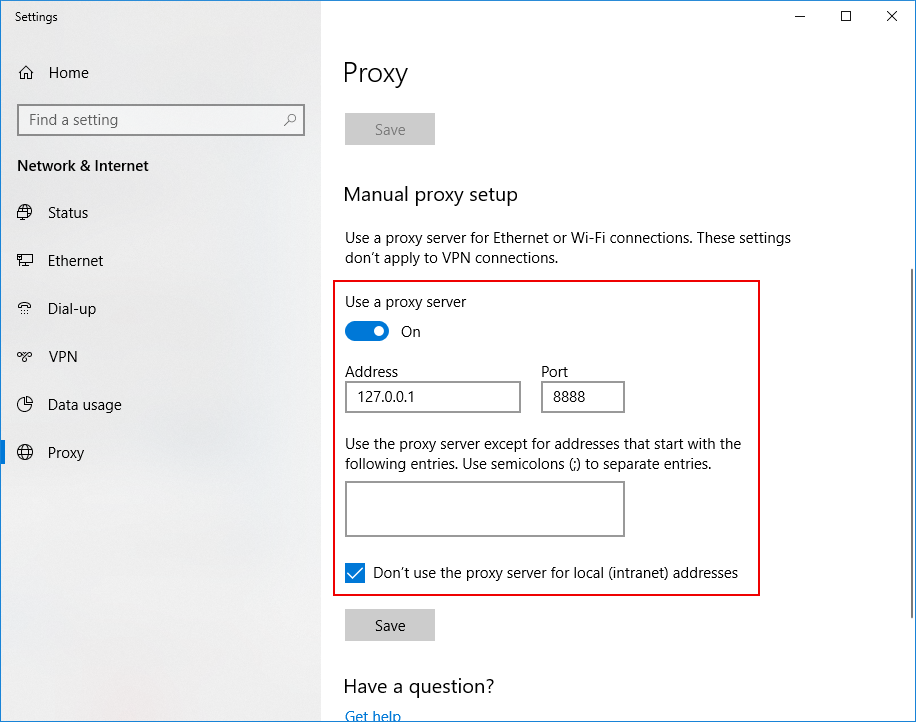
The PowerBuilder installable cloud app supports the Windows system proxy (not browser proxy), therefore you must configure your Windows system proxy to use the JMeter Proxy. You can either configure the proxy in the Windows system or in Internet Explorer (whose proxy settings will be synchronized with the Windows system). Notice that you should not configure the proxy in Firefox which provides the browser-level proxy.
Step 1: Open the Windows proxy settings (on Windows 10, click Settings > Network & Internet > Proxy, or simply input "proxy" in the Windows search box).
Step 2: Enter 127.0.0.1 and port 8888 (and make sure the Web API URL is not in the exception list).
Step 1: Return to HTTP(S) Test Script Recorder, and click Start.

This will start the JMeter proxy server which is used to intercept the browser requests.
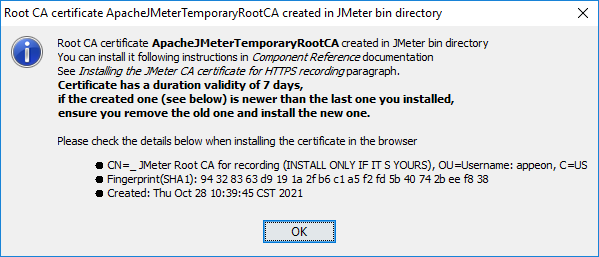
Step 2: Click OK when prompted to install the certificate as shown below.
Step 3: Keep the "Recorder: Transactions Control" window open during recording.

Step 4: Now run the Sales Demo installable cloud app in the Web browser. (Make sure PowerServer Web APIs started before JMeter started. See Running PowerServer Web APIs and then JMeter recorder and Fiddler for why.)
Step 5: Click a few buttons such as Address, Customer etc. in the window and then exit from the application. These HTTP requests will be automatically captured by the script recorder.
Step 6: Close the Web browser and return to the JMeter window.
Step 7: Click the Stop button in the "Recorder: Transactions Control" window to stop the recording.
After you finished recording the scripts, you can turn off the Windows system proxy or change it back to whatever it was before.
The recorded HTTP requests will be listed in the tree on the left panel. You can manually remove any HTTP requests that are not needed.
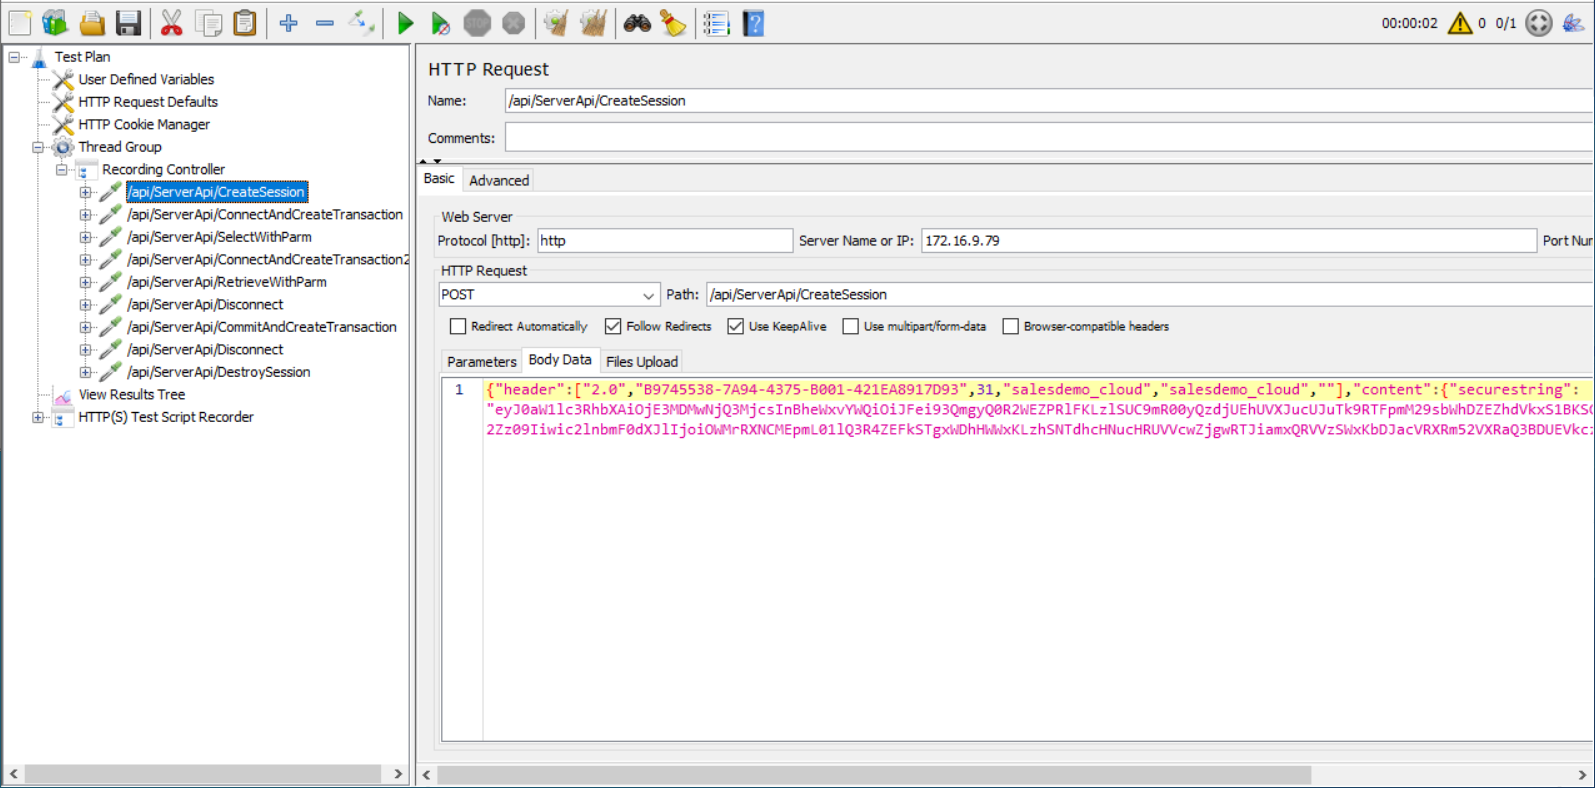
To use the dynamic values of the access token, session ID, transaction ID etc. that are returned from the server, you need to correlate them in the scripts. See the section called “Parameterization and correlation” for detailed instructions.


