In this tutorial, we will learn how to set up Nginx on Linux and use it as the reverse proxy server to redirect requests to the PowerServer Web APIs running on the Kestrel server.
In this tutorial, we will configure and use the following server environment and URLs. Make sure the port number is not occupied by any other program. For how to verify if a port number is occupied, follow the instructions in Choosing an appropriate port number.
Step 1: Set up the reverse proxy server with the following OS and software (install the software in the order listed).
-
CentOS 7 (64-bit)
-
Nginx
The section Installing Nginx has detailed installation instructions.
Step 2: Configure the CentOS user account: you can either use the root account or create a new account with administrative privileges.
Step 3: Set up a firewall on the server and make sure the firewall allows the port (80 and 8080 in this tutorial or any port number you choose) to go through.
Step 4: Make sure the server can connect to Internet during the installation of Nginx.
This section is to configure Nginx as a reverse proxy server in a Linux machine.
Step 1: Go to the /etc/nginx/ folder and open the nginx.conf file in a text editor.
Step 2: Locate the "server" block and add another "server" block as shown below.
This is to configure Nginx as a reverse proxy server which will redirect requests made to the URL: https://172.16.100.51:8080/ to the PowerServer Web APIs running on Kestrel at https://172.16.100.35:6000/.
    server {
        listen  8080;
        location / {
           proxy_set_header Host $http_host;
           proxy_pass  https://172.16.100.35:6000;
        }
    }
Tip: In CentOS, you can execute the command "netstat -anp | grep 8080" to check if the port number is occupied by any other program.
Step 3: Run the following command to add port 8080 to "http_port_t":
$ sudo semanage port -a -t http_port_t -p tcp 8080
Note
If the port is not properly added, you may see the following error when Nginx starts:
and may have the following error in the \var\log\nginx\error.log file.
2021/06/09 05:26:29 [emerg] 4107#0: bind() to 0.0.0.0:8080 failed (13: Permission denied)
Step 4: If you have set up a firewall on the server, run the following command to permanently enable port 8080:
$ sudo firewall-cmd --permanent --zone=public --add-port=8080/tcp
and the following command to reload the firewall service:
$ sudo firewall-cmd --reload
Note
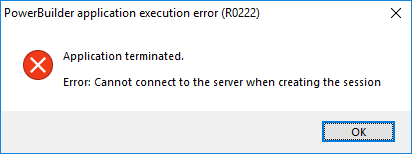
If the firewall blocks the port number, you will have the following error when running the application.
Step 5: Check if any syntax errors in the Nginx configuration file, and then restart Nginx for the changes to take effect.
$ sudo nginx -t
$ sudo systemctl restart nginx
Step 6: Verify that Nginx is running.
$ sudo systemctl status nginx
Step 7: Run the following command to allow Nginx to make outbound connections.
$ sudo setsebool -P httpd_can_network_connect 1
Note
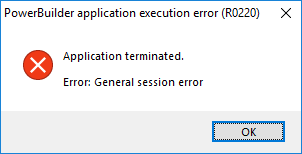
If Nginx is not allowed to make outbound connections, you may encounter the following error when running the application,
and may have the following errors in the \var\log\nginx\error.log file.
2021/06/09 02:38:02 [crit] 5364#0: *2 connect() to 172.16.100.35:6000 failed (13: Permission denied) while connecting to upstream, client: 172.16.100.35,
server: _, request: "POST /api/ServerApi/CreateSession HTTP/1.1", upstream: "http://172.16.100.35:6000/api/ServerApi/CreateSession", host: "172.16.100.51"
You must modify the Web API URL to point to the Nginx reverse proxy server.
Step 1: Go to the [appname] folder (for example, "salesdemo_cloud") on the web server and open the apprun.json file in a text editor.
The web server and the Nginx reverse proxy server can reside in the same or different machine. If the web server is an Nginx HTTP server, it can be the same or different server instance with the Nginx reverse proxy server.
Step 2: Set the value of Web API URL to the URL of the Nginx reverse proxy server, for example, https://172.16.100.51:8080 in this tutorial. It is highly recommended that you specify an HTTPS URL for the production environment.
All requests for the PowerServer Web APIs will be first made to https://172.16.100.51:8080 and then redirected by the Nginx reverse proxy server to the PowerServer Web APIs running on Kestrel server (for example, https://172.16.100.35:6000).
Now let's run the PowerServer Web APIs and verify that the requests are forwarded successfully from the reverse proxy server to the PowerServer Web APIs.
In order to view the detailed log information, let's directly start the PowerServer Web APIs as a console application in the local development environment, using either of the following methods:
-
Execute the "dotnet run --project PowerServer19\ServerAPIs\ServerAPIs.csproj" command, or
-
Open the PowerServer C# solution in the SnapDevelop IDE and then click the Run button.
Make sure the PowerServer Web APIs is running on the correct IP address and port number. For example, https://172.16.100.35:6000/ in this tutorial. You may modify the port number in the launchSettings.json file of the ServerAPIs project of the PowerServer C# solution when running in the development environment.
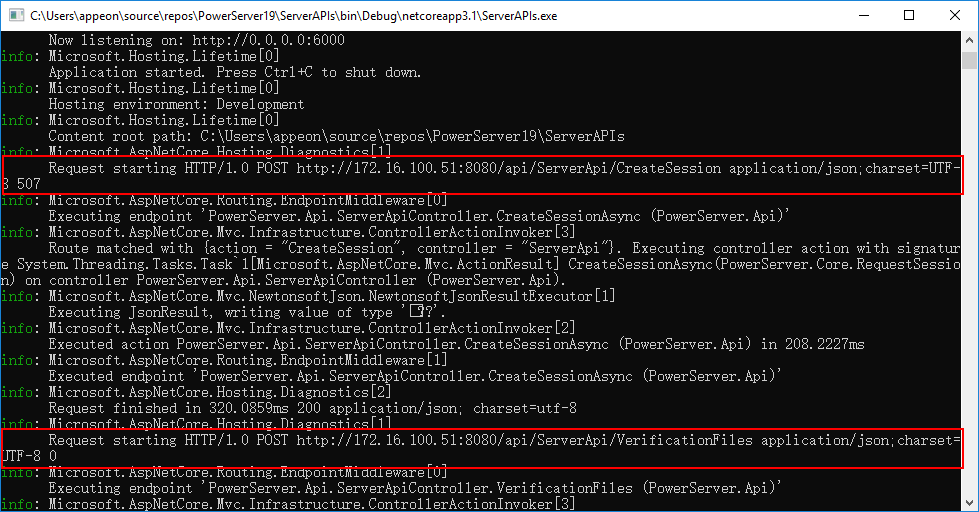
Run the application (https://172.16.100.72:80/salesdemo_cloud in this tutorial). You should be able to see from the console that the requests are going through successfully and the requests are originally made to the Nginx proxy server (https://172.16.100.51/8080 in this tutorial).
Once you have verified that the reverse proxy server works properly, you can publish and start the PowerServer Web APIs in a production environment, as described in Running Web APIs with Kestrel.


