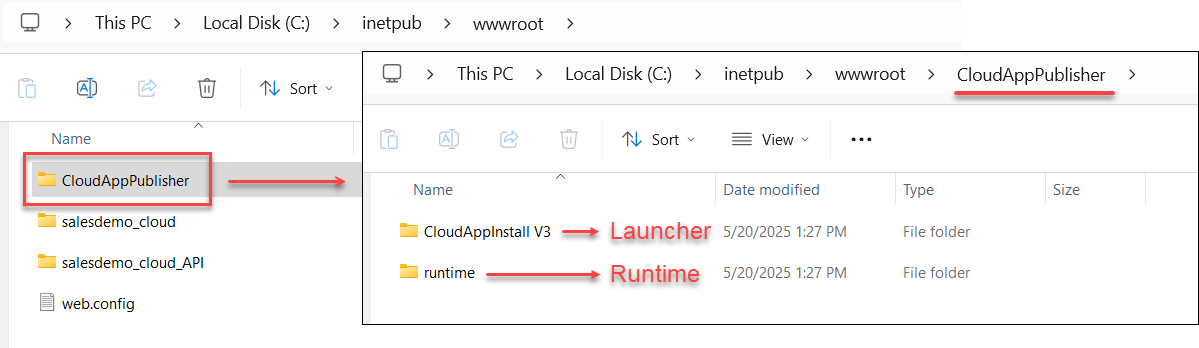
The cloud app launcher is uploaded to the server automatically when the PowerServer project is deployed or packaged/installed. The default launcher is uploaded by default; if you have customized a launcher, simply select that launcher profile (instead of the Default profile) on the Deploy > Advanced tab, and it will be uploaded automatically along with the project.
Manual upload is only required when you deploy to a folder (the launcher and runtime files are packaged to a zip file/installer/folder first and uploaded later); it is not required for a customized launcher. For details about creating or modifying a launcher profile, see Customize cloud app launcher.
Note
Apps deployed to the same server and directory will use the same app launcher and the same runtime files. There will be only one app launcher in the specified server and directory (although there can be multiple versions of runtime files). The app launcher will be overwritten without notice by the one uploaded later to the same server and directory.
Multiple installable cloud apps can download the same cloud app launcher. You can specify the download URL of the launcher installer in the client app.
To upload the cloud app launcher:
-
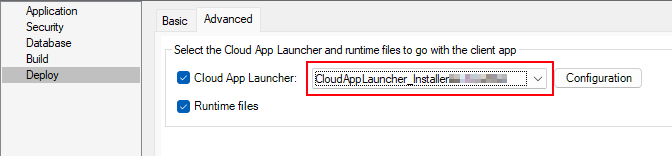
In the PowerServer project painter, select Deploy > Advanced tab.
The Cloud App Launcher, Default profile, and Runtime files are selected by default.
-
Select a launcher profile from the dropdown list. (Or click Configuration to create or modify a launcher profile. For more about the launcher profile, see the section Customize cloud app launcher.)
-
Deploy the project.
The cloud app launcher and the runtime files will be deployed or packaged along with the application files depending on the settings in Deploy > Basic tab.
-
When deploying to the local Kestrel server or a local or remote IIS server, the app launcher and runtime files will be directly uploaded to the server.
-
When deploying to the folder, the app launcher and runtime files will be packaged to a zip file/installer/folder first and then manually uploaded to the server later.
Note
When deploying to the server, if you receive the "Error code: 6" error, it means that you have no right to write in the server folder. The solution is to run PowerBuilder IDE as administrator.
The version of runtime files to be deployed/packaged is determined by the runtime version selected in the IDE > System Options dialog. Multiple versions of runtime files can co-exist on the same server and directory.
-