The examples in this section demonstrate how you might use the TreeView DataWindow.
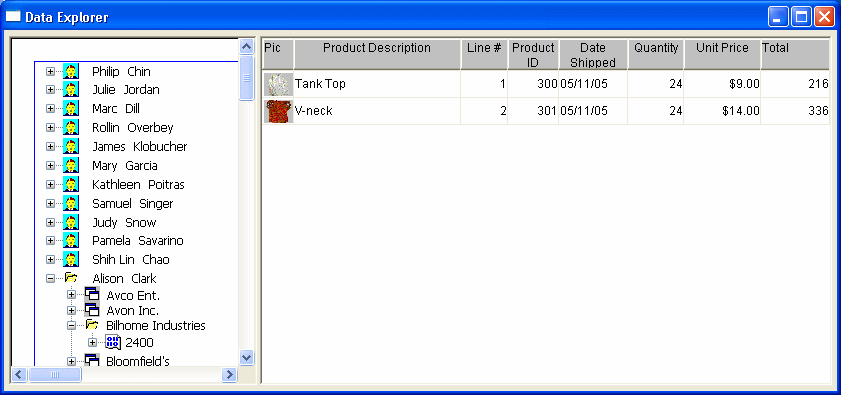
The Data Explorer uses a TreeView DataWindow to display sales-related data in a Windows Explorer-like interface and allows users to update the data.
The Data Linker uses a TreeView DataWindow on the left for data navigation, linked to four DataWindows on the right for updating the data. The Data Linker demonstrates populating a TreeView DataWindow with data and linking each TreeView level to a separate DataWindow.
Tables and database
Both examples use the employee, sales_order, sales_order_items, customer, and product tables in the PB Demo DB database.
TreeView DataWindows
The TreeView DataWindows are d_sales_report and d_sales_report2. Each TreeView DataWindow has three TreeView levels:
-
The first level (level 1) is the sales representative's name.
You create the first level using the TreeView DataWindow wizard.
-
The second level (level 2) is the name of the customer's company.
You create the second level using the Rows>Create TreeView Level menu item in the DataWindow painter.
-
The third level (level 3) is the sales order ID.
You also create the third level using the Rows>Create TreeView Level menu item in the DataWindow painter.
Clicking on each TreeView level displays details in a DataWindow on the right. For example, if you click a name in the TreeView DataWindow on the left, detailed customer data displays in the DataWindow on the right.

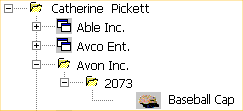
You can click on any TreeView level in the Data Explorer. If you click a company name in the TreeView DataWindow on the left (for example, Able Inc., under Catherine Pickett), order information displays on the right.

If you click an order ID in the TreeView DataWindow on the left (for example, order ID 2400, under Bilhome Industries, under Alison Clark), the customer order information displays on the right.
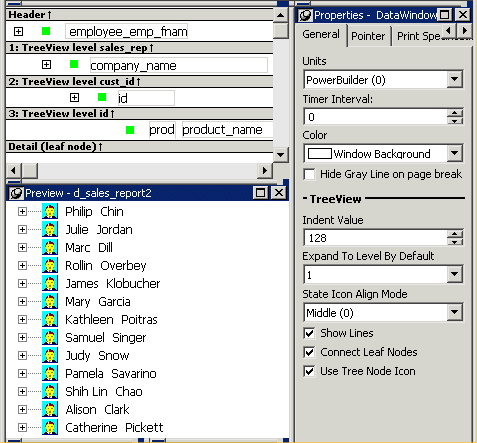
Data Explorer TreeView DataWindow
Here is the TreeView DataWindow used in the Data Explorer.

One TreeView DataWindow
The Data Explorer uses one TreeView DataWindow, but DataWindows that are not TreeView DataWindows also support the Data Explorer's functionality.
Data Explorer code
The code in the Clicked event uses GetBandAtPointer to determine which DataWindow to display. Clicking on some editable items in the detail DataWindow opens a window in which you can manipulate the data.
The PopMenu menu object has two menu items that call the CollapseAll and ExpandAll methods to collapse or expand all the nodes in the TreeView.
When you first run the Data Linker, no data displays on the right side of the window.
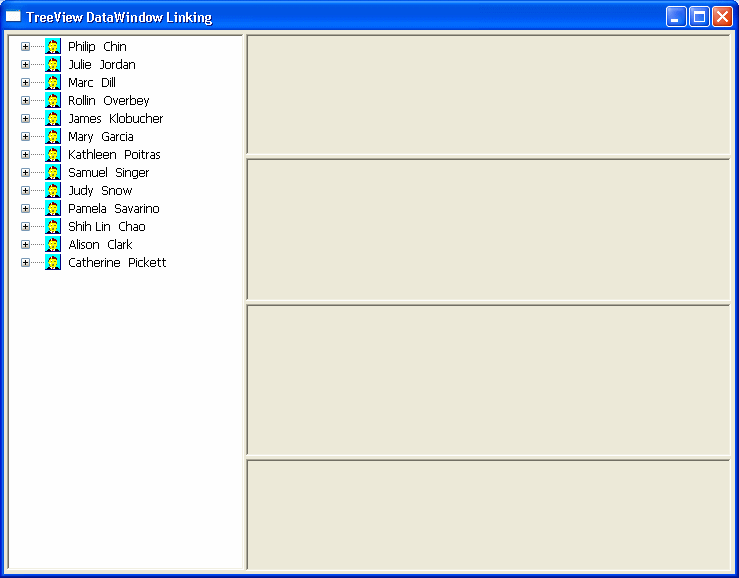
To use the Data Linker, you first expand an employee name and a company's data in the TreeView DataWindow.
Expanding the TreeView displays the company names, the orders for the company you select, and in the detail band, the icon and name for each item in the order.
You can click on each of the TreeView levels in order, and then click in the detail band to display the details in the four DataWindows on the right.
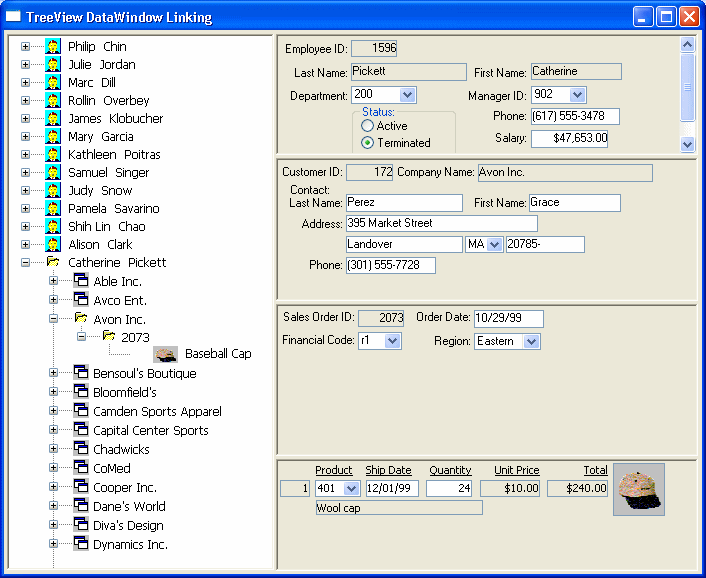
For example, if you click first on Catherine Pickett, then on Avon Inc., then on 2073, and last on Baseball Cap, the data in each of the related DataWindows displays on the right. You can also update the data in each of the DataWindows.
Data Linker TreeView DataWindow
Here is the TreeView DataWindow used in the Data Linker sample.
One TreeView DataWindow
The Data Linker uses one TreeView DataWindow, but other DataWindows that are not TreeView DataWindows also support the Data Linker's functionality.
Data Linker code
The code in the Clicked event uses GetBandAtPointer to determine which DataWindow to display.
