When you include a pipeline in an application and run it, the Pipeline window displays. As the window is displaying, messages are written to the Pipeline Log box to indicate connection to the source and destination databases, when these connections are occurring, and the elapsed time.
You can print the log or save the log to any report format. Users may need to send the log to you to use for debugging a pipeline. You can empty the log at any time by clicking the Reset Log button.
A pipeline in an application executes when you execute it manually or when you set a delayed execution mode to automatically execute the pipeline.
The execution mode (Manual by default) shows in the Execution Mode box. If you set a delayed execution mode, the time settings and a countdown clock display in the When box.
Manual execution
You can manually execute a pipeline anytime, even if you have set a delayed execution mode.
Delayed execution
You can specify delayed automatic execution of the pipeline. This setting remains in effect until you close the Pipeline window.
To delay the execution of the pipeline:
-
Select Actions>Delayed Execution from the menu bar.
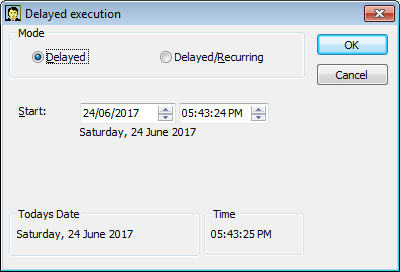
The Delayed Execution dialog box displays.
-
Select the Delayed radio button if it is not already selected:
-
In the Start boxes, specify the execution date and time.
The day, month, numerical day, and year for the date you specify display under the Start boxes. You should verify that this date is the date you want, because the date is based on the operating system's short date setting. For example, a date of 04/12/03 could mean April 12, 2003, or December 3, 2004.
-
Click OK.
The pipeline will execute at the specified date and time.
Delayed/Recurring execution
You can specify delayed and recurring automatic execution of the pipeline. This setting remains in effect until you close the Pipeline window.
To delay and repeat the execution of the pipeline at specified intervals:
-
Select Actions>Delayed Execution from the menu bar.
The Delayed Execution dialog box displays.
-
Select the Delayed/Recurring radio button.
-
In the Start boxes, specify the execution date and time.
The day, month, numerical day, and year for the date you specify display under the Start boxes.
-
In the Every boxes, specify the time delay for subsequent executions of the pipeline.
-
Click OK.
The pipeline will execute at the specified start time and then execute repeatedly.
If execution errors occur
If execution errors occur, the errors display in the Pipeline Errors box. You can print the errors or save the errors to any report format. You can sometimes correct errors in the Pipeline Errors box.
Users of the application usually should not repair pipeline execution errors. Users should contact you if execution errors occur and send the error log to you for debugging of the pipeline. Usually you should modify the pipeline object in InfoMaker to fix errors and redeploy the application.
At times, you may want users to fix execution errors by modifying the pipeline definition from the application. Advanced users of the application can modify the application's initialization file to allow them to change the pipeline object's definition from the application. You can tell users how to do this if needed.
For information about adding a [Pipe] section to the initialization file, see Modifying the pipeline object's definition.
Repairing execution errors
When a pipeline executes and has execution errors, the error messages display in the Pipeline Errors box in the workspace and instructions for repairing the errors display in a message box.
To repair pipeline errors:
-
In the Pipeline Errors box, look at the Error Message column to identify errors.
-
Change the data values for the appropriate columns in the error rows.
You can extend the column borders to resize the column to the width needed to see error messages and column data.
-
Click the Repair button to execute the pipeline.
If errors have been corrected, the pipeline executes and the Pipeline Errors box clears.
By default, you can execute a pipeline in an application, but you cannot modify the pipeline object's definition.
If you are deploying your application to advanced users, however, you may want to give users the ability to modify the pipeline object from the application. Allowing users to modify pipelines means that you do not have to modify the pipeline object in InfoMaker, recreate the application, and deploy it immediately. However, since the pipeline object definition is not saved when you modify a pipeline in an application, you should redeploy the application later.
What you can allow users to modify
To modify a pipeline definition, either you or your users must add a new section to the application's initialization file. Users can change the type of pipeline operation and the Commit and Max Errors values. Depending on the quality of the network connection (particularly if users are connecting by telephone from laptops), lowering the Commit and Max Errors values could result in more efficient committing of rows to the database. For example, committing all rows when the database connection is through a 28.8 Kb/sec modem could take a long time and your phone connection could fail. It may be better to change the Commit value to 10.
To enable users to modify the pipeline's definition:
-
Open the application's initialization file and create a Pipe section by adding the following line:
[Pipe]
-
Include these lines in the Pipe section:
[Pipe]
AllowTypeChange = 1
AllowRunTimeChange = 1
This keyword
Allows the user to change the
AllowTypeChange
Type of pipeline operation: Create, Refresh, Replace, Append, and Update
AllowRunTimeChange
Commit value, Max Errors value, and whether to pipe extended attributes
Omitting lines in the [Pipe] section
If you do not want users to change the pipeline type, you can omit the AllowTypeChange line in the [Pipe] section. You cannot omit the AllowRunTimeChange line.
-
Save the initialization file.
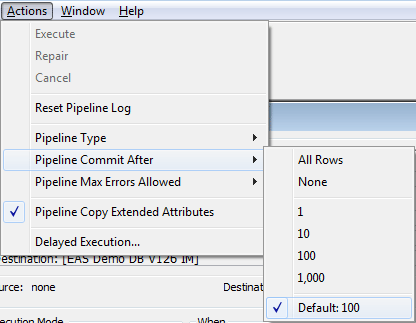
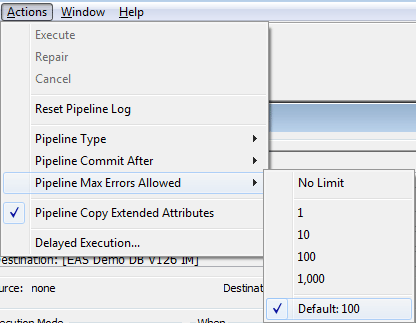
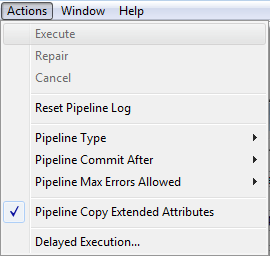
Now when you select the Actions menu in a pipeline, you see new menu items that enable you to change the pipeline type, the Commit value, the Max Errors value, and whether the pipeline copies extended attributes:
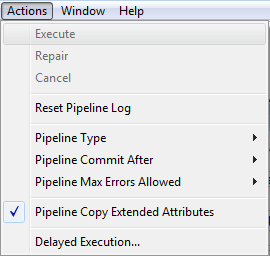
Modifying the pipeline definition
After a user's application initialization file has been modified to include the [Pipe] section, the user can use items on the Actions menu to modify the pipeline definition.
For complete information about pipeline types, the Commit value, and the Max Errors value, see Working with Data Pipelines
To modify the pipeline type:
-
Select Actions>Pipeline Type from the menu bar.
A menu of pipeline types displays.
-
Select the pipeline type:
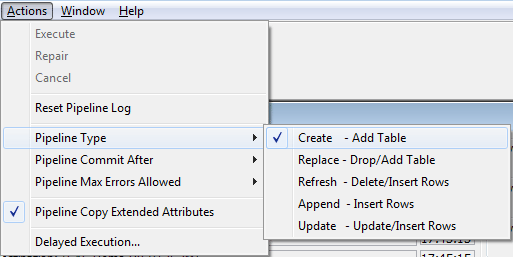
To modify the Commit value:
-
Select Actions>Pipeline Commit After from the menu bar.
A menu of Commit values displays.
-
Select the Commit value:
