After the workspace/solution is added to the Git source control, you can have various operations related to Git branches, such as creating new branches, switching between branches, merging branches, rebasing branches etc.
-
Right-click the workspace/solution and select Git Create Branch from the pop-up menu.
-
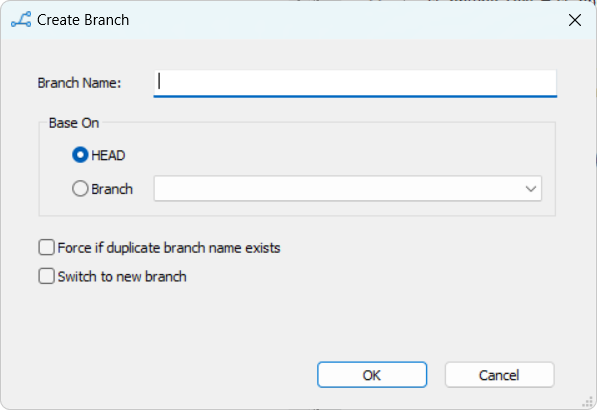
In the Create Branch dialog, input the branch name you want to create, select whether to base the new branch on HEAD or a chosen branch, and click OK.
To overwrite the branch if a branch with the same name already exists, select the Force if duplicate branch name exists option before clicking OK.
To switch to this branch after creation, select the Switch to new branch option before clicking OK. This will automatically change your working directory to the newly created branch, allowing you to start making changes right away without needing to switch branches manually later.
The branch will be created in your local repository. You can use the Git Push menu to commit the branch to the remote repository on the server, but note that the PBL file(s) in the workspace will not be uploaded to the server.
-
Right-click the workspace/solution and select Git Switch Branch from the pop-up menu.
-
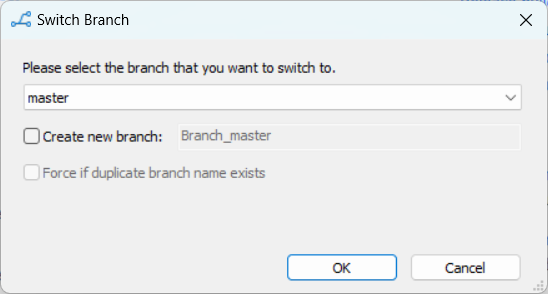
In the Switch Branch dialog, select the branch you want to switch to and click OK.
If you switch to a remote branch (in most cases the one starting with "origin/"), you will not be able to commit changes to the remote branch.
If you want to create a new branch while switching, you can select the Create new branch option in the dialog. This allows you to specify a name for the new branch and choose whether to base it on the current branch or another existing branch. Once you click OK, the new branch will be created, and your working directory will automatically switch to this new branch. If you encounter a situation where a branch with the same name already exists, you can select the Force if duplicate branch name exists option. This will overwrite the existing branch with the new one you are trying to create, ensuring you can proceed without conflicts.
If you get a workspace/solution which was added to Git using a third-party tool such as TortoiseGit, you should commit the entire workspace/solution from the PowerBuilder IDE to Git immediately after you get it; otherwise the object or changes may be lost after you switch the branch.
Once you have completed work on a feature branch and are ready to integrate those changes, follow these steps to merge branches:
-
Switch to the branch you want to merge changes into (e.g.
master). -
Ensure your target branch is up to date with the remote repository (by right-clicking the workspace/solution and select Git Pull from the pop-up menu).
-
Now you can merge the feature branch into the target branch. Right-click the workspace/solution and select Git Merge from the pop-up menu.
-
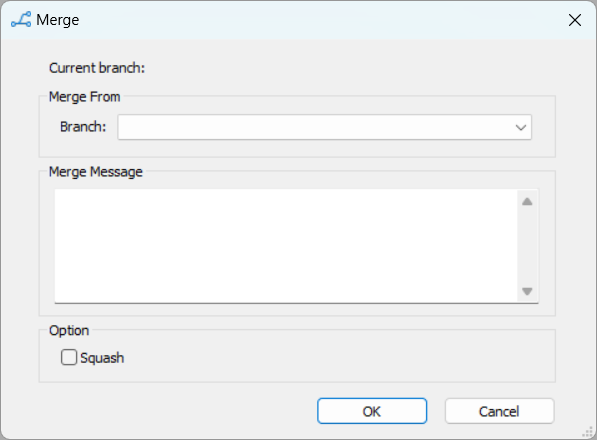
In the dialog box that appears, choose the feature branch (local or remote) you want to merge.
You can input a message summarizing the changes being merged in the Merge message text field.
You can also select the Squash option to combine all commits from the feature branch into a single commit on the target branch. This can keep the commit history clean and focused, as it merges multiple changes into one cohesive commit.
-
Resolve conflicts (if necessary). If there are conflicts, the affected objects will be marked with a "!" sign (
 ) in the library tree. You will need to
manually resolve these conflicts by right-clicking the
conflicted object and selecting Edit
Conflicts.
) in the library tree. You will need to
manually resolve these conflicts by right-clicking the
conflicted object and selecting Edit
Conflicts.
-
After resolving any conflicts, commit the changes by right-clicking the target branch and selecting Git Commit.
-
Finally, push the merged changes to the server repository by right-clicking the target branch and selecting Git Push from the pop-up menu.
You can fetch the latest commits from the remote repository
without changing your current working branch. This updates the
remote tracking branches (for example,
origin/master or
origin/branch1) to reflect the latest state on
the server.
-
Right-click the workspace/solution and select Git Fetch from the pop-up menu.
-
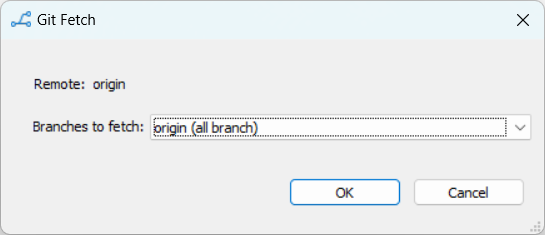
In the Git Fetch dialog box, the name of the remote repository will be shown, for example,
origin. -
The Branches to fetch list will default to origin (all branches) which means all branches from that remote repository will be fetched. This will update all remote tracking branches under
origin/. -
Click to start fetching. The fetched commits will be shown in the Output window.
Note: Fetching only updates the remote tracking branches. It does not change your current local branch. To apply the remote updates to your current branch, use the rebase or merge??? operation.
You can rebase your current branch to replay its commits on
top of another branch, such as the latest
origin/master. This helps keep your branch up to
date with the latest code base while maintaining a linear
history.
-
Right-click the workspace/solution and select Git Rebase from the pop-up menu.
-
In the Git Rebase dialog box, set the following options:
-
Current branch: the branch you want to update (for example,
branch1). -
Rebase onto: the branch you want to base your work on (for example,
origin/master).
Suppose you have been developing on
branch1, andmasterhas received new updates; you now want to rebase your work on top of the latestorigin/master. You can configure the dialog as below: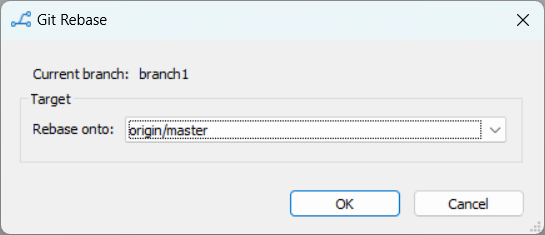
-
-
Click to start rebasing. PowerBuilder will replay your local commits on top of the selected base branch.
