You use the Script editor to code functions and events, define your own functions and events, and declare variables and external functions.
Script editor is part of the default layout in the Application, Window, User Object, Menu, and Function painters. In Application, Window, and User Object painters, the initial layout has one Script editor that displays the default event script for the object and a second Script editor set up for declaring instance variables. You can open as many Script editors as you need, or perform all coding tasks in a single Script editor.
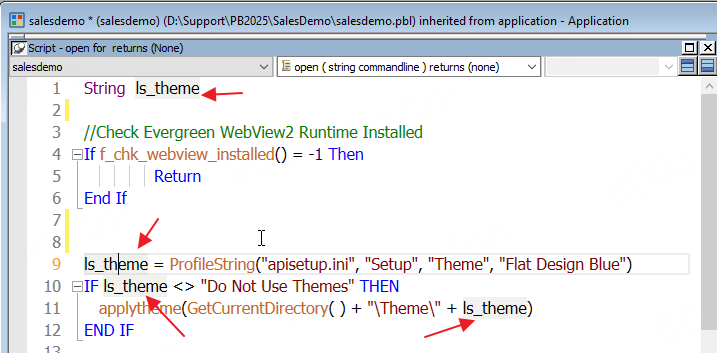
Title bar
The Script editor's title bar (①) shows the name and return type of the current event or function, as well as the name of the current control for events and the argument list for functions. If the Script editor is being used to declare variables or functions, the title bar shows the type of declaration.
Status bar
The status bar (②) displays at the bottom of the editor.
A zooming slider displays at the bottom left corner to allow users to adjust the text size, and line and column numbers displays at the bottom right corner.
Navigation drop-down lists
There are three drop-down lists (③) at the top of the Script editor, to help you navigate the code easily:
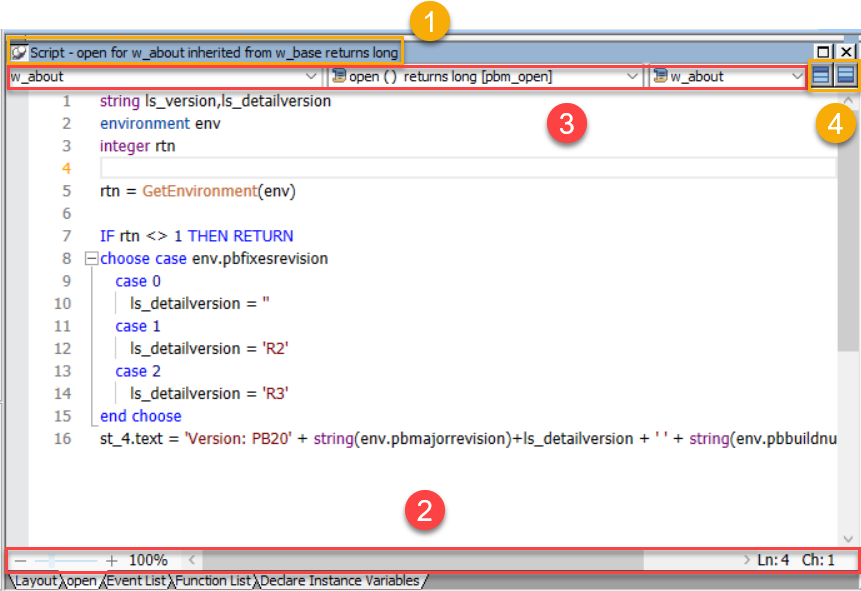
In the first list, you can select the object, control, or menu item for which you want to write a script. You can also select Functions to edit function scripts or Declare to declare variables and external functions.
The second list lets you select the event or function you want to edit or the kind of declaration you want to make. A script icon next to an event name indicates there is a script for that event, and the icon's appearance tells you more about the script:
|
If there is a script |
The script icon displays |
|---|---|
|
For the current object or control |
With text ( |
|
In an ancestor object or control only |
In color ( |
|
In an ancestor as well as in the object or control you are working with |
Half in color ( |


The same script icons display in the Event List view.
The third list is available in descendant objects. It lists the current object and all its ancestors so that you can view scripts in the ancestor objects.
Toggle buttons for Prototype and Error windows
A Prototype window displays at the top of the Script editor when you define a new function or event. An Error window displays at the bottom of the view when there are compilation errors. You can toggle the display of these windows with the two toggle buttons to the right of the lists (④).
For more information about the Prototype window, see Working with User-Defined Functions and Working with User Events.
Line numbers
Line numbers are enabled by default and displayed in the left margin of the editor. To disable line numbers, go to Design menu > Options menu > Script tab page, and disable the Display line numbers option.
Syntax coloring
Different code elements such as function name, variable name, class name etc. appear in different colors. You can enable/disable this feature and configure the colors in the Design menu > Options menu > Coloring tab page.
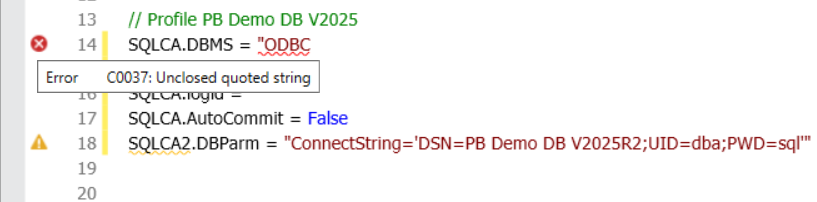
Real-time syntax checking
Syntax can be checked at real-time during coding. The syntax error and warning (if any) are indicated by icons at the beginning of the corresponding code lines. When you hover the cursor over an icon, the detailed message for the error or warning is displayed.
In the Design menu > Options menu > Script tab page, when the Enable real-time syntax checking option is selected, syntax is checked immediately when a new line is entered or when the cursor pauses for two seconds while editing code; when this option is not selected, syntax is checked only when the code is saved or compiled.
Highlight current line
The current line where the cursor is located is highlighted with a grey box, and the line number displays in a different color. This feature can be turned off in the Design menu > Options menu > Script tab page.
When you click on a code element (such as keyword, variable name, method name, etc.), all instances of that element are highlighted.
Move selected lines up/down
You can place the cursor in a line or select multiple lines, and then press Alt + Up/Down Arrow to move the line(s) without cutting and pasting.
Cursor navigation history
You can navigate backwards and forwards to previous caret positions using the toolbar buttons.
Bracket matching
Placing the cursor to the left of an open bracket, or to the right of a closing bracket, will automatically highlight the bracket pair. This allows you to find out which brackets are misplaced or missing.

Change tracking
Changes you have made since the file was opened are indicated by color marker in the left margin of the editor. The changes are indicated by yellow marker before saved; and indicated by green marker after saved.
Rectangular selection
You can select a rectangular area of code or text by holding the Alt key and dragging the mouse over the selection (or pressing Alt+Shift+<arrow key>). The selection includes all characters within the rectangle defined by the first character and the last character in the selection. Anything typed or pasted into the selected area is inserted at the same point on each line.
Multi-cursor editing
You can edit the text at multiple locations (multi-cursors) at the same time. To do this, hold down the Ctrl key and use the mouse to click multiple locations to insert the cursor or select multiple text locations and edit the text.
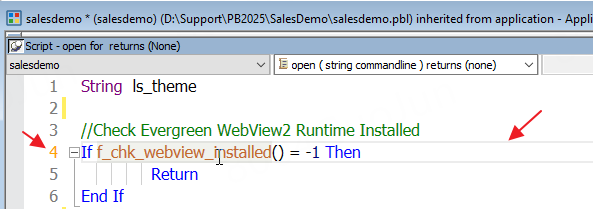
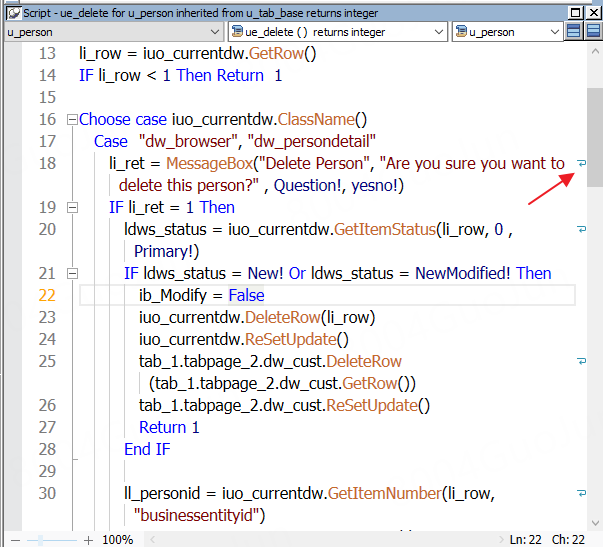
Outlining & folding
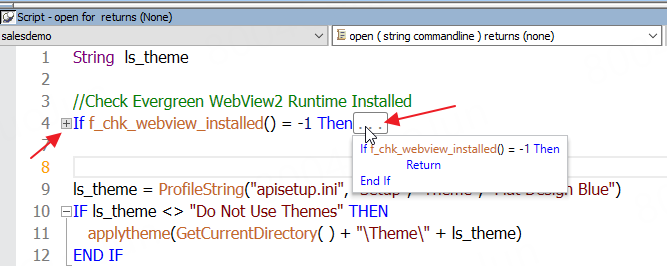
Syntax statements like FOR...NEXT, IF...ENDIF, CHOOSE CASE, DO...LOOP, TRY...CATCH etc. and /*...*/ can be displayed in the outlining & folding view.
Click the minus symbol in front of the statement to fold the code. When the syntax is folded into one line, an ellipse (...) symbol will display at the end of the line; when you hover the mouse over symbol, you can view the folded code.
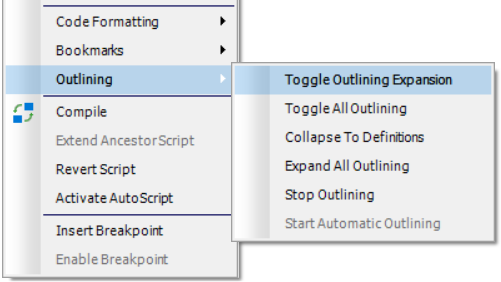
You can also right click in the editor and use the following popup menus to control code outlining in the editor:
-
Toggle Outlining Expansion -- Expands or collapses the current code block. If the block is currently collapsed, this command expands it; if expanded, it collapses it.
-
Toggle All Outlining -- Toggles outlining for all code blocks in the editor - expanding all if they are collapsed, or collapsing all if they are expanded.
-
Collapse to Definitions -- Collapses all code regions so that only the top-level definitions (such as functions, events, or classes) remain visible. This helps focus on the overall code structure.
-
Expand All Outlining -- Expands all collapsed code regions, showing the entire source code.
-
Stop Outlining -- Turns off the outlining feature and removes all collapsible regions from the current editor view.
-
Start Automatic Outlining -- Turns on the outlining feature.
Custom collapsible code blocks
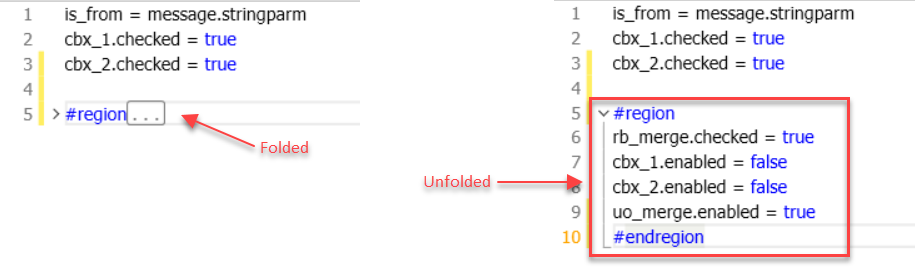
You can input specific markers #region and #endregion in your code to manually create a collapsible and expandable code section. Lines between these markers can be folded as a block. These markers are automatically ignored during compilation and do not affect the program's execution.
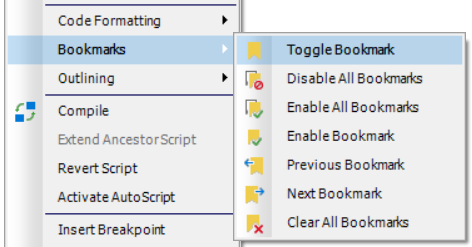
Bookmarks
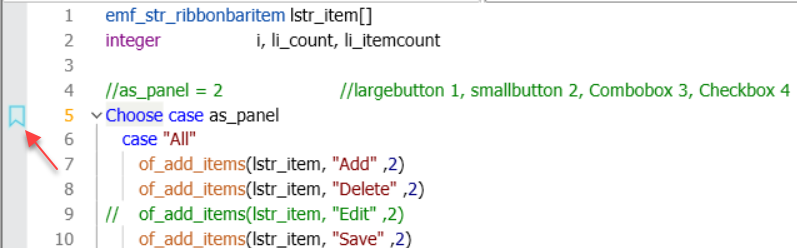
Bookmarks allow developers to mark specific lines of code so they can quickly navigate between important sections within a source file.
You can right click the gray bar at the beginning of a line to add or remove a bookmark for that line.
You can also right click in the editor and use the following popup menus to set, remove, enable, disable, or jump to bookmarks without scrolling through the entire file.
Rename symbol
You can quickly rename identifiers (such as variables, functions, or objects) within the current document, by right-clicking a symbol in the editor and then selecting Rename. Note that Rename is limited to the current document and does not affect references in other scripts or objects.

Word wrapping
Text can be automatically wrapped and displayed on the next line when it exceeds the editor's width, and a wrap symbol appears after the line breaks. This feature can be turned off in the Design menu > Options menu > Script tab page.
View white space
White spaces can be set to visible in code. Spaces will display as dots and tabs will display as arrows. This feature can be turned on in the Design menu > Options menu > Script tab page.
Enable virtual space
You can place the caret beyond the end of a line for better code alignment. This feature can be turned off in the Design menu > Options menu > Script tab page.
Horizontal whitespace removal
You can remove extra or unnecessary spaces and tabs that appear between elements in a single line of code, via the right-click menu: Code Formatting > Delete Horizontal White Space.
Line indentation
You can enable/disable auto indenting inside statements such as IF, FOR etc. in the Design menu > Options menu > Script tab page.
You can also increases or decreases line indentation via the right-click menu: Code Formatting > Increase Line Indent or Decrease Line Indent.
Case conversion
You can convert the case of selected text via the right-click menu: Code Formatting > Make Uppercase or Make Lowercase.
Comments
You can add comment characters to the selected line, or to the current line if no characters are selected, or remove comment characters, via the right-click menu: Code Formatting > Comment Selection or Uncomment Selection.
Format document/selection
You can automatically format the entire source file or only the selected code block based on predefined indentation, alignment, spacing, and line break rules, making the code cleaner and more readable. This feature can be accessed via right-click menu: Code Formatting > Format Document or Format Selection.
Code auto completion
Code auto completion offers all possible options alphabetically as you type the trigger characters in the script editor, and highlights the option that best matches the trigger characters. You can choose to display one or more types of code via the icons at the bottom of the list, such as function, event, variable, code snippet, class, keyword etc. For more information, refer to Using AutoScript.
Parameter info help
When you you type a method name followed by the parameter bracket "(", you can directly activate the parameter information help for that method. For more information, refer to Using Parameter Info.
QuickInfo help
When you hover over a variable, method etc. with the mouse pointer, the detailed information for that item will be displayed. For more information, refer to Using QuickInfo.
Add breakpoints
When you click the gray bar at the beginning of a line, a red circle will appear indicating a breakpoint is added for that line. And you can remove the breakpoint by clicking on the red circle. For more information, refer to Setting breakpoints.
Note
Mosts of the above features are also available in the source editor opened from the Edit Source pop-up menu in the system tree.
