Appeon DataWindows menu have the following features: Find, Find Next, Find Previous, Sort, Filter, Print, and Save As File (Obsolete). Perform the following steps to use the menu in the Web DataWindows.
The user can search for data using the Find, Find Next and Find Previous functions.
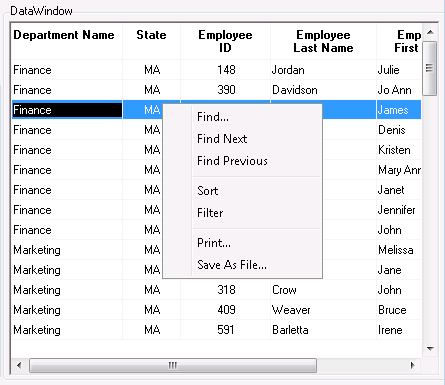
Step 1: Right-click the Web DataWindow and select Find from the popup menu, as shown in the following figure.
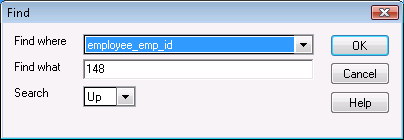
Step 2: Select the column and search scope and input criteria for the search.
Use the Find function to find all rows where the orders count column is equal to 2, as shown in the following figure.
Step 3: The first row that matches the search criteria will be highlighted.
Step 4: Right-click and select Find Previous or Find Next to highlight the rows (one at a time) that match the criteria.
The user can sort data by the column in ascending or descending order, or filter data using a number of functions.
To sort data:
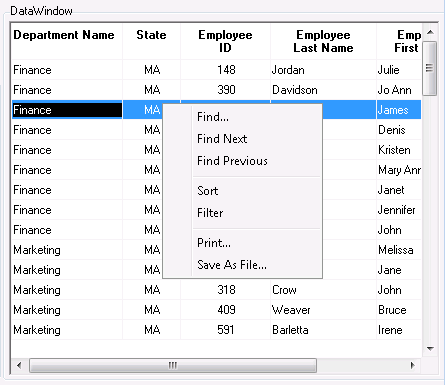
Step 1: Right-click the Web DataWindow and select Sort from the popup menu, as shown in the following figure.
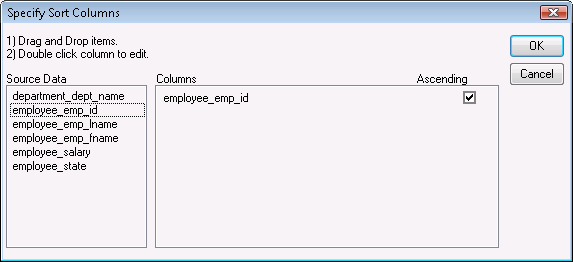
Step 2: Specify the column used to sort the data in the DataWindow by clicking on the column name in the left list box. The column name appears on the right, as shown in the following figure.
Step 3: Check the Ascending check box to sort the data in ascending order or uncheck the Ascending check box to sort the data in descending order. Click OK to accept the changes. The DataWindow automatically refreshes and the data is sorted.
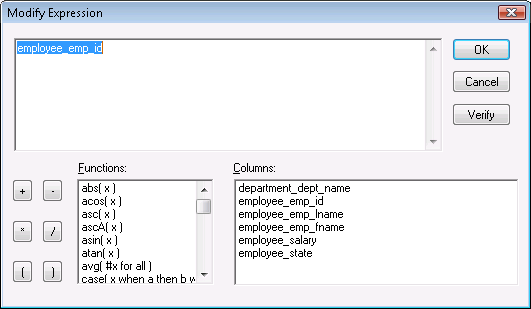
If you want to edit the selected column, double click it to open the "Modify Expression" dialog, as shown in the following figure.
To filter data:
Step 1: Right-click the Web DataWindow and select Filter from the popup menu, as shown in the following figure.
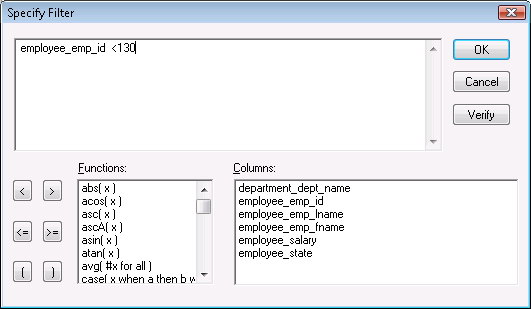
Step 2: Specify the filter by selecting the functions and columns. Click Verify to test whether the filter expression is valid. Click OK to accept the filter, as shown in the following figure. The DataWindow automatically refreshes and the data is filtered.
The Print menu provides user ability to print DataWindows directly on printers connected to the Client.
Step 1: Right-click the DataWindow and select Print from the popup menu, as shown in the following figure.
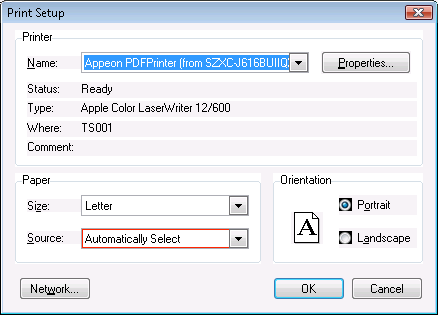
Step 2: Specify the printer settings and paper settings in the Print Setup window, as shown in the following figure. Click OK.
The DataWindow will be printed directly to the local printer.
This menu is only available in PowerServer Web 6.5.1 or prior. In PowerServer Web 6.6 or later, you can directly call the DataWindow SaveAs function.
The user can save the contents of a DataWindow in different file formats.
Step 1: Right-click the DataWindow and select Save As File from the popup menu, as shown in the following figure.
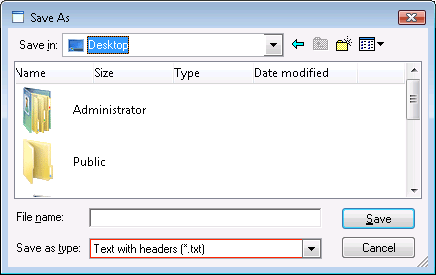
Step 2: Specify the file location, file name and file type in the Save As window, as shown in the following figure.
Note:
If the DataWindow without any data is saved as the HTML file or the XML file, on the Web the DataWindow header will not be saved, whereas it will be saved on PB.
In addition to the popup menu (Find, Find Next, Find Previous, Sort, Filter, Print, Save As File), PowerServer offers more features for users to manage DataWindows on the Web. Users can place DataWindow columns in a different order by dragging and dropping them to new positions. When navigating an editable DataWindow, users can use the popup menu to quickly edit the contents. These features are always available and require no extra coding to be enabled. The following steps show you how to access them:
Step 1: Select a column header in the Web DataWindow and the selected location is highlighted, as shown in the following figure.
Step 2: Drag and drop it to the desired location, and the location to be dropped is highlighted as well.
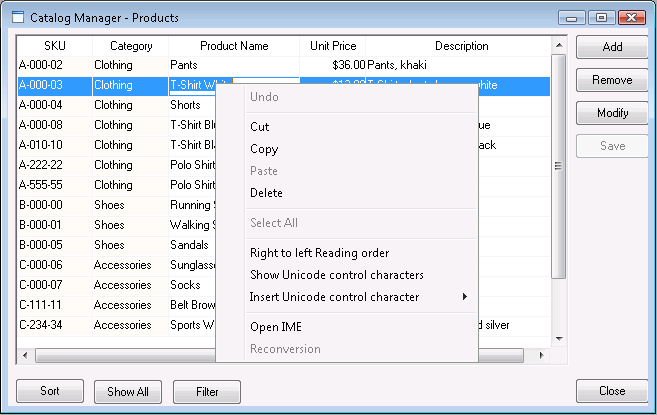
Step 3: Right click on an item in an editable HTML DataWindow and a menu pops up, as shown in the following figure.
The user can select the following menu items from the popup menu to perform quick editing: Undo, Cut, Copy, Paste, Delete, Select All.


