This section will explore some key tips and suggestions for creating a neat and organized RibbonBar layout.
Tips 1: Create groups and use the group Newline setting
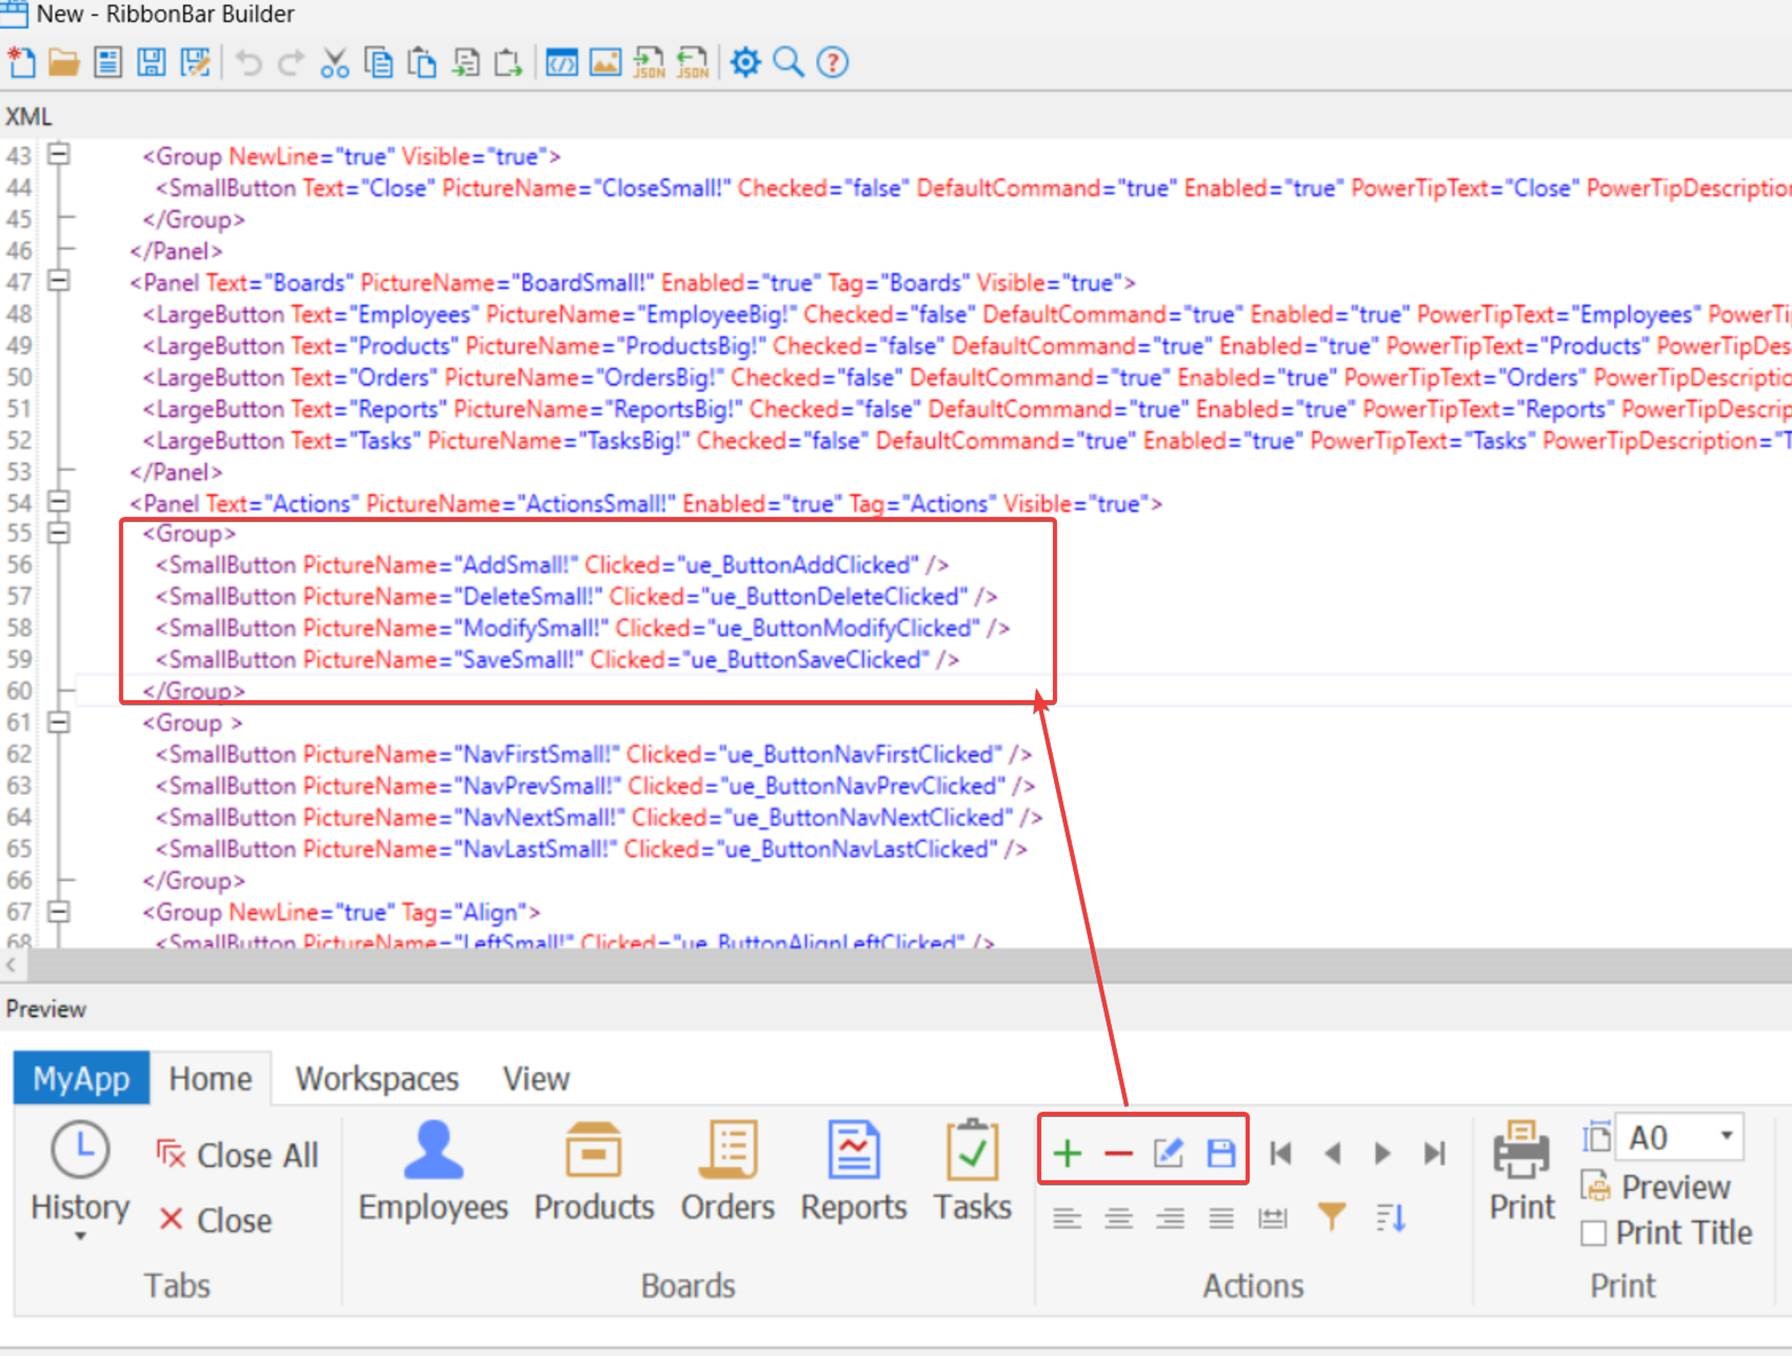
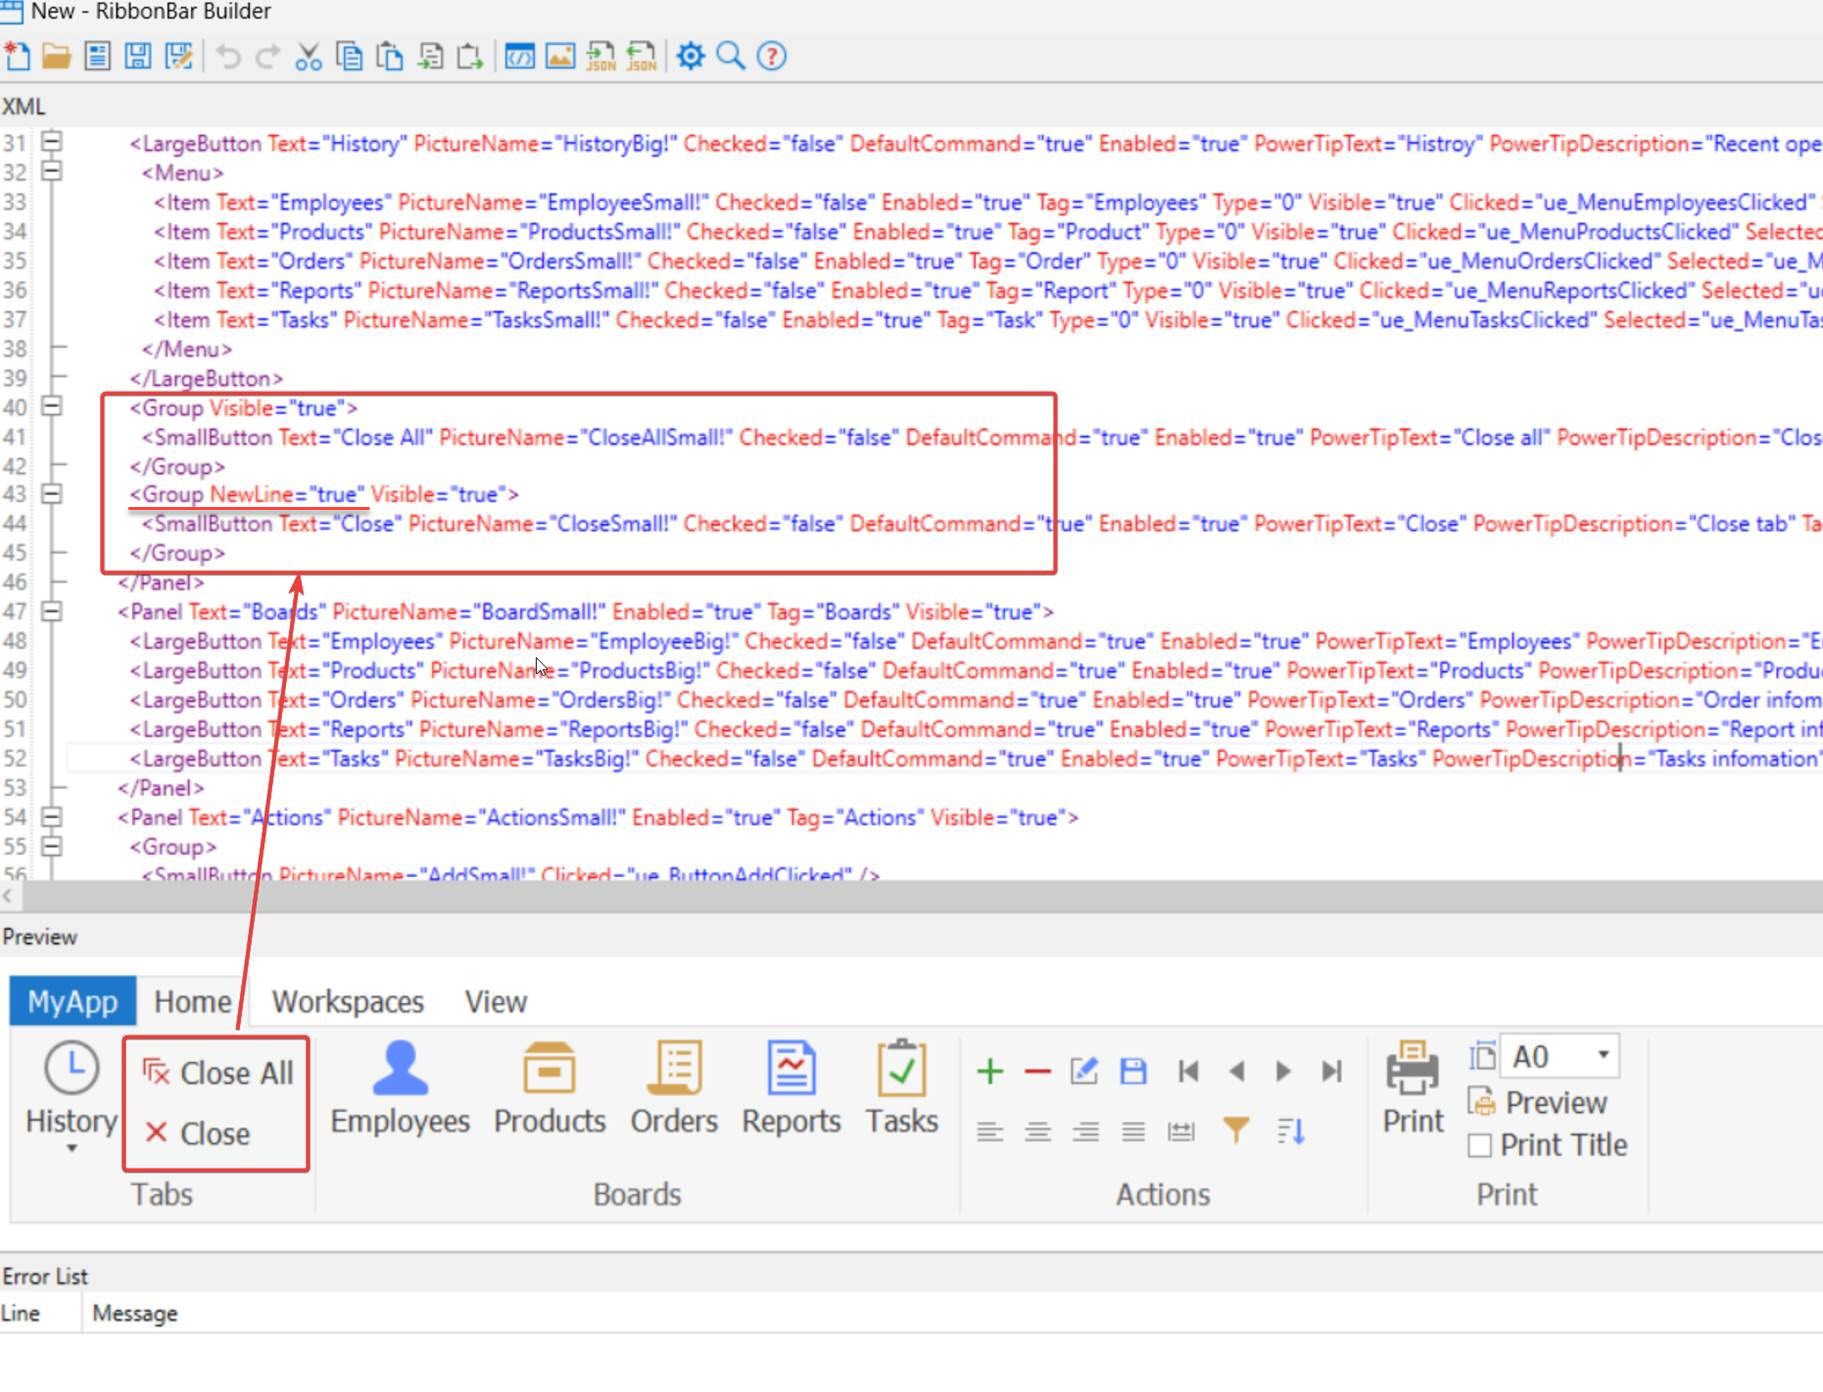
To achieve alignment of items in a panel, it is recommended to organize items into groups within the panel, and utilize the group "Newline" property to control the alignment of items.
Tips 2: Avoid arranging small buttons and groups in a single line within a panel
Instead, consider the following optimization options: Place group A in the first line and group B in the second line. Alternatively, you can have group A and group B in the first line, followed by group C and group D in the second line.
Tips 3: Utilize manual spacing for proper alignment
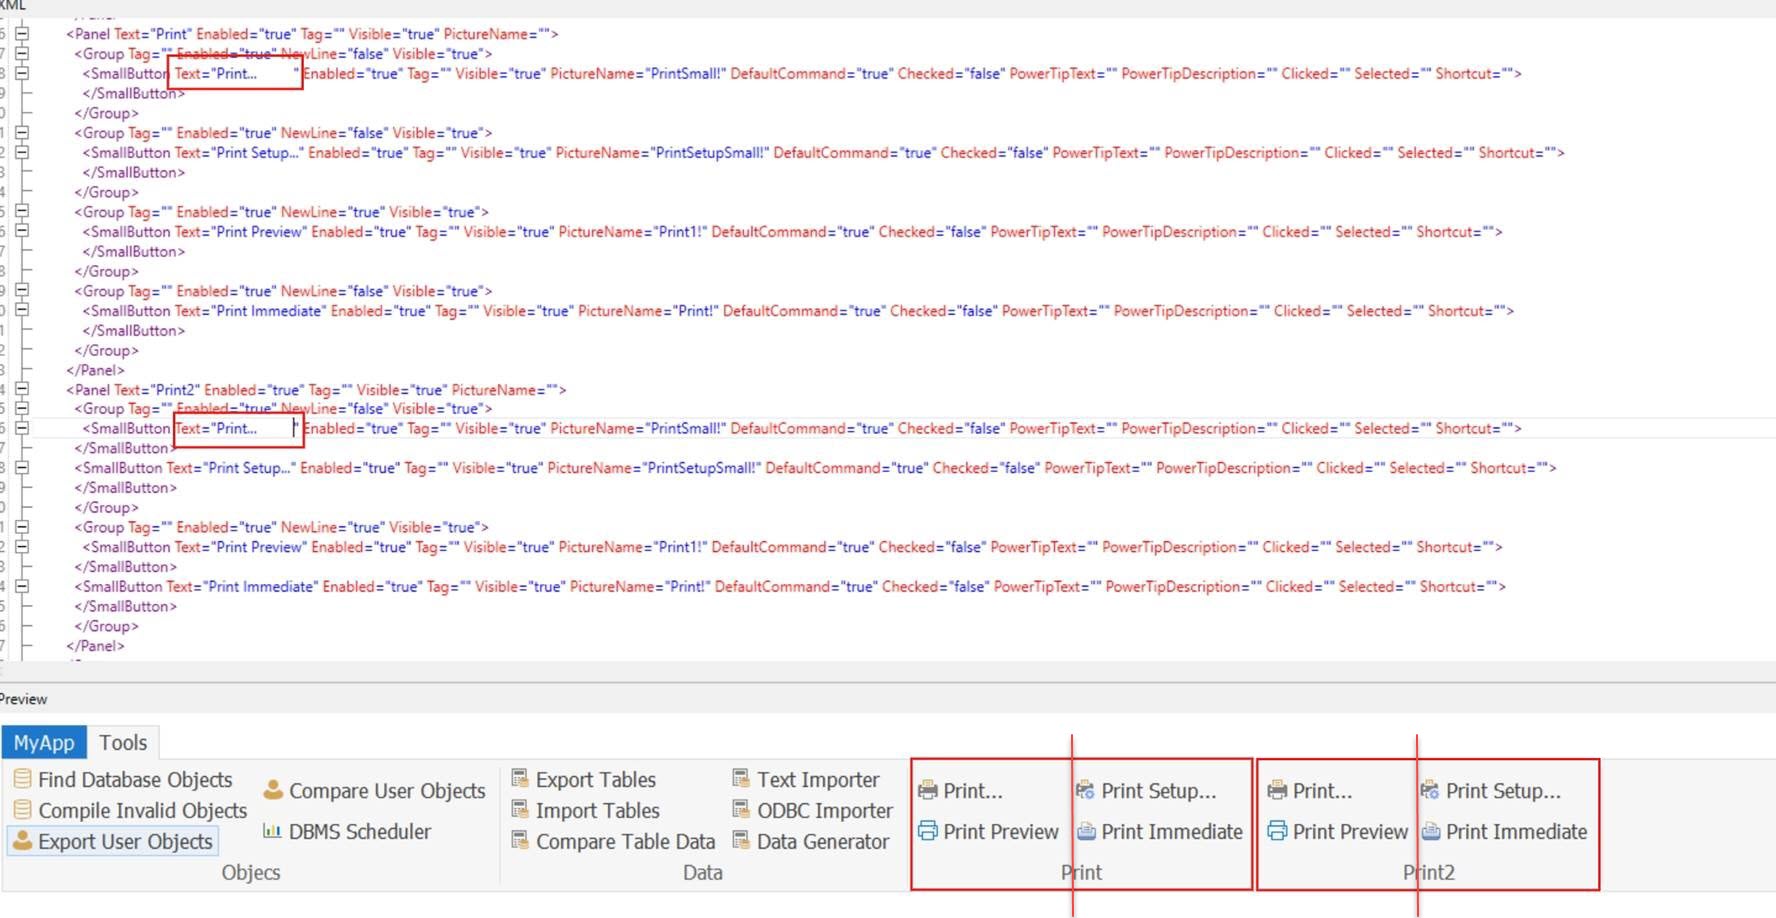
To ensure proper alignment of groups, you can manually add spaces to the item text within a group. By adding spaces strategically, you can achieve a visually balanced RibbonBar layout.
Additional reference:
This Microsoft document (https://learn.microsoft.com/windows/win32/windowsribbon/windowsribbon-templates) provides valuable insights into RibbonBar layout recommendations; it can serve as a useful reference, offering further guidance and inspiration for creating an exceptional RibbonBar layout.
You can try out the settings, layouts, and spacing techniques mentioned above and the recommendation provided in the Microsoft documentation to ensure your RibbonBar looks visually appealing and well-organized.
The following demonstrates the group NewLine property via XML scripts. When NewLine property is not used, the buttons are displayed in one line (one after another).
When NewLine property is used, the Close button is displayed in a new line (instead of after the Close All button).
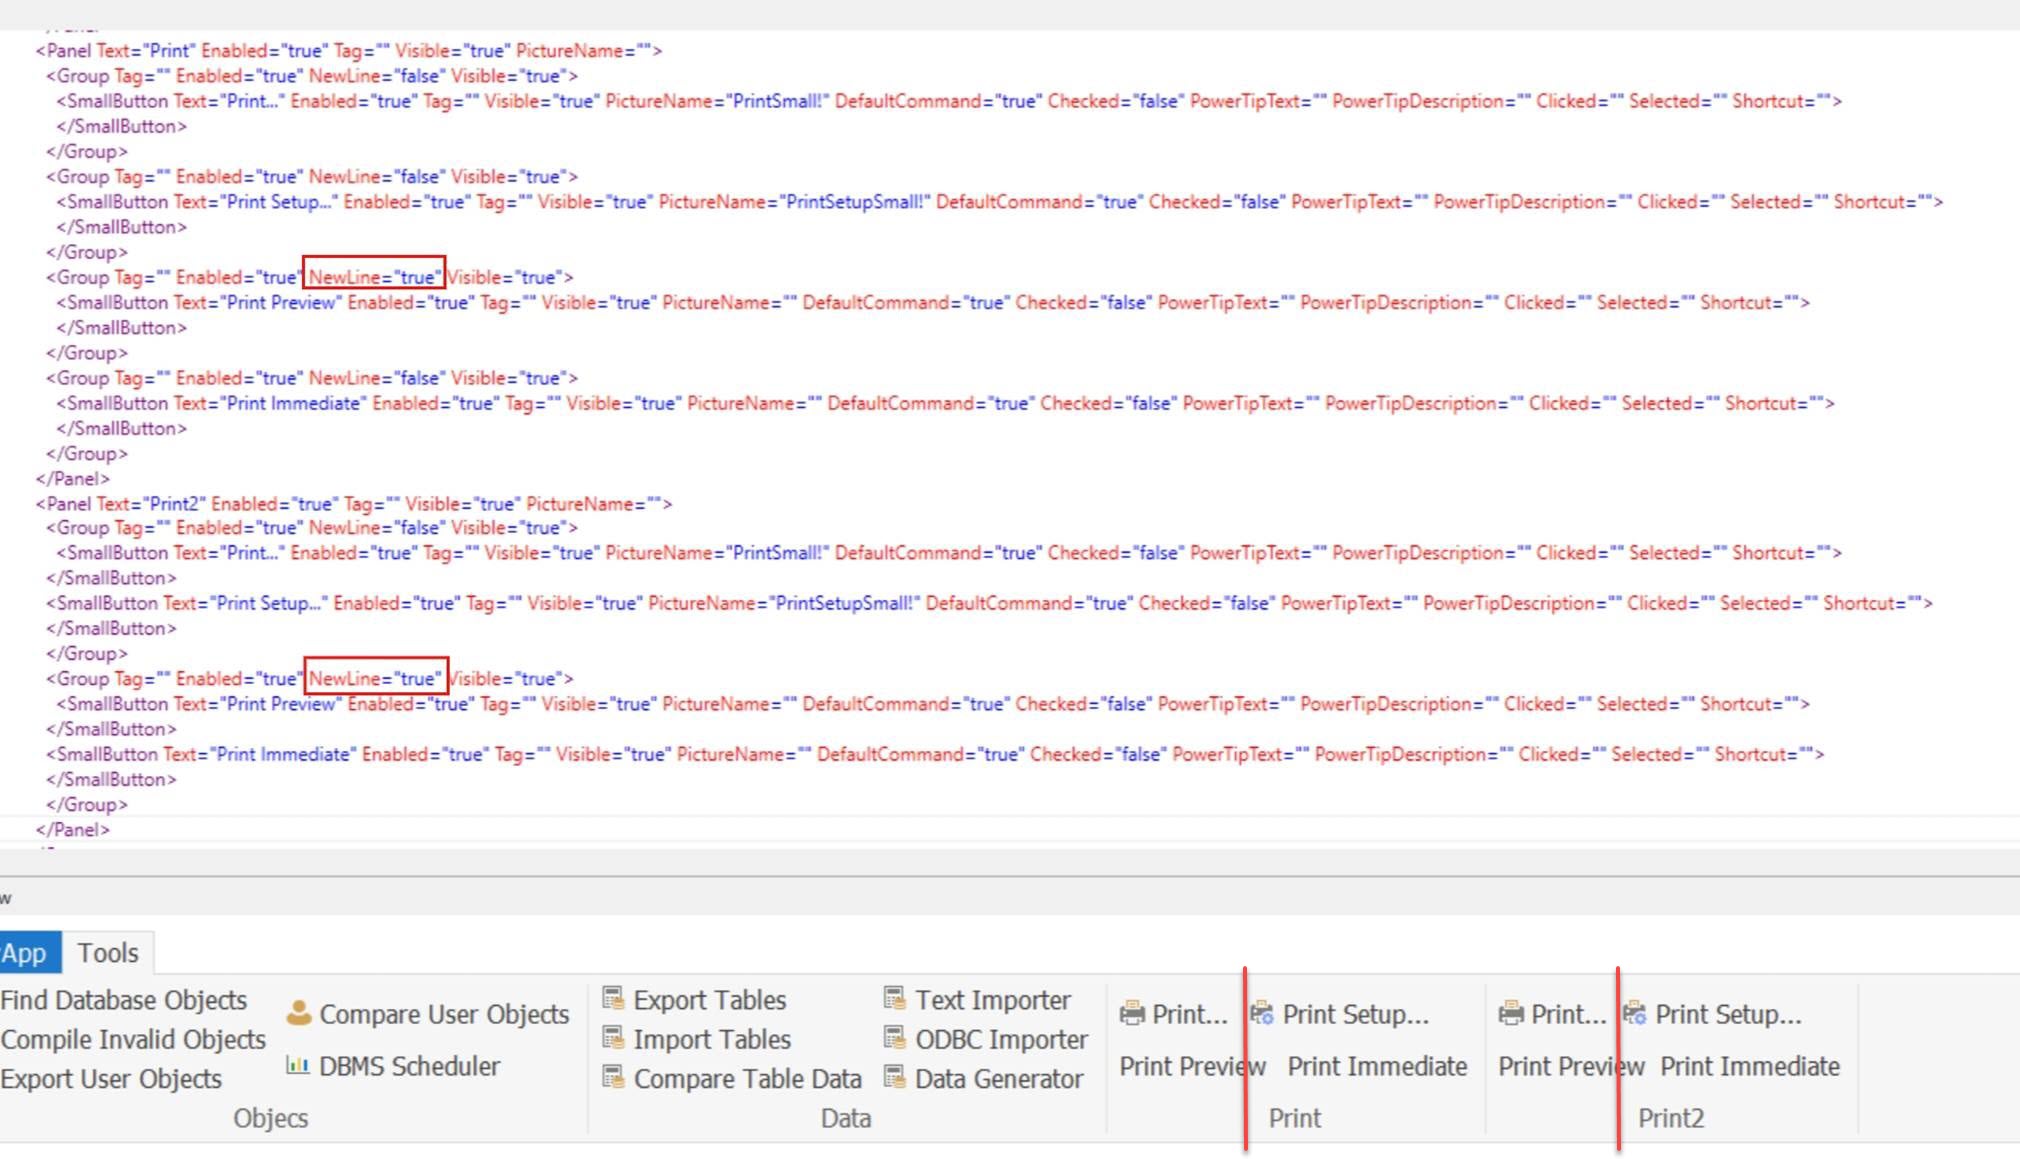
The following demonstrates using spaces to align items. Sometimes using groups and group NewLine still cannot have the proper alignment. For example,
You can try to add spaces to the items. For example,


