When you right click an application object in the system treeview and then select Edit Source, the source code editor will be opened and the source code of the application object will be shown in the editor.
The following table lists the variables available in the application
object and its corresponding IDE options. If you find any mistake or
anything missing from the table, please contact
<support@appeon.com>.
Note: It is not recommended to modify the value of these variables in the source code editor. You should configure the corresponding options in the PowerBuilder IDE instead.
|
Variables in application object |
How to set the variable in IDE |
|---|---|
|
appname |
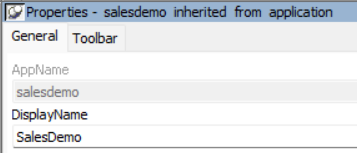
This variable/option is read-only. In the Application painter > General tab, view the value in the AppName field. See the screenshot below. |
|
displayname |
In the Application painter > General tab, input the value in the DisplayName field.
|
|
themepath |
In the Application properties dialog box (opened from Application painter > General tab > Additional Properties button), select the Themes tab, and then input the value in the Theme Path field. See the screenshot below. |
|
themename |
In the Application properties dialog box, select the Themes tab, and then select a value from the Theme list box.
|
|
nativepdfvalid |
In the Application properties dialog box, select the PDF Export tab, and then select the check box of Always use NativePDF! method for PDF Export. See the screenshot below. |
|
nativepdfincludecustomfont |
In the Application properties dialog box, select the PDF Export tab, and then select the check box of Packaging custom fonts in the generated PDF files. See the screenshot below. |
|
nativepdfappname |
In the Application properties dialog box, select the PDF Export tab, and then input the value in Specify the Application property of the generated PDF file.
|
|
richtextedittype |
In the Application properties dialog box, select the RichTextEdit Control tab, and then select a rich text editor from the list box of Select Which Rich Edit Control to Use in the 32-bit Application. See the screenshot below. |
|
richtexteditx64type |
In the Application properties dialog box, select the RichTextEdit Control tab, and then select a rich text editor from the list box of Select Which Rich Edit Control to Use in the 64-bit Application.
|
|
richtexteditversion |
Obsolete |
|
richtexteditkey |
Obsolete |
|
appicon |
In the Application properties dialog box, select the Icon tab, and then input the value in the Icon Name field.
|
|
appruntimeversion |
This variable is read-only. The value is automatically updated to the version of the runtime currently used in the target upgrade or full build. |
|
manualsession |
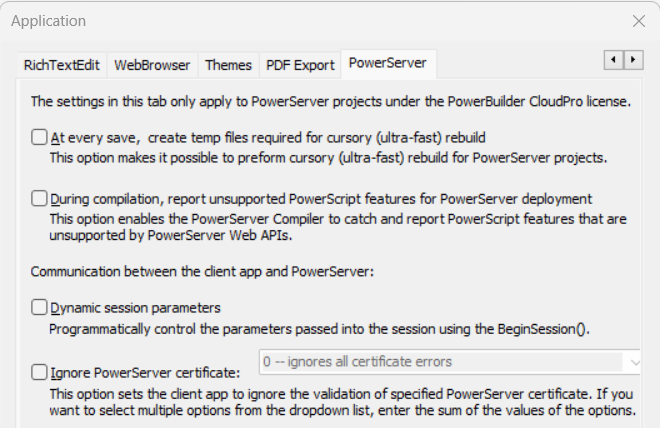
In the Application properties dialog box, select the PowerServer tab, and then select the check box of Dynamic session parameters. See the screenshot below. |
|
unsupportedapierror |
In the Application properties dialog box, select the PowerServer tab, and then select the check box of During compilation, report unsupported PowerScript features for PowerServer deployment. See the screenshot below. |
|
ultrafast |
In the Application properties dialog box, select the PowerServer tab, and then select the check box of At every save, create temp files required for cursory (ultra-fast) rebuild. See the screenshot below. |
|
bignoreservercertificate |
In the Application properties dialog box, select the PowerServer tab, and then select the check box of Ignore PowerServer certificate. See the screenshot below. |
|
ignoreservercertificate |
In the Application properties dialog box, select the PowerServer tab, and then select a value from the list box of Ignore PowerServer certificate.
|
|
webview2distribution |
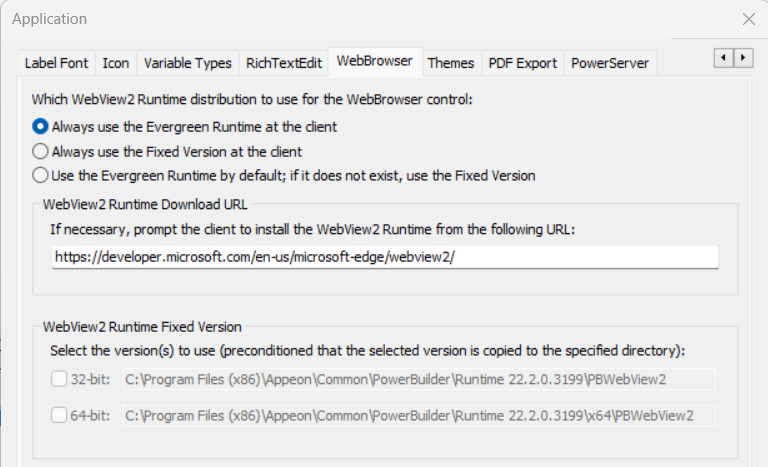
In the Application properties dialog box, select the WebBrowser tab, and then select a radio button under Which WebView2 Runtime distribution to use for the WebBrowser control. See the screenshot below. |
|
webview2checkx86 |
In the Application properties dialog box, select the WebBrowser tab, and then select the check box of 32-bit under WebView2 Runtime Fixed Version. See the screenshot below. |
|
webview2checkx64 |
In the Application properties dialog box, select the WebBrowser tab, and then select the check box of 64-bit under WebView2 Runtime Fixed Version. See the screenshot below. |
|
webview2url |
In the Application properties dialog box, select the WebBrowser tab, and then input the value under WebView2 Runtime Download URL.
|


