This section describes the general form properties you can modify.
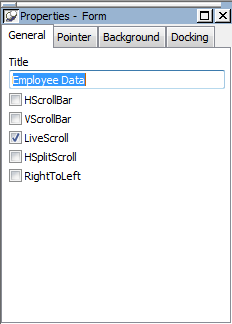
You can specify a title that displays in the title bar of a form when you run the form:

To specify a title for a form:
-
Display the pop-up menu of the form and select Properties.
-
On the General page of the Properties view, specify the title in the Title box.
To change a form's name in the current library (PBL)
To change a name of a form in the current library, select File>Save As from the menu bar, name the form, add a comment, and click OK.
You can set different colors for each element of a form to enhance the display of information.
To set colors for a form:
-
Do one of the following:
To set colors for
Do this
The form's background
Position the pointer on an empty spot in the form, display the pop-up menu, then select Properties. On the General page of the Properties view, select a color from the Color drop-down list.
A control
Select the control and use the Foreground Color drop-down toolbar and the Background Color drop-down toolbar.
Alternatively, you can position the mouse pointer on the control, display the pop-up menu, then select Properties. For controls that use text, you can set colors for background and text on the Font page of the Properties view. For drawing controls, you can set colors on the General page of the Properties view.
You can define your own custom colors for use in forms and reports.
To maintain your custom colors:
-
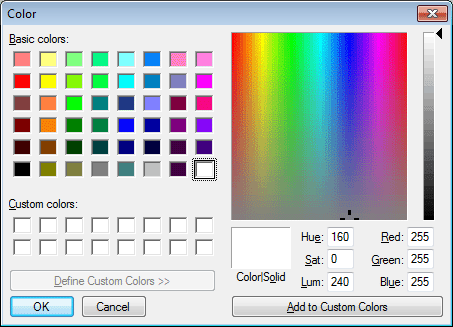
Select Design>Custom Colors from the menu bar.
The Color dialog box displays:
-
Define your custom colors.
For information about working in the Color dialog box to define custom colors, see Defining colors.
You can specify whether your form has scrollbars when you run it.
You can specify a particular pointer image to display when the mouse pointer is over a specific area of a form.
To change the mouse pointer used while running the form:
-
Position the pointer over the element of the form whose pointer you want to define, display the pop-up menu, and select Properties.
You can set a pointer for the entire form and for specific controls.
-
Select the Pointer page in the Properties view.
-
Choose the pointer from the Pointers list, or, if you have files containing pointer definitions (CUR files), enter a pointer file name.
You can use the Browse button to search for the file.
When InfoMaker initially generates the basic form, it uses the following:
-
For the text and alignment of column headings and labels, InfoMaker uses the column's extended attributes definitions created in the Database painter.
-
For fonts, InfoMaker uses the properties of the table definitions created in the Database painter.
You can override any of these defaults in a particular form.
When InfoMaker generates the basic form, it assigns controls (including data columns) to a default tab order, the default sequence in which focus moves from control to control when you press the tab key when running the form. InfoMaker assigns tab values in increments of 1,0 in left-to-right and top-to-bottom order.
Tab order is not used in the Layout view
Tab order is used only when a form is run, not in the Layout view.
You can change the tab order.
To change the tab order in a form:
-
Click the Tab Order button in the PainterBar, or select Format>Tab Order from the menu bar
The current tab order displays.
-
Use the mouse or press the tab key to select the tab value you want to change.
-
Enter a new tab value (0-9999).
The value 0 removes the control from the tab order so that you cannot tab to the control. It does not matter what value you use (other than 0); all that matters is a relative value. For example, if you want to tab to column B after column A but before column C, set the tab value for column B so that it is between the value for column A and the value for column C.
-
Repeat the procedure until you have the tab order you want.
-
Click the Tab Order button in the PainterBar again, or select Format>Tab Order from the menu bar again.
InfoMaker saves the tab order and the tab-order display turns off.
Each time you select Tab Order, InfoMaker reassigns tab values to include any controls that have been added to the form and to allow space for inserting new controls in the tab order.
You can place borders around controls to enhance their appearance. InfoMaker provides six types of borders in forms: Shadow box, Box, Resize, Underline, 3D Raised, 3D Lowered.
To add a border to a control in a form:
-
Select the controls you want to add a border to.
-
Click the button for the border you want in the Borders drop-down toolbar in the PainterBar or select the Border from the drop-down list on the General page in the Properties view.
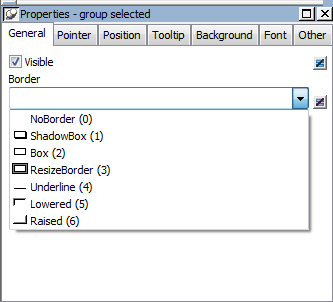
InfoMaker places the border around the selected controls. For example, to add a raised border to the controls, click the Raised button in the Borders drop-down toolbar or select Raised in the drop-down list.
You can define your form so that it always prompts you for retrieval criteria just before it retrieves data. In this way, you limit the data retrieved.
To prompt for retrieval criteria in a form:
-
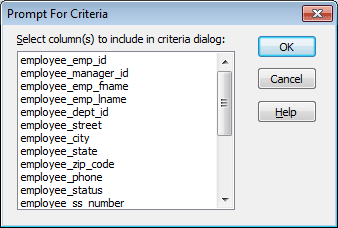
Select Design>Prompt for Criteria from the menu bar.
The Prompt for Criteria dialog box displays, listing all columns in the form:
-
Select the columns for which you want to specify retrieval criteria when you run the form.
-
Click OK.
What happens
If you have specified prompting for criteria, InfoMaker displays the Specify Retrieval Criteria dialog box when you run the form -- just before the retrieval is done.
Each column you selected in the Prompt for Criteria dialog box displays in the grid. For example, if you selected the State column and the Salary column, you can specify criteria so that only data for employees in Massachusetts with salaries greater than $50,000 is retrieved:
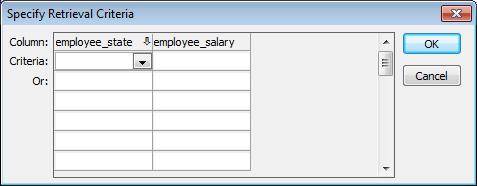
You specify criteria exactly as you do in the grid with the Quick Select data source. Criteria specified are added to the WHERE clause for the SQL SELECT statement defined for the form.
Using edit styles
If a column uses a code table or the RadioButton, CheckBox, or DropDownListBox edit style, an arrow displays in the column header, and you can select a value from a drop-down list when you run the form.
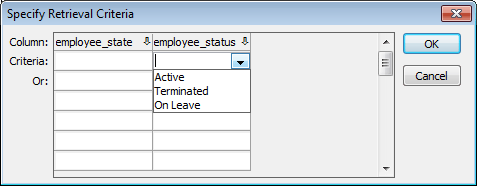
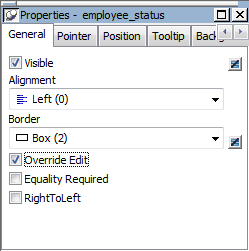
If you do not want the drop-down list used for a column when you specify retrieval criteria, select Properties from the column's pop-up menu and select the Override Edit check box on the General page in the Properties view:
Forcing the entry of criteria
If you have specified prompting for criteria for a column, you have the option of entering criteria when you run the form. If you want, you can make the entry of criteria a requirement rather than an option. For example, you might have a departmental form that requires the selection of a department.
You can force the entry of criteria for a column by selecting the Equality Required check box on the General page in the Properties view.
When you run the form, InfoMaker underlines the column header in the grid. You must enter criteria for the column. If the column values are presented in a drop-down list, you must pick one. If the column values are numeric, you must use the = operator and not other operators, such as < or >=.
For information about how you can specify selection criteria in the grid, see Specifying selection criteria.
When modifying a form, you might realize that you have not included all the columns you need, or you might need to define retrieval arguments. You can modify the data source from the Form painter by graphically modifying the SQL SELECT statement.
To modify the form's data source:
-
Select Design>Edit Data Source from the menu bar, or select Edit Data Source from the form's pop-up menu.
If your form style is Master/Detail
For a master/detail many-to-one or one-to-many form, the Select Data Source dialog box displays. Select the data source you want to modify: the master or the detail.
InfoMaker returns you to the Select painter.
If you used Quick Select to define the data source, this might be the first time you have seen the Select painter.
For information, see Using SQL Select.
-
Modify the SELECT statement graphically using the same techniques you used when creating it.
-
Click the Return button to return to the Form painter, or select File>Return to Form Painter from the menu bar.
Changing the table
If you change the table referenced in the SELECT statement, InfoMaker maintains the columns in the Layout view (now from a different table) only if they match the datatypes and order of the columns in the original table.
Adding columns
You can add columns to the SELECT statement. However, the column does not automatically display in the Layout view. You need to add columns manually, one at a time.


