After you package a standalone mobile app or Appeon Workspace, you can upload the file to the Appeon Server and then send the download URL to your users. If you have uploaded an updated file to overwrite the existing file, your users will get automatically updated, as Appeon Workspace and the standalone mobile app will check for the updates and compare the version/build number once it connects with Appeon Server.
For how to package a standalone mobile app or Appeon Workspace, refer to the section called “Packaging a stand-alone mobile project” in Appeon Developer User Guide and the section called “Customizing and packaging Appeon Workspace” in Appeon Developer User Guide.
For how to make the auto-upgrade feature of Appeon Workspace and standalone mobile app to work, refer to the section called “Enabling auto-upgrade of Appeon Workspace” in Appeon Workspace User Guide (Mobile only).
To upload the standalone mobile app and Appeon Workspace to the server:
Step 1: Select the installer type for the standalone mobile app or Appeon Workspace: APK (.apk) for the Android device, or IPA (.ipa) for the iOS device.
Step 2: Click Browse to select the installer file.

Step 3: Click Upload to upload the selected file to the Appeon Server.
During this process, the file will be uploaded to the Appeon Server Web server, and will be deployed as a WAR file if Appeon Server is installed on top of JBoss, WebLogic, and WebSphere. The deployment process is automatic for JBoss, WebLogic (development mode), and JEUS, but not automatic for WebLogic (production mode) and WebSphere, in this case you will need to manually deploy it just as how you deploy the other applications.
If the "HTTP Error 404.13 - Not Found" error occurs during the upload process, resolve the error by following instructions in the section called “Blob data cannot be correctly manipulated if it is over 4MB” in Appeon Troubleshooting Guide.
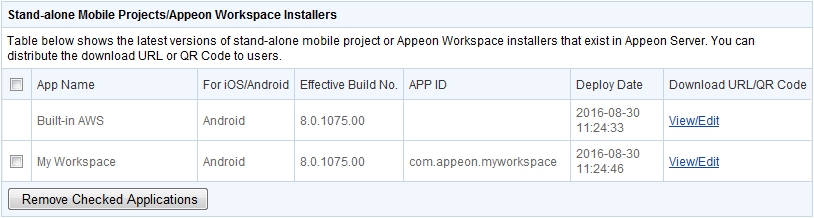
Once the installer file is uploaded successfully, the download URL and QR code of the installer will be available from the table below.
A built-in Appeon Workspace for the Android device (App Name: Built-in AWS) is provided by Appeon by default. You can view and change the download URL of this built-in Appeon Workspace but cannot remove it.
To get the download URL and the QR code of the installer:
Step 1: Click the View/Edit link of the installer in the table. You will be directed to the Download URL or QR Code page.
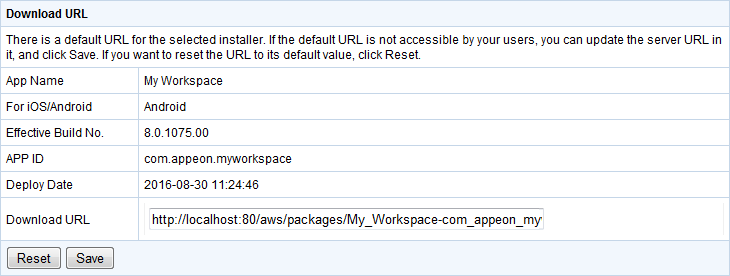
Step 2: Make sure the download URL is accessible to your users. By default the IP address/domain name and port number of Appeon Server will be used in the download URL of the installer.
You can change the download URL if the server IP or port number cannot be accessed by your users; or if you have set up another Web site to host the installer, you will need to manually copy the installer over and change the download URL to point to the correct location. Once you change the URL, click Save to save the change and refresh the QR code.
For the Android installer, you should set the download URL of the APK file.
For the iOS installers, you should set the download URLs pointing to different files for different client types: for the installer to be downloaded and installed on the mobile device, you should set the download URL of the PLIST file in the For Download on Mobile Devices field; while for the installer to be downloaded to the Windows PC or Mac (and later synchronized to the mobile device via iTunes), you should set the download URL of the IPA file in the For Download to iTunes on Desktops field.
For the built-in Appeon Workspace, the download URL is bound to the Appeon Workspace download center by default; you can de-select the Bind the above URL to Download Center box to unbind them.

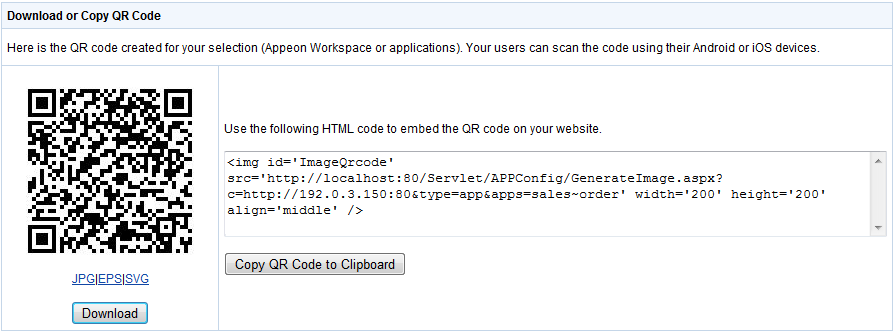
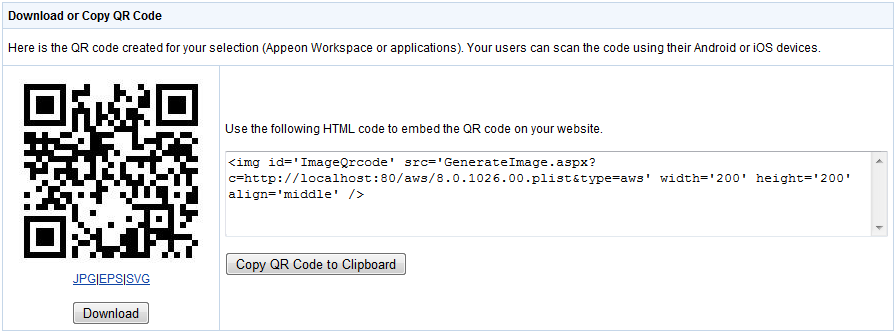
Step 3: Click the Download button to download the image file of the QR code in JPG/EPS/SVG format and send the image file to your users, or click the Copy QR Code to Clipboard button to copy and embed the image of QR code in your download web page.
The end user can use a scanning tool to scan the QR code to directly download and install Appeon Workspace on their mobile devices.
You can also generate the QR code for those mobile apps that you deployed to Appeon Server using the Appeon Deployment Wizard. For how to deploy the mobile app using the Appeon Deployment Wizard, refer to Deploying PowerBuilder Applications in Appeon Developer User Guide.
To generate the QR code for mobile application(s):
Step 1: In the Web Server URL field, input the IP address or domain name of the Web server where mobile apps are deployed.
Step 2: From the application list, select one or more mobile apps to be included in the QR code.
Step 3: Click the Get QR Code button to download or copy the QR code generated for the selected app(s).

To download or copy the QR code:
You can click the Download button to download the image file of the generated QR code in JPG/EPS/SVG format and send the image file to end users, or click the Copy QR Code to Clipboard button to copy and embed the image of QR code in your download web page.
The end user can open Appeon Workspace and use the scan tool in Appeon Workspace to directly download and install mobile application(s). For more about the scan tool in Appeon Workspace, refer to the section called “Adding applications” in Appeon Workspace User Guide (Mobile only).