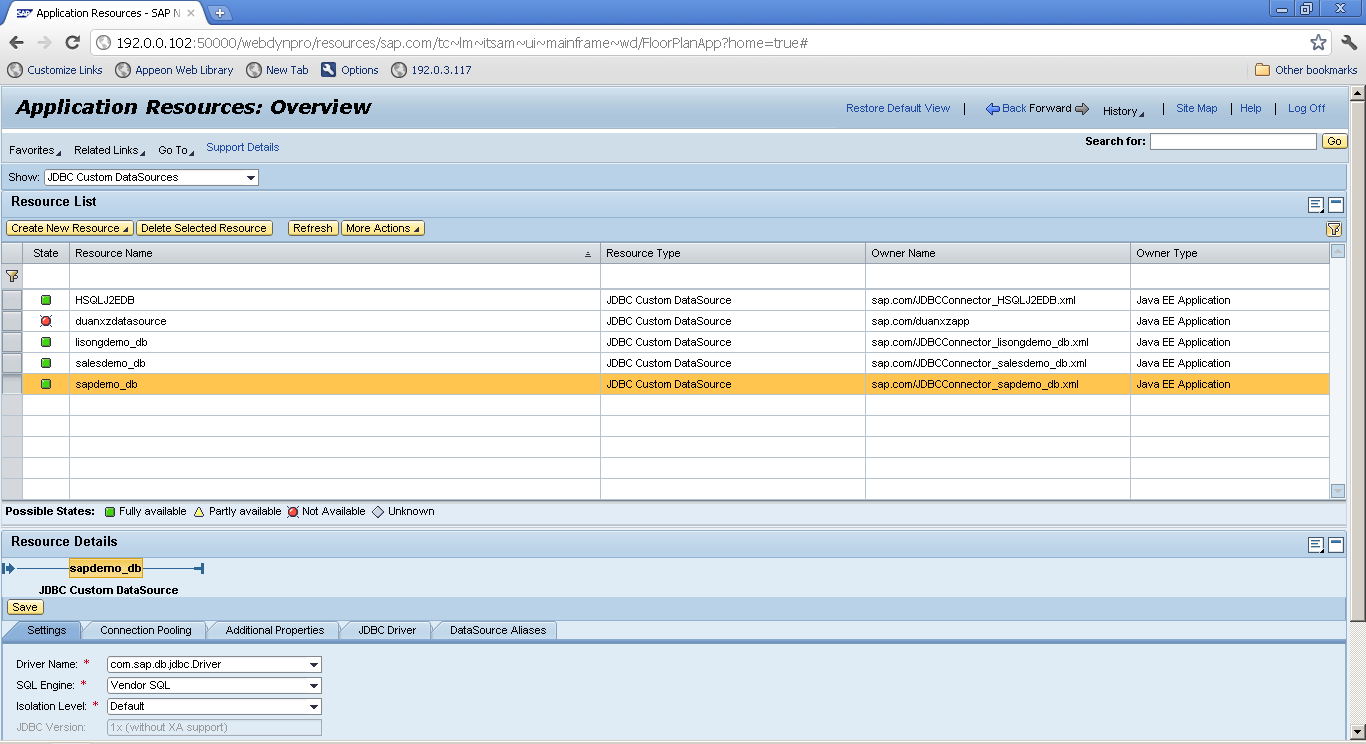
The following section will take one database type (SAP HANA database with HANA JDBC driver) as an example to show you how to create a data source for NetWeaver Application Server, you can later create data sources for other database types by taking the same steps below but specifying different parameters according to Data source parameters.
Step 1: Log in to SAP NetWeaver Administrator with the URL http://IP:50000/nwa. The IP here is your server's IP address.
Step 2: Click the Site Map in the right top of the page to view site map, as shown in the following figure.
Step 3: Click Application
Resources in the infrastructure of configuration to configure
application resources, as shown in the following figure.
Step 4: If it is the first time that you create an SAP HANA database connection in the NetWeaver, you need to deploy the HANA JDBC driver at first.
Click Create New Resource, and then select Deploy New JDBC Driver. On the page that appears, enter a JDBC driver name in the JDBC Driver Name text box. It is required, but you can enter any name, which is only used to identify the type of JDBC drivers. For simplicity, enter “com.sap.db.jdbc.Driver”, and then click Add New Driver File to select the JDBC driver jar file. Finally, click Save to deploy JDBC driver.
Step 5: After the JDBC driver is deployed successfully, click Create New Resource and then select New JDBC Custom DataSource to create a new database connection. On the page that appears, do the following:
-
In the Database Name text box, Enter a DataSource name;
-
In the Diver Name dropdown list box, select the correct Driver Name;
-
In the SQL Engine dropdown list box, select Vendor SQL;
-
In the Isolation Level dropdown list box, select Default;
-
In JDBC Version dropdown list box, select 1x (without XA support);
-
In Driver Class Name text box, enter “com.sap.db.jdbc.Driver”;
-
In Database URL text box, enter "jdbc:sap://Host:Port?reconnect=true", for example, enter "jdbc:sap://imdbhdb:30015?reconnect=true".
-
In the User Name text box, enter the correct user name, and in the Password text box, enter the correct password;
-
Click Save to finish creating a database connection.
Step 6: To verify whether it is created successfully, select JDBC Custom DataSource, and you can see a list of database connections. If the state of the database connection is a green icon, then it indicates that the database connection is created successfully.


