This lesson provides the information you need to start PowerBuilder and create an application.
In this lesson you:
How long does it take?
About 20 minutes.
Where you are
Specify an icon for the application
Change the size of the main window
The workspace is where you build, edit, debug, and run PowerBuilder targets. You can build several targets within a single workspace.
Now you start PowerBuilder and create a new workspace.
First read the Release Bulletin for this release
Any last-minute items are documented in the Release Bulletin. To make sure you have all the files necessary to complete the tutorial, see Setting up for the tutorial.
-
Double-click the PowerBuilder icon (representing PB190.EXE) in %AppeonInstallPath%\PowerBuilder [version]\
or
Select All Programs>Appeon>PowerBuilder [version]>PowerBuilder [version] from the Windows Start menu.
The Welcome to PowerBuilder dialog box displays.
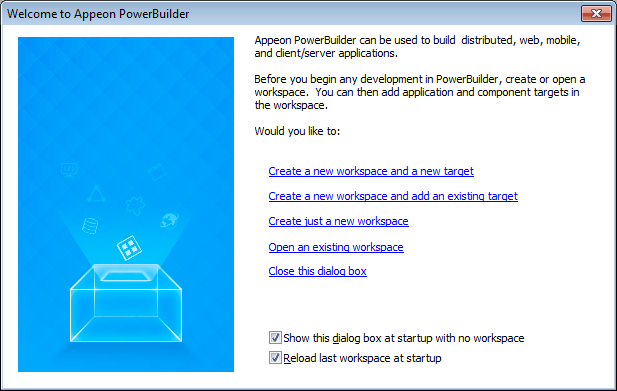
The Welcome to PowerBuilder dialog box allows you create a new workspace and add a new target or an existing target to the workspace.
If you do not want PowerBuilder to display the dialog box again
You can leave the "Show this dialog box at startup with no workspace" check box unchecked to keep PowerBuilder from displaying the welcome dialog box every time you start PowerBuilder. Select the "Reload last workspace at startup" check box to load the most recently used workspace each time you start a PowerBuilder session. Then click "Close this dialog box".
The PowerBuilder development environment displays.
If this is the first time you are opening PowerBuilder on your machine, you see only a top-level entry in the System Tree to indicate that no workspace is currently open. Otherwise, the System Tree might show a workspace with targets and objects in it.

-
Select New from the File menu
or
Click the New button in the PowerBar.
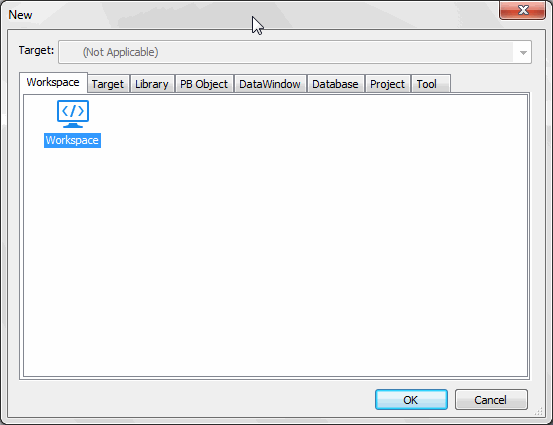
The Workspace page of the New dialog box displays.
PowerBuilder displays the page of the New dialog box that was used before the dialog box was last closed. In this exercise, make sure that the Workspace page of the New dialog box displays.
-
Select Workspace from the Workspace page of the New dialog box.
Click OK.
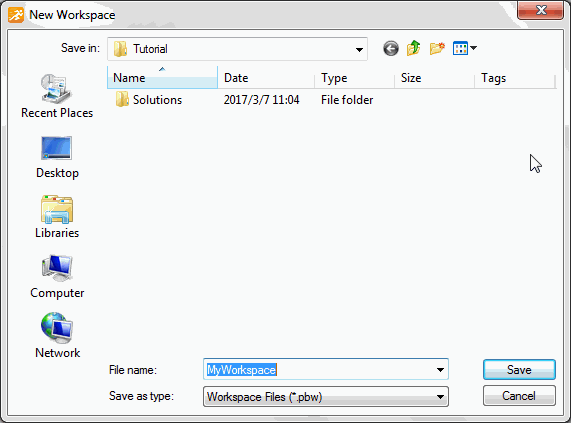
The New Workspace dialog box displays.
-
Choose the tutorial folder.
If you have created a workspace before, the dialog opens to the location of the most recently-used workspace. For this new workspace, change the location to the path described in the next paragraph.
If this is your first workspace, the New Workspace dialog box opens to %SystemDrive%\Users\[username]\Documents. Navigate from this point to Appeon\PowerBuilder [version]\Tutorial. The solutions for the tutorial are in the Solutions subfolder, but you will create your own solutions as you work your way through the tutorial.
-
Type MyWorkspace in the File name text box.
-
Click Save.
The New Workspace dialog box closes and the workspace you created appears as the first item in the System Tree.
Where you are
Specify an icon for the application
Change the size of the main window
Now you create a new target using the Template Application wizard. Based on the choices you make, the Template Application wizard creates precoded events, menus, windows, and user objects in addition to the application object.
-
Select New from the File menu and click the Target tab
or
Right-click MyWorkspace in the System Tree, select New from the pop-up menu, and click the Target tab.
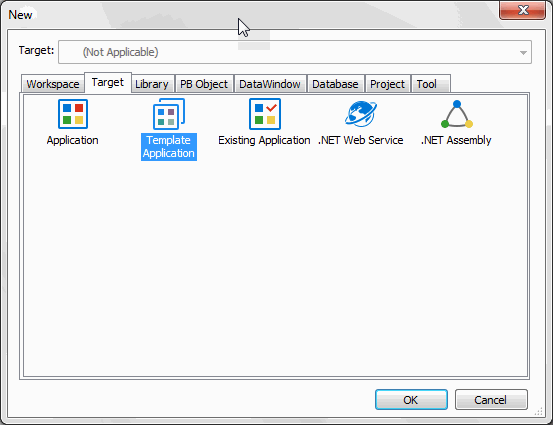
The Target page of the New dialog box displays.
-
Select the Template Application icon and click OK.
The Template Application wizard displays. The first page of most wizards explains what the wizard is used for. As you step through the wizard, you can press F1 to get Help on most fields.
-
Click Next until the Specify New Application and Library page displays.
-
Type pbtutor in the Application Name text box.
The wizard automatically assigns file names to a library and target that use this application name. It assigns the library a PBL extension and the target a PBT extension.
-
Click Next.
The Specify Template Type page displays. The MDI Application with Microhelp radio button is selected. You will create an MDI template application, so you do not need to change this selection.
About MDI
MDI stands for multiple document interface. In an MDI application, the main window for the application is called the MDI frame. Using the MDI frame menu bar, you can open additional windows known as sheet windows that display inside the frame window.
-
Click Next 4 times until the Name Individual Sheets page displays.
In this tutorial you accept the default application type, library search path, frame and frame menu names, sheet menu and manager service, and MDI base sheet.
If you have clicked Next too many times
You can use the wizard's Back button to navigate back to the correct wizard page.
-
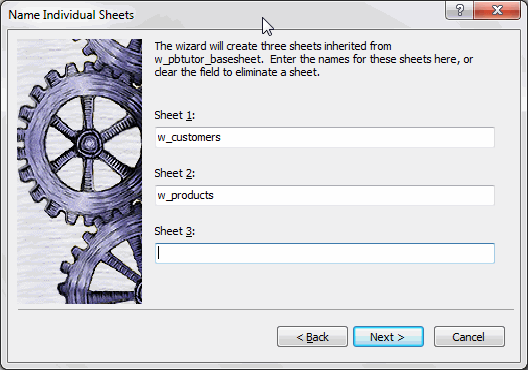
On the Name Individual Sheets page, type w_customers for Sheet 1, w_products for Sheet 2, and clear the Sheet 3 text box.
PowerBuilder will generate two windows based on the default basesheet (w_pbtutor_basesheet), one for customers and one for products. You will add a third sheet window later in the lesson on exception handling.
-
Click Next.
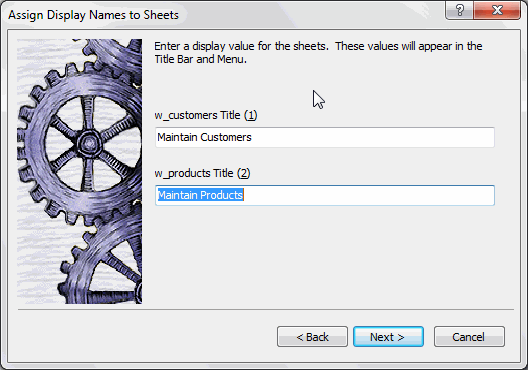
Type Maintain Customers as the display name for Sheet 1.
Type Maintain Products as the display name for Sheet 2.
The names you type will display in the title bars of these sheet windows.
-
Click Next twice.
You do not need to change the names of the About and Toolbar windows.
-
On the Specify Connectivity page, select None.
You will add a Connection object later.
-
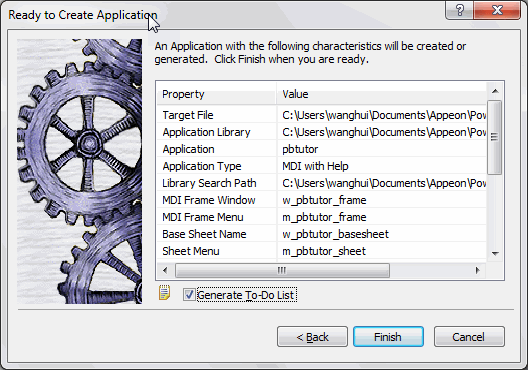
Click Next twice to display the Ready To Create Application page.
You will create a project later.
This is the last wizard page. It lists your current selections so that you can review them and use the Back button to go back and change them if necessary.
-
Make sure the Generate To-Do List check box is selected.
-
Click Finish.
The Template Application wizard creates the pbtutor.pbt target and the pbtutor.pbl library, and sets the new pbtutor application as the default application.
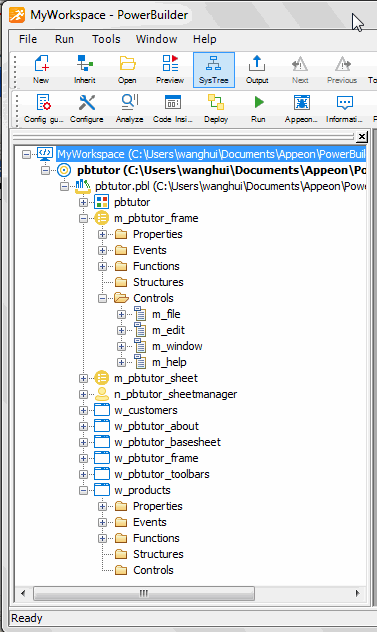
You can expand the System Tree to view all the objects that have been created by the Template Application wizard. The System Tree does not display the file extension of the pbtutor target, but it does display the directory where the target file is saved.
The pbtutor.pbl library displays under the pbtutor target in the System Tree. It contains the target Application object, which has the same name as the target object but displays under the library file. Other objects generated by the wizard also display under the library file.
Where you are
> Specify an icon for the application
Change the size of the main window
Now you specify an icon for the application. The icon appears in the workspace when you minimize the application during execution. PowerBuilder includes the icon automatically when you create an executable file. You specify an icon from the Properties view in the Application painter.
-
Double-click the pbtutor Application object in the System Tree
or
Right-click the pbtutor Application object in the System Tree and select Edit from the pop-up menu.
The pbtutor Application object is located under the pbtutor library, which is under the pbtutor target object that you created with the Template Application wizard. Different views of the Application object display in the Application painter.
-
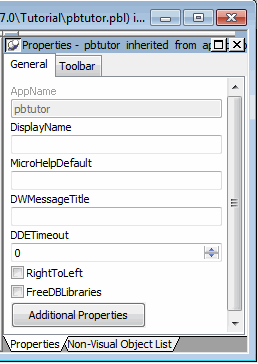
Make sure the Properties view displays in the Application painter.
If the Properties view is not open, you can open it by selecting View>Properties from the menu bar. The menu item is grayed out if the Properties view is already open.
-
Click the Additional Properties button in the Properties view.
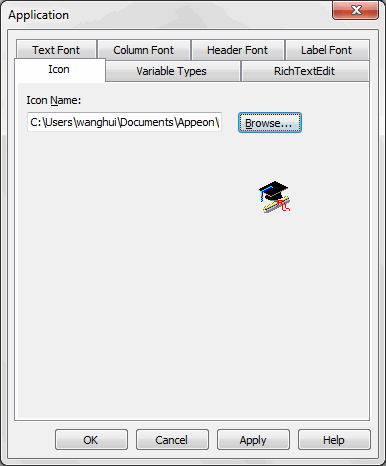
A tabbed Application property sheet displays.
-
Select the Icon tab.
-
Click Browse.
Navigate to the Tutorial directory.
-
Select the tutorial.ico file.
Click Open.
If you do not see the ICO file extension
You do not see ICO file extensions if the Hide File Extensions for Known File Types check box is selected in the Options dialog box of your Windows Explorer.
The tutorial icon displays on the Icon page of the Application property sheet.
-
Click OK.
Click the Save button in PainterBar1 or select File>Save.
Click the Close button in PainterBar1 or select File>Close.
Where you are
Specify an icon for the application
> Change the size of the main window
Now you change the size of the application's main window. When you run the application, the main window displays in the position and size that you specify.
-
Double-click w_pbtutor_frame in the System Tree.
The Window painter opens the application's frame window.
-
Check the Center check box on the General page in the Properties view.
Now when you run the application, the frame window will be centered.
-
Scroll down and select normal! in the WindowState drop-down list box.
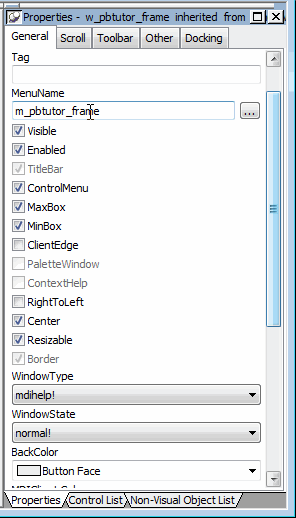
If your Properties view looks different
You can change the position of Properties view labels by right-clicking the Properties view and selecting a preference from the pop-up menu. You can position the labels either to the left of all fields, or on top of the text fields and to the right of the check boxes.
-
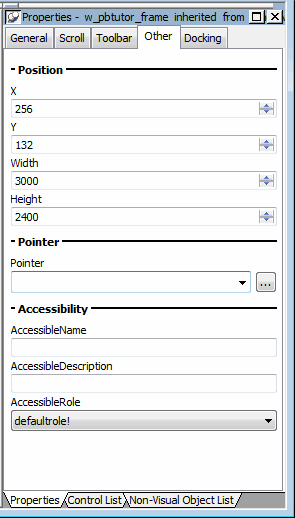
Click the Other tab in the Properties view.
-
Type 3000 in the Width text box and 2400 in the Height text box.
The size of the window rectangle in the Layout view changes. The values you type are in PowerBuilder Units (PBUs).
-
Press the Tab key.
-
Select File>Close from the PowerBuilder menu.
Click Yes when you are prompted to save your changes.
The Window painter closes.
Next you run the application. When you run the application, the frame window will be centered and sized as you specified.
Where you are
Specify an icon for the application
Change the size of the main window
Now you run the application to see how it works. At this point the application does not do very much. By running the application, you can see the windows and menus that were created for you when PowerBuilder generated the application based on your choices. You will modify them later.
-
Click the Run button (
 ) on the PowerBar.
The MDI frame window displays and is maximized. All MDI applications created using the Wizard have a menu bar and a toolbar with some items already coded for you.
-
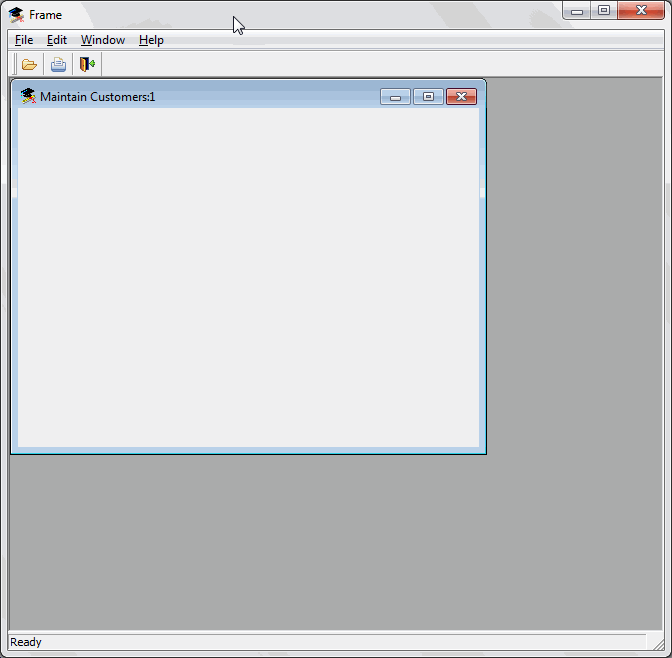
Select File>New>Maintain Customers.
The application opens a sheet window. The display name that you typed in the Template Application wizard for Sheet 1 appears in the title bar. The sheet window title has a number after it to indicate the instance of the window that displays.
About the number in the window title bar
The number 1 appears following the window title because this is the first instance of the w_customers sheet window that is open. The code that adds the instance number to the title bar is in the ue_postopen event of the w_master_detail_ancestor base sheet window.
-
Select File>New>Maintain Products.
A second application sheet window displays.
-
Select Window>Tile Horizontal.
The sheet windows are arranged horizontally inside the MDI frame, with the active sheet window at the top.
-
Select File>Toolbars from the menu bar.
The application displays the Toolbars dialog box.
-
Select Floating in the Toolbars dialog box.
The toolbar floats within the MDI frame. You might need to move the Toolbars dialog box to see the floating toolbar.
-
Select Top.
The toolbar is repositioned at the top of the frame.
-
Click Done to close the Toolbars dialog box.
-
Select File>Exit.
The application closes and you return to the PowerBuilder development environment.
When you exit and restart PowerBuilder, you might want to have PowerBuilder in the state it was in when you exited, with the workspace and painters you were working in open.
-
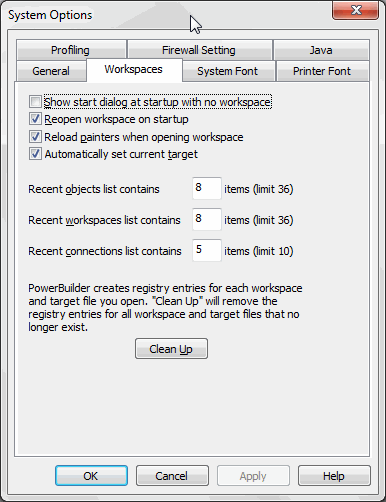
Select Tools>System Options from the menu bar and then click the Workspaces tab.
-
Make sure the Reopen Workspace On Startup and the Reload Painters When Opening Workspace check boxes are selected.
Click OK.
Now when PowerBuilder starts up, it opens the workspace and the painters that were open when you exited. If you were coding in PowerBuilder when you exited, the last script you were working on opens at the last line you edited.


