Docker Support
Last updated: August, 2022
Docker is an open platform for developing, shipping, and running applications. It enables you to separate your applications from your infrastructure so you can deliver software quickly. It provides the ability to package and run an application in a loosely isolated environment called a container. The isolation and security allow you to run many containers simultaneously on a given host. They are lightweight and contain everything needed to run the application, so you do not need to rely on what is currently installed on the host. You can easily share containers while you work, and be sure that everyone you share with gets the same container that works in the same way.
One of Docker's most attractive features is that you pack your application's dependencies and environment along with it without having to worry about dependency versioning or conflicts on the host machine.
For more information on Docker, please follow this link.
Installing Docker environment
To be able to use SnapDevelop's Docker support, you must have a Docker environment set up on your local machine or a remote server. For more information on how to set up your Docker environment, follow this link.
Container Explorer
SnapDevelop's 2022 Container Explorer is a tool that allows you to search and download Docker images from configurable registries, create/customize containers based on those images and manage the running container instances.
Following is an introduction to the tool and how to operate it.
Opening the Container Explorer
To open the Container Explorer, go to the View Menu and select Container Explorer.
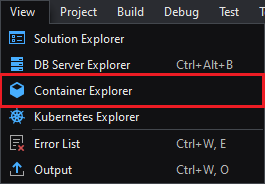
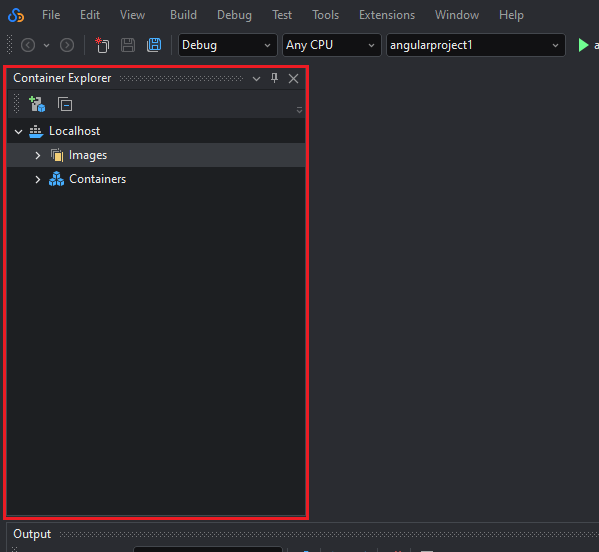
The Container Explorer will display on the side panel.
Connecting to an Engine
The engine is the entity that will be running the containers. If you're doing local development and have a local instance of Docker Desktop, the Localhost engine will show up by default.
Follow steps below to connect to an Engine through HTTP/S:
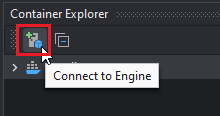
Click the Connect to Engine button in the Container Explorer to open the Connect to Engine window.
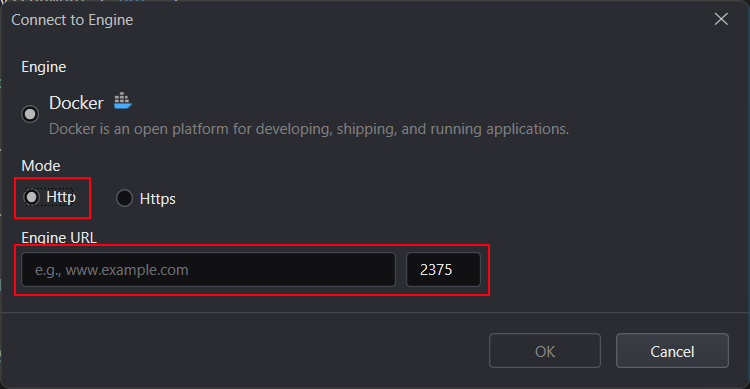
Fill in the required information.
For connecting with HTTP:
For connecting with HTTPS:
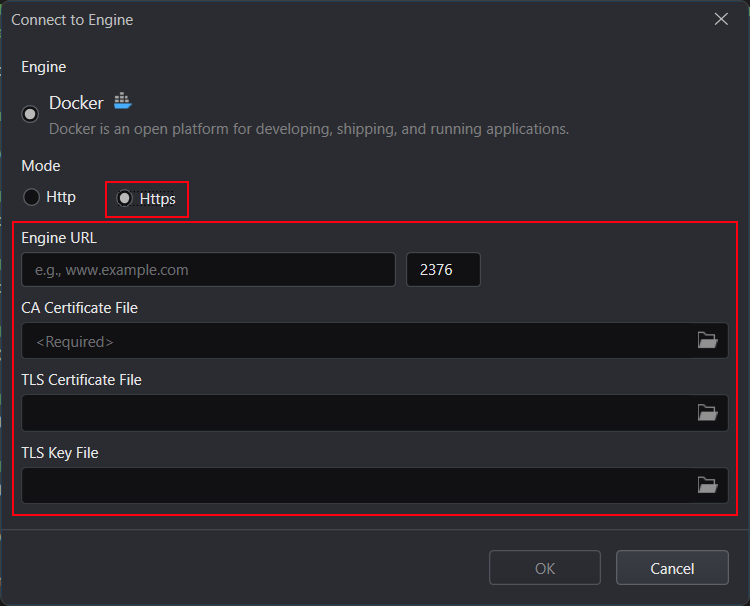
Click OK.
The new engine is added to the Container Explorer.
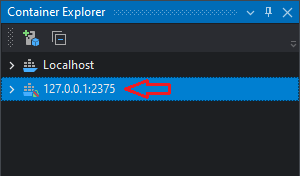
Images
Browsing images
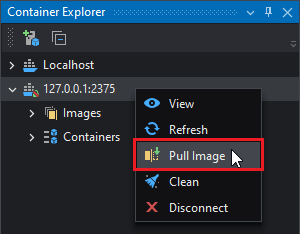
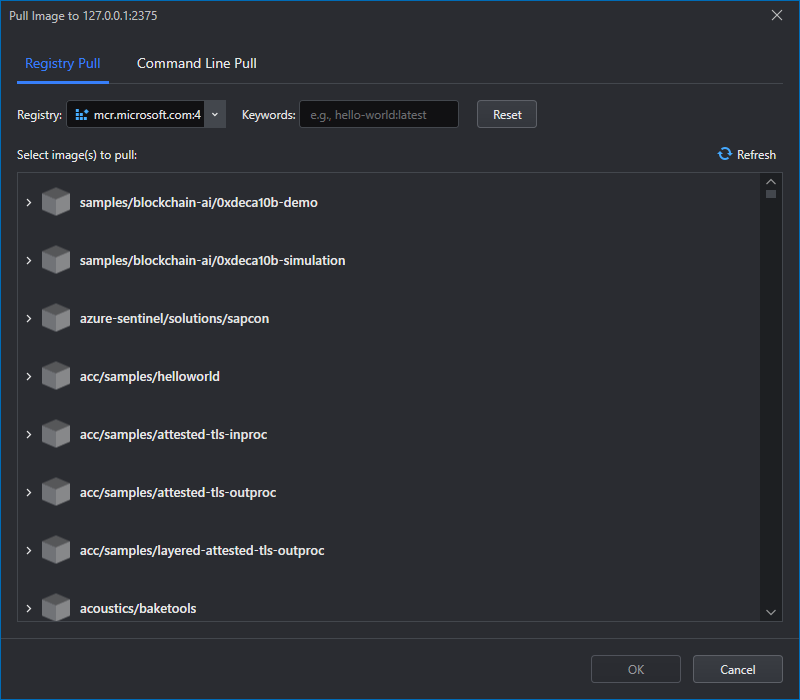
To browse the images of a registry, right click on an engine and select Pull Image.
The Pull Image window will show up.
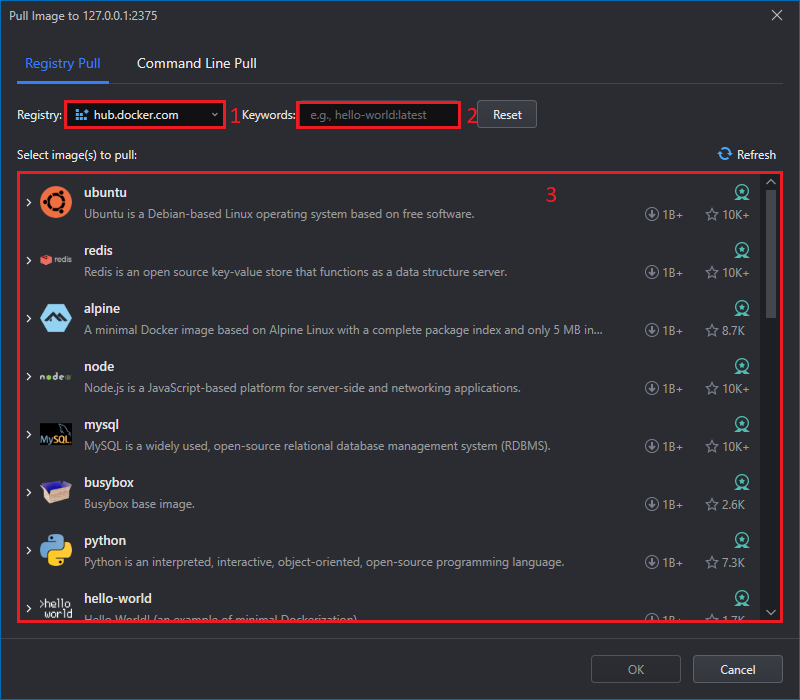
This window is composed by the following:
Registry dropdown list -- Here you can select the registry from which to show images from.
Image filter -- You can filter by image name or tag.
Image browser -- This is the list of the images that match the specified filter in the selected registry. You can see the available versions of each image by clicking the arrow on the left.
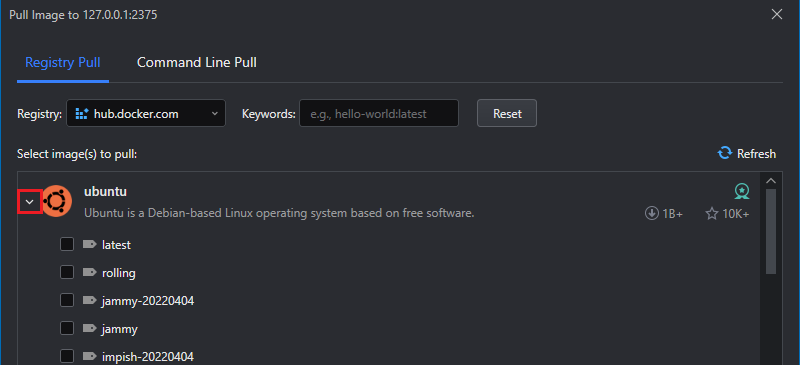
Adding a registry
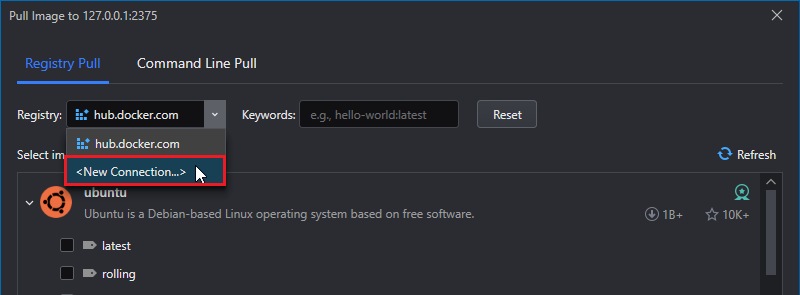
To add a new registry from which to pull images from:
Expand the Registry dropdown list and select New Connection.
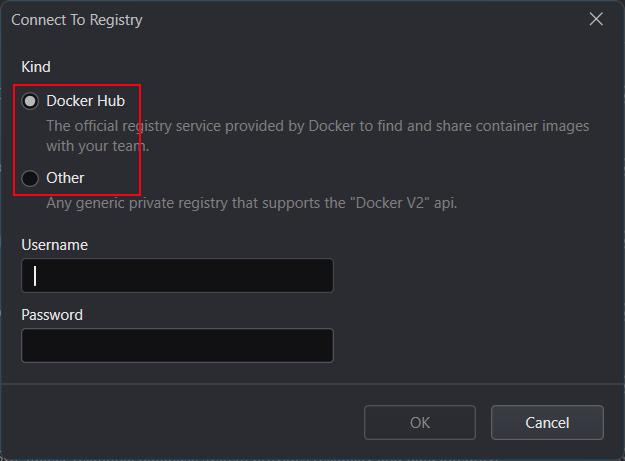
Select the kind of registry to be added.
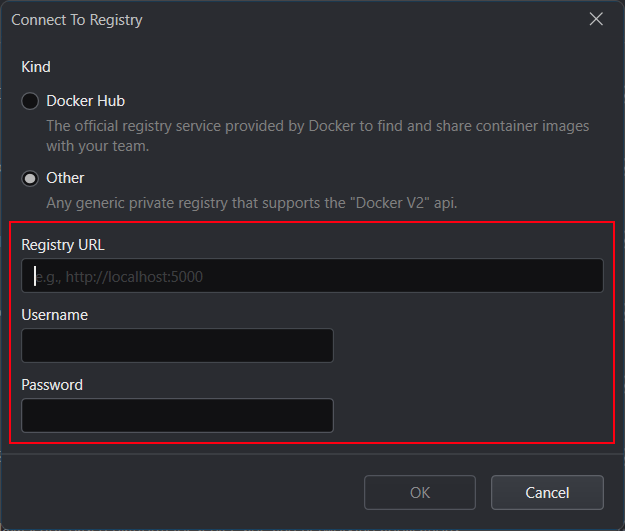
Fill in the required information accordingly.
Click OK.
If the information provided is correct, the registry will now be loaded and is browsable.
Downloading images
To download an image to the Engine:
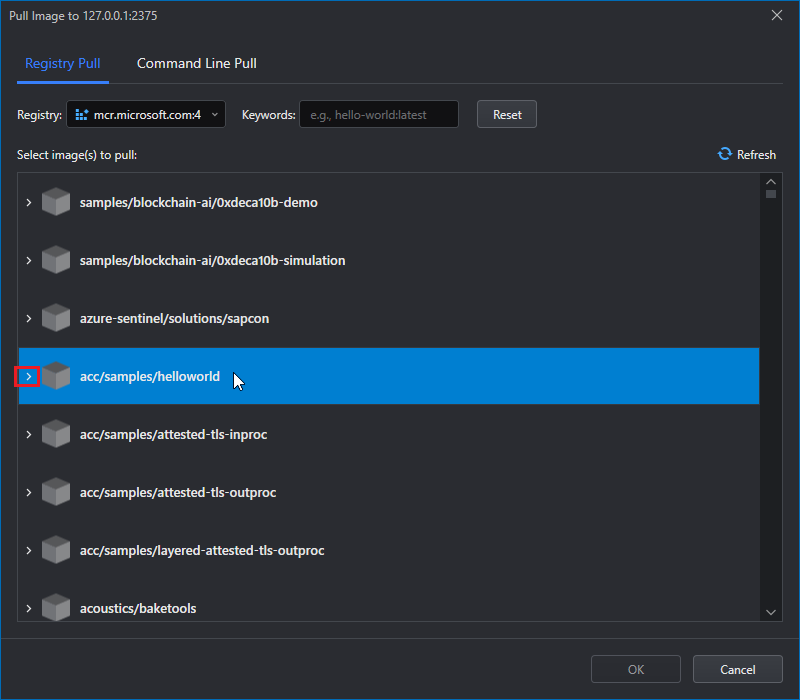
- In the Pull Image window, select the image to download and expand it using the arrow to the left.
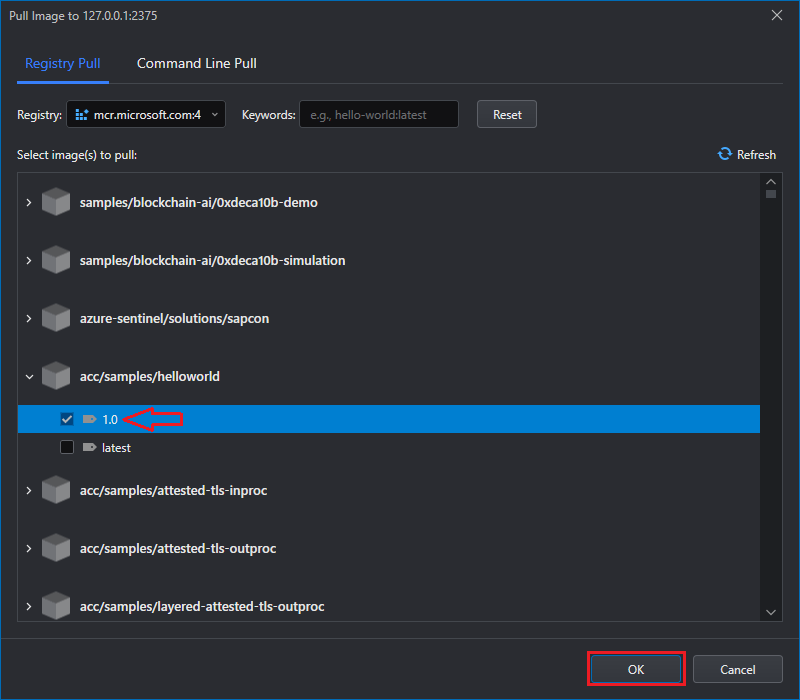
- Select the image tag you want to download and click OK.
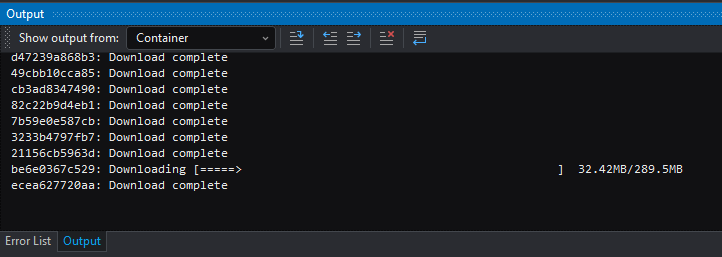
The image will start downloading. Its output can be visible in the Output panel under the Container tab.
Inspecting an image
To view details about an image, expand the Images section of the Engine, and double-click an image (if the image comes from a registry, you might need to expand the registry entry as well).

This will open the image's details in a separate view.
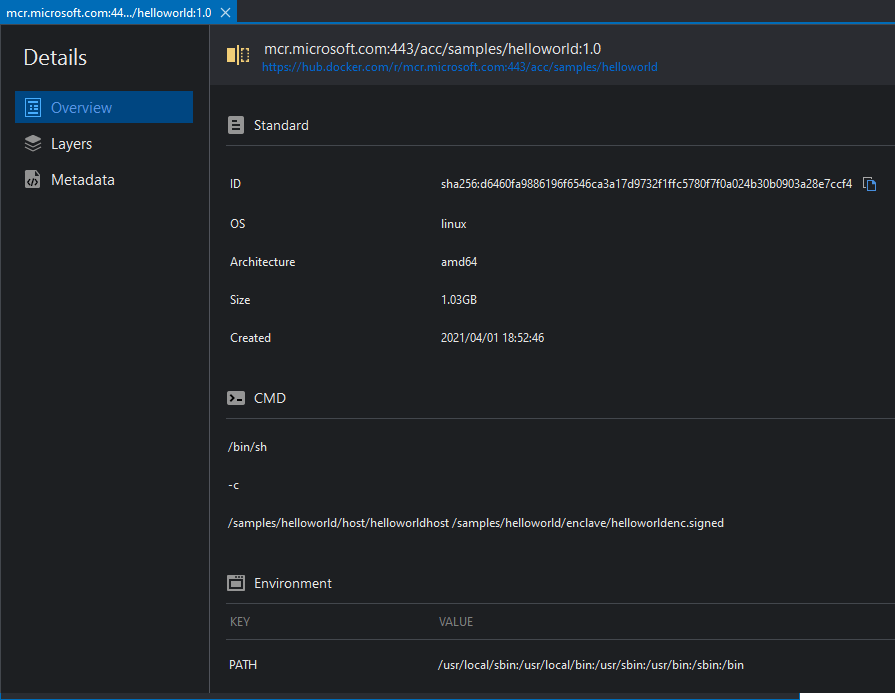
Overview
This view contains details and metadata for the images and some other fields (for example Environment and Labels) that might be different between images.
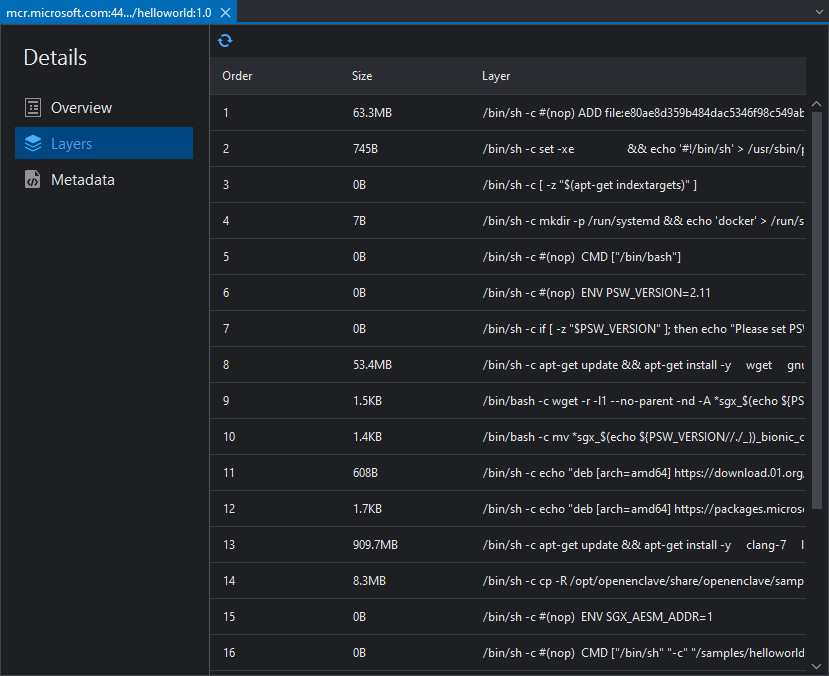
Layers
This view shows the layers that compose the image. For more more information on layers please see this documentation.
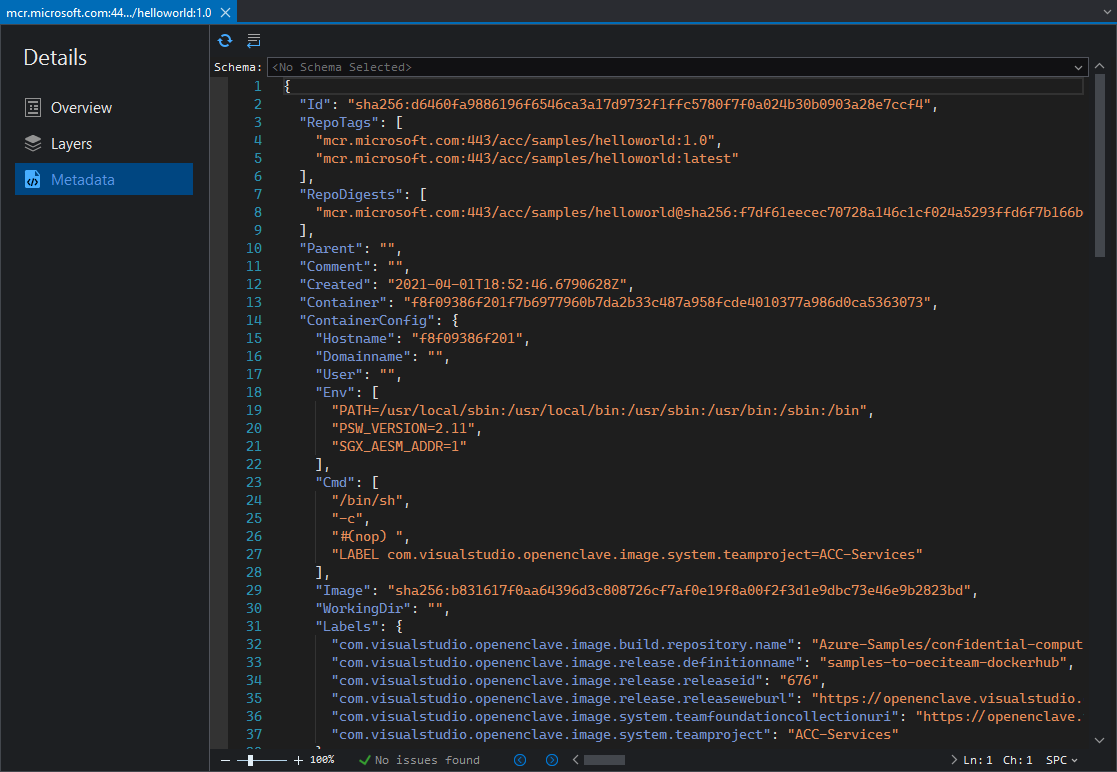
Metadata
This view shows the Image's metadata, which includes information not otherwise accessible through the Overview tab.
Pushing and pulling images
Pushing
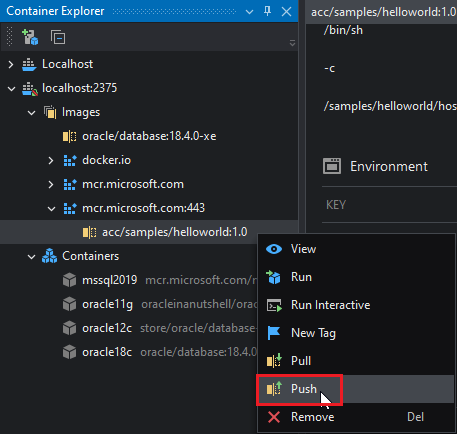
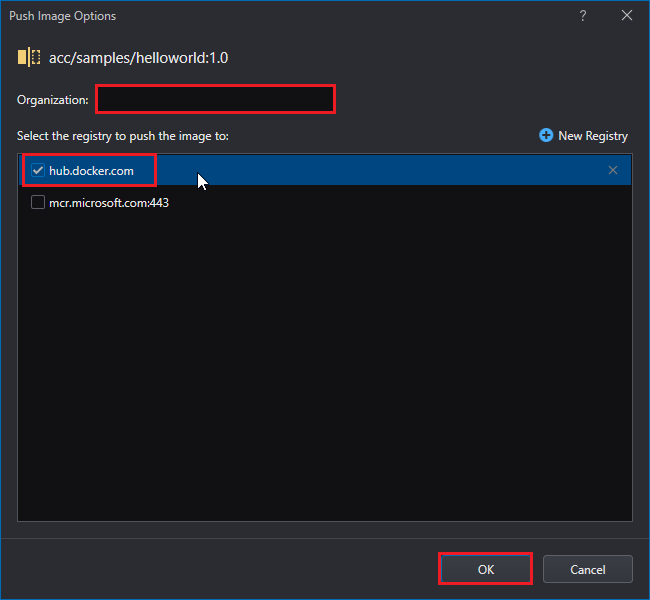
To push an image to a registry, right click the image and select Push.
Input the name of your organization and select the registries to which the image will be pushed, then click OK.
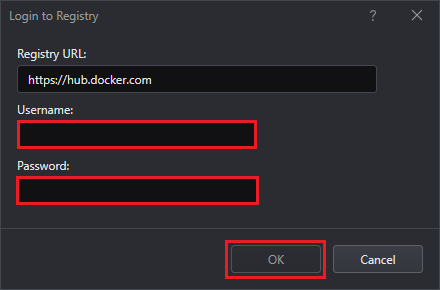
Enter your credentials for the registry and click OK.
Pulling
To pull an image so as to ensure the latest version of the current tag is downloaded, right click on the image and click Pull.
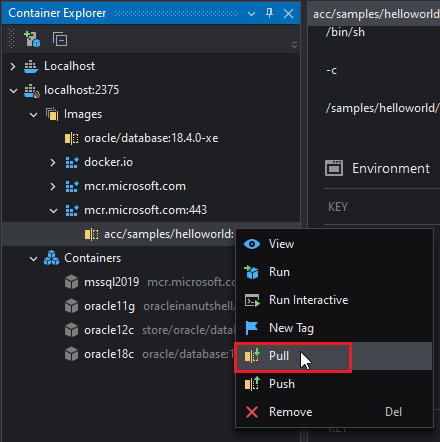
This will check if there's a newer version of the image with the same (and version) and will download it. The output of this process is visible in the Output panel.

Tagging Images
To add another tag to an image, right click on the image and select New Tag.
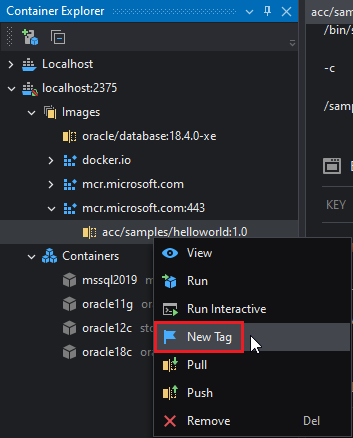
Fill in the appropriate information and then click OK.
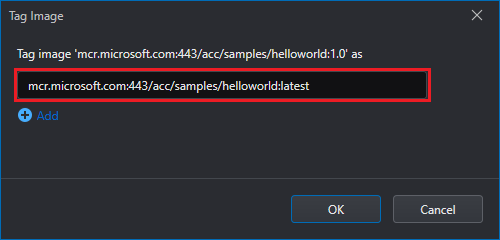
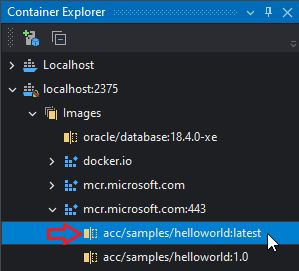
The new tag will show up immediately under the configured Registry in the Container Explorer.
Containers
Containers are particular instantiations of an image. Many containers can be based on the same image but these containers might write different data to their containers making them effectively different. At the same time, a container based on an image can push the changes it made to itself back into the image. This is called Committing.
Creating Containers
To create a container (an instance of an image), expand the Images section of the Engine, right click the image you want to create a container of, and then click Run.
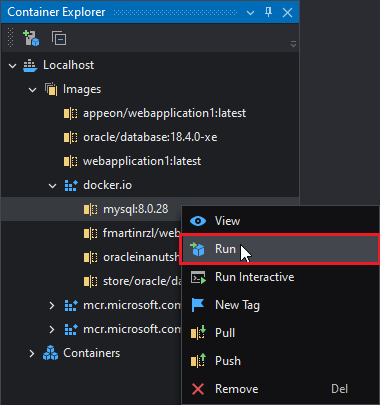
This will open the Run the container window.
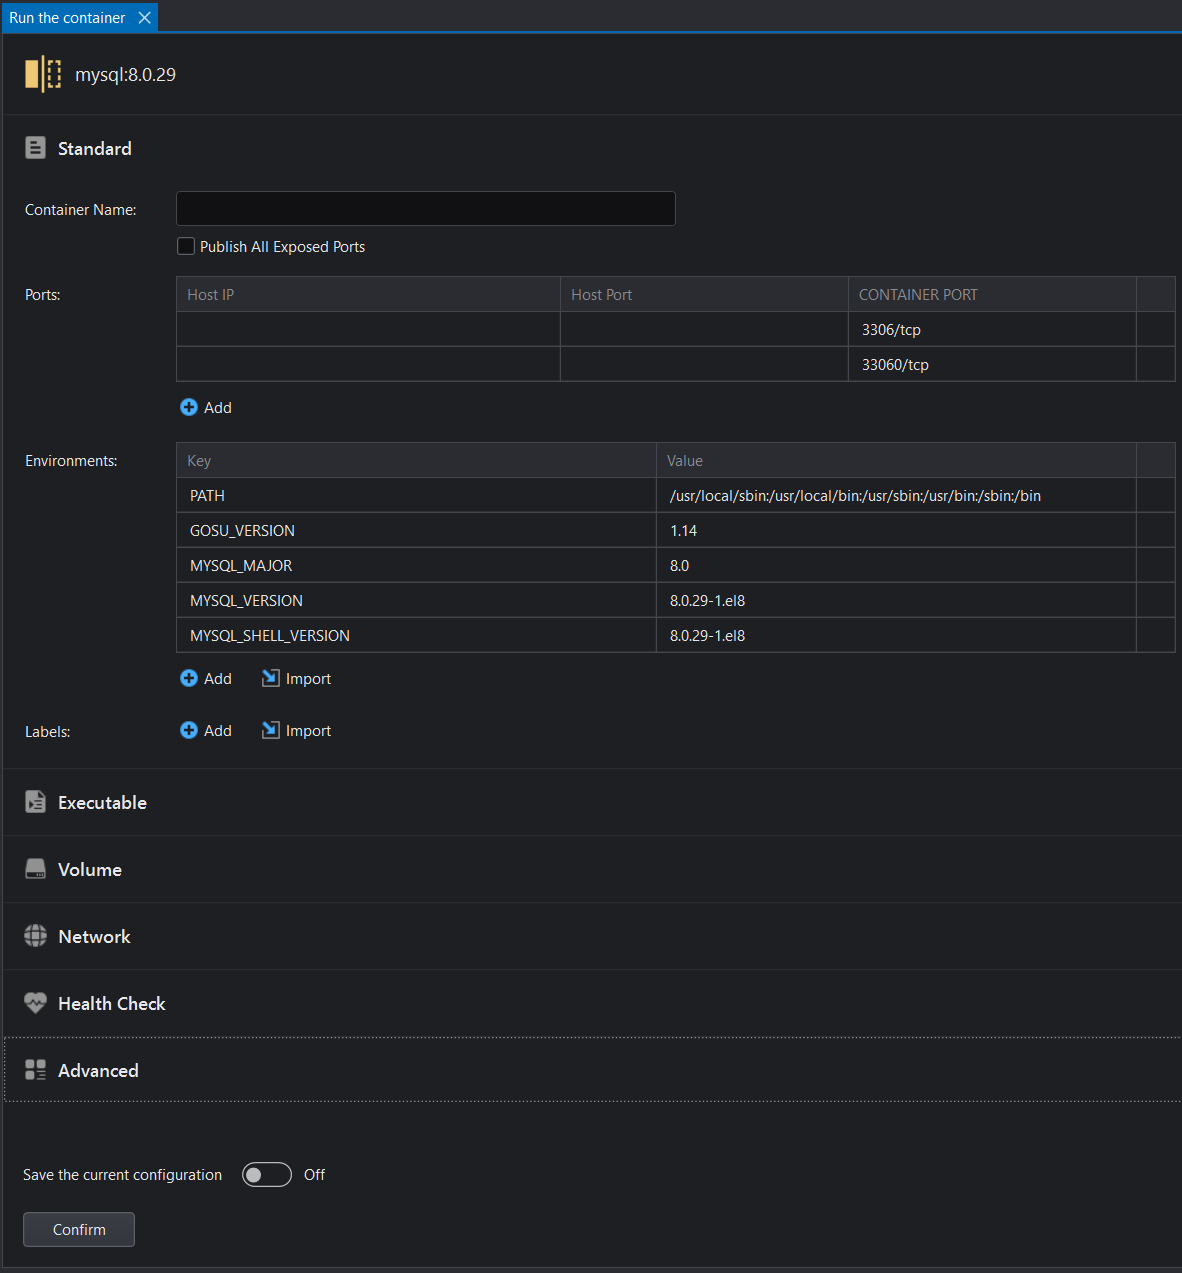
The settings are split in several sections:
Standard
Most commonly overridden settings for containers.
Setting Description Container Name The name of the container. It serves for identification of the container and will be the visible name in the Container Explorer. If omitted, it will default to a random pair of words. Publish All Exposed Ports Makes all ports marked in the Dockerfile with EXPOSEaccessible from the host.Ports The port mapping between the host and the container ports. All requests that the host receives in <HOST IP>:<HOST PORT>will be forwarded to the container's<CONTAINER PORT>.Environments Key-Value pairs that are passed into the container as Environment Variables. Usually, images declare the environment variables they require. You can set their values here. Labels Additional metadata that can be added to the container. Executable
These settings allow to change the startup behavior of the container.
Entrypoint: The command that will always be executed when the container starts.
Command: Indicates the default command to run, or the parameters to the Entrypoint. Passing arguments to a container overrides this setting.
Volume
Directories shared between the container and the host. Volumes are useful to keep data across containers' lifecycles (e.g. databases, logs, etc.).
Network
Health Check
Advanced
Advanced settings that can be configured for the container.
Working Directory: Sets the working directory which will be the context under which the ENTRYPOINT will be run. If the specified directory doesn't exist it will be created.
Restart Policy: Selects a restart policy to control whether the container automatically restarts when it exits or stops.
- No: Never restart the Container.
- On Failure: Automatically restart the container if its main process exited with a non-successful exit code.
- Unless Stopped: The container will be restarted on successful and unsuccessful exit codes, unless it's manually stopped.
- Always: The container will restart after exiting or being stopped.
Allocate a pseudo-TTY: Allocates a terminal into the container to enable acquiring a shell window into it.
Give extended privileges to this container: The container will run in Privileged mode. This will give the container access to all devices on the host.
Delete container when exit: Deletes the container when it exits.
Save the current configuration: Makes the currently configured settings the default for further containers.
To verify that the container is running properly later, it is recommended to set the host IP and port.

After clicking Confirm, the newly created container will appear under the Containers node. Its details page will open in the right window. To verify that the container is working properly, see Previewing a Container.
Run Container Interactive
You can use the Run Interactive option to run a container with the default options, and immediately connect a terminal to the main process.
This is useful for images that contain a single tool whose default command contains a CLI.
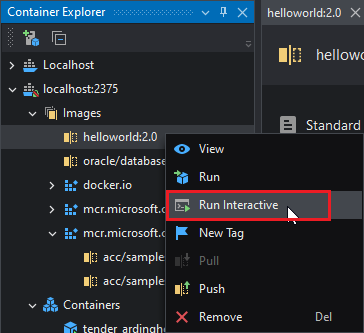
This will immediately open a terminal in the bottom panel.
Inspecting Containers
Previewing a container
Once a container is created, its details page will automatically open for viewing.
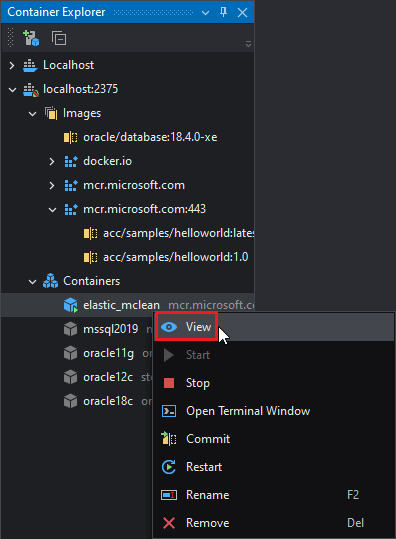
Or expand the Containers node, and then double-click or right-click the container and select View to view detailed information about a container.
In the details view of the container, you can see some of the settings that were configured on creation, along with the network information of the container.
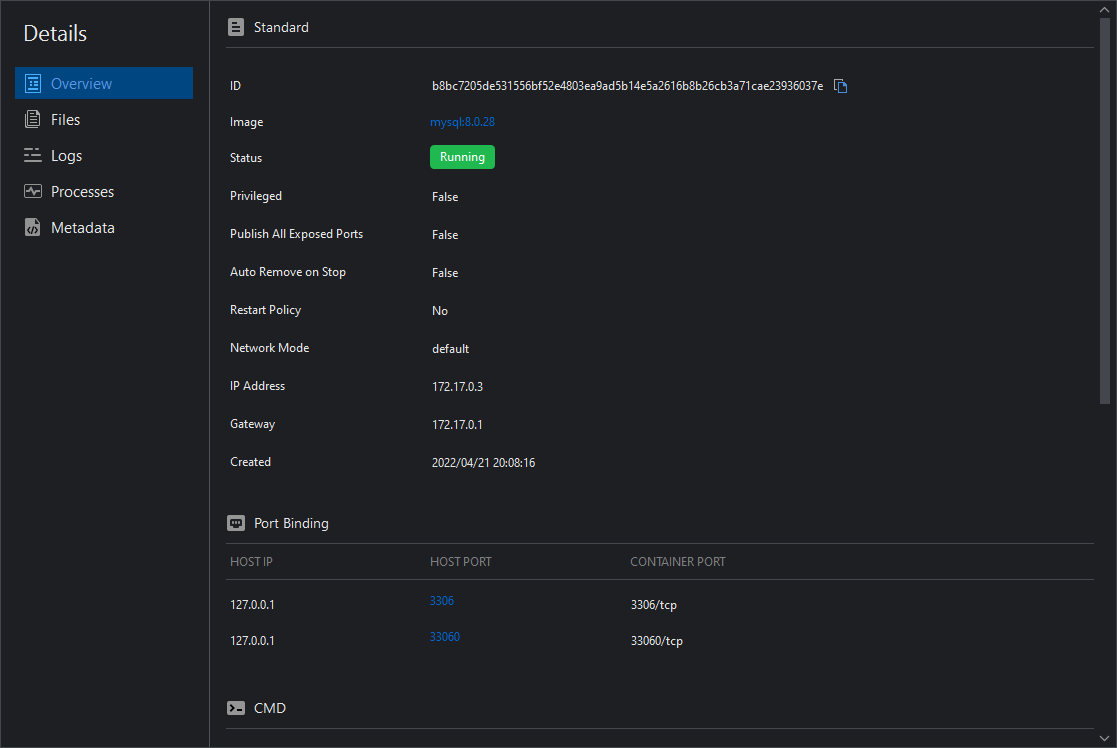
To preview the container, you can directly click the port number in Host Port.

Getting a Shell into the Container
To get a shell into the container and be able to peek around and execute commands from inside the container's environment, right click a running container and select the Open Terminal Window option.
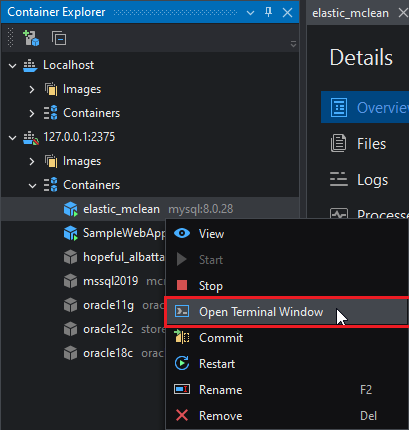
The terminal will open in the lower panel.
This terminal tunnels INTO the container, so any commands issued through this terminal are essentially being executed inside the container, giving you a perspective of the things that the containerized applications can see and what things they have access to.
Viewing the container's files
You can preview a running container's filesystem by opening the container's details and switching to the Files tab.
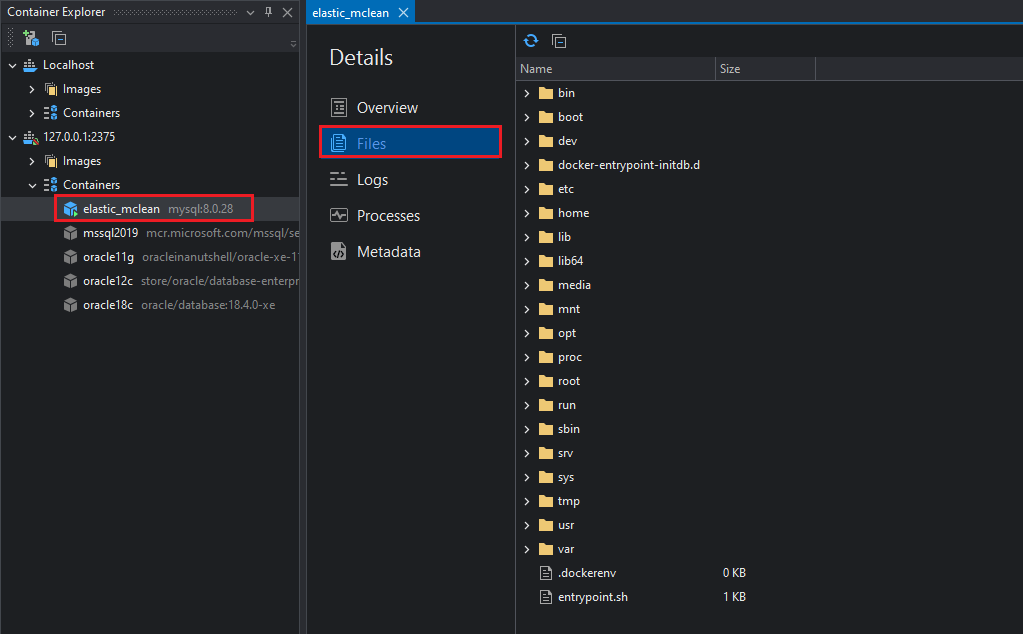
On this view you'll be able to see the files the containerized application creates and any volumes that have been mounted to it.
Viewing the container's logs
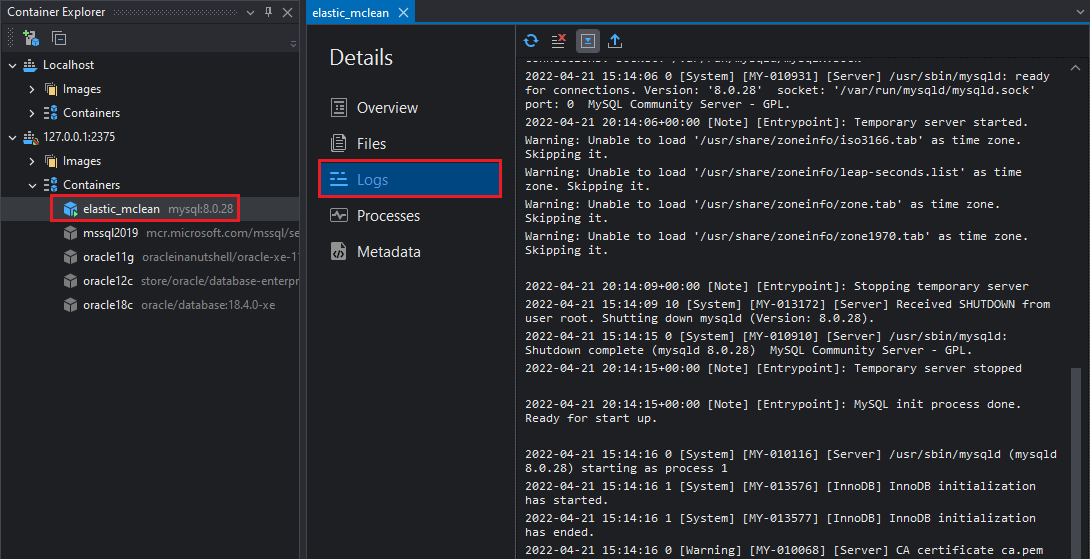
You can view the container's main process' logs by going to the Logs tab of the container details window. The container doesn't have to be running for this operation.
Viewing the container's processes
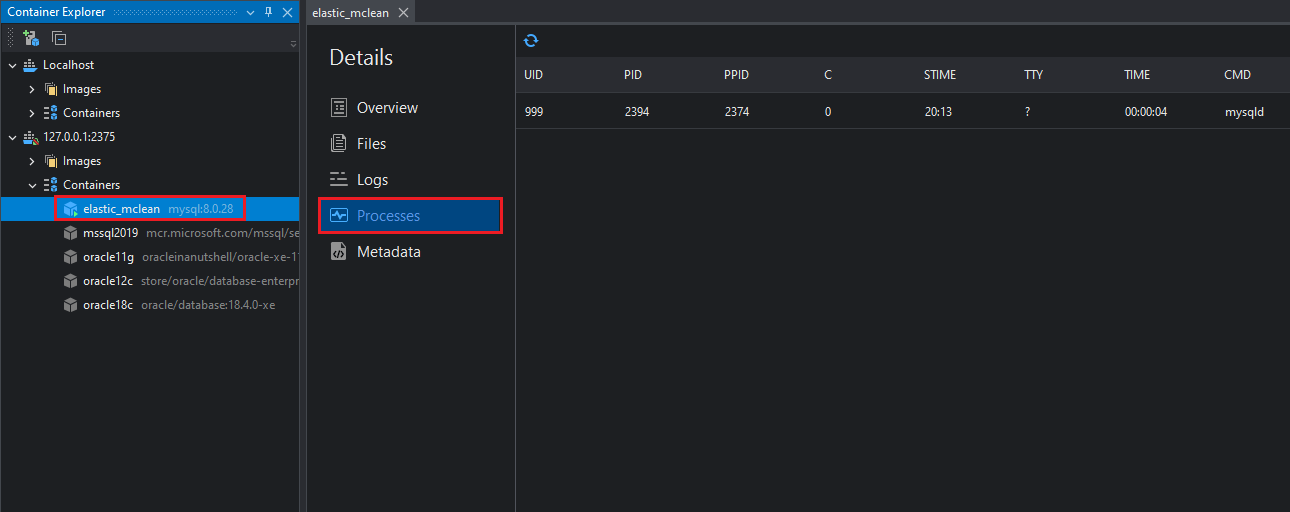
In this tab, a list of the container's running processes is displayed in a table containing information about the process.
Viewing the container's metadata
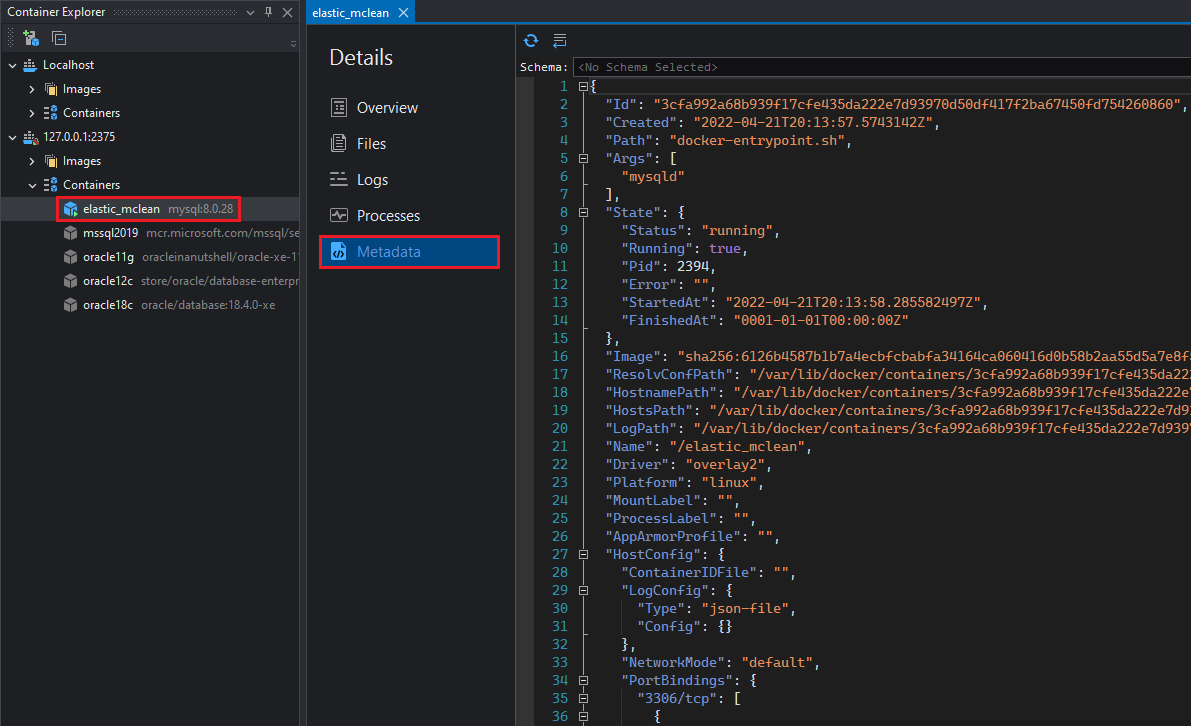
This view displays the container's metadata. That is, additional information that can cannot usually be accessed via other means.
Managing Containers
Starting/Stopping containers
Containers can be started/stopped. Stopping them sends a signal to the main process that it should terminate, and after this is completed, the container stops. Filesystem state is preserved when stopping/starting.
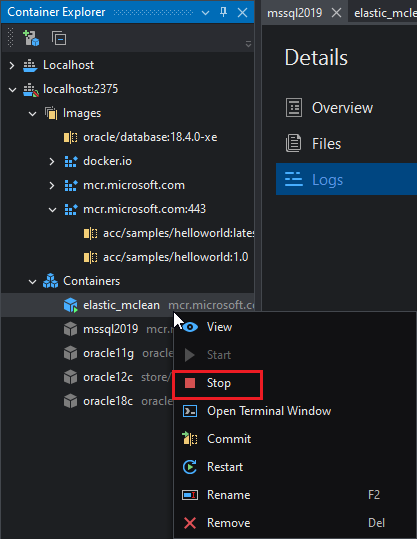
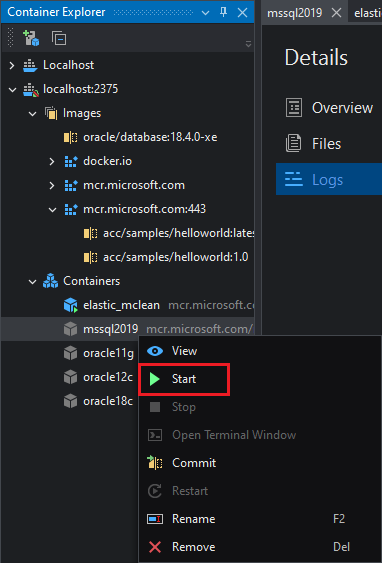
To start/stop a container, right click the container and then select the appropriate option in the popup menu.
 |
 |
|---|---|
| Running containers can only be stopped | Non-running containers can only be started |
Additionally, the Restart option stops and then immediately starts the container.
Committing Containers
Committing a container saves any file or configuration changes made to it into a new image. This doesn't include data contained in mounted volumes.
To commit a container into a new image, right-click the container under the Container section of the Container Explorer and then select the Commit option.
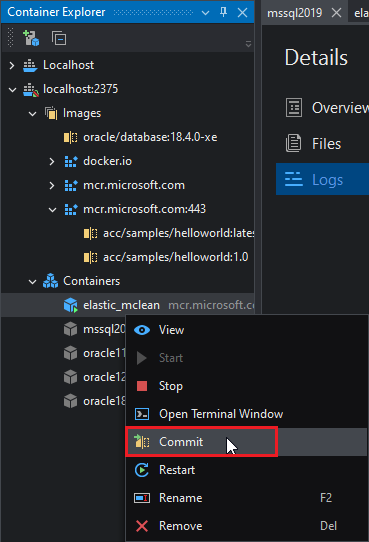
This will open a window in which you can configure the new image's attributes. Set the name and tag of the new image and click OK.
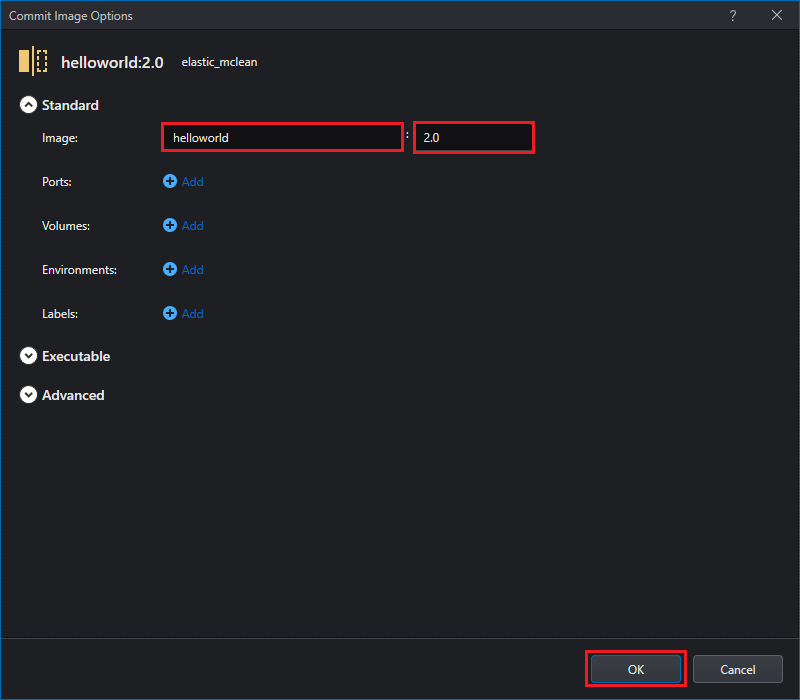
Review the new image that was created under the Images section.
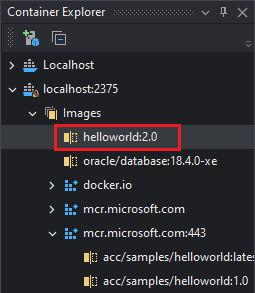
You can now proceed to create containers from this image.
Adding Docker Support to a Project
New Project
When creating the ASP.NET Core Web API, you're offered with the option to add Docker support to it:
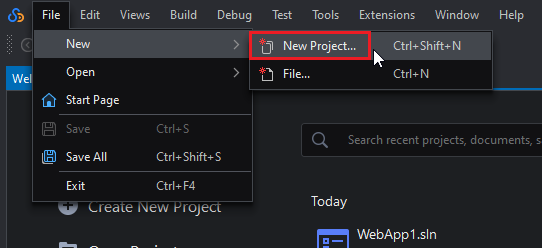
Open the New Project window.
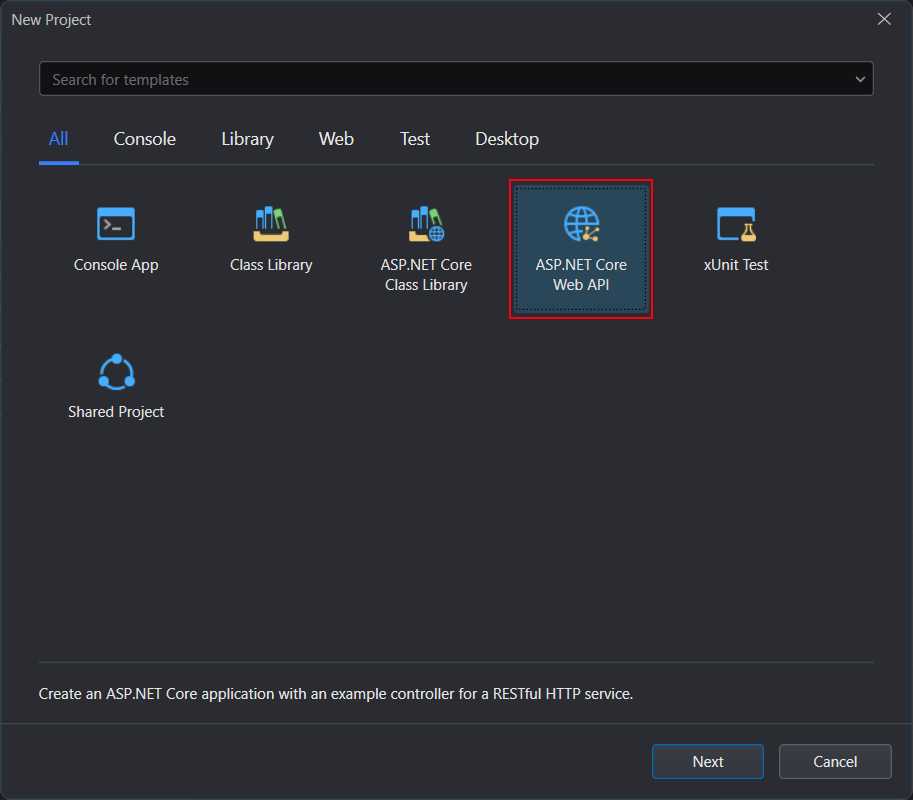
Select ASP.NET Core Web API and click Next.
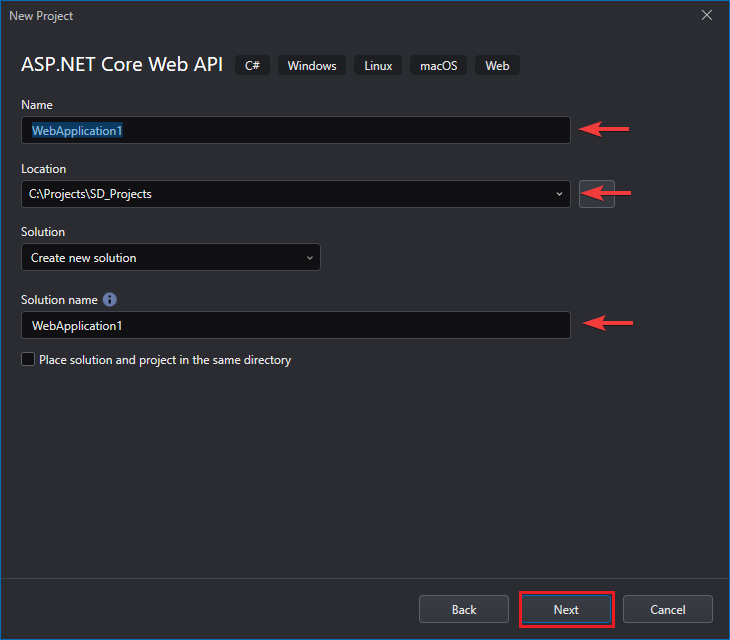
Introduce the project name and its location and click Next.
Click the Enable Docker check box and select Linux as the Docker OS subsystem on top of which the container should run, then click OK.
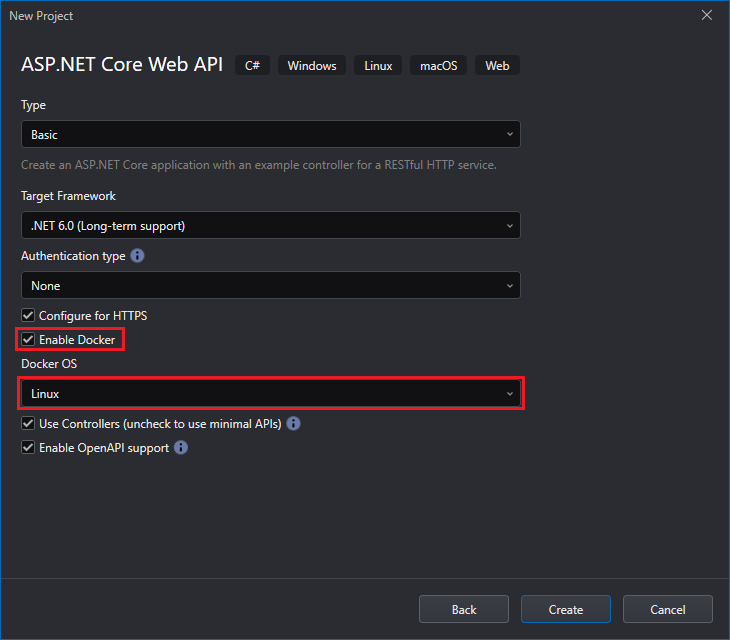
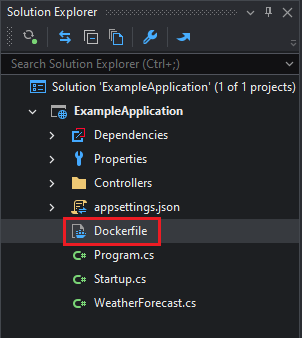
The resulting project will contain a Dockerfile and a .dockerignore file. The Dockerfile contains all the commands that the user can call on the command line to build the image. The .dockerignore file is used to set which files and directories (unnecessarily large or sensitive files and directories) are not sent to the daemon.
Docker can automatically build images by reading the commands in the Dockerfile. When you add Docker support, SnapDevelop automatically generates a Dockerfile specific to your project, which you can also customize to your needs. For more information on Dockerfiles, see Dockerfile reference.
Existing Project
To add Docker Support to an existing project:
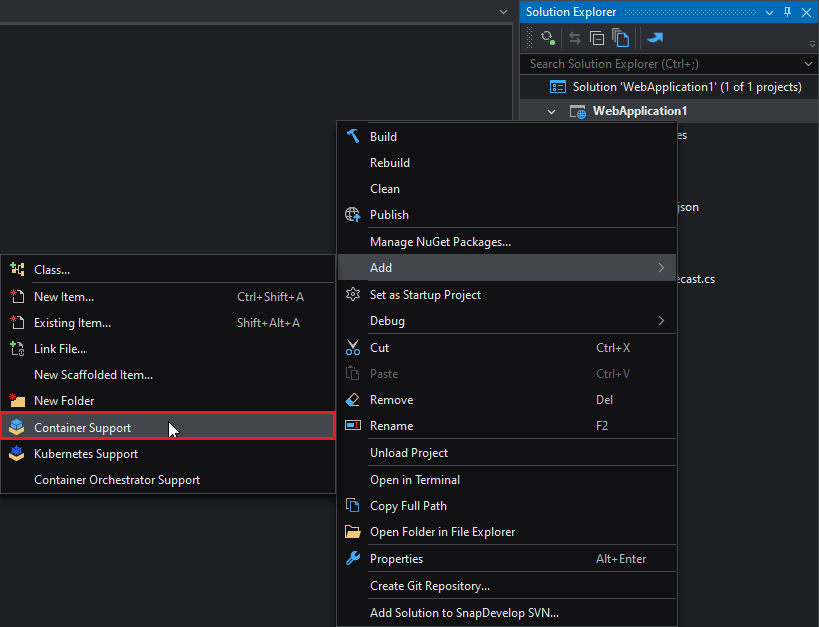
Right-click the project and select Add > Container Support.
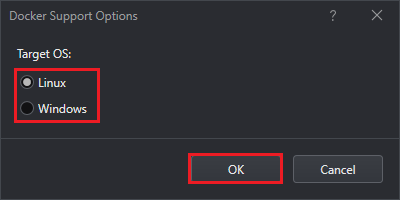
Select the Target OS (the operating system on which the container will be run) and click OK.
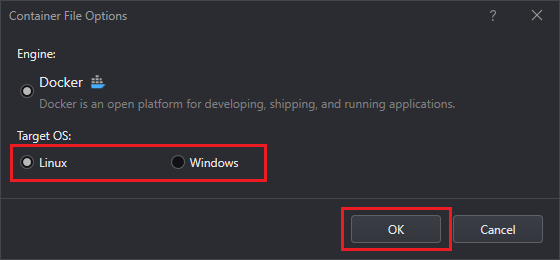
This will add a Dockerfile entry to the project.

Multiple Projects (Adding Docker Compose container orchestration)
SnapDevelop supports two container orchestrators: Kubernetes Compose and Docker Compose. This tutorial will talk about only Docker Compose. For instructions on using Kubernetes Compose, please refer to Adding Kubernetes Compose Container Orchestration.
Container orchestration is a mechanism to deploy applications composed of multiple containers, declaring what containers there are and how they interact with each other. Then the container orchestrator ensures that the requested containers are started, and when one of them fails, it will try to restart it (if allowed by the policy).
When the solution contains multiple projects and needs to be deployed to containers, it is recommended to use container orchestration to deploy multiple projects at one time.
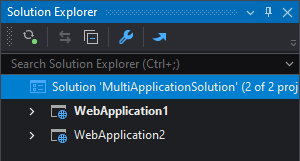
Suppose we have a solution composed of two projects.
You can choose to add container support to the project one by one (that is, add Docker support to each project as described previously, so each project will have the required Dockerfile, and each project will then be deployed separately).
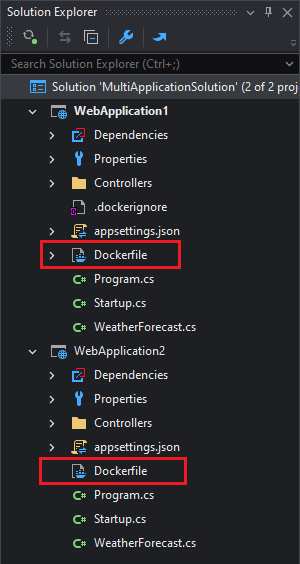
You can also choose to add container orchestration support to both projects in the solution, so you can deploy both projects at one time.
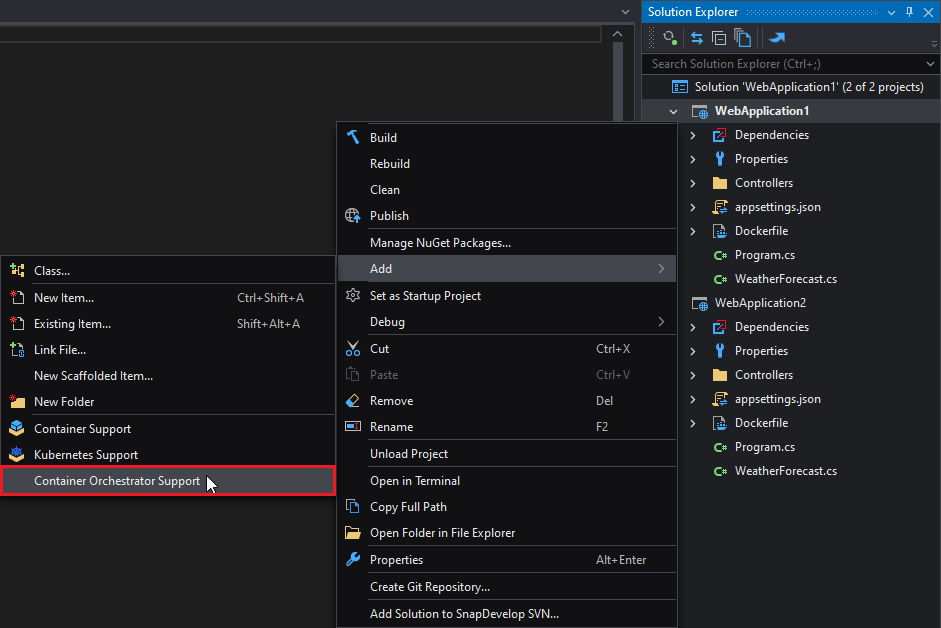
To add container orchestration support, you will need to work on the project one by one. Right-click on the first project and select Add > Container Orchestration Support.
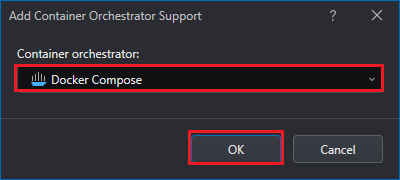
Select Docker Compose as the Container orchestrator and click OK.
Select the Target OS for the containers and click OK.
This adds a file named Dockerfile to each project, and adds a project named docker-compose to the solution.
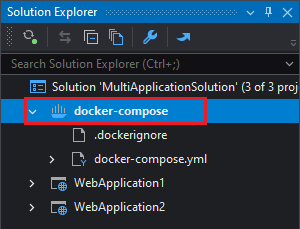
The docker-compose project includes the docker-compose.yml and .dockerignore files. docker-compose.yml is a YAML file defining services, networks, and volumes. For more information about docker-compose.yml, refer to the Compose file reference. The .dockerignore file helps to avoid unnecessarily sending large or sensitive files and directories to the daemon. For more information about the .dockerignore file, go to Dockerfile reference | Docker Documentation.
You can remove the Docker orchestration support by right clicking on the docker-compose project and selecting Remove.
docker-compose.yml is the Docker Compose description file. This is what it looks like:
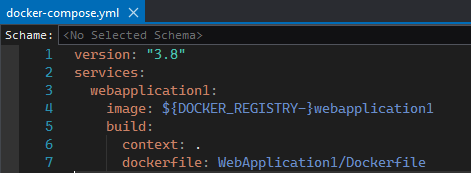
Currently it only contains one container (because we have added the container orchestrator support to the first project). To add the second container repeat the previous steps with the second project. After doing that, the docker-compose.yaml file will be updated as follows.

If your solution contains more projects, repeat the above steps to add container orchestrator support to the other projects.
For more information on Docker Compose, please follow this link.
Starting a project with Docker
There are multiple ways to start projects in containers.
Running a single project
To run a Docker-enabled project, you can
Build the image and create the container manually, or
Let SnapDevelop do all that automatically for you
Building the Image Manually
Right click on the project's Dockefile and then select Build Docker Image.

Specify the target engine and the image's name and tag and click OK.
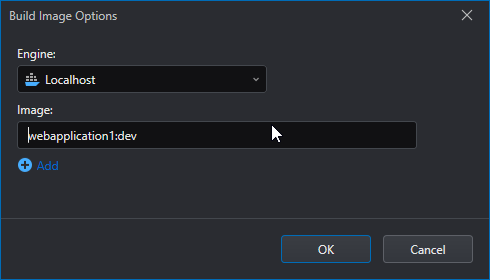
The Docker image will begin the build process and its output will be visible in the Output panel.
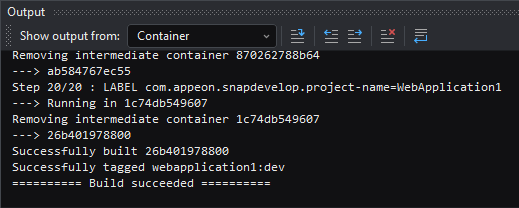
The image will now be visible under the Container Explorer's Images section (under the selected engine).
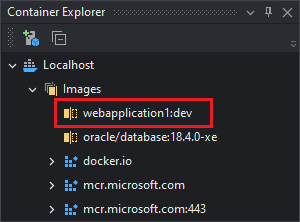
You can now run this image following the steps in Creating Containers.
Using SnapDevelop
To launch a project as a container using SnapDevelop, change the launch option to Docker.
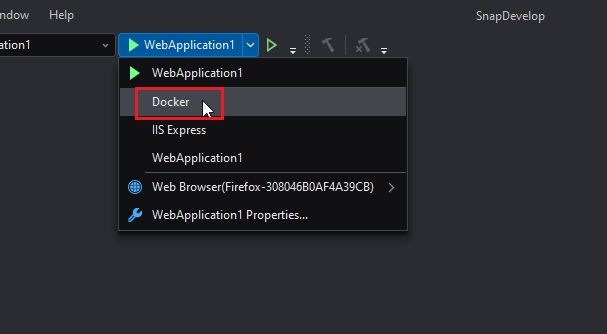
And then click the button.
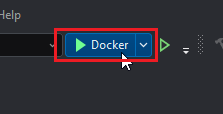
The image will be built, the container will be created and the application will be launched automatically. The output for these processes can be seen in the Output panel.
Note: this way of running a project is only for development and testing purposes. This method mounts the source code, binaries, secrets and other folders into the container to make it function properly. Using the image generated with this method in any other way will yield unintended results.
Running with Docker Compose
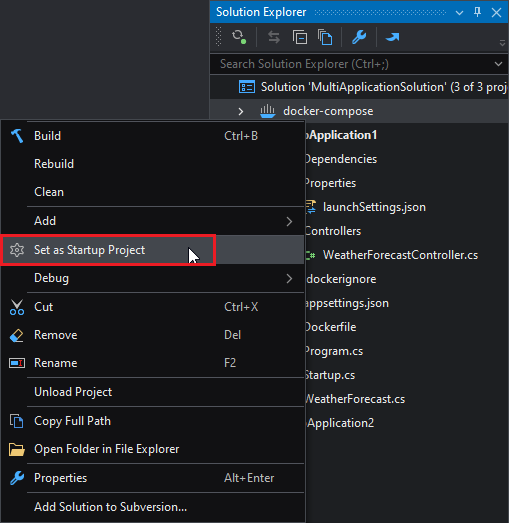
To run a solution through the Docker Compose orchestrator, first make sure the docker-compose project is set as the startup project.
The toolbar should show Docker Compose as the Run Target. Click the Docker Compose button.
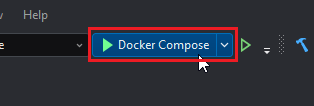
SnapDevelop will build the projects and images, and create the containers. The output will be shown on the Output panel.
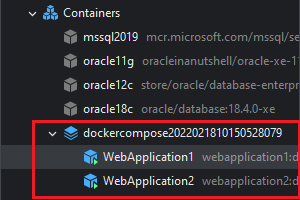
The resulting containers will be grouped by their network and visible in the Container Explorer.
Debugging a Project
You can debug your project in the Docker or Kubernetes environment. For details, refer to Debugging a project in Docker or Kubernetes.
Publishing a Project to a Docker Registry
This section assumes the project's already configure to allow Docker Support. Please refer to the Adding Docker Support to a Project section for more information.
To publish a project as a Docker Image:
Right click the project and select Publish.
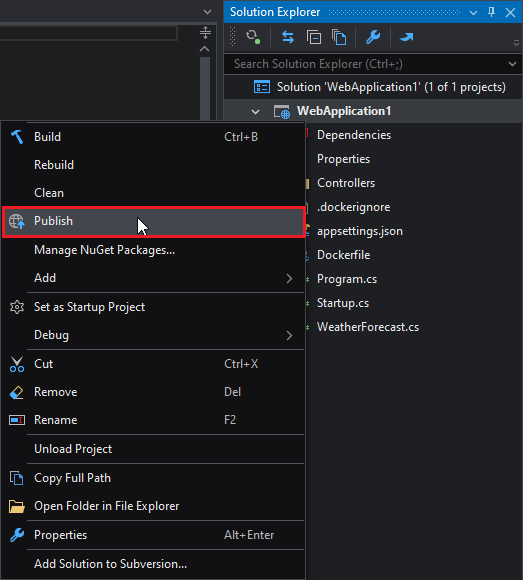
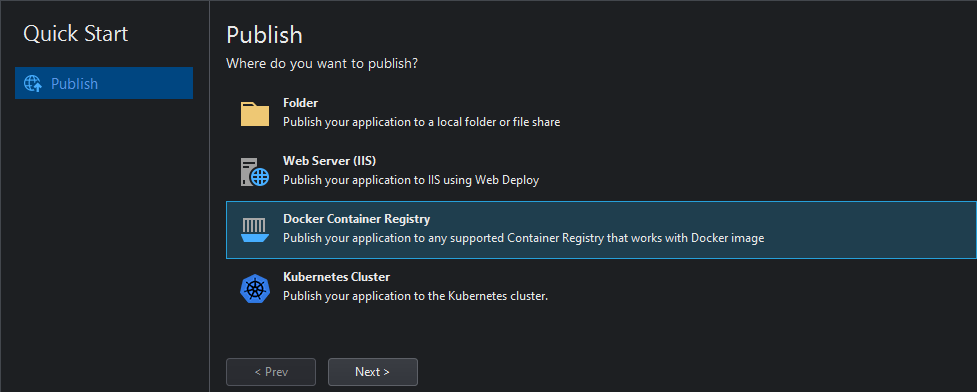
Select Docker Container Registry and click Next.
Select the engine from which to publish, the target registry, type the Organization name and the image's name and tag, then click Next.
Settings Description Engine Select a Docker engine, or select New Connection... to connect to a new Docker engine. Registry Select a Docker registry. You can select a registry on Docker Hub or MCR (Microsoft Container Registry), or select New Connection to connect to a self-hosted Docker registry. Organization Specify your organization name. Image Specify the image name. Tag Specify a tag for the image. 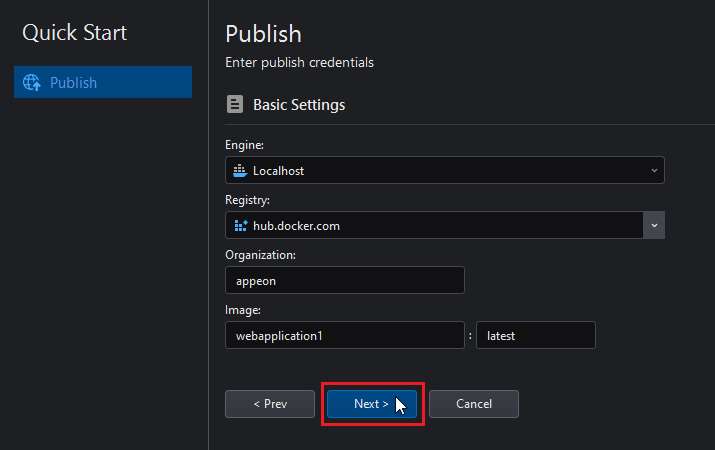
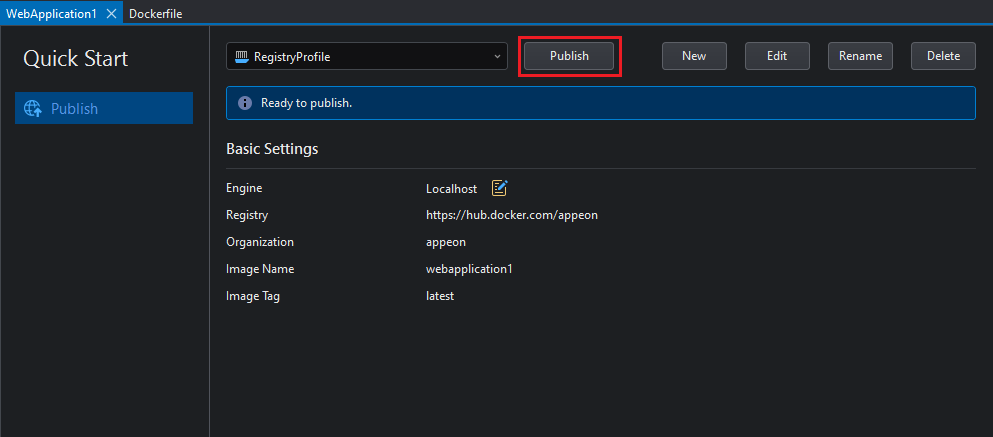
Review the summary of the settings and click Publish.
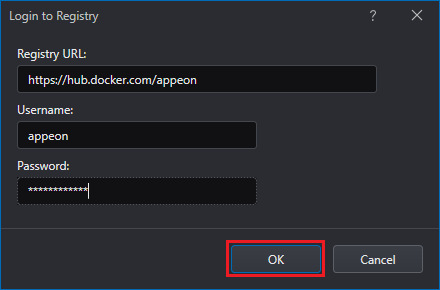
If the registry requires authentication, you will be prompted for your credentials. Input them and click OK.
When the publishing is completed you will see the following confirmation message.
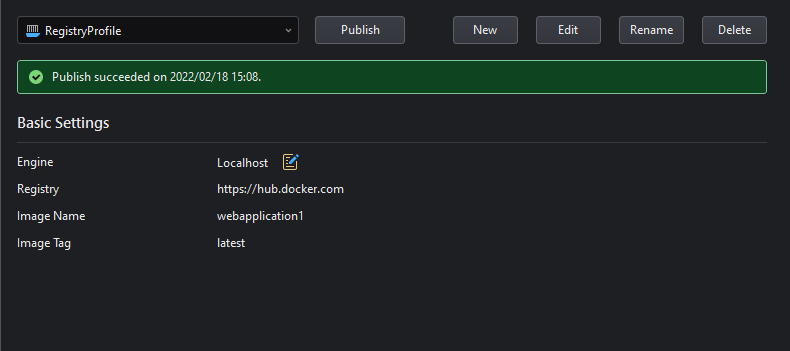
Next, you can open Container Explorer, connect to the corresponding Docker engine and find the published image, then create a container for it. For detailed instructions, please refer to the Creating Containers section.