Kubernetes Support
Last updated: August, 2022
SnapDevelop 2022 Kubernetes support aims to simplify Kubernetes management. It provides a new and convenient UI to make developing, debugging and deploying Kubernetes applications easier from inside the IDE itself.
By reading this article you'll learn about the new Kubernetes features added to SnapDevelop 2022 as well as how to perform Kubernetes' most common operations using SnapDevelop 2022's Kubernetes Support and deploying and publishing projects into Kubernetes clusters.
About Kubernetes
Kubernetes, also known as K8s, is an open-source system for automating deployment, scaling, and management of containerized applications.
It groups containers that make up an application into logical units for easy management and discovery. Kubernetes builds upon 15 years of experience of running production workloads at Google, combined with best-of-breed ideas and practices from the community.
For more information about Kubernetes please visit the following link: What is Kubernetes?
Installing Docker and Kubernetes environment
To be able to use SnapDevelop's Kubernetes features, access to a Kubernetes cluster is required. A local single-node (for testing only) Kubernetes cluster can be created using Docker Desktop. Please follow this link for more information.
For its demonstrations, this tutorial will be mainly working around a deployment created on the Workloads section. Whereas for the Running a project with Kubernetes section, a sample project will be introduced.
Kubernetes Explorer
SnapDevelop's 2022 Kubernetes Explorer is a tool that allows you to manage a Kubernetes Cluster's resources (Deployments, Ingresses, Secrets, Config Maps, etc.) from inside the IDE. When used in conjunction with SnapDevelop's Docker Explorer, it allows you to deploy your projects into a Kubernetes Cluster without leaving SnapDevelop.
Opening the Kubernetes Explorer
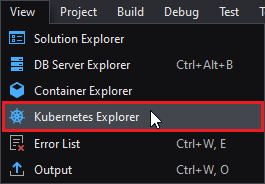
To open the Kubernetes Explorer, go to menu View > Kubernetes Explorer.
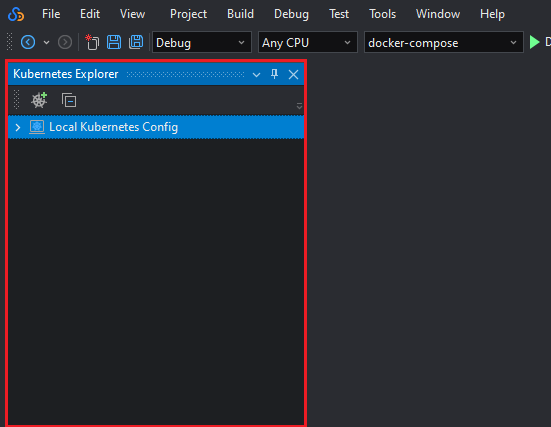
This will show the Kubernetes Explorer sidebar:
Connecting to a Cluster
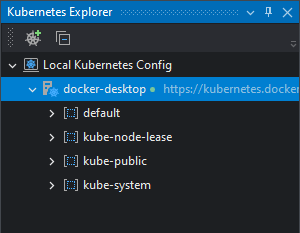
If you're running a local cluster (minikube, Docker Desktop, etc) the cluster will show up automatically on the Kubernetes Explorer:
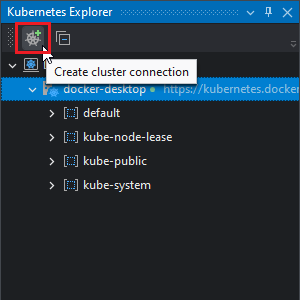
To add an external cluster to the Kubernetes Explorer, click on the Create cluster connection button:
The Cluster Connection window will show up.
You can choose to connect with the cluster through specifying the YAML descriptions; or inputting the connection settings directly.
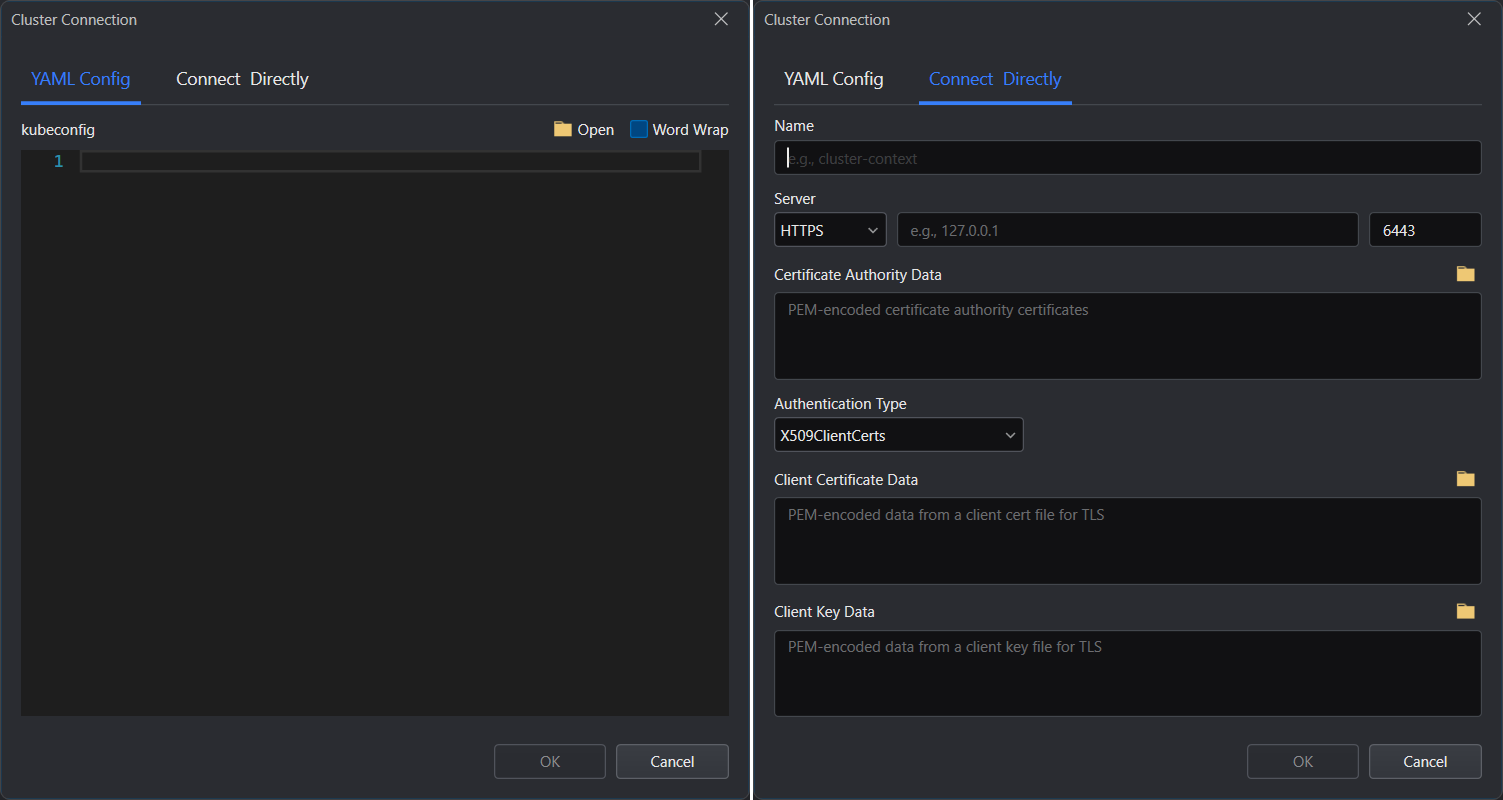
Following is the description of the fields in the Connect Directly tab:
| Field | Description |
|---|---|
| Name | The name of the Cluster. This setting is local and will only affect the display name of the cluster in the Explorer. |
| Server | The protocol and IP/Port of the Cluster to which connect. |
| Certificate Authority Data | (HTTPS only) Data of the Certificate Authority (CA)'s certificate with which the client's certificate is signed. |
| Authentication Type | Selects whether to use X.509 Client Certificates for authentication or Bearer Tokens. |
| Client Certificate Data | (X.509 Client Certificate authentication only) The PEM data of the client's certificate that's been signed by the CA. |
| Client Key Data | (X.509 Client Certificate authentication only) The PEM data of the client's private key. |
| Token | (Token authentication only) A valid Service Account token. |
Viewing a cluster
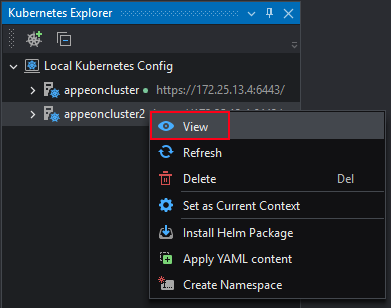
After successfully connecting to the cluster, you can view the cluster information by right-clicking the cluster and then selecting View.
Click Deploy to deploy the metrics-server component in the cluster. After that, you will be able to view information of CPU, memory etc.
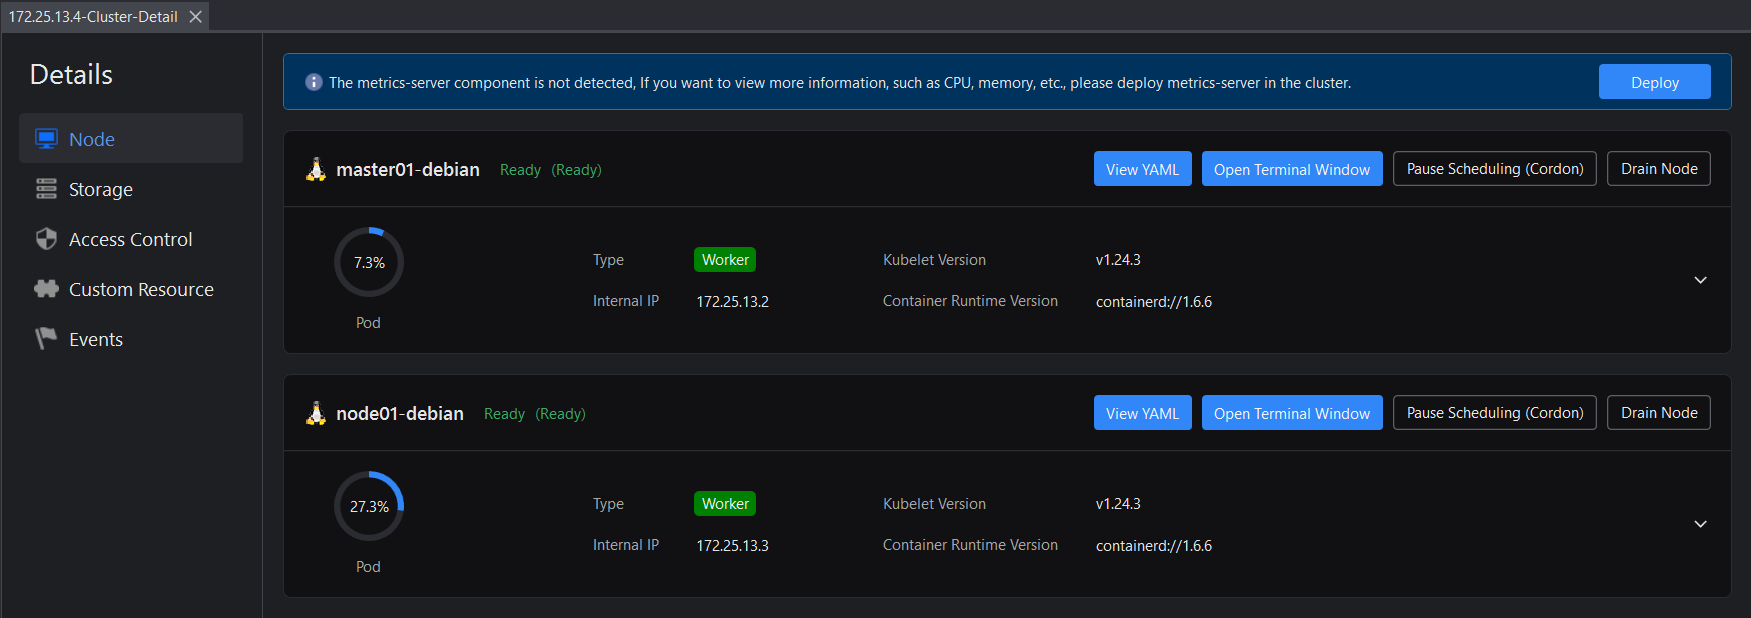
The details view of the cluster has 5 tabs:
- Node -- Displays the information and running status of each server node in the cluster, and provides the ability to view YAML descriptions, open a terminal window (operate the server via commands), and pause/recover scheduling.
- Storage -- Displays information about persistent volumes. Persistent volumes are displayed by storage type. You can search by the state of the persistent volume or by the namespace. You can also view the YAML description and delete persistent volumes.
- Access Control -- Displays cluster role bindings and cluster roles. You can also view YAML descriptions and delete role bindings and roles.
- Custom Resource -- Displays information about custom resources. You can also view YAML descriptions and delete custom resources.
- Events -- Displays cluster related events. You can view the information returned by the event execution.

Installing Helm packages
The Install Helm Package feature is designed to simplify and quickly deploy application services to Kubernetes clusters. You don't need to install the Helm CLI client or learn to use Helm commands.
You just need to create a Helm package (also called a chart) by consolidating all the resource definitions needed to run applications, tools or services in the Kubernetes cluster, and prepare a dedicated configuration file (for example, values.yaml) for the corresponding deployment. For more information about Helm, please refer to https://helm.sh/docs/.
Then right-click on the cluster and select Install Helm Package.

Specify to install the Helm package through a Helm package or a Helm archive.
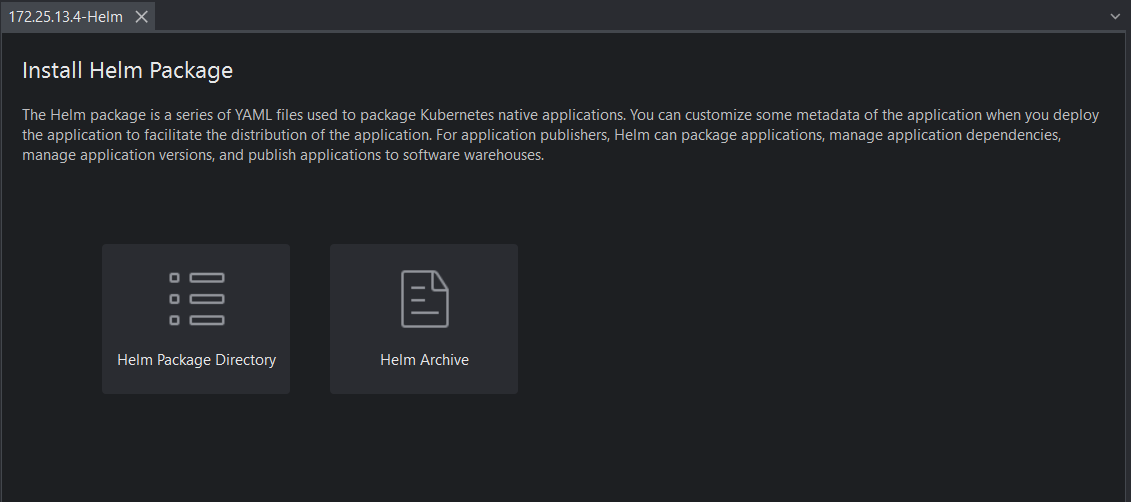
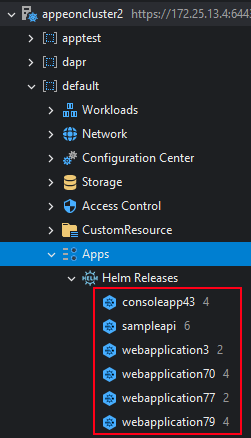
Once installed, you will see a new release under Apps > Helm Releases in Kubernetes Explorer. To view and delete a release, please refer to Apps.
Applying YAML content
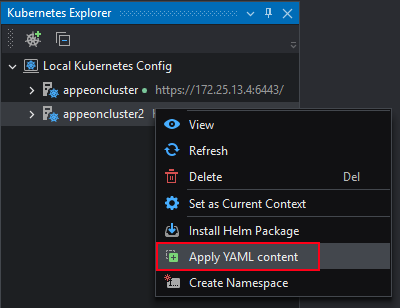
After successfully connecting to the cluster, you can execute YAML content to manipulate the cluster, such as creating or editing workloads, services, etc.
Right-click the cluster and select Apply YAML Content.
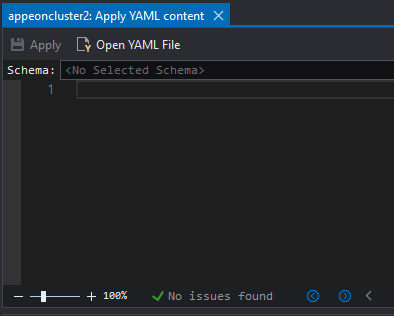
Enter the YAML content in the YAML editor, or open one or more YAML files. Then click Apply.
Set to current context
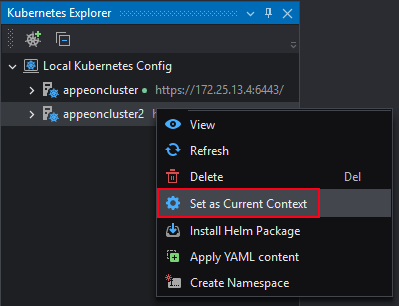
After successfully connecting to multiple clusters, if you want to use commands to operate different clusters, you can use the Set as Current Context function to quickly switch to different clusters. For example, if you want to use commands on the appeoncluster2 cluster, you can right-click the appeoncluster2 cluster, and then select Set as Current Context to use commands on the appeoncluster2 cluster without manually entering commands to switch to that cluster.
The cluster set as the current context displays a small green dot icon.

Namespaces
Namespaces are logical organizational scopes that group the resources of a cluster.
Resources in one namespace do not conflict with resources in another cluster even if they have the same name. At the same Each namespace can have a distinct authorization policy attached to it.
Namespaces are intended for use in environments with many users spread across multiple teams, or projects. For clusters with a few to tens of users, you should not need to create or think about namespaces at all. Start using namespaces when you need the features they provide.
They are the first level of objects in the Explorer (children of the cluster object) and are identified with the ![]() icon:
icon:
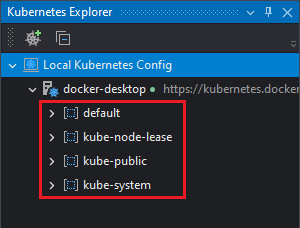
Each namespace groups its resources in the same way, described in the following sections.
Creating a Namespace
To create a namespace, right click on the cluster element and select Create Namespace:

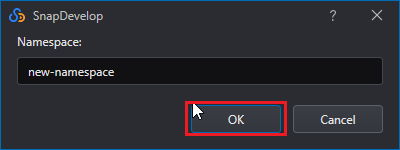
Then enter the name of the namespace and click OK:
Deleting a Namespace
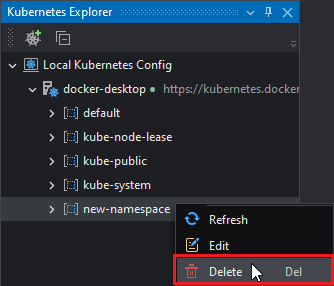
To delete a namespace, right click it and then select Delete:
Workloads
Workloads are the objects that ensure the state of the cluster reflects what's desired. SnapDevelop's Kubernetes Explorer supports 2 types of workloads:
Deployments:
You describe a desired state in a Deployment, and the Deployment Controller changes the actual state to the desired state at a controlled rate. You can define Deployments to create new ReplicaSets, or to remove existing Deployments and adopt all their resources with new Deployments. For more info on Deployments check this link.
Stateful Sets:
StatefulSet is the workload API object used to manage stateful applications.
Manages the deployment and scaling of a set of Pods, and provides guarantees about the ordering and uniqueness of these Pods.
Like a Deployment, a StatefulSet manages Pods that are based on an identical container spec. Unlike a Deployment, a StatefulSet maintains a sticky identity for each of their Pods. These pods are created from the same spec, but are not interchangeable: each has a persistent identifier that it maintains across any rescheduling.
If you want to use storage volumes to provide persistence for your workload, you can use a StatefulSet as part of the solution. Although individual Pods in a StatefulSet are susceptible to failure, the persistent Pod identifiers make it easier to match existing volumes to the new Pods that replace any that have failed.
For more info on Stateful Sets check this link.
When Deployments have its pods be destroyed, a new one will be created albeit with a new identity (Network ID, storage, pod name). They are stateless. But if a Stateful Set pod is destroyed and a new pod is started to achieve the desired state, its identity will be preserved.
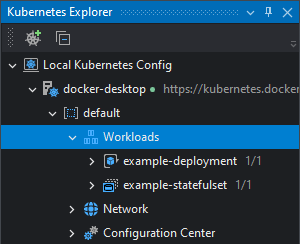
They are grouped under the Workloads node with the ![]() icon for Deployments or
icon for Deployments or ![]() for StatefulSets.
for StatefulSets.
Creating a Workload
To create a workload, right-click the Workloads entry and select either Create Deployment or Create StatefulSet. For this example, a deployment will be created.
Please review the respective documentations on Deployments and StatefulSets for more information.
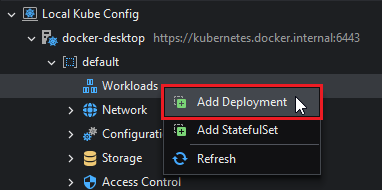
This will open the Deployment window:
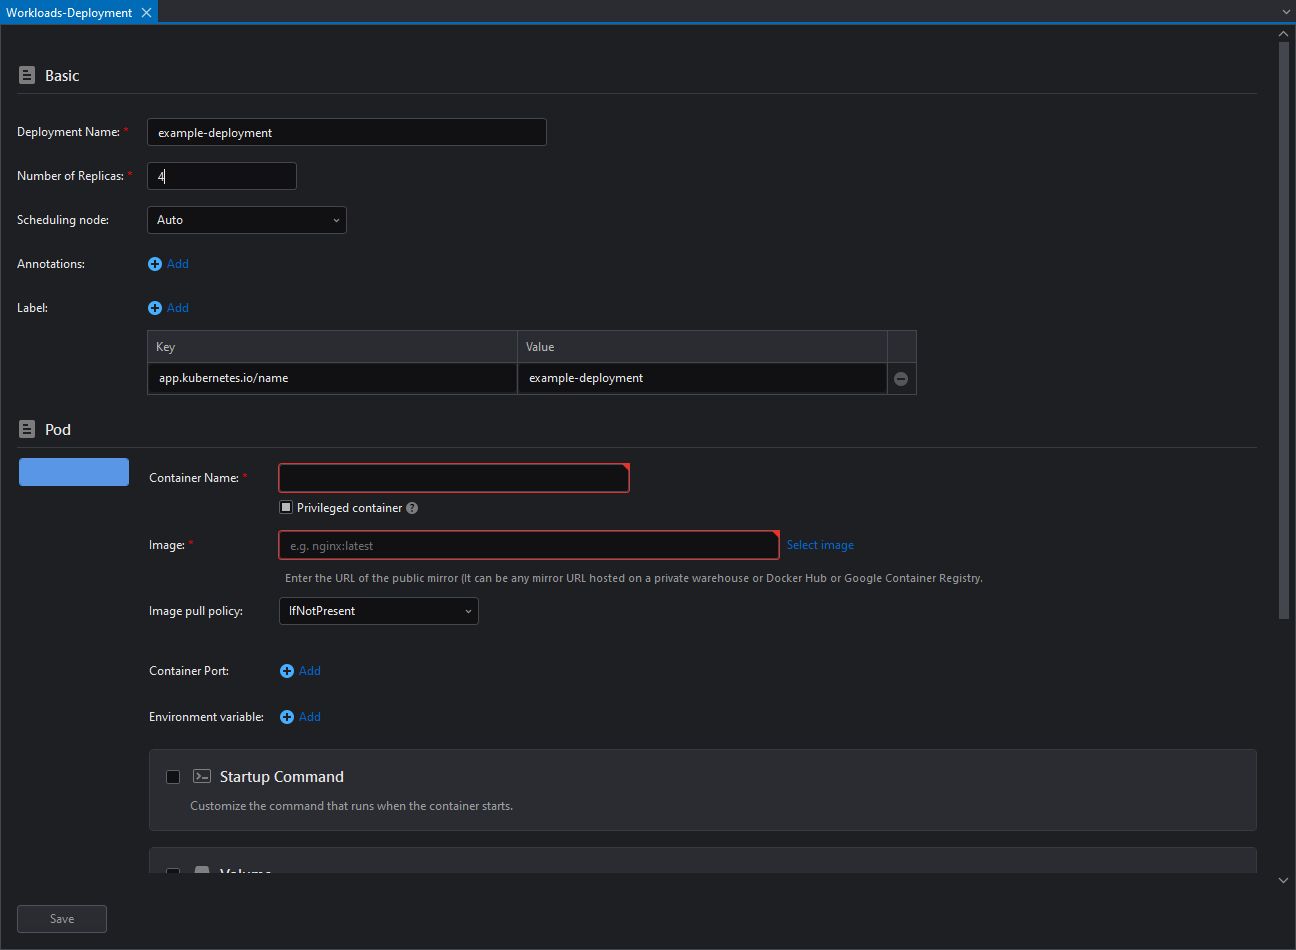
The parameters are described as follows:
Basic Parameters
| Parameter | Description |
|---|---|
| Deployment Name | The name of the deployment. |
| Number of Replicas | How many pod replicas (instances) the deployment will try to maintain. |
| Scheduling node | The node that's hosting the scheduler. |
| Annotations | Additional information attached to the pods. This is often used to communicate information to other tools. |
| Label | A label that will identify the pods this deployment creates. |
Pod Parameters
| Parameter | Description |
|---|---|
| Container Name | The name of the container. |
| Image | The image the containers will pull. |
| Image pull policy | The image pull policy of the pods. See below for more details. |
| Container Port | The container ports that will be exposed. |
| Environment variable | Environment variables that will be passed to the container. |
| Command | Override for the container's ENTRYPOINT. |
| Args | Arguments to the application. |
| Local storage | Volumes that will be mounted on the container. See below for more details. |
| Survival check | Container endpoint that will be queried to know if the container is in a good state. If this request fails, the container will be restarted. |
| Readiness check | Container endpoint that will be queried to know if the container is ready to receive requests. Until this endpoint returns a successful code, it will not receive client's requests. |
| Required resources | Specifies the minimum amount of resources this pod requires to work. See below for more details. |
| Resource limit | Specifies the maximum amount of resources this pod is allowed to have. If this value is exceeded: For CPU, the process is throttled; for memory, the container is terminated. See below for more details. |
| Metrics scaling | Automatically scale the deployment under certain CPU/memory conditions. |
ImagePullPolicy
The policy to follow when creating the containers.
IfNotPresent -- Will search on the configured registry when the requested image is not found on the local cache
Always -- Will retrieve the image from the registry even if a cached copy exists
Never -- Will not search the registry if the image is not found on the local registry. Container creation will fail if the image is not in the cache.
Local Storage
Resources that will be mounted into the container.
Temporary Directory: A directory that will be empty when the container starts, can be shared across all the containers in the pod (might use different mountpoints) and will be permanently deleted when the pod is removed.
HostPath: Maps a directory from the node hosting the pod (mount source) into the container (Container Path).
Secrets: Mounts a Secret as a file in the container. Please see the section Secrets for more details.
ConfigMaps: Similar to Secrets, mounts a ConfigMap as a file in the container. Please see the section ConfigMaps for more details.
PersistentVolumeClaims: Uses cloud storage and mounts it into the container. Visit PersistentVolumeClaims for more details.
Required Resources
Specify the minimum amount of resources required for the pod. Pods will only be scheduled onto nodes that have this amount of resources available. If no nodes have the requested resources available, the pod will not be available until there is. Containers are free to under-use or over-use their requested resources.
Resource Limits
Specify the maximum amount of resources a specific container can use. Kubernetes will throttle a container's process to make it obey the CPU limit, but if the process tries to go over the Memory Limit, the process will be terminated.
Inspecting a Workload
The details of the workload can be accessed by right-clicking the workload and then selecting View.
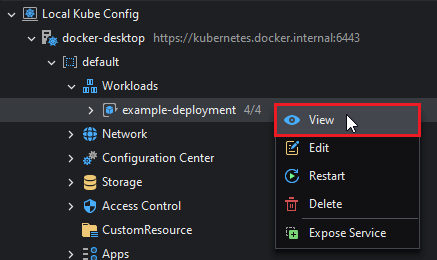
This will open the Workload details view:
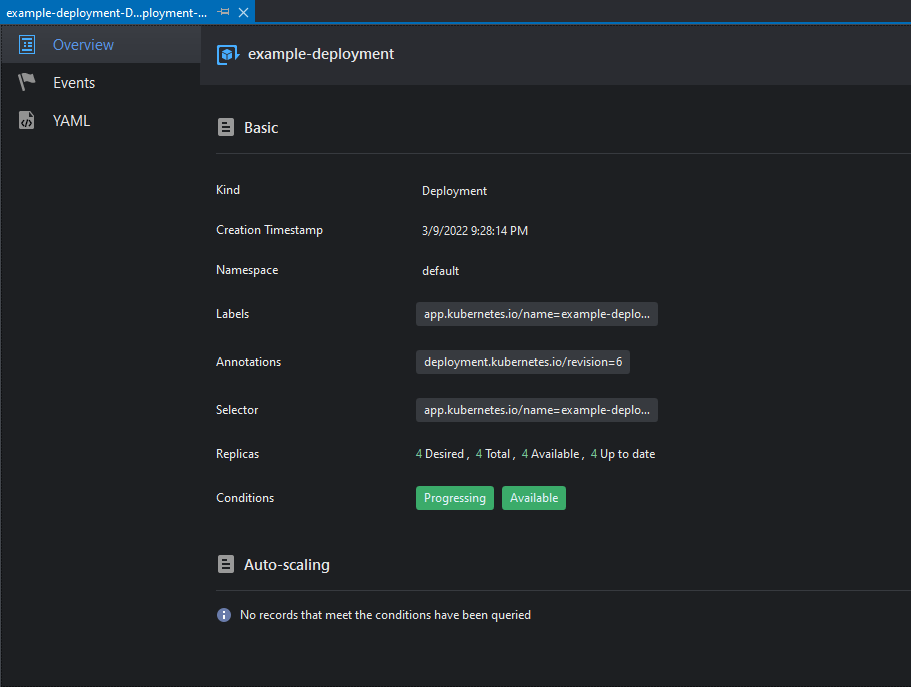
This view has 3 tabs:
| Tab | Description |
|---|---|
| Overview | Shows general information about the workload |
| Events | Shows events related to the workload |
| YAML | Renders a YAML description of the workload |
Editing a Workload
Workloads can be edited by right-clicking it and then selecting Edit:
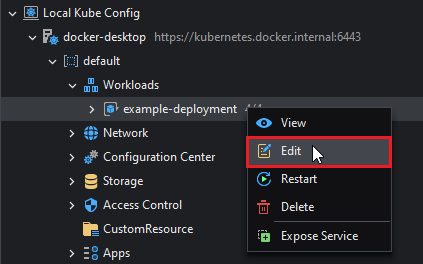
This will open the Workload Edit view, which is similar to the Create Deployment View. Please refer to that section for more details. After completing the edits, click the Save button.
Restarting a Workload
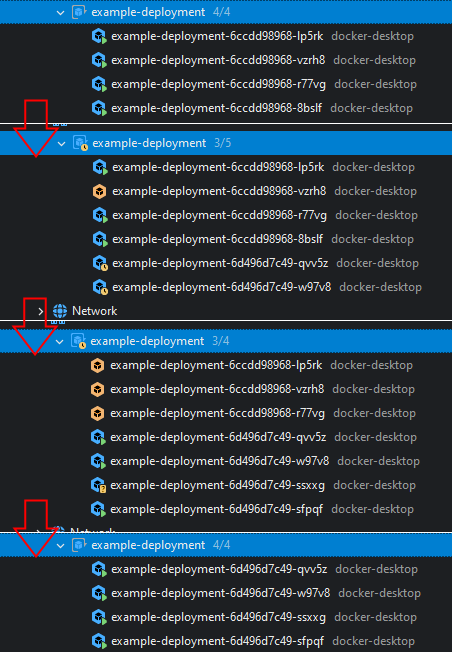
Some changes to the Workload are not immediately reflected on the existing pods (such as changing the image version). For these cases restarting a workload is an option. This will initiate a replacement sequence of all pods, while making sure there's at least one pod available during the whole process (i.e. no downtime). If an error occurs during the redeploy, the changes will be rolled back.
To restart a workload, right click and then select Restart on it.

The changes in the pods will be visible in the Explorer:
Deleting a Workload
Workloads can be deleted by right-clicking and then selecting Delete:
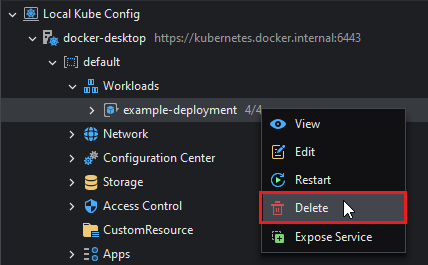
Please note that the deployment and its pods will be deleted, but any services that rely on those pods will not.
Pods
Pods are the smallest deployable units of computing that you can create and manage in Kubernetes.
A Pod is a group of one or more containers, with shared storage and network resources, and a specification for how to run the containers. For more information on pods visit this link.
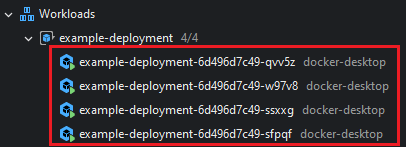
In SnapDevelop's Kubernetes Explorer, you cannot create pods directly. Instead, they're always spawned and managed by a Workload object. Pods are shown under the workload that owns them:
Inspecting a Pod
Same as with workloads, you can see the Pods' information by right-clicking and then selecting View.
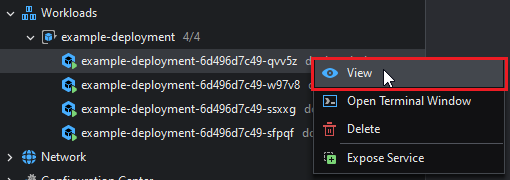
The details view has the following tabs:
| Tab | Description |
|---|---|
| Overview | Shows basic information about the pod: Network details, status and the containers it's running. |
| Logs | Shows the logs for its containers. |
| Files | Shows the filesystem of its containers. |
| Events | Displays any events captured. |
| YAML | Renders the YAML description of the pod. |
Getting a Terminal into a Pod
To open a terminal into a Pod's default container, right click and then select Open Terminal Window:
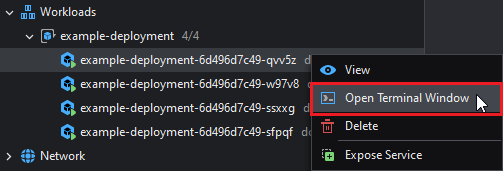
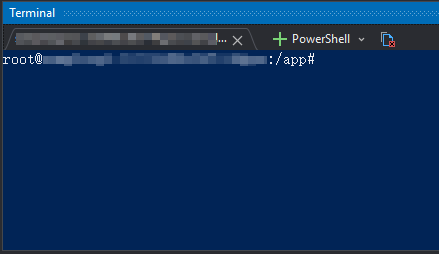
This opens a terminal window into the specified pod's container and shows on the bottom panel:
Deleting a Pod
To delete a pod, right click and then select Delete on a pod:

Deleting a pod this way will result in another one being created to replace it. This is the Deployment Controller's job. Making sure the replica count specified in the Deployment's configuration is preserved.
Exposing services
When you right-click a workload or pod, you can also select Expose Service to create that workload or pod as a service. For more information, please refer to the next section: Services.
Network
Services
Services are an abstract way to expose an application running on a set of Pods as a network service.
With Kubernetes you don't need to modify your application to use an unfamiliar service discovery mechanism. Kubernetes gives Pods their own IP addresses and a single DNS name for a set of Pods, and can load-balance across them. For more info on Kubernetes Services follow this link.
Services are exposed in the Kubernetes Explorer under Network > Services.
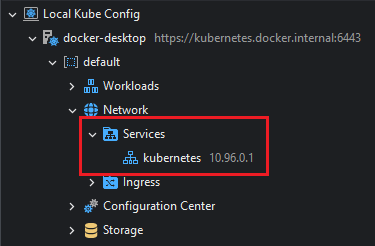
Creating a Service
Services cannot be created manually, they need to be created from a Workload or a Pod.
To create a service from a workload, right click and then select Expose Service:
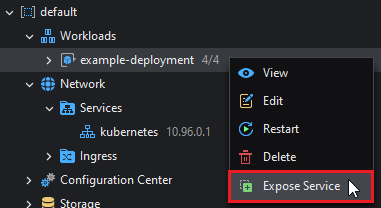
The Service configuration view will open:
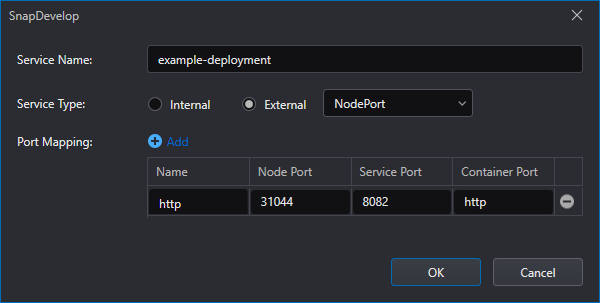
The parameters are as follows:
Service Name: The name of the service.
Service Type
Internal: The service will only be visible from inside the cluster.
External: The service will provide access from outside the cluster. There's two types:
LoadBalancer: Exposes the service externally by using the cluster's cloud provider. This setting won't work on a local cluster out-of-the-box (e.g. minikube, Docker Desktop).
NodePort: Exposes the service by using a static port on each node.
Enable Headless Service (Internal only): Headless services are not assigned an IP, they are used for discovering the Pods' IPs without using a Proxy.
Port Mapping: Define the port mapping between the service and the containers. Each entry has the following fields:
Name: The name of the port. Ports can also be references by name.
Node Port: The Node Port that will be exposed. Only values between 30000-32767 are allowed by default. If this field is left empty it will be randomly chosen.
Service Port: The port the service will be available on.
Container Port: The container port requests incoming to Service Port will be forwarded.
LoadBalancer IP (LoadBalancer only): The IP to use for the LoadBalancer (if the cloud provider supports it).
Inspecting a Service
To view a service, right click and then select View:
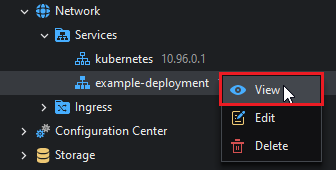
This will open the Service Details view:
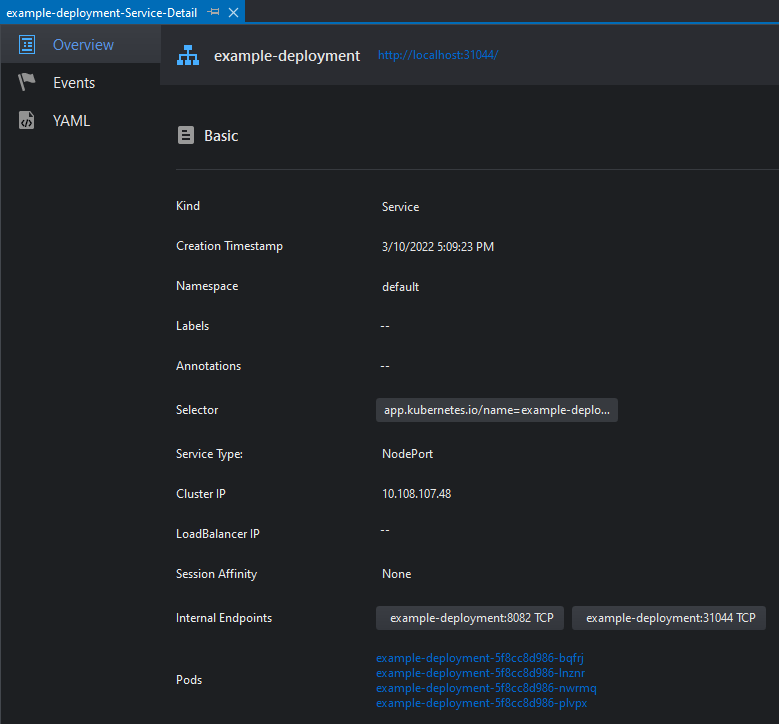
This view is composed of 3 tabs:
| Tab | Description |
|---|---|
| Overview | Shows general information about the service. |
| Events | Shows events related to the service. |
| YAML | Renders a YAML description of the service. |
Editing a Service
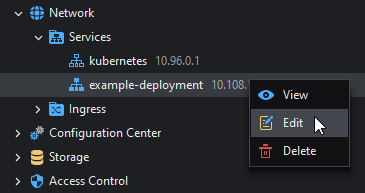
To edit a service, right click and then select Edit. A dialog similar to Create Service will show up.
Deleting a Service
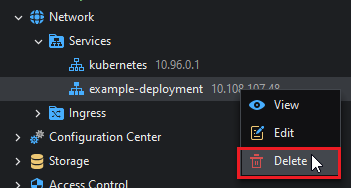
To delete a service, right click and then select Delete.
Ingress
Ingress exposes HTTP and HTTPS routes from outside the cluster to services within the cluster. Traffic routing is controlled by rules defined on the Ingress resource.
An Ingress may be configured to give Services externally-reachable URLs, load balance traffic, terminate SSL / TLS, and offer name-based virtual hosting. An Ingress controller is responsible for fulfilling the Ingress, usually with a load balancer, though it may also configure your edge router or additional frontends to help handle the traffic.
You must have an Ingress controller to satisfy an Ingress. Only creating an Ingress resource has no effect.
For more information on Kubernetes' Ingress Resource follow this link.
Ingresses are exposed in the Kubernetes Explorer under Network > Ingress.
Adding an Ingress
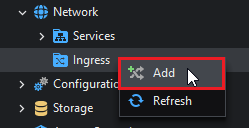
To add an Ingress resource, right click the Ingress folder and then select Add:
This will open the Ingress configuration window (it's already been configured for this guide):
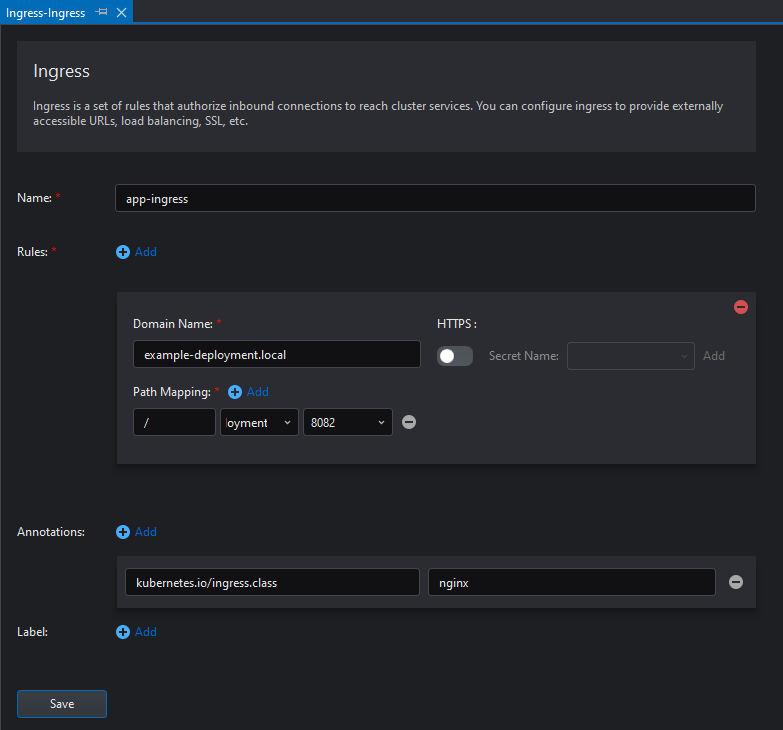
The parameters are explained as follows:
Name: The name of the Ingress resource.
Rules: They define the mapping between Services and URLs.
Domain Name: The Domain Name that will be listened for.
HTTPS: Whether to require HTTPS connections. If enabled, it's required to select a secret containing the certificate and the key.
Path Mapping: Defines the mapping between the URIs and Kubernetes Services.
Annotations: Additional metadata attached to the resource. In this case, the annotation
kubernetes.io/ingress.class=nginxis required to have the ingress work withnginx-ingress.Label: Labels that identify this ingress resource.
After defining the Ingress' parameters click Save.
The Ingress resource will be created, but it might take some time to become available. This depends on the Cloud Provider itself.
Inspecting an Ingress
To inspect an Ingress resource, right click and then select View on it:
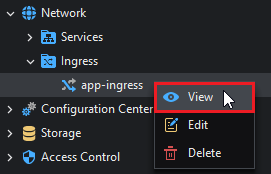
This will open the Ingress Details view:
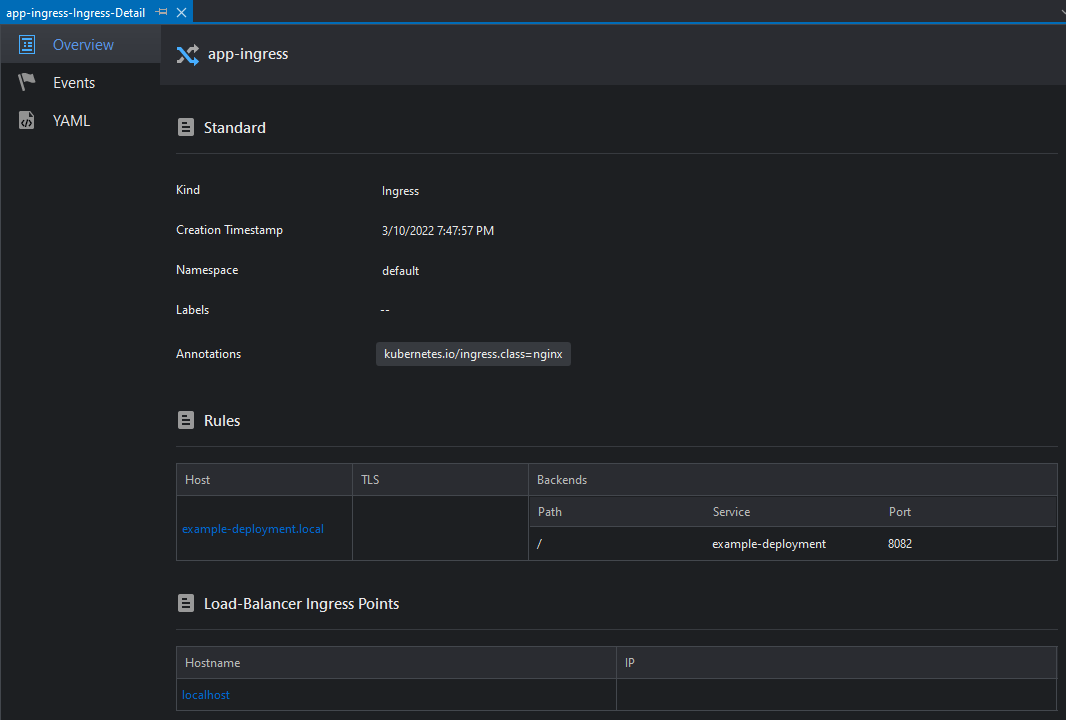
This view is composed of 3 tabs:
| Tab | Description |
|---|---|
| Overview | Shows information about the Ingress |
| Events | Shows events related to the Ingress |
| YAML | Renders a YAML definition for the Ingress |
Editing an Ingress
To edit an Ingress, right click and then select Edit:
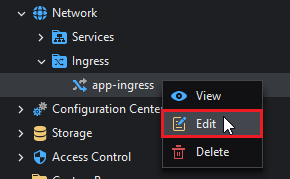
Deleting an Ingress
To delete an Ingress, right click and then select Delete:
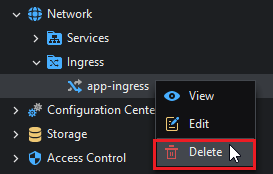
Configuration Center
This section holds both methods used to pass data to pods via environment variables, command line arguments, or volumes: Secrets and ConfigMaps.
Secrets
A Secret is an object that contains a small amount of sensitive data such as a password, a token, or a key. Such information might otherwise be put in a Pod specification or in a container image. Using a Secret means that you don't need to include confidential data in your application code.
Because Secrets can be created independently of the Pods that use them, there is less risk of the Secret (and its data) being exposed during the workflow of creating, viewing, and editing Pods. Kubernetes, and applications that run in your cluster, can also take additional precautions with Secrets, such as avoiding writing confidential data to nonvolatile storage.
Secrets are similar to ConfigMaps but are specifically intended to hold confidential data.
Please note that Kubernetes Secrets are, by default, stored unencrypted in the API server's underlying data store (etcd). Anyone with API access can retrieve or modify a Secret, and so can anyone with access to etcd. Additionally, anyone who is authorized to create a Pod in a namespace can use that access to read any Secret in that namespace; this includes indirect access such as the ability to create a Deployment.
For more information on Secrets, please visit this link.
In the Kubernetes Explorer, Secrets are located under Configuration Center > Secrets.
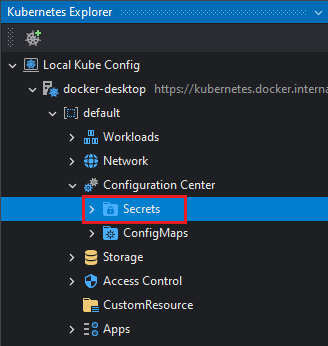
Creating a Secret
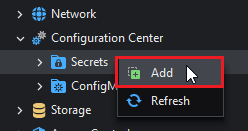
To create a Secret, right click and then select Add on the Secrets node:
This will open the secret editor:
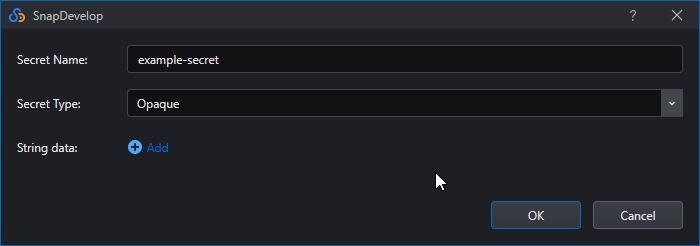
The parameters are as follows:
| Parameter | Description |
|---|---|
| Secret Name | The name of the Secret. This is the name with which the secret will be referenced |
| Secret Type | The type of secret: Opaque (an arbitrary string) or TLS (a certificate and key mainly used for TLS termination of the Ingress resource) |
| String Data (Opaque Secret only) | Set of Key-Value pairs that hold sensitive data |
| TLS Crt (TLS Secret Only) | PEM-encoded contents of the trusted certificate used for TLS termination |
| TLS Key (TLS Secret Only) | PEM-encoded contents the key used for TLS termination |
Inspecting a Secret
To inspect a secret, right click and then select View on a secret:
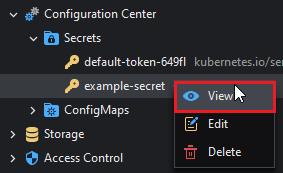
This will open the Secret Detail view:
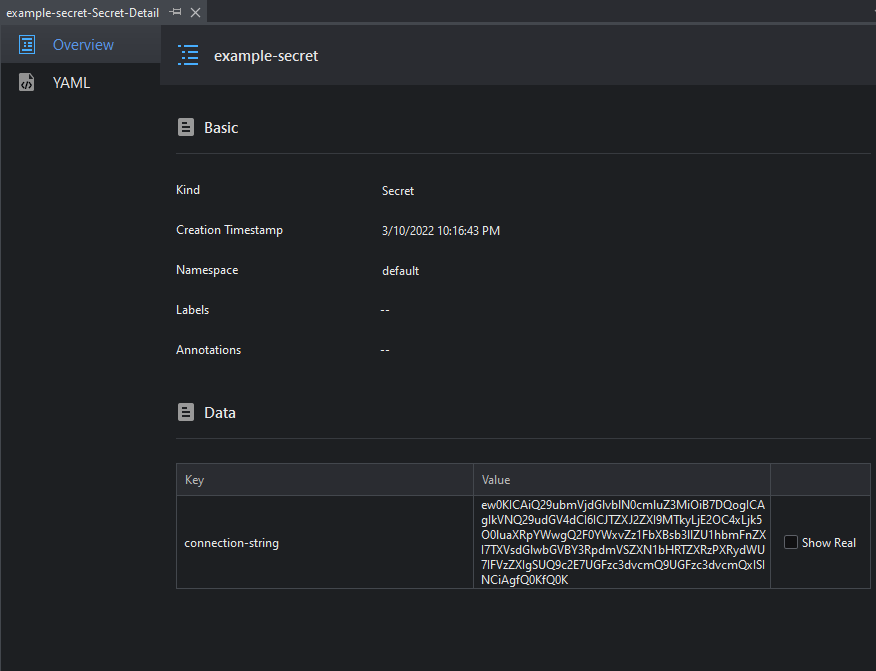
This view is composed of three tabs:
| Tab | Description |
|---|---|
| Overview | Shows some general information about the secret. Since secrets are encrypted by default, SnapDevelop offers a tool to show the decoded data. |
| YAML | Renders a YAML description of the secret. |
Editing a Secret
To edit a secret, right click and then select Edit on a secret:
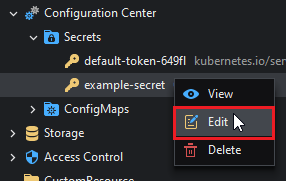
Deleting a Secret
To delete a secret, right click and then select Delete on a secret:
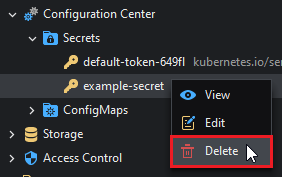
ConfigMaps
A ConfigMap is an API object used to store non-confidential data in key-value pairs. Just as with Secrets, Pods can consume ConfigMaps as environment variables, command-line arguments, or as configuration files in a volume.
A ConfigMap allows you to decouple environment-specific configuration from your container images, so that your applications are easily portable.
Please note that a ConfigMap does not provide secrecy or encryption. If the data you want to store are confidential, use a Secret rather than a ConfigMap, or use additional (third party) tools to keep your data private.
For more information about ConfigMaps, please follow this link.
In the Kubernetes Explorer, ConfigMaps are located under Configuration Center > ConfigMaps.
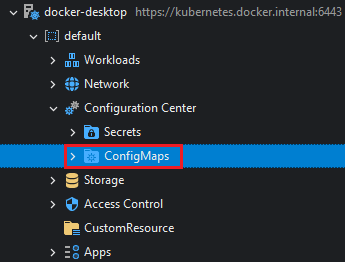
Creating a ConfigMap
To create a ConfigMap, right click and then select Add on the ConfigMaps node:
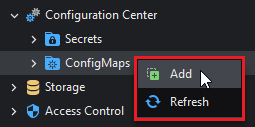
This will open the Create ConfigMap dialog:

The parameters are as follows:
| Parameter | Description |
|---|---|
| ConfigMap Name | The name of the ConfigMap. This is the name that will be used to reference the ConfigMap. |
| String data | Set of key-value pairs that define this ConfigMap. |
Inspecting a ConfigMap
To inspect a ConfigMap, right click and then select View on it:
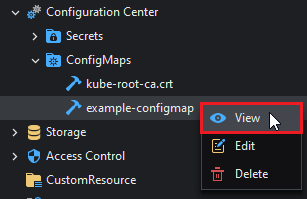
This will open the ConfigMap Details view.
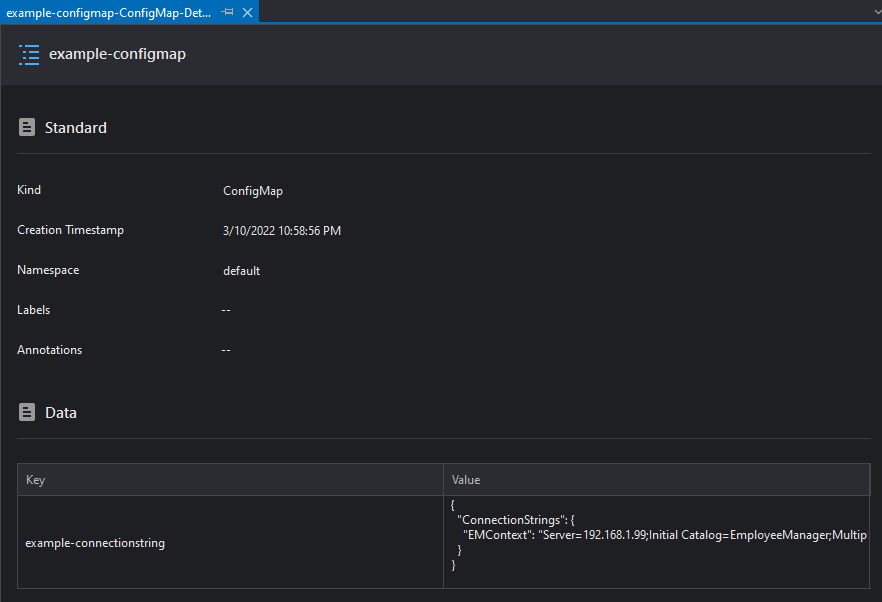
This view shows general information about the ConfigMap as well as its contents.
Editing a ConfigMap
To edit a ConfigMap, right click and then select Edit on it:
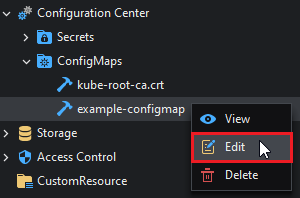
Deleting a ConfigMap
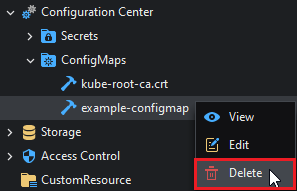
To delete a ConfigMap, right click and then select Delete on it:
It's important to remember that ConfigMaps should not be used to store sensitive data. To store information such as credentials, tokens, etc., secrets should be used.
Storage
PersistentVolumeClaims
A PersistentVolumeClaim (PVC) is a request for storage by a user. It is similar to a Pod. Pods consume node resources and PVCs consume PV resources. Pods can request specific levels of resources (CPU and Memory). Claims can request specific size and access modes.
For more information about PersitentVolumeClaims and Kubernetes persistent storage follow this link.
In order to make use of PersistentVolumeClaims the cluster has to have a Dynamic Provisioner and at least one Storage Class, which should be configured by the cluster administrator.
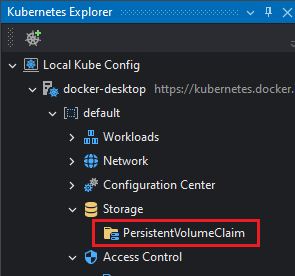
In the Kubernetes Explorer, PersistentVolumeClaims are exposed in the Kubernetes Explorer under Storage > PersistentVolumeClaim.
Creating a PersistentVolumeClaim
To create a PersistentVolumeClame, right click and then select Add on the PersistentVolumeClaim node:

This will open the Create PersistentVolumeClaim dialog:
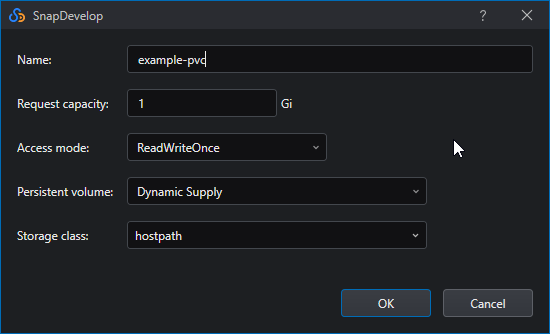
The parameters are as follows:
| Parameter | Description |
|---|---|
| Name | The name of the PersistentVolumeClaim. This is the name that will be used when referencing the PVC. |
| Request capacity | The capacity of the volume requested to the provisioner. |
| Access mode | The access mode requested to the provisioner. See below for more details. |
| Persistent volume | Type of provisioning to use. Currently only Dynamic Supply is supported (i.e. volumes will be created on demand). |
| Storage class | The Storage Class that will be providing the storage. Storage Classes are configured by the cluster administrator. |
Access Mode
There are 4 storage access modes:
ReadWriteOnce: The volume can be written to/read from by only one node at a time.
ReadOnlyOnce: The volume can only be read by one node at a time.
ReadWriteOncePod: The volume can be written to/read from only one pod at a time.
ReadWriteMany: The volume can be written to/read from many nodes simultaneously.
Inspecting a PersistentVolumeClaim
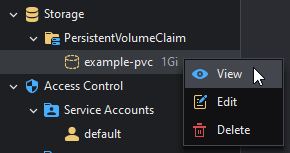
To inspect a PVC, right click and then select View on the PVC:
This will open the PersistentVolumeClaim Details window:
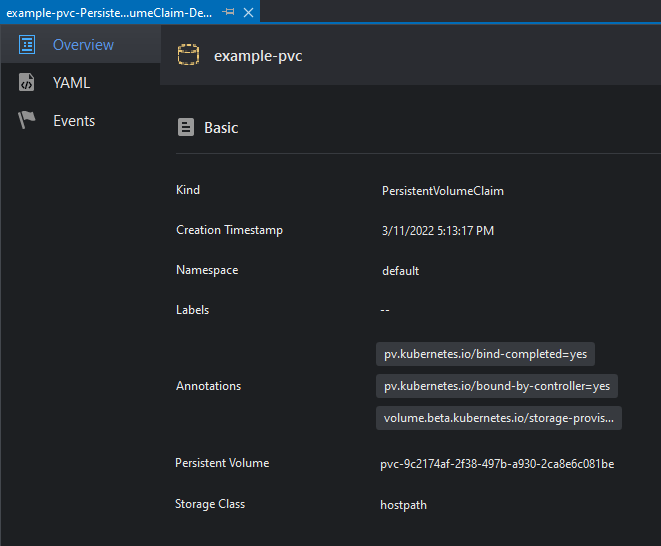
This view has 3 tabs described as follows:
| Tab | Description |
|---|---|
| Overview | Shows general information about the PVC |
| YAML | Renders a YAML description of the PVC |
| Events | Shows events related to the PVC |
Editing a PersistentVolumeClaim
To edit a PVC, right click and then select Edit on the PVC:
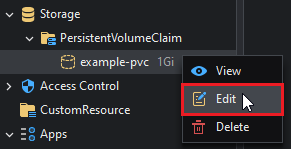
Deleting a PersistentVolumeClaim
To delete a PVC, right click and then select Delete on the PVC:
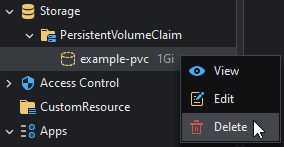
Access Control
Service Accounts
Service Accounts are special accounts used by the pods to perform requests to the Kubernetes API. Every namespace has at least one Service Account: the default Service Account, which has all privileges and can do anything in the cluster. However, this is bad practice and is always recommended to associate pods to a Service Account that gives it the minimum privilege it needs for its function.
For more information about ServiceAccounts and Authentication in Kubernetes follow this link.
In the Kubernetes Explorer, Service Accounts are exposed in the Kubernetes Explorer under Access Control > Service Accounts.
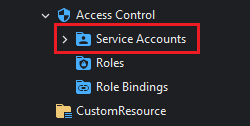
Editing Service Accounts
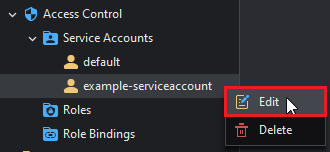
To edit a service account, right click and then select Edit on a service account:
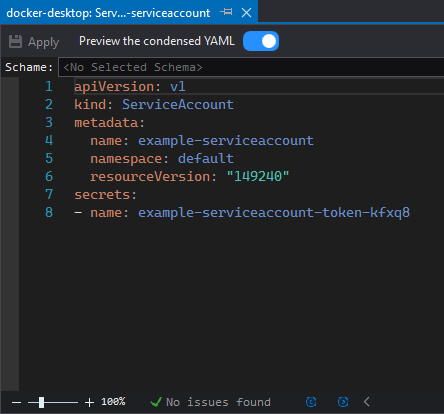
This will open a YAML editor with the service account:
Roles
A Role contains rules that represent a set of permissions. Permissions are purely additive (there are no "deny" rules).
A Role always sets permissions within a particular namespace; when you create a Role, you have to specify the namespace it belongs in.
For more information on Roles, follow this link.
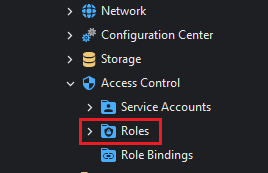
In the Kubernetes Explorer, Roles are exposed in the Kubernetes Explorer under Access Control > Roles.
Editing Roles
To edit a role, right click and then select Edit on a role:
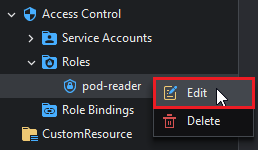
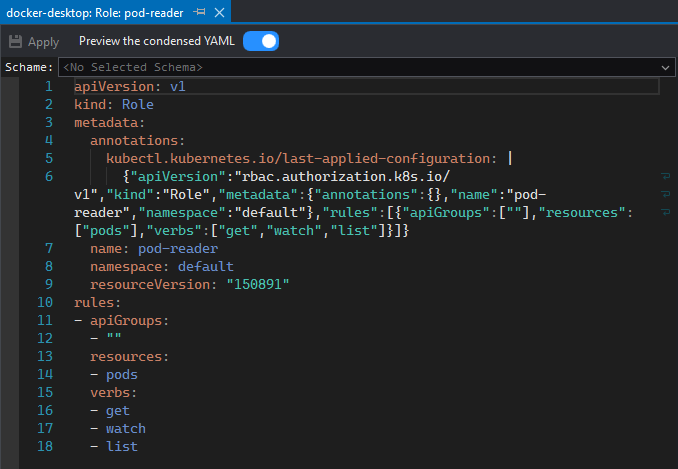
This will open a YAML editor with the role:
RoleBindings
A role binding grants the permissions defined in a role to a user or set of users. It holds a list of subjects (users, groups, or service accounts), and a reference to the role being granted. A RoleBinding grants permissions within a specific namespace.
For more information on RoleBindings visit this link.
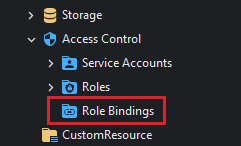
In the Kubernetes Explorer, RoleBindings are exposed in the Kubernetes Explorer under AccessControl > RoleBindings.
Editing RoleBindings
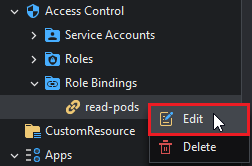
To edit a RoleBinding, right click and then select Edit on it:
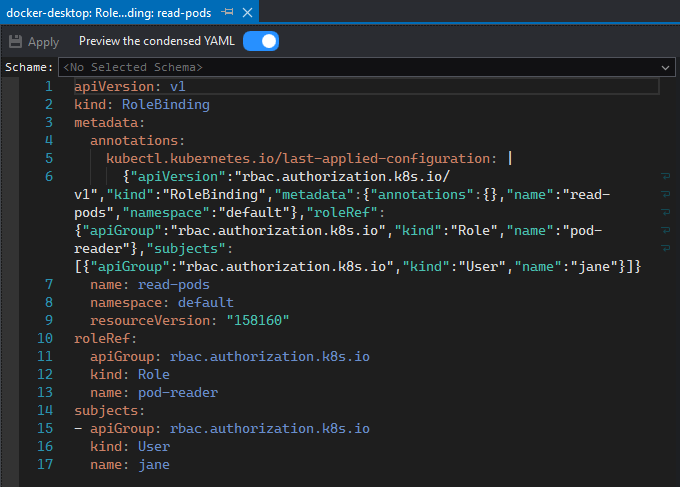
This will open a YAML editor with the RoleBinding:
Custom Resources
Custom resources are extensions of the Kubernetes API. This page discusses when to add a custom resource to your Kubernetes cluster and when to use a standalone service. It describes the two methods for adding custom resources and how to choose between them.
A resource is an endpoint in the Kubernetes API that stores a collection of API objects of a certain kind; for example, the built-in pods resource contains a collection of Pod objects.
A custom resource is an extension of the Kubernetes API that is not necessarily available in a default Kubernetes installation. It represents a customization of a particular Kubernetes installation. However, many core Kubernetes functions are now built using custom resources, making Kubernetes more modular.
For more information on Kubernetes Custom Resources visit this link.
In the Kubernetes Explorer, Custom Resources are exposed in the Kubernetes Explorer under CustomResource:
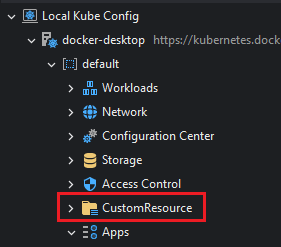
The custom resources are grouped by type and then by namespace:

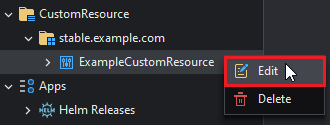
Editing the Custom Resource Definition
To edit the Custom Resource Definition, right click and then select Edit on the CRD:
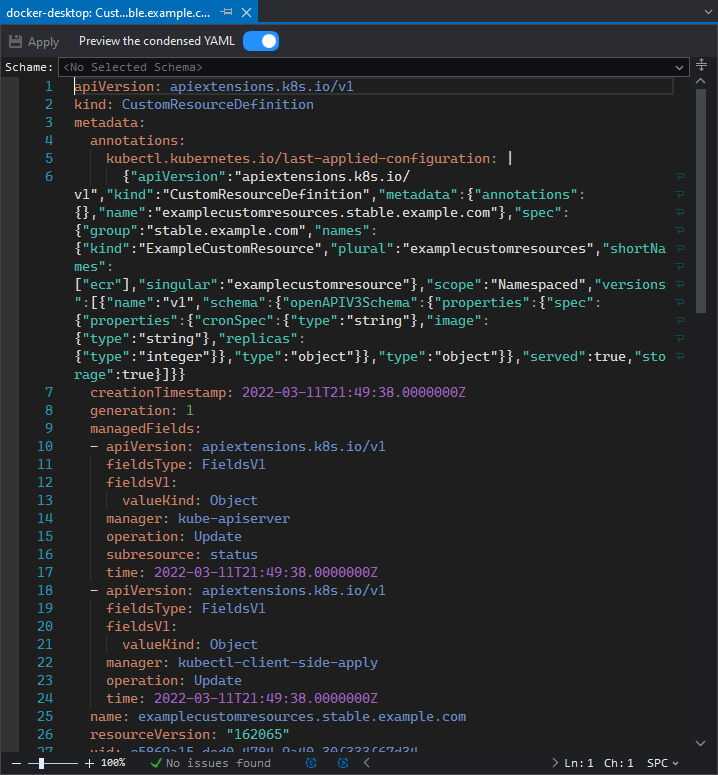
This will open the CRD as a YAML file:
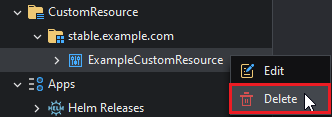
Deleting the Custom Resource Definition
To delete the Custom Resource Definition, right click and then select Delete on the CRD:
Editing Custom Resource objects
To edit a Custom Resource Object's definition, right click and then select Edit on the object:

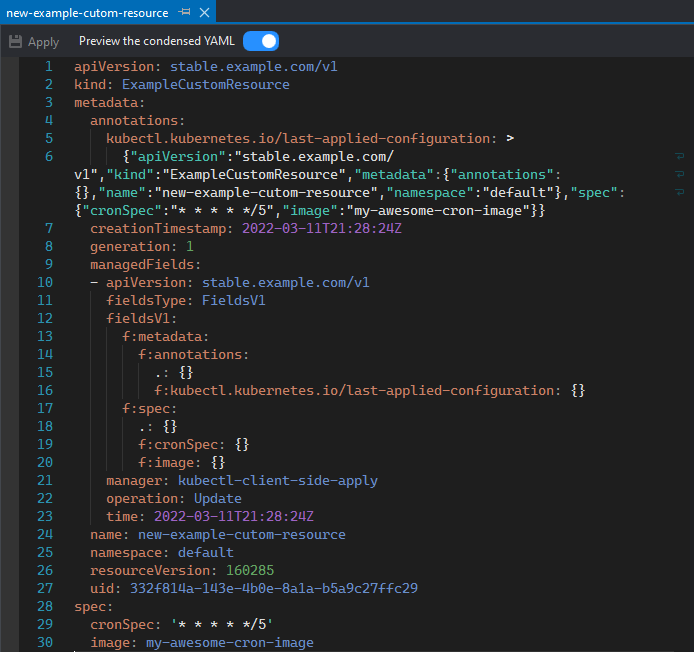
This will open the object's definition as a YAML file:
Apps
Helm helps you manage Kubernetes applications — Helm Charts help you define, install, and upgrade even the most complex Kubernetes application.
Charts are easy to create, version, share, and publish — so start using Helm and stop the copy-and-paste.
To read more about Helm and Charts visit this link.
Helm Releases are located under the Apps > Helm Releases:

Inspecting an Application
To inspect an application installed through Helm (A Helm Release), right click and then select View:
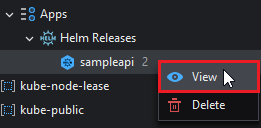
This will show the following view:
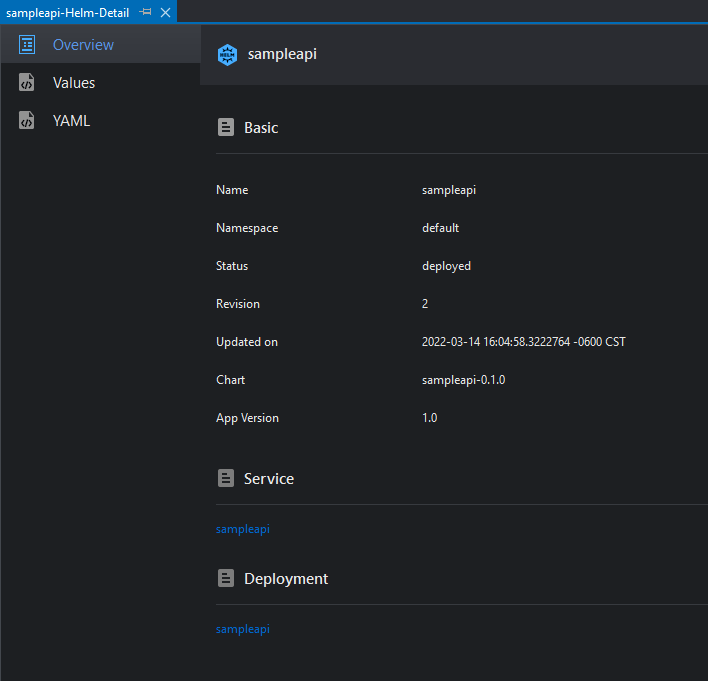
This view has 3 tabs as follows:
| Tab | Description |
|---|---|
| Overview | Shows general information about the Application |
| Values | Shows the deployment configuration of the Helm Release |
| YAML | Renders a YAML description of the resources created by the Helm Release |
Deleting an Application
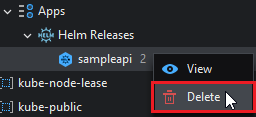
Deleting a Helm Application will also remove all the resources installed by it.
To delete a Helm Release, right click and then select Delete on it:
Publishing a project to Kubernetes
You'll begin by creating the project that will be used in the following examples.
Creating a project
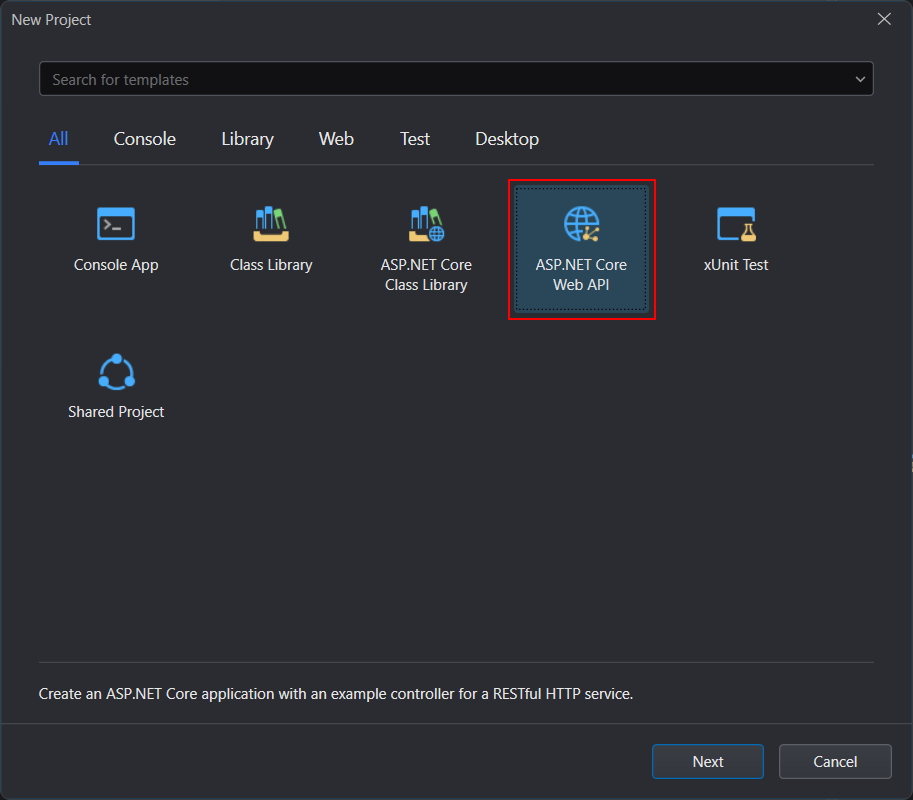
Go to File > New > New Project... and select ASP.NET Core Web API and click Next.
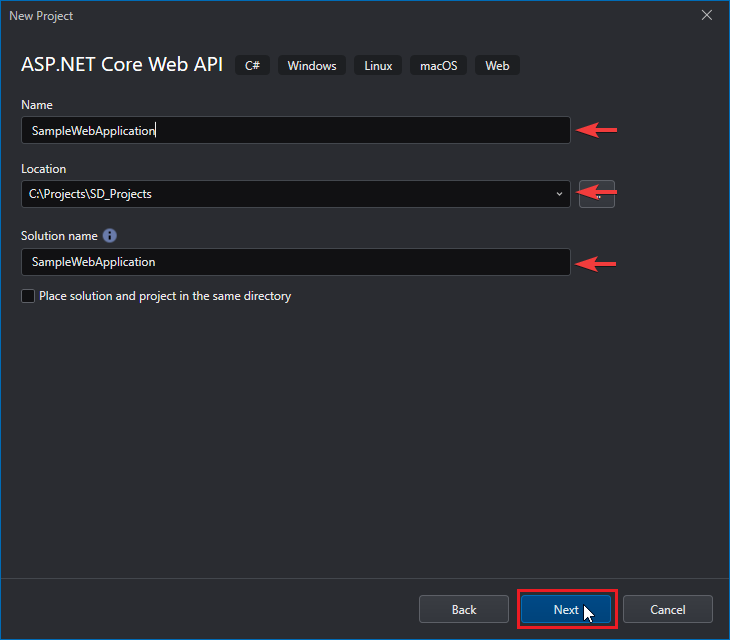
Introduce a name and select the location for the project, then click Next:
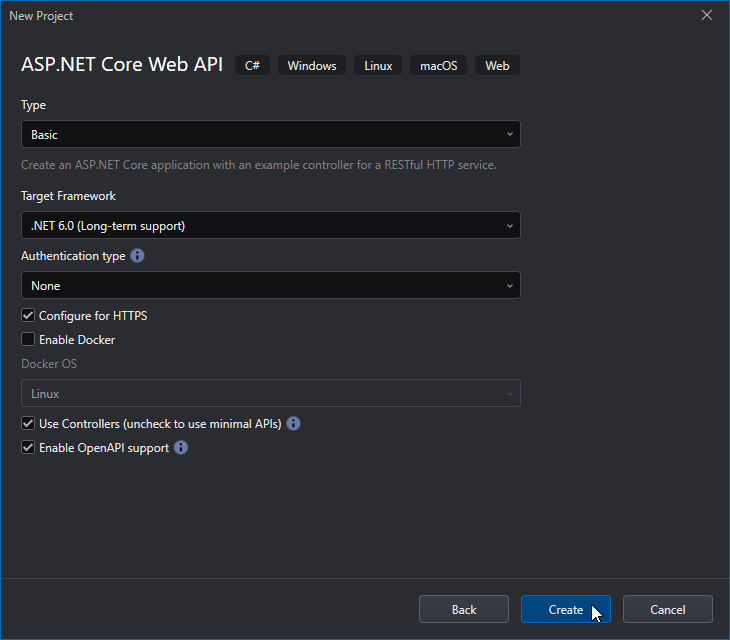
Leave the project settings as they are and click Create:
Adding Kubernetes Support
To add Kubernetes Support to the project, right click and then select Add > Kubernetes Support on the project.
This will show the following dialog. Select a valid cluster (or create one) and click OK:
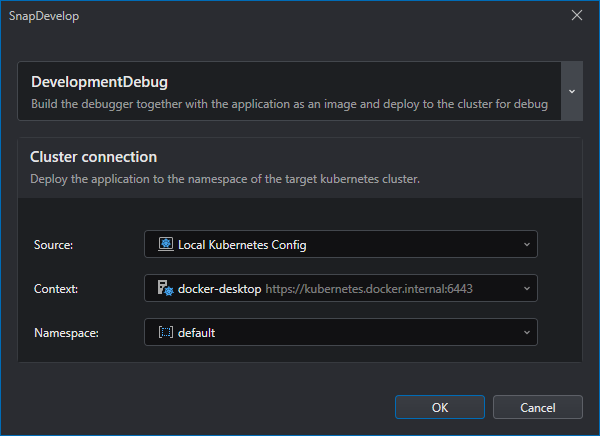
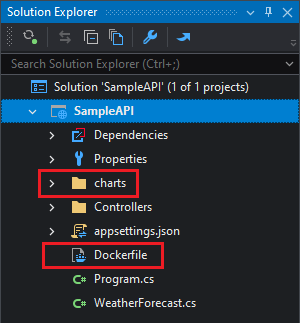
A charts folder containing the Helm Chart definition of the project and a Dockerfile (if one didn't already exist) will be added to the project:
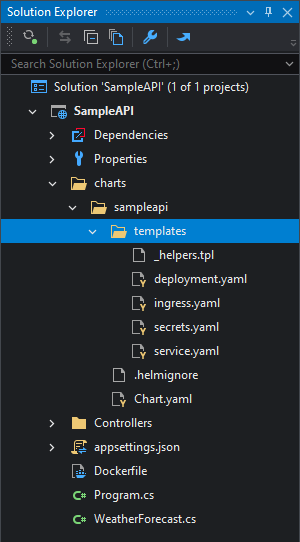
If you want to customize the Kubernetes deployment, edit the files inside the charts > sampleapi > templates directory:
After this is done, you can run the project on Kubernetes by selecting Kubernetes and then clicking the Run button.

The project will be compiled and deployed to the cluster and a service created for it:

Since the project (and the debugger) will also be built as a Docker image and pushed to the registry, you may also need to specify the Docker container engine (see the next section), or install Docker Desktop on the local machine.
Adding Kubernetes Compose container orchestration
SnapDevelop supports two container orchestrators: Kubernetes Compose and Docker Compose. This tutorial discusses Kubernetes Compose. For instructions on using Docker Compose, please refer to Adding Docker Compose Container Orchestration.
Container orchestration is a mechanism to deploy applications composed of multiple containers, declaring what containers there are and how they interact with each other. Then the container orchestrator ensures that the requested containers are started, and when one of them fails, it will try to restart it (if allowed by the policy).
When the solution contains multiple projects and needs to be deployed to containers, it is recommended to use container orchestration to deploy multiple projects at one time.
Suppose we have a solution composed of two projects. You can choose to add Kubernetes support to each project (that is, to add Kubernetes support to each project as described previously; so a charts folder and a Dockerfile file will be added to each project).
Or add the two projects to the container orchestration. You need to work on the projects one by one.
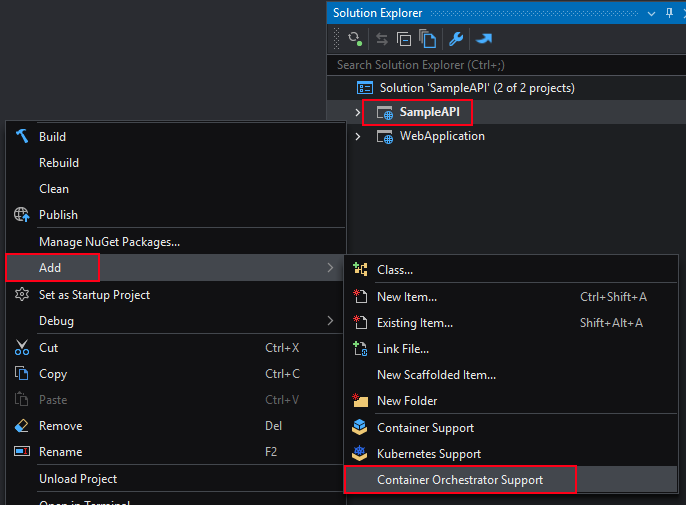
Right click on the first project and select Add > Container Orchestration Support.
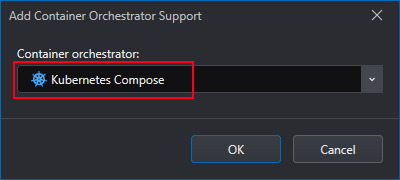
In the Container Orchestrator drop-down list, select Kubernetes Compose and click OK.
Specify cluster information (including cluster source, cluster context, namespace) and image information (including container engine, and repository). Then click OK.

A kubernetes-compose project will be added to the solution.
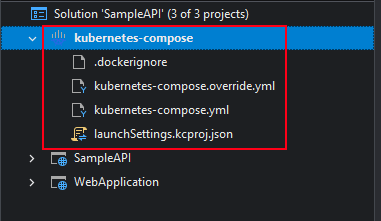
The kubernetes-compose project includes .dockerignore, kubernetes-compose.override.yml, kubernetes-compose.yml, and launchSettings.kcproj.json files.
- .dockerignore sets which files and directories (unnecessarily large or sensitive files and directories) should not be sent to the daemon.
- kubernetes-compose.override.yml defines the parameters of the container such as environment, URL, port, etc.
- kubernetes-compose.yml defines the containers and services to be created.
- launchSettings.kcproj.json defines parameters related to container orchestration and clustering.
You can remove Kubernetes container orchestration support by right-clicking on the kubernetes-compose project node and selecting Remove.
kubernetes-compose.yml is the description file for Kubernetes Compose, the following is an example. Currently it only contains one container (as we currently only added container orchestration support to the first project).
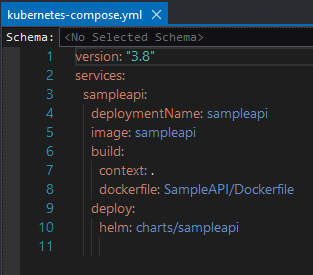
To add a second container, repeat the previous steps for the second project. After that, the kubernetes-compose.yaml file will be updated as follows.
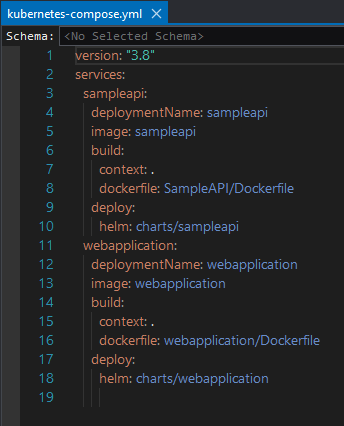
If you have other projects in your solution, repeat the previous steps to add container orchestration to the projects one by one.
Running a project with Kubernetes
Make sure the Run Profile is set to Kubernetes, otherwise select it from the button's dropdown menu.

Clicking this button will compile and run the project on the configured Kubernetes Cluster.
Kubernetes debug settings
The settings for Running with Kubernetes are located on the Debug project options which can be accessed by right-clicking on the project > Properties > Debug, or Kubernetes > SampleAPI Properties...
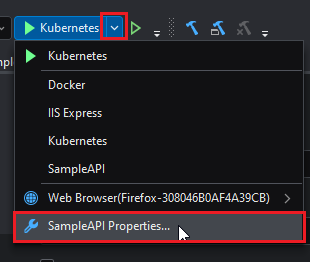
This will open the project's Debug Settings:
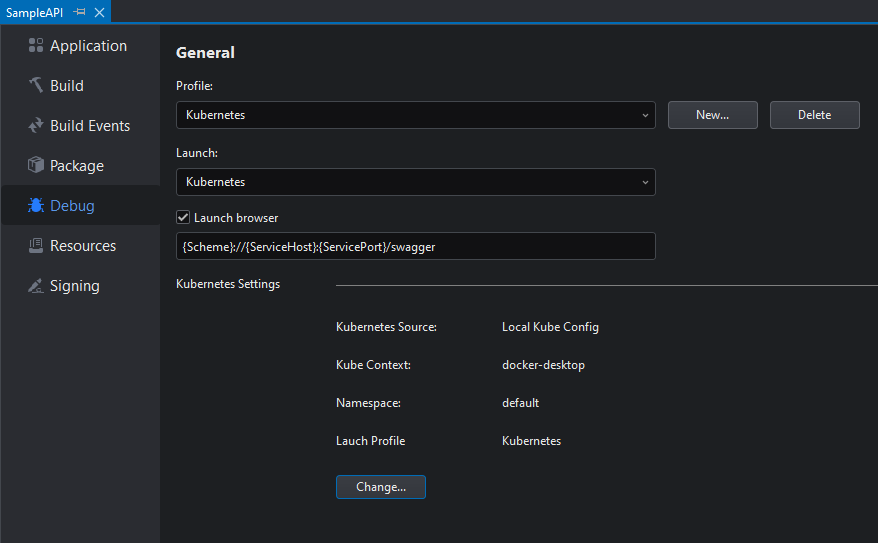
For information about the debug settings, refer to Debug.
The Kubernetes-specific settings are as follows:
| Setting | Description |
|---|---|
| Launch Browser | Whether to open the browser on the specified address when the project is run |
| Kubernetes Settings | The cluster to which connect and deploy the project to |
The cluster settings look like the following:
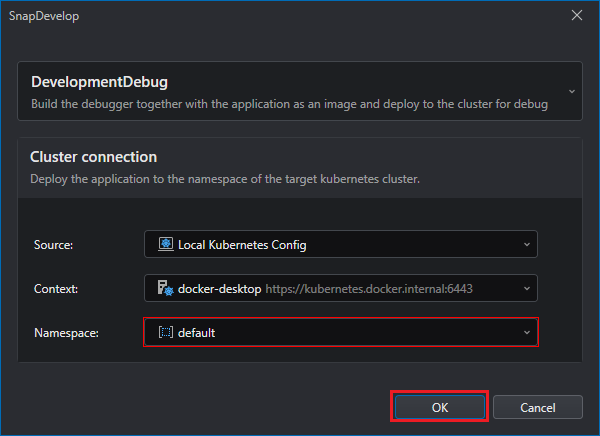
The parameters are:
| Parameter | Description |
|---|---|
| Source | Currently only Local Kubernetes is supported. |
| Context | The cluster to which connect and deploy the project. You can select an existing one or create a new one. |
| Namespace | The namespace on which the project's objects will reside. You can select an existing one or create a new one. |
| Container Engine | The location of the Docker engine that will be used for building the image. You can select an existing one or create a new one. |
| Push to the registry | The Docker Registry to which the built image will be pushed. You can select an existing one or create a new one. |
From the PowerShell
After installing the Kubectl tool, you can also use Kubernetes commands in a terminal window (e.g. Windows PowerShell, Windows Command) to publish and run the project. For example, You can right-click a Pod in the Kubernetes Explorer and select Open Terminal Window.

This will open a PowerShell terminal window inside the Pod's container. You can directly enter commands to operate the corresponding Pod container.

Debugging a project
You can debugging your project in a Kubernetes cluster. For details, refer to Debugging a project in Docker or Kubernetes.
Publishing to Kubernetes
To deploy a project with Kubernetes, right click and then select Publish on the project:
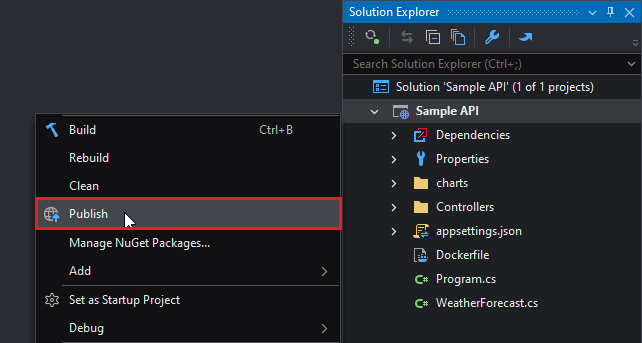
This will open the Publish window. Select Kubernetes Cluster and click Next:
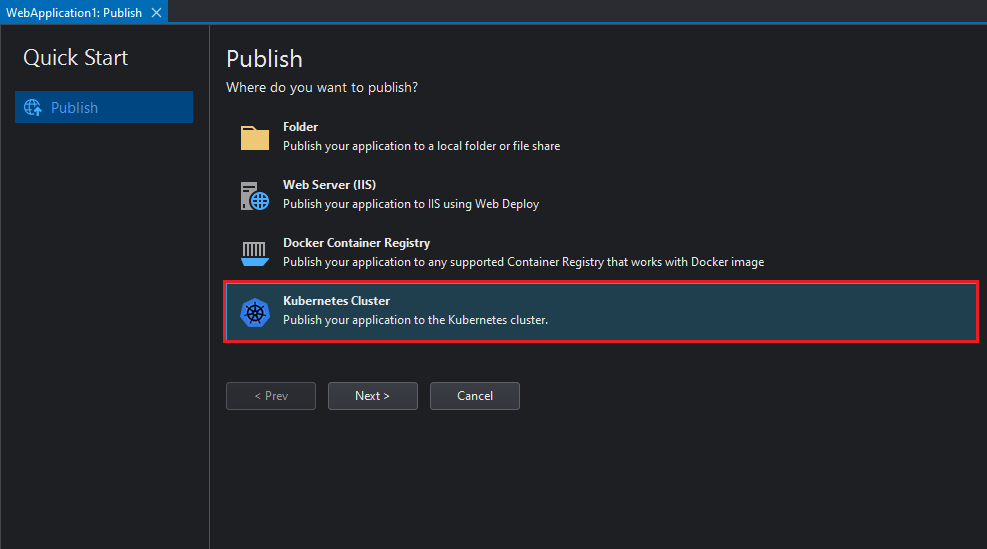
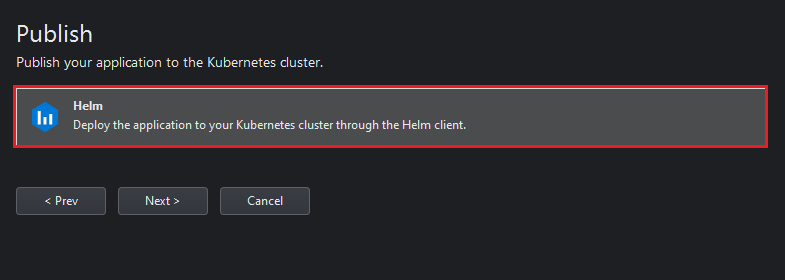
Select Helm as the publishing mechanism and then Next:
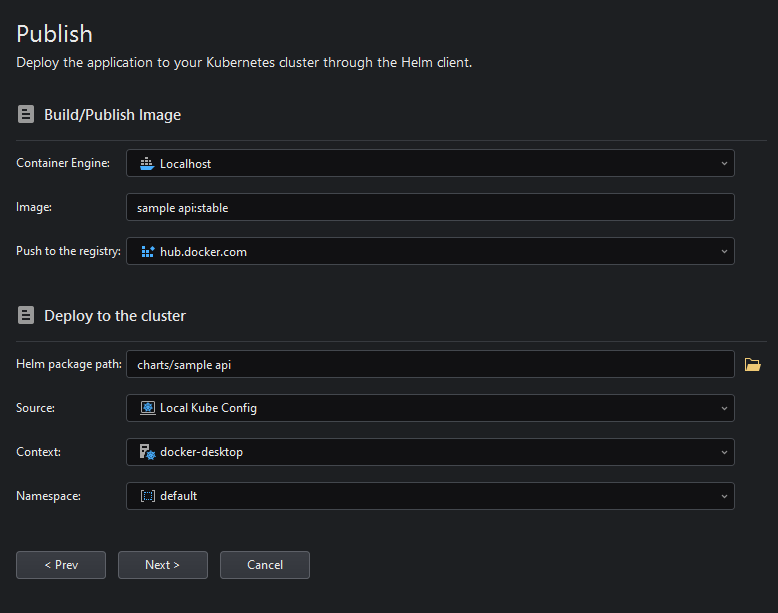
Introduce the Docker Registry and Kubernetes Cluster information and click Next:
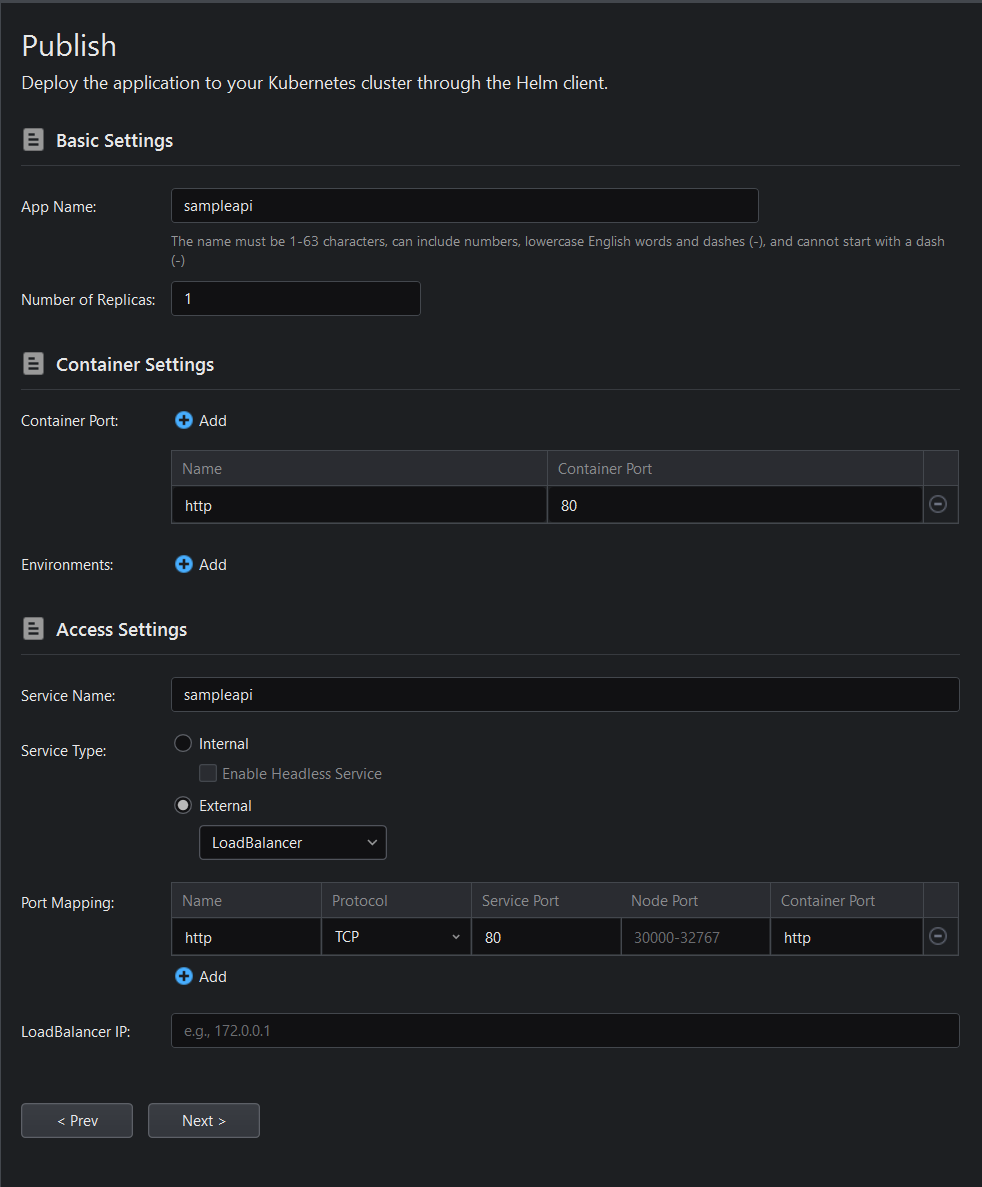
Fill the information for the Image and Deployment settings.
To verify that the project was successfully published later, it is recommended to set the Service Type to External (this will generate an external URL, making the service accessible outside the cluster).
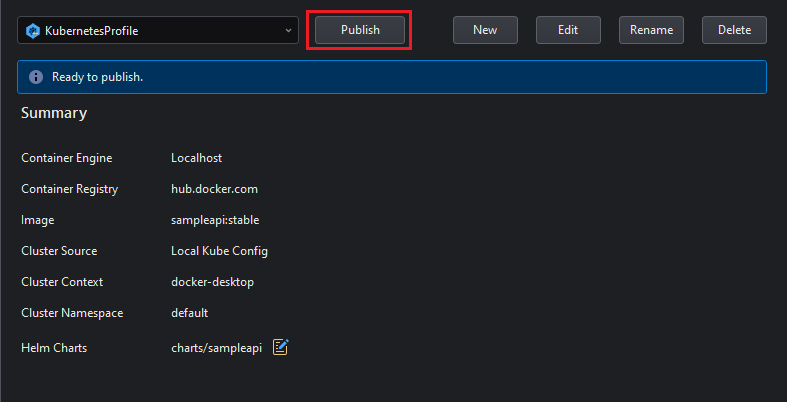
Review the publishing configuration and click Publish:
The progress of the publishing process will be visible in the Output panel:

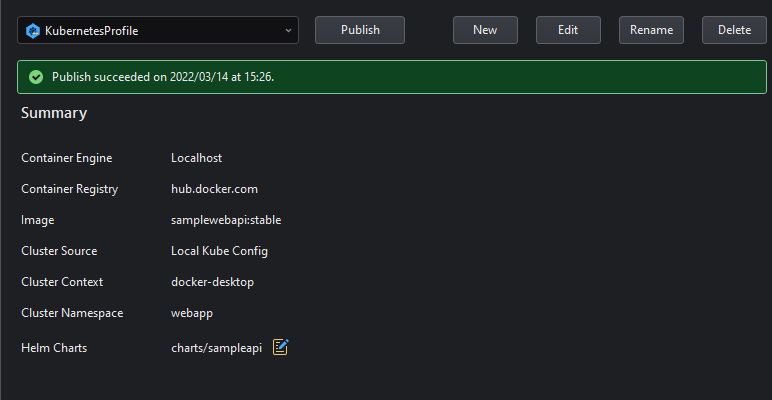
If the publishing is successful, the following message will be shown:
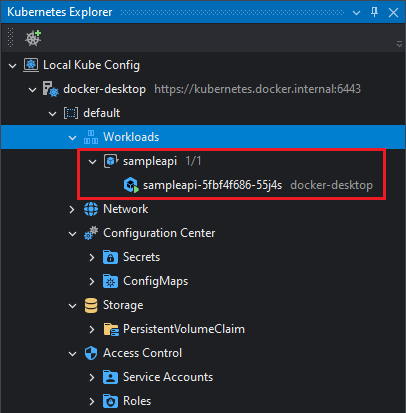
And the Deployment will be visible in the Kubernetes Explorer panel (provided the Kubernetes Explorer has a connection to the cluster you published the application to):
And the corresponding Helm application in the Apps node:

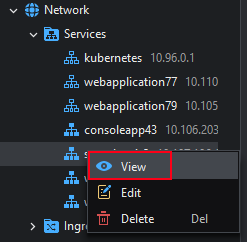
To verify that the service is working externally, right-click the service and select View to get the service's external URL. (If the external URL does not exist, right-click the service and select Edit, set Service Type to External. This will generate the external URL for the service).

References
Creating a Kubernetes Cluster using Minikube and Katacoda
Creating a local Kubernetes Cluster using Docker Desktop