If the PowerBuilder Installer executable (PowerBuilderInstaller_bootstrapper.exe) does not start automatically, you should be able to start it manually from your download directory.
-
Double click PowerBuilderInstaller_bootstrapper.exe to start the PowerBuilder Installer (you must have administrator privileges to run the installer).
-
Select to agree to the license terms and click Continue.
-
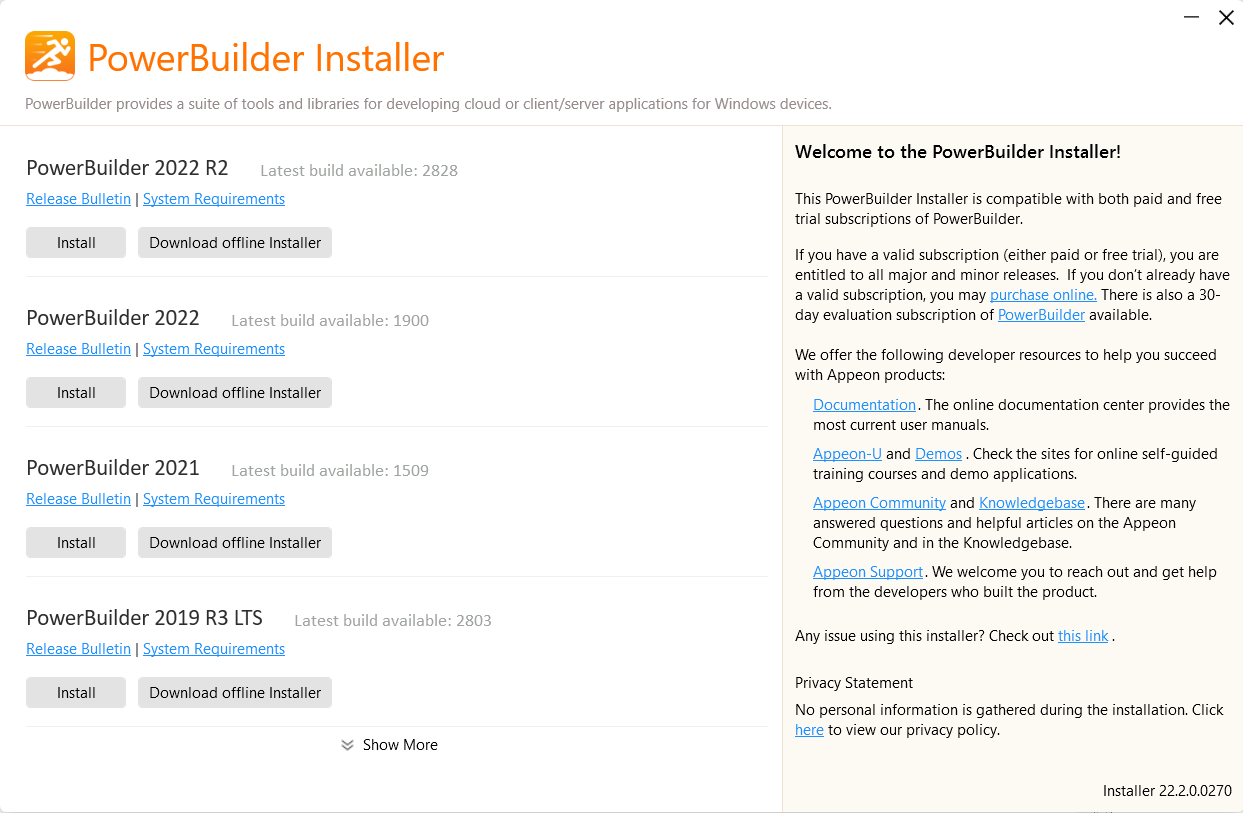
Click Install/Modify under PowerBuilder [version].
If you prefer to use the traditional offline installer, you can select Download Offline Installer and then select the programs and components you wants to download. This will download the offline installer.
If you want to upgrade the program, you can click Update and then select the EBF or MR package for the program you wants to upgrade.
-
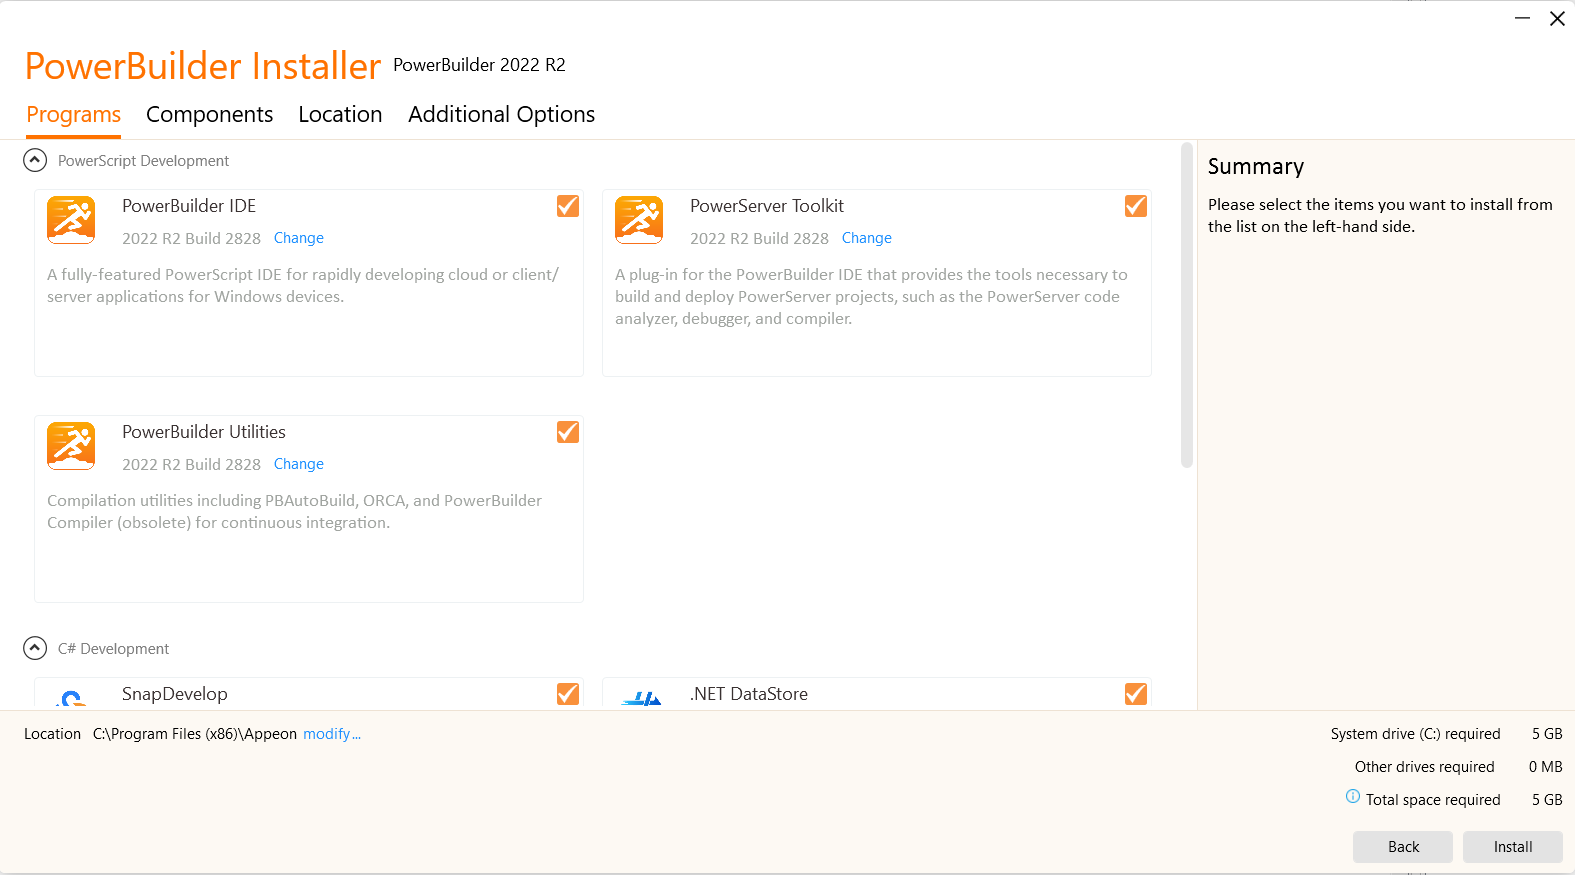
Select PowerBuilder IDE and PowerBuilder Utilities from the Programs tab.
PowerBuilder Installer will also check if the prerequisites have been installed; if not installed, a warning message (and installation instructions if any) will be displayed on the right of page.
If you want to install PowerServer Toolkit, check the PowerServer installation requirements first.
If you want to install SnapDevelop, .NET DataStore, and PowerScript Migrator, follow the installation instructions in Installation Guide for SnapDevelop.
-
Based on the program(s) you selected, the available components will be shown in the Components tab. Select the components you want to install.
The required components or prerequisites are automatically selected and cannot be de-selected. The installed components/prerequisites will still be listed but cannot be selected (the selection box is greyed out).
If no PowerBuilder Runtime has been installed on the machine before, then select to install PowerBuilder Runtime from the Components tab, as PowerBuilder IDE requires a runtime to start.
If a compatible version of PowerBuilder Runtime has already been installed, you could use the existing version or select to install the latest version of PowerBuilder Runtime from the Components tab.
PowerBuilder Runtime is always installed to %systemdrive%\Program Files (x86)\Appeon\Common\PowerBuilder\Runtime [version]. For more details, refer to the section called "Installing PowerBuilder Runtime" in Application Techniques.
-
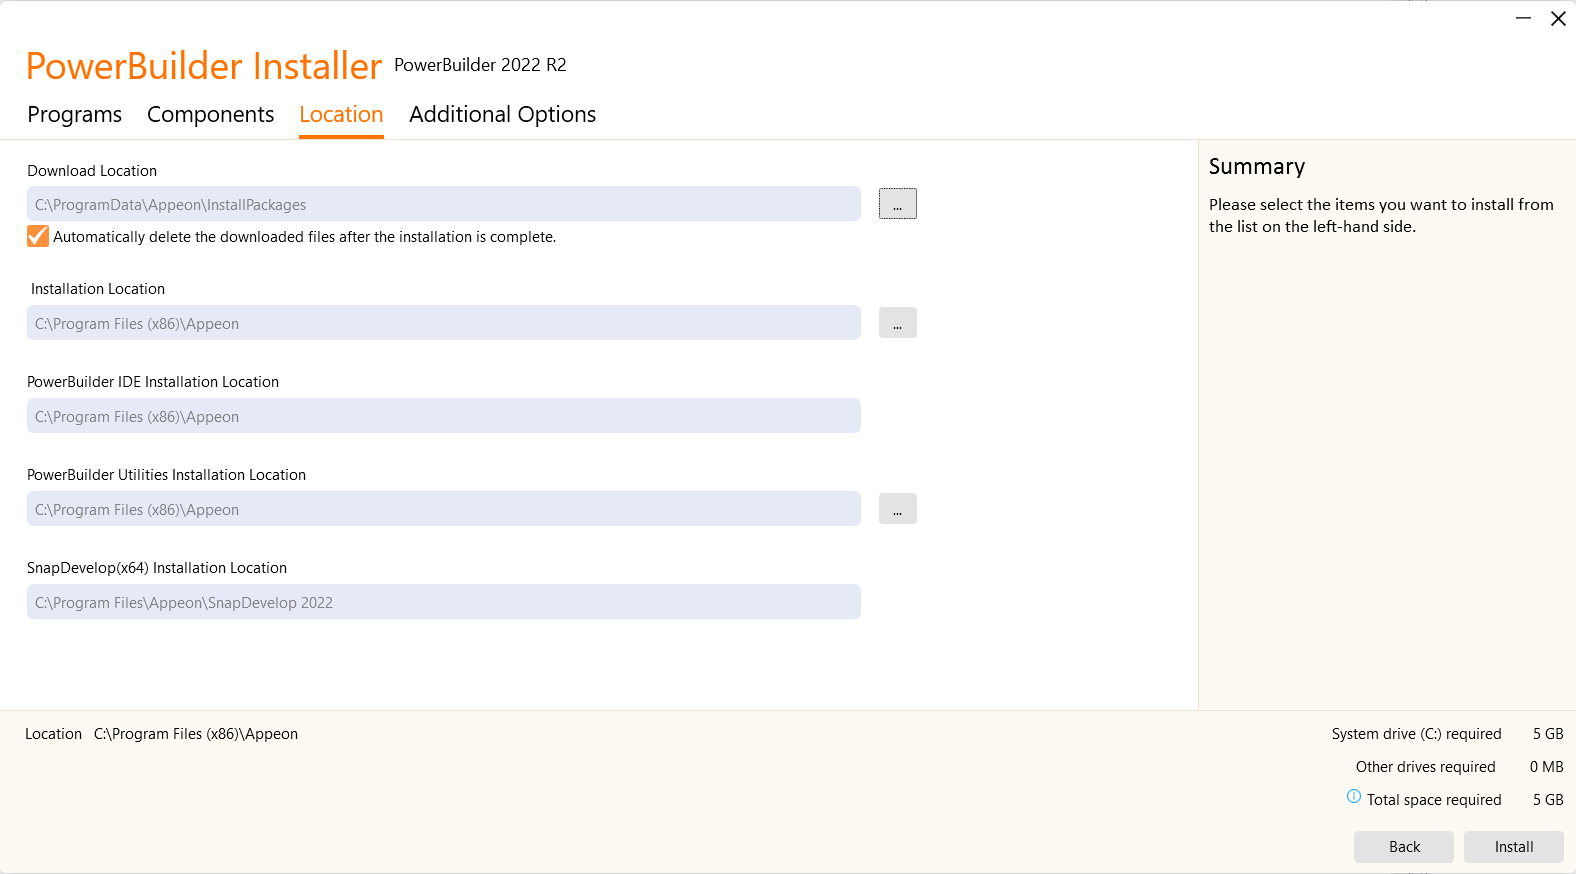
In the Locations tab, use the default download location and installation location or specify where you want the program(s) to be downloaded and installed.
-
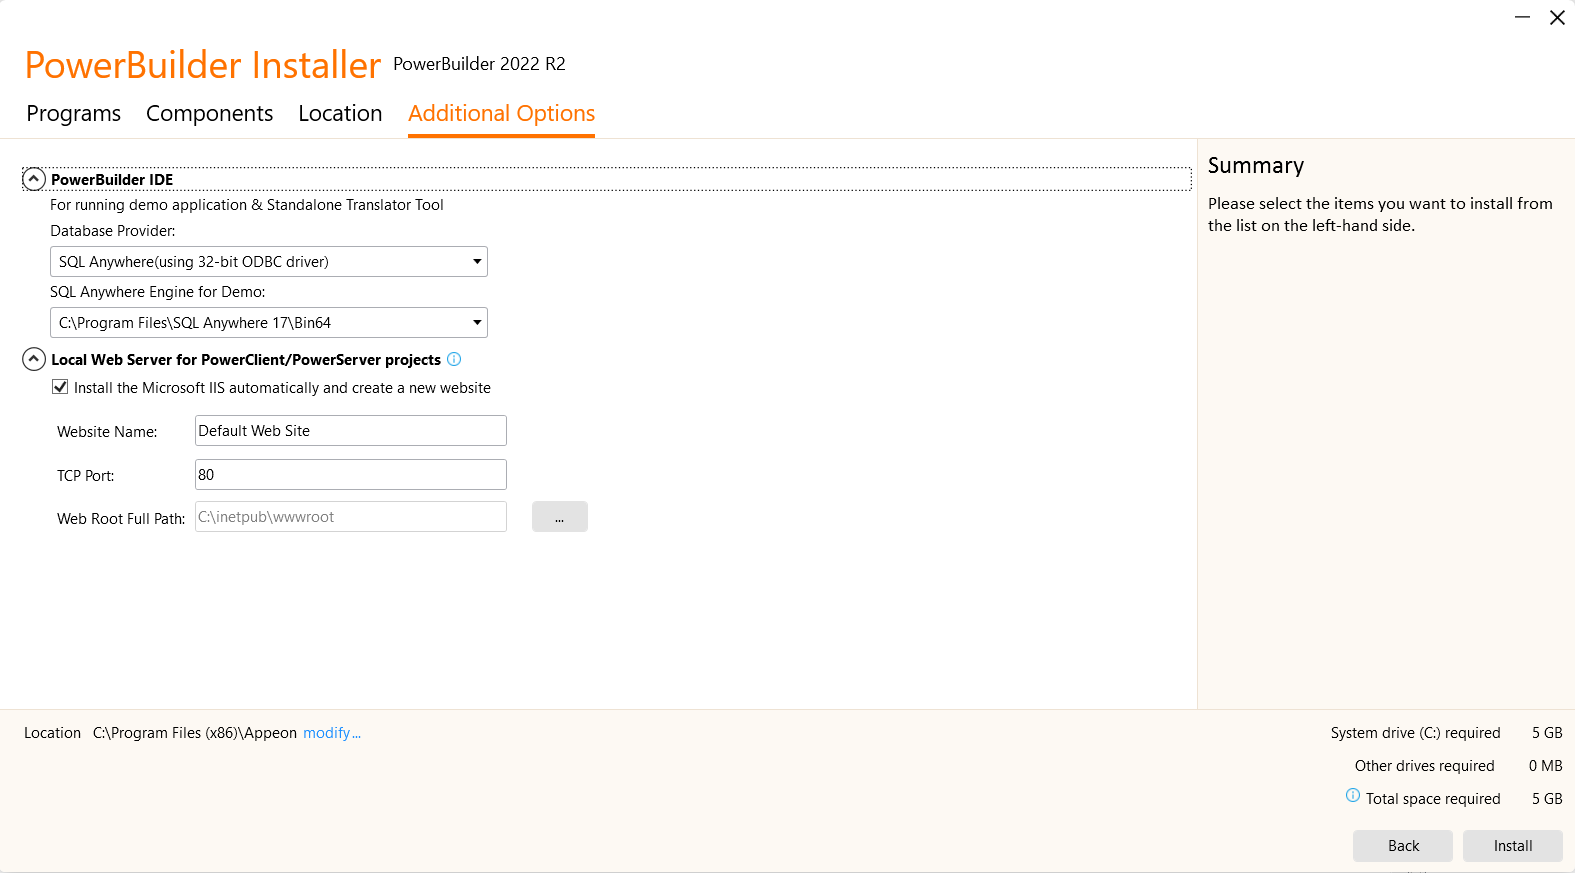
In the Additional Options tab, specify a database engine for running the PowerBuilder demo database and set up the local web server.
The demo database will be connected through the ODBC data source.
To use the demo database with the PowerBuilder Application projects and PowerClient projects, you will need a 32-bit ODBC data source (hence a 32-bit ODBC driver is required).
To use the demo database with the PowerServer projects, you will need a 64-bit ODBC data source (hence a 64-bit ODBC driver is required).
If you specify the PostgreSQL engine, make sure both the PostgreSQL client (included in Command Line Tools of the PostgreSQL Windows installer) and PostgreSQL ODBC driver (32-bit and 64-bit) have been installed.
If you specify the SQL Server engine, make sure the Database Engine Services and Client Tools Connectivity features are installed.
If you select "Do not install demo", the demo applications and databases will not be installed.
PowerBuilder Installer allows users to set up the IIS server as the local web server. You can select an existing website or create a new website as the default server profile for PowerClient/PowerServer projects, or specify the website later.
-
Click Install to begin the installation.
-
When installation is complete, read the status message carefully to make sure installation is successful, and then click Restart Now to restart the machine immediately or click Restart Later to manually restart the machine later.


